
One of the questions that I’m asked most often is what kind of camera equipment I use for our travel photos. I’ll let you in on a little secret… I use my iPhone 11 for everything! And up until two years ago, I was still using my old, trusty iPhone 6! The key to capturing great photos is knowing how to use the camera that you have and taking tons of pictures!
If you follow along on our adventures, then you probably know that I’m a teacher and we travel on a budget. I would love to have professional gear, but that’s not really an option for us right now. I do have a Nikon starter camera, but to be honest it’s too big and bulky for me to lug around on our adventures. So, I’m going to show you I my best photo tips and tricks for using the iPhone camera that I have.
Shooting Modes and Angles
One of the first photo tips I like to share is shooting in different modes and from different angles. Cell phones are pretty fancy these days and even an amateur like me can simply click a button to change the mode on the camera. Below are the different modes and angles that I recommend.
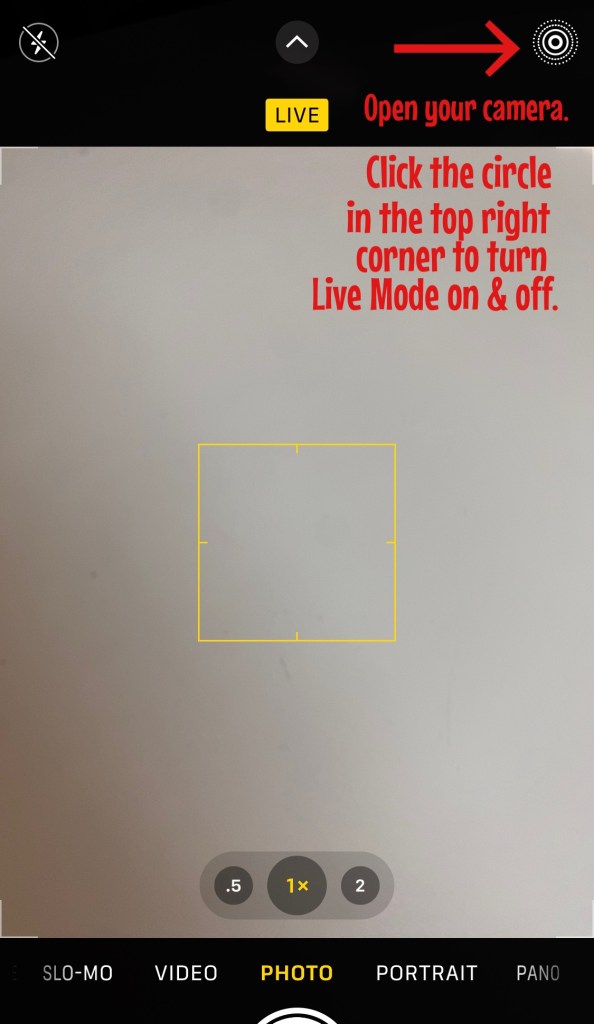
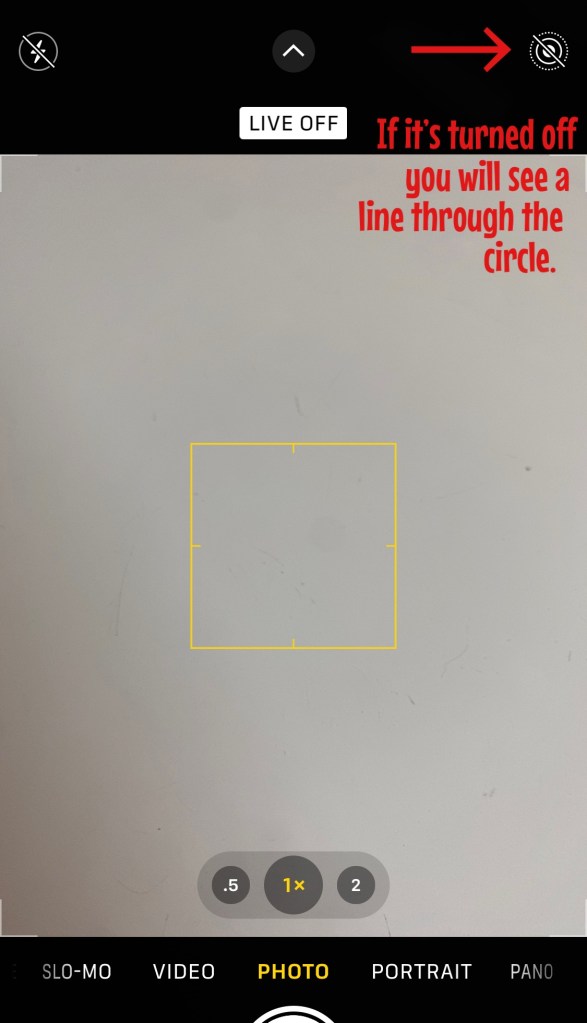
Live Mode – I always take photos with Live Mode turned on. I like this feature because you can go back and make Reels clips later with these photos. I have created some really special travel vlogs specifically using mini clips from Live Mode photos. This mode is also necessary for Long Exposure photos, which I will touch on next. Check out the steps below to make sure you have your camera’s Live Mode turned on.
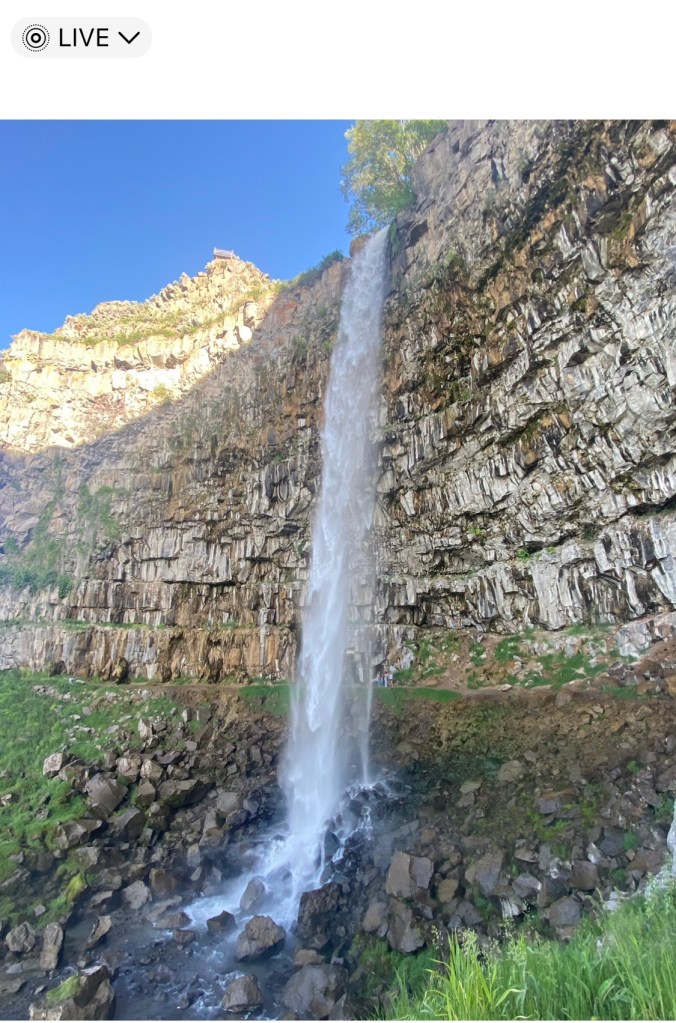
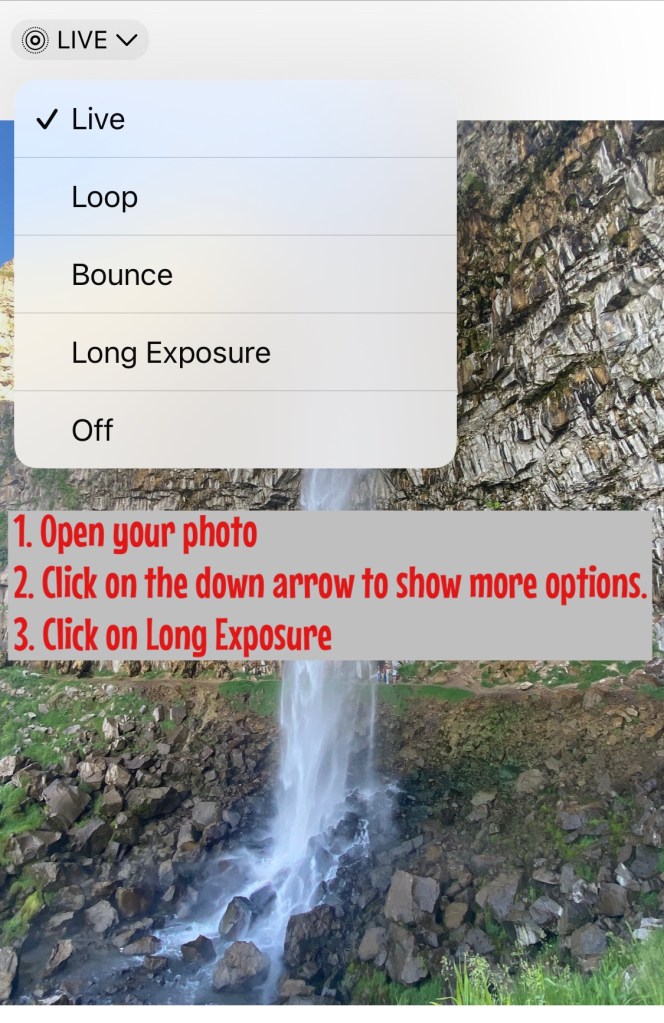
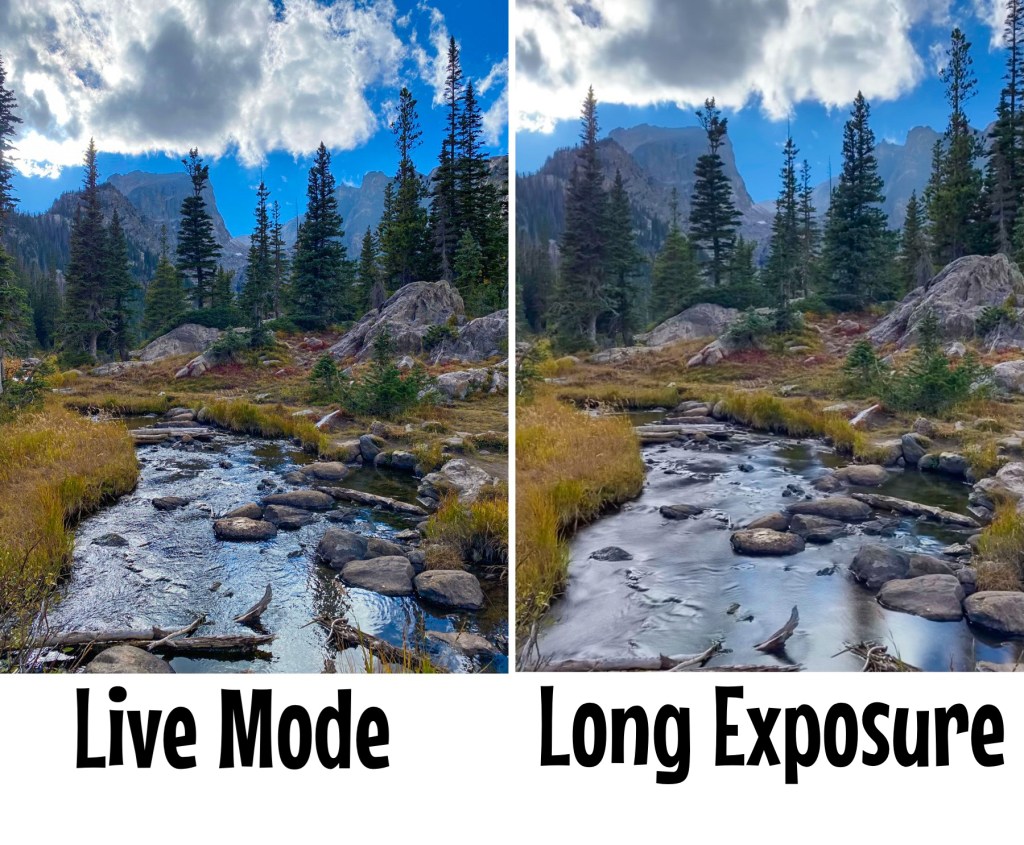
Long Exposure – Have you ever wondered how people transform a photo of a waterfall or a flowing river into those stunning photos with the blurry/foggy water effect? Well, I know the secret! And it all starts with shooting in Live Mode first, then editing the photo in the iPhone’s camera app to a Long Exposure. Another quick Long Exposure photo tip is to only add this option to landscape or scenery shots. I have not had the best luck with this feature if there are people in the photo because they become blurry as well! Check out the steps below to do this and look at some of my before and after photos in Long Exposure Mode! Both images of the waterfall are from the same photo, the first one was taken in Live Mode and the second image is the photo with Long Exposure.

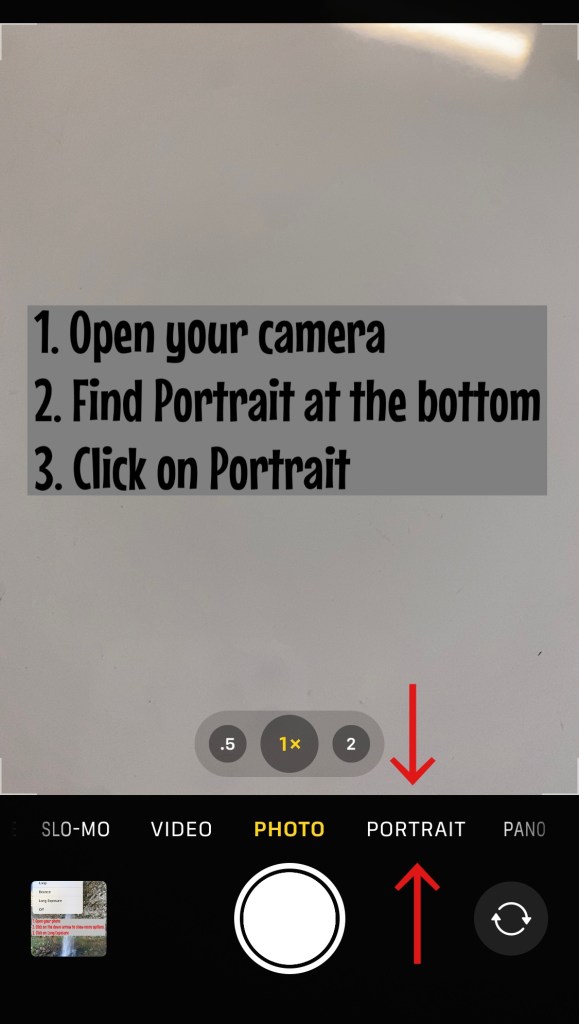
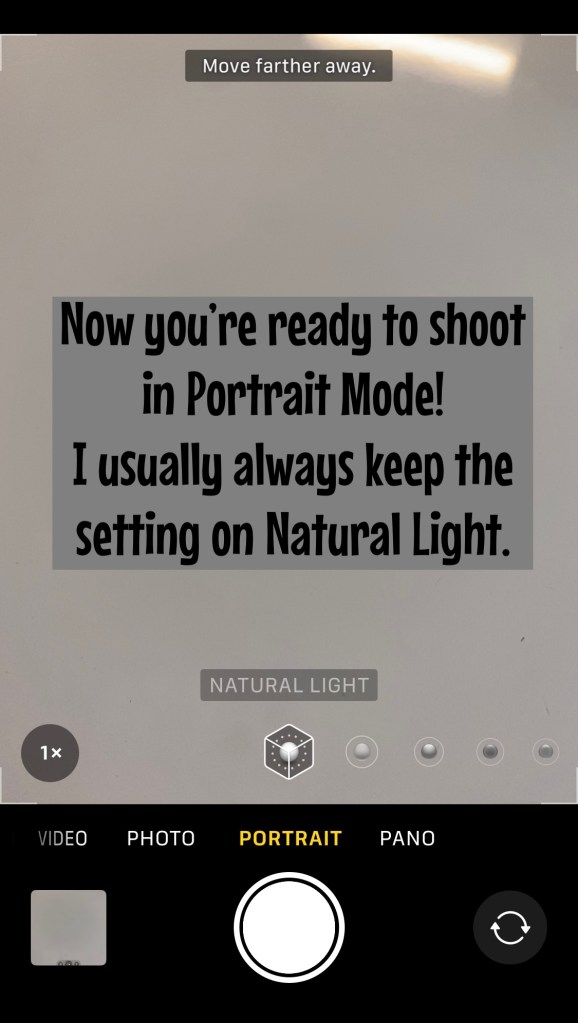
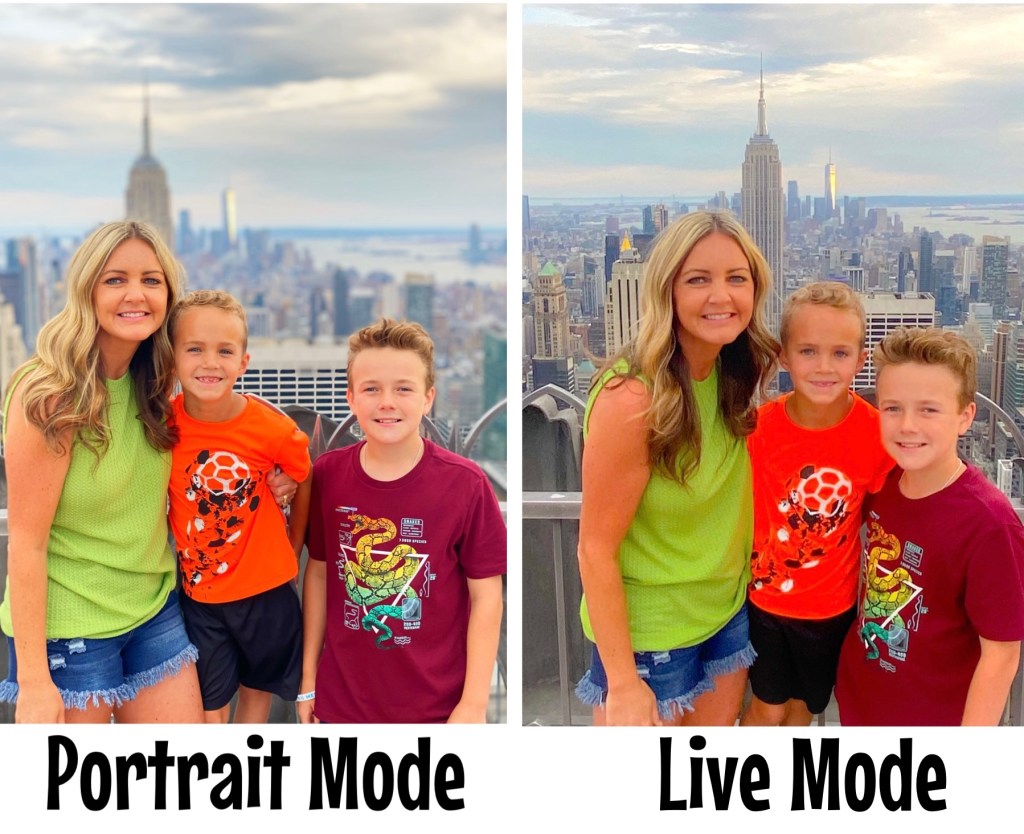
Portrait Mode – I really love taking pictures in Portrait Mode! City shots are my favorite when taken in this mode. I also like to use Portrait Mode when there are crowds of people or something not that visually pleasing in the background. I highly suggest trying this photo tip, I know you will be surprised at how professional your photos turn out! Follow the steps below to put your camera in Portrait Mode and enjoy some of my favorite photos shot in this mode, too!
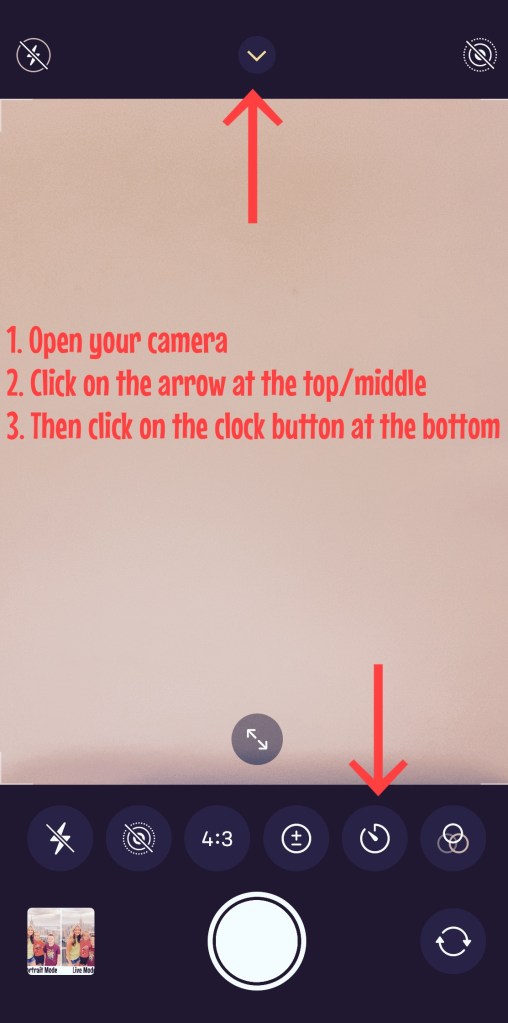
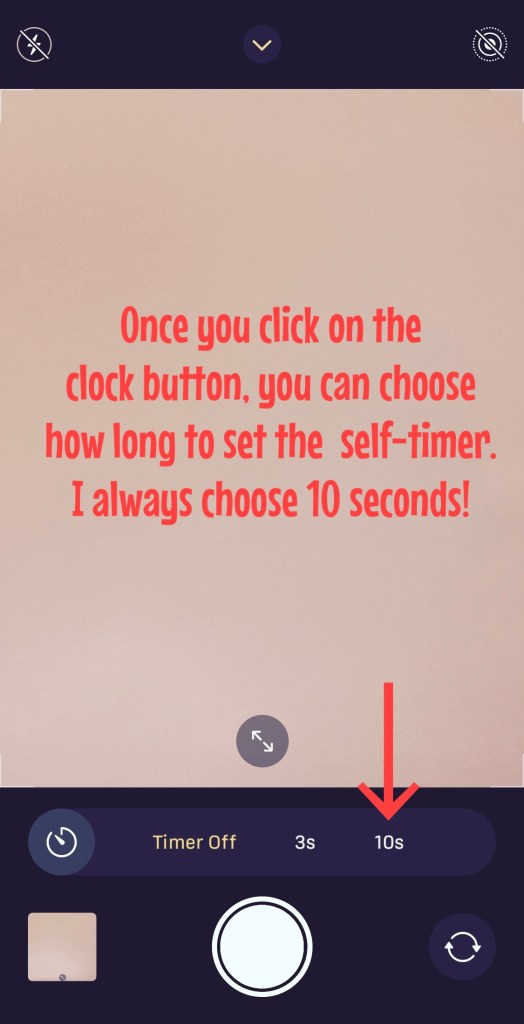
Self-Timer – Another one of my favorite photo tips is using your camera’s self-timer. I do have a cell phone tripod, so this mode comes in handy when I want a great family shot! I also use the self-timer when I’m taking selfies of us! This mode gives us time to get situated in the frame and for me to get the angle right. Keep reading to learn how to set the self-timer on your phone.

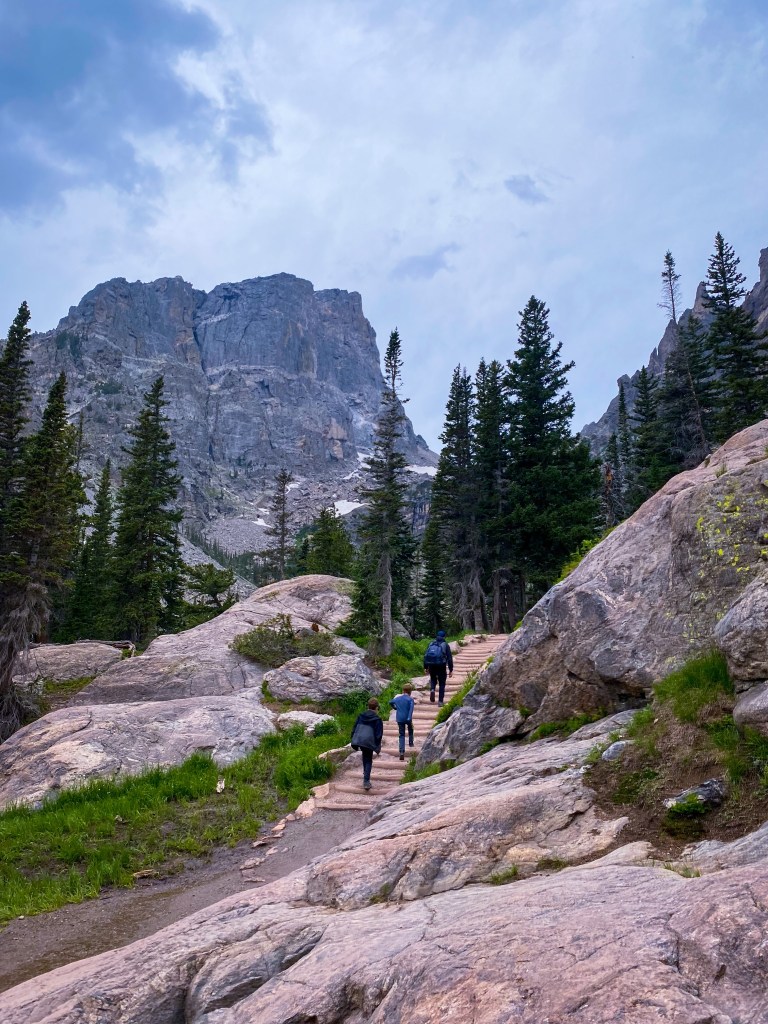
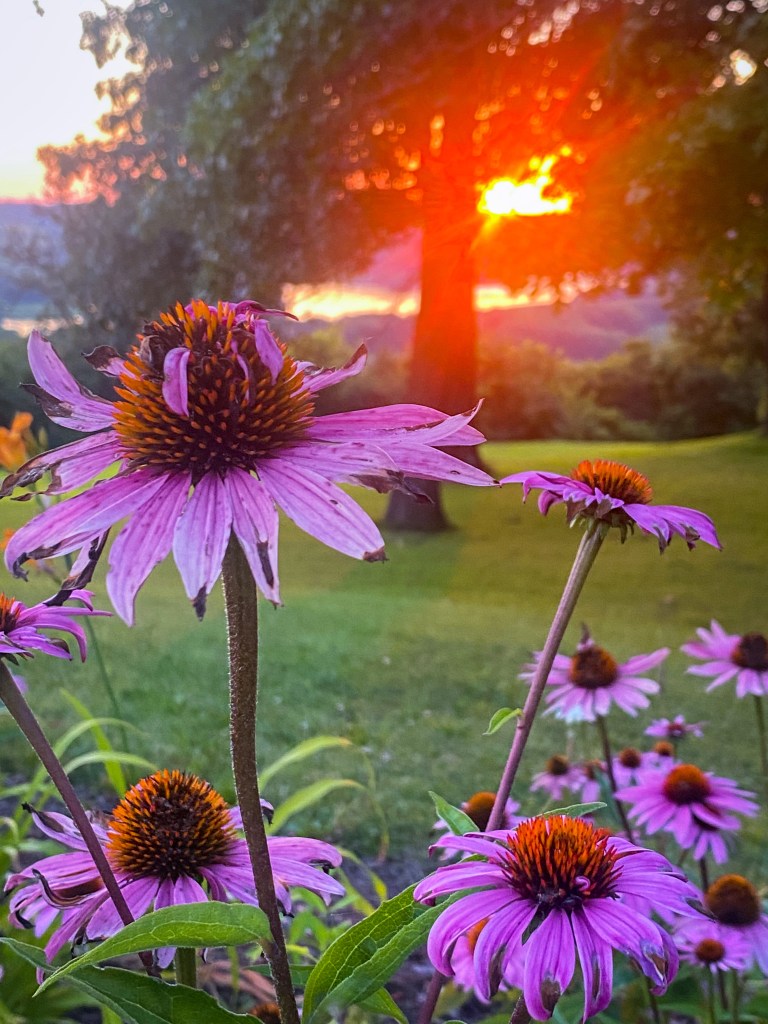
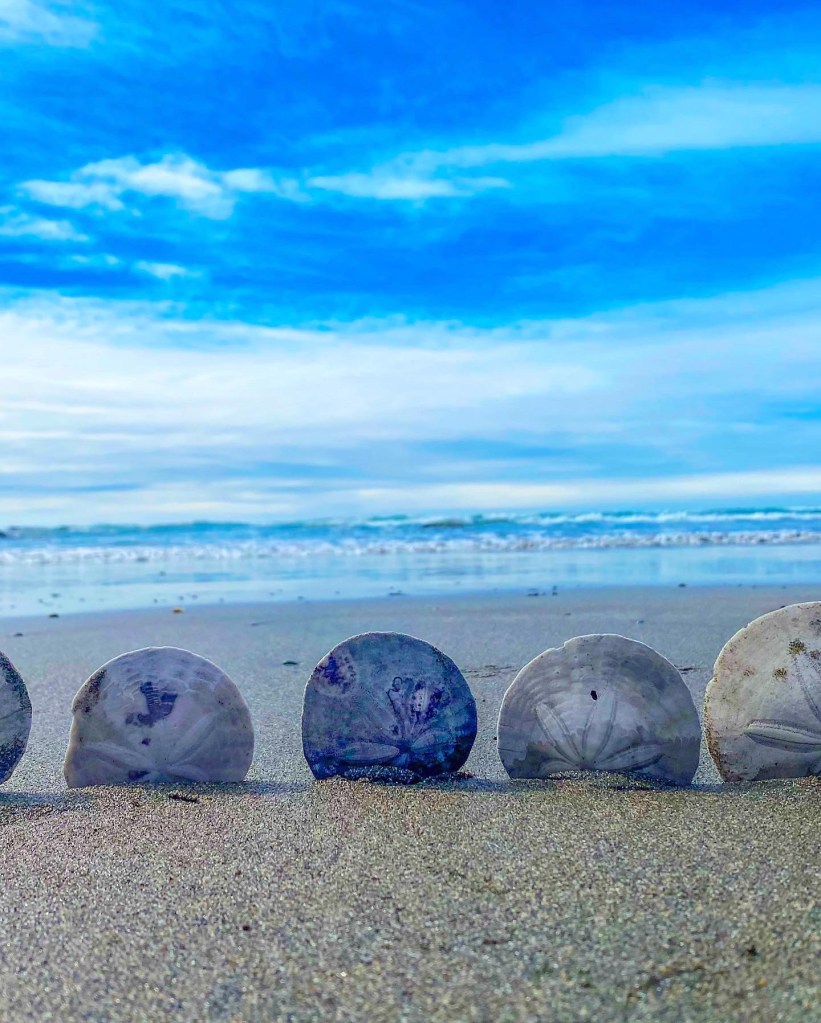
Angles, Vantage Points, & Perspectives – The next time you’re on vacation or somewhere scenic, play around with different angles and vantage points when you’re photographing the landscape. I like to get down really low to the ground when photographing a picturesque scene. It’s also fun to play around with different natural objects, like rocks or a water line. A good photo tip is to off-center your main subject, whether that be people or an object! Check out some of my favorite landscape photos below.
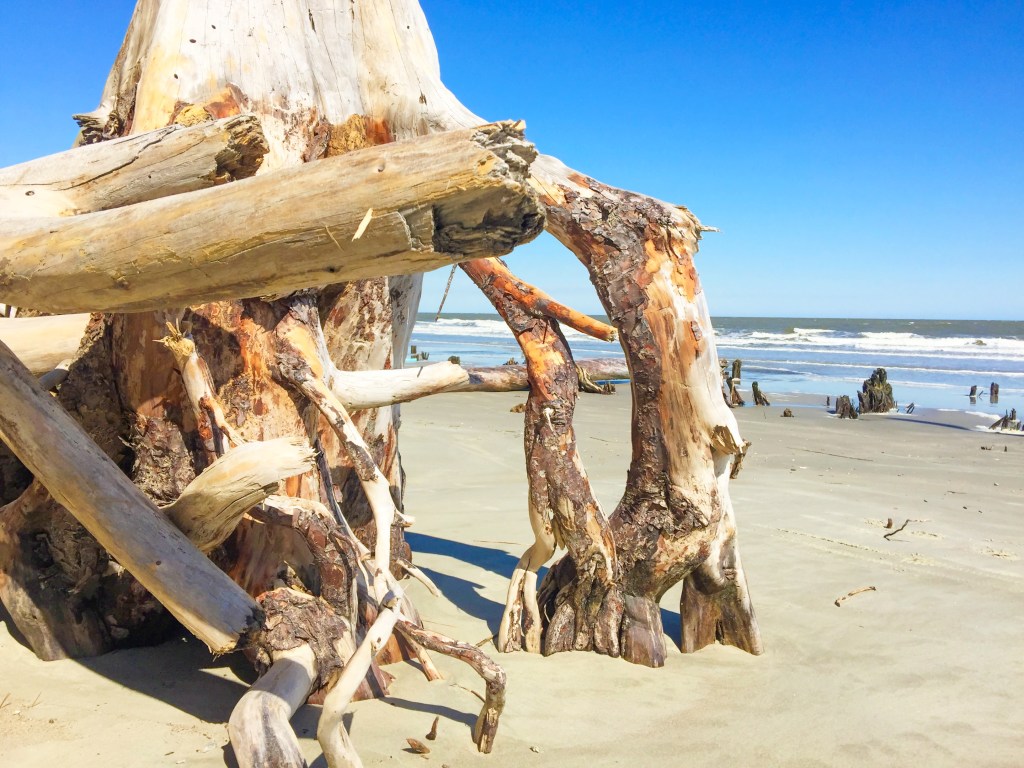
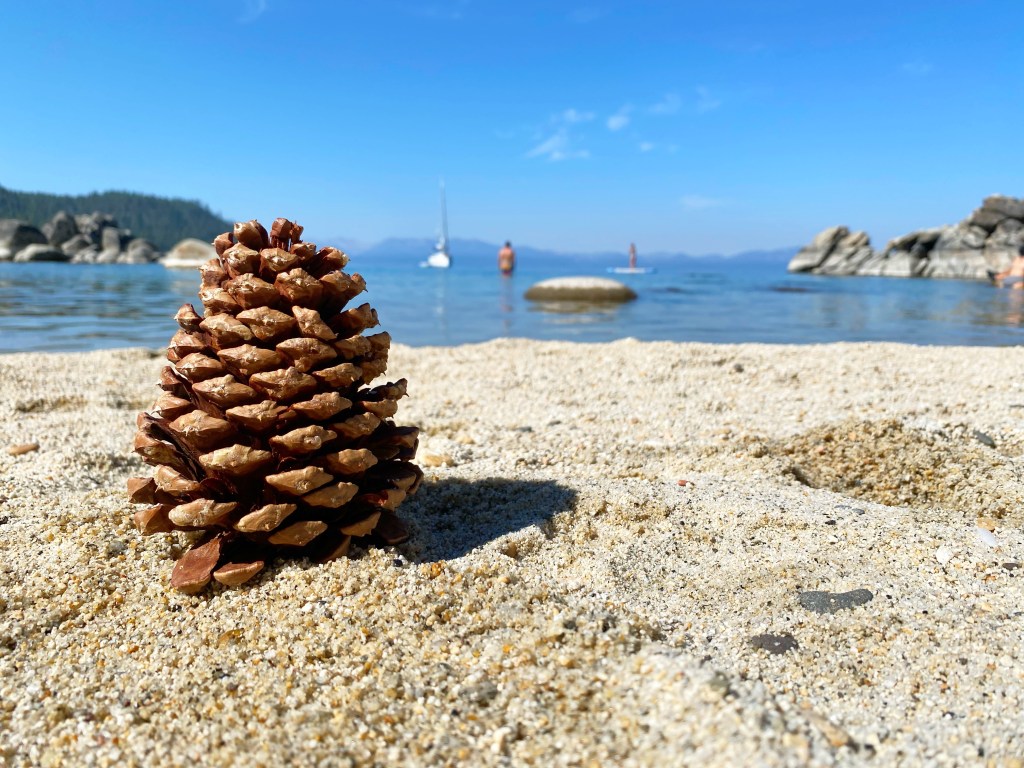

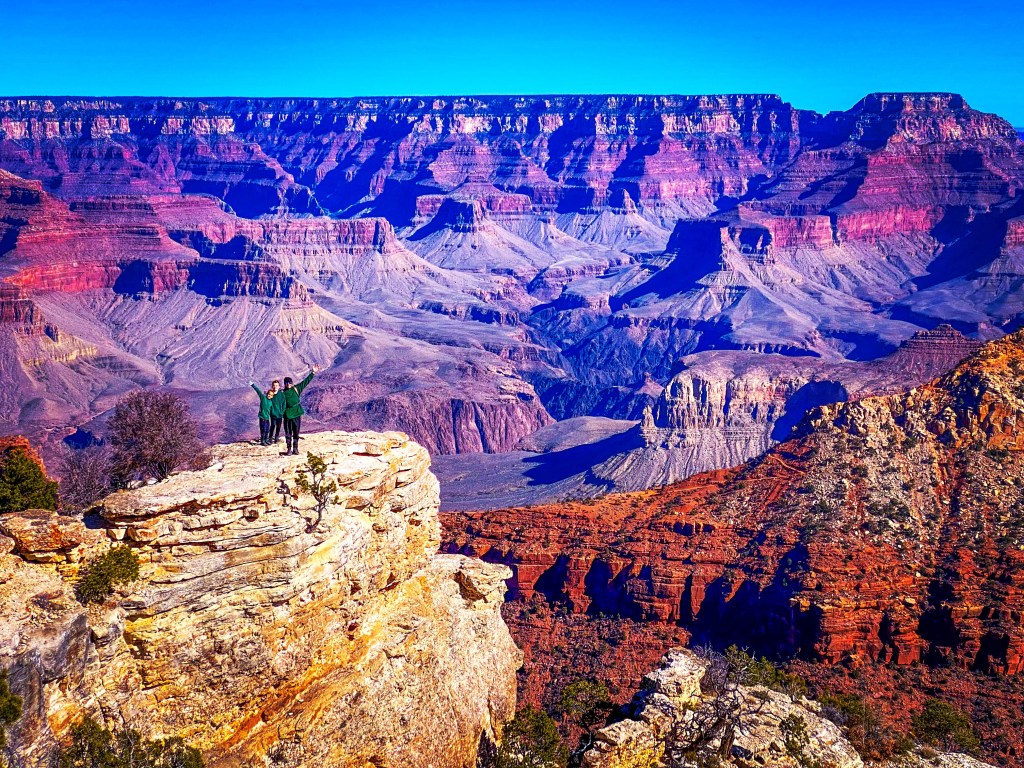
Photo Editing
I wish I knew all the ins and outs of Photoshop, but unfortunately I do not. However, I do know how to enhance photos to make them look more visually appealing without altering the people in the image in an unrealistic way. I exclusively use two apps besides the basic editing features in the iPhone’s picture gallery, which are the Lightroom App and the Facetune App.
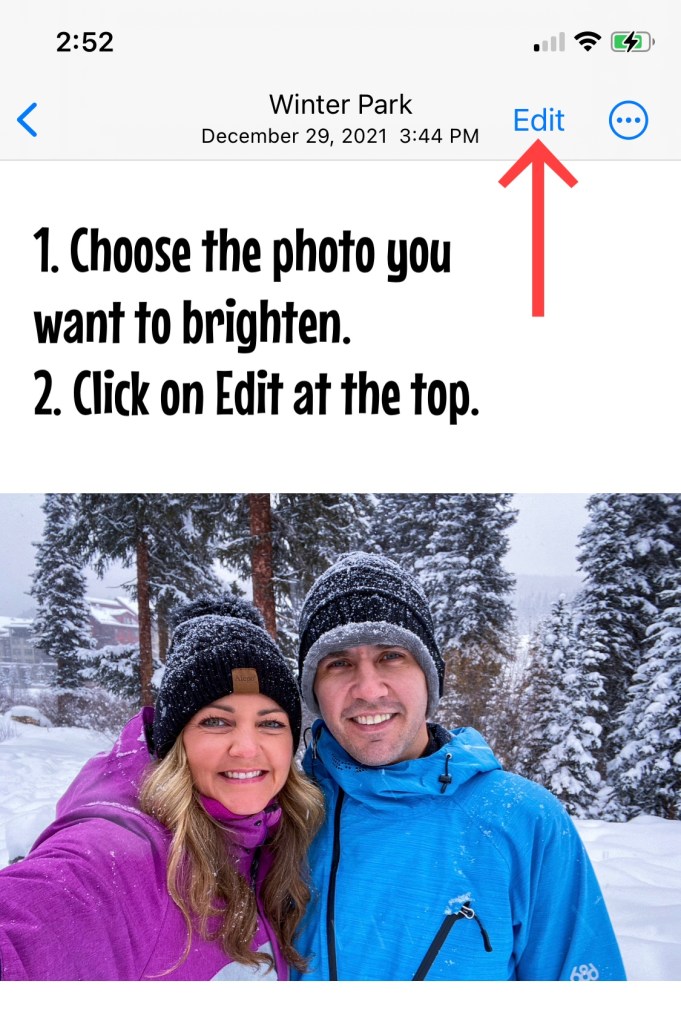
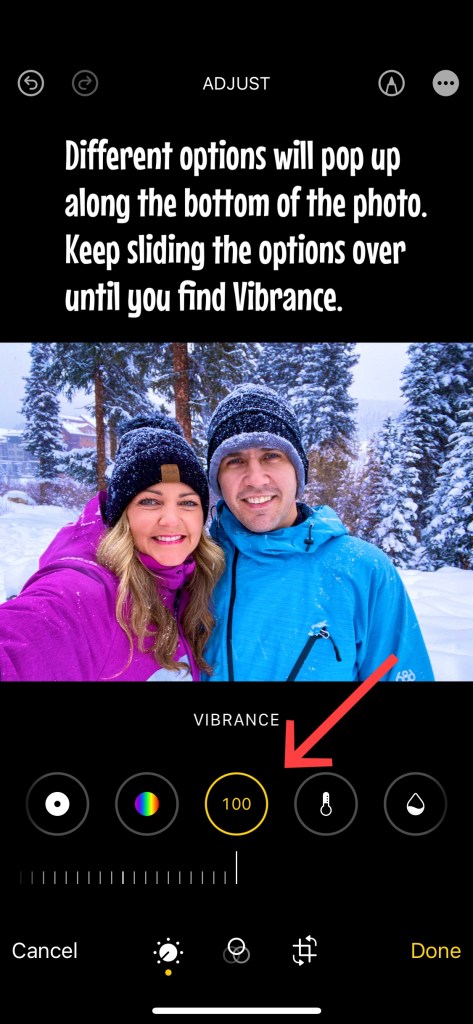
iPhone Camera App – This is where I start my photo editing, right in the photo app! And typically, I brighten photos and increase the vibrancy only. These are my go to edits and are so simple and easy. Keep reading to see how I increase the brightness and vibrancy in my photos.
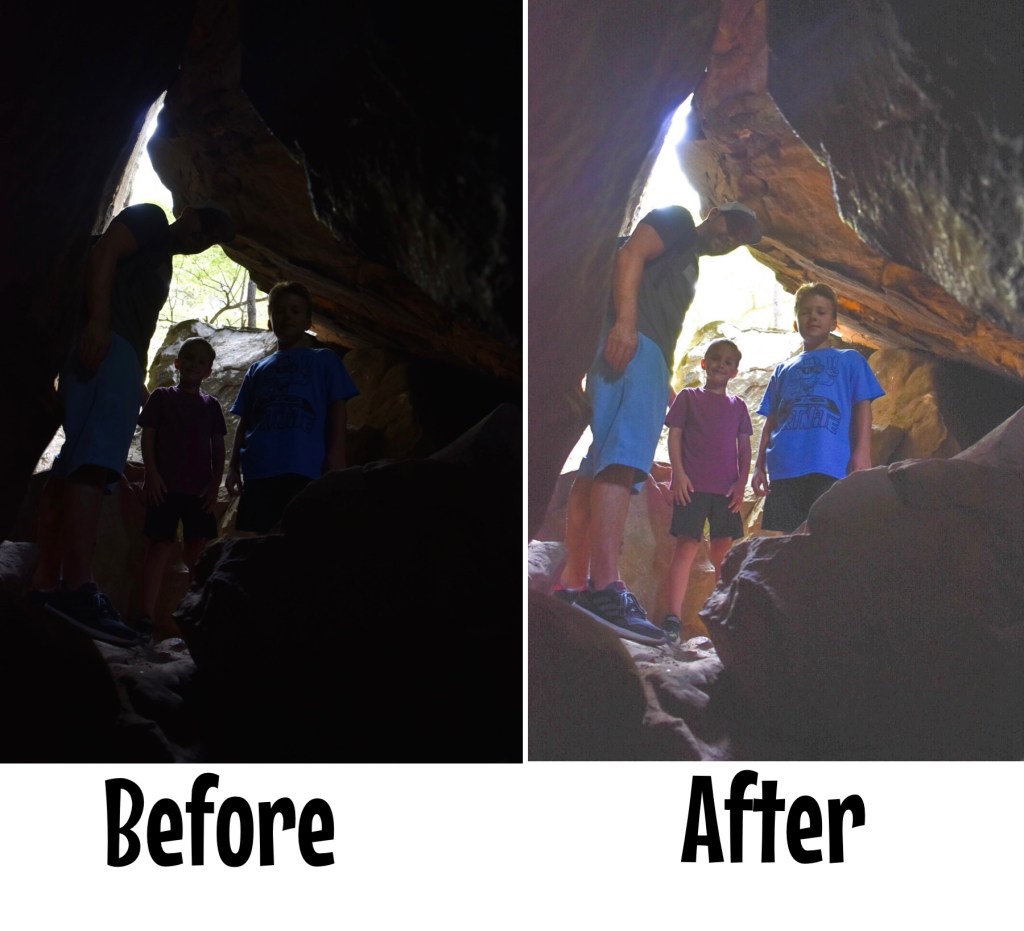
Lightroom App – This is another one of my go-to editing apps when I have a photo that just doesn’t look like the real deal. Maybe the faces in the picture are dark because of shadows. Maybe the colors just aren’t popping like they are in real life. I don’t have any presets saved here, but I do like to increase the brightness and vibrancy with this app, too.

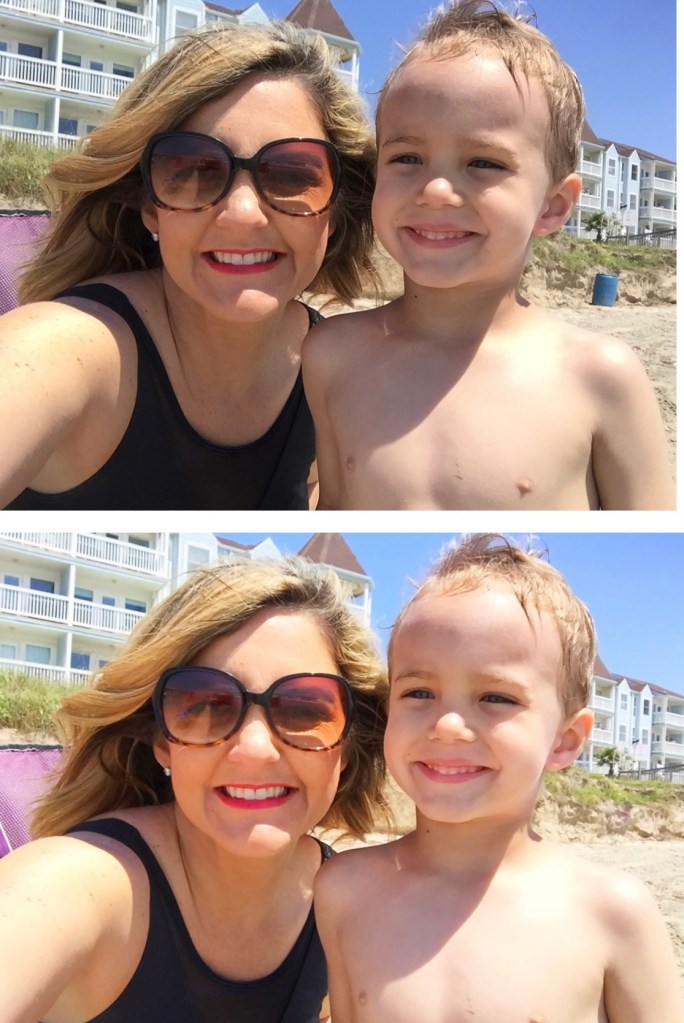
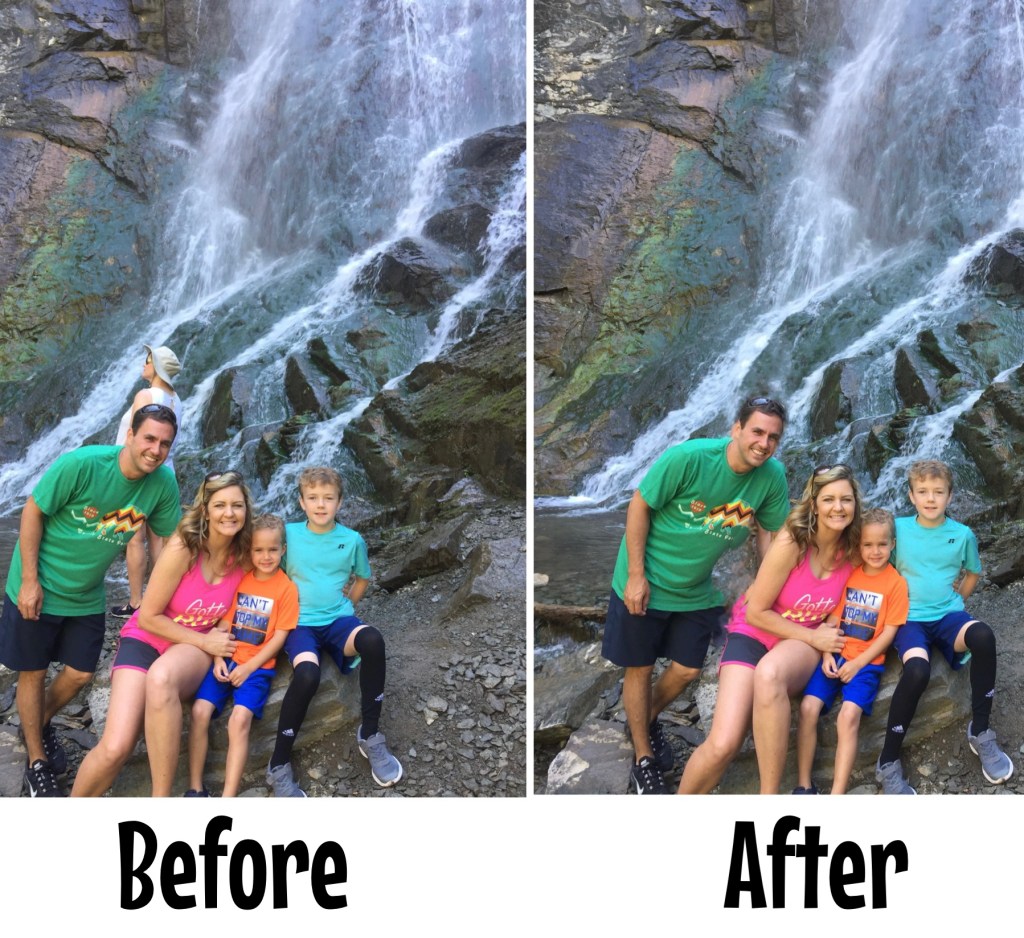
Facetune App – I love Facetune when I need to make something in a photo vanish. Whether that be a pimple or a random person in the background! The patching and vanishing tools in this app are amazing! I used to like smoothing out facial features, especially when I first started noticing all of my wrinkles. But now, I’ve embraced my age and really hate that plastic look. So, I truly only use this app for the vanishing/patching tool. Check out these features and some before and after pictures below.
Poses & Action Shots
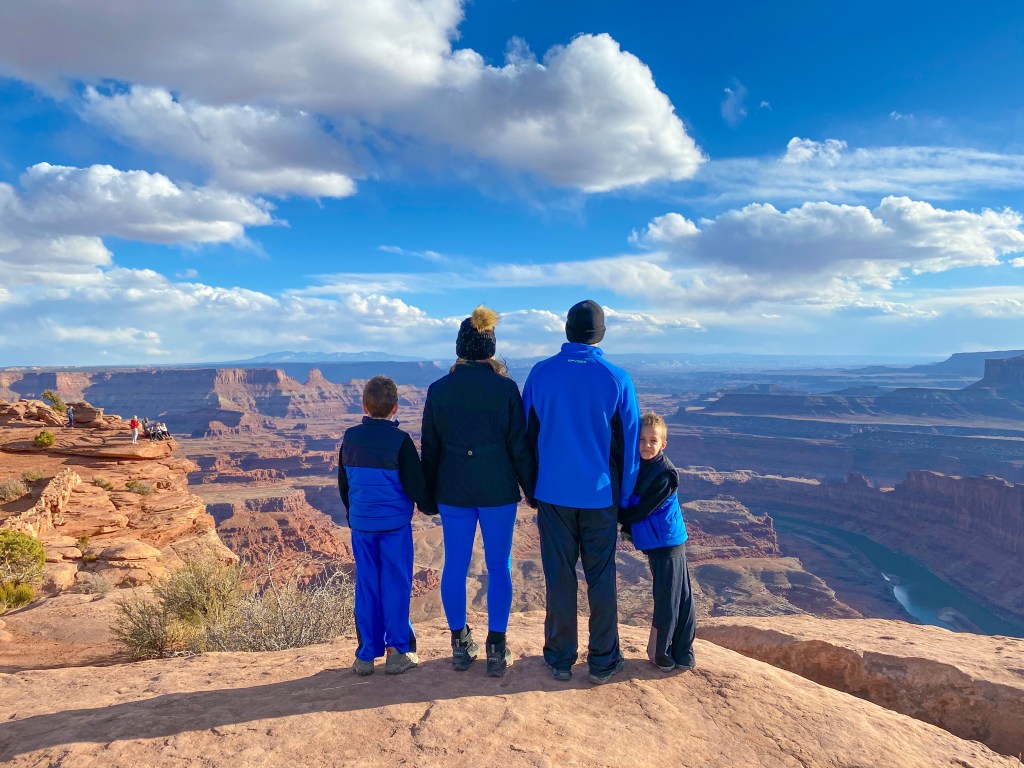
Learning how to change up our poses is something that I am still trying to figure out, it can feel so awkward at times. And I really do love those traditional pictures where everyone is smiling and looking at the camera! But, I’m also finding that I really adore those action shots, too. If you’re tired of taking the same old photos, then try changing up how you pose or getting more action shots. I’ve taken photos of us walking, jumping, running, and facing away from the camera, just to name a few. Check out some of our favorite action shots and nontraditional poses below!
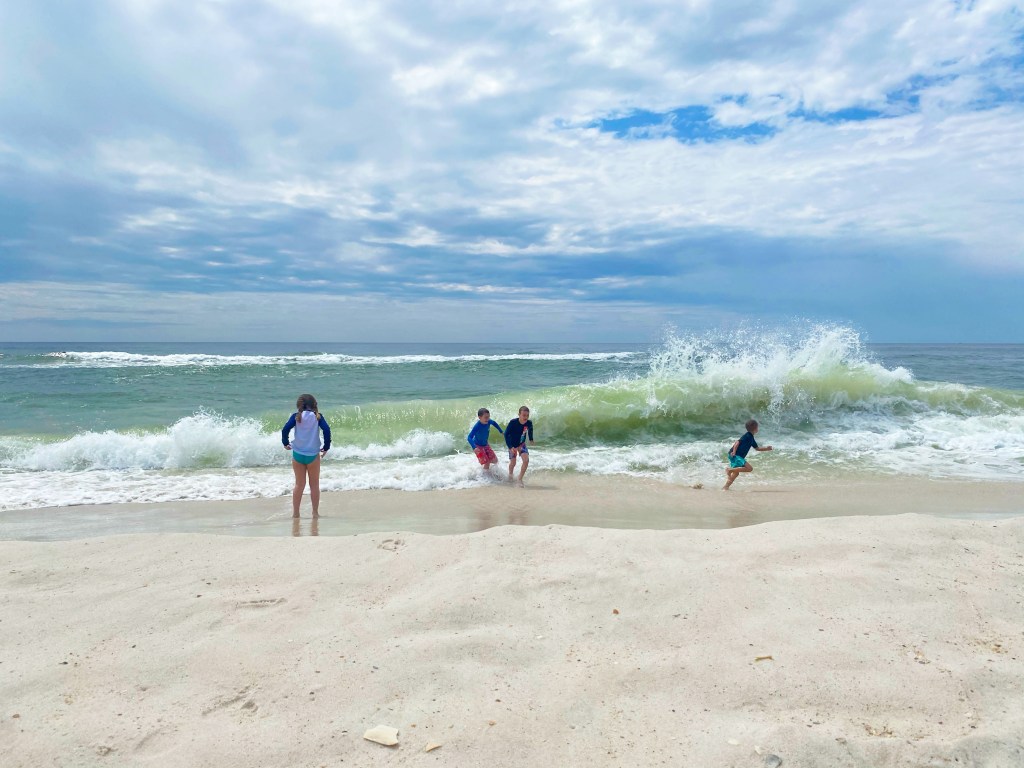
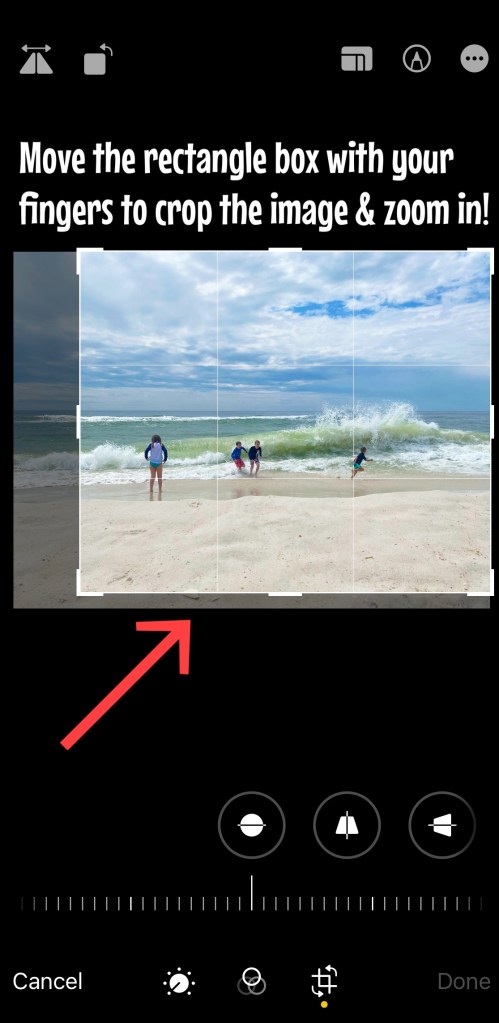
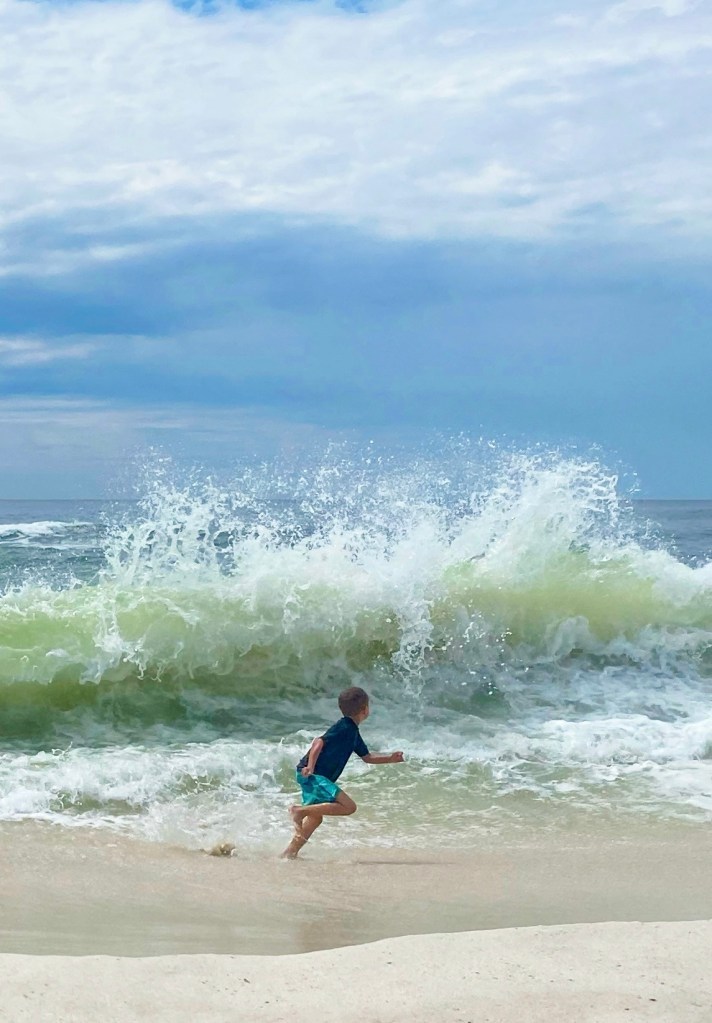
Cropping, Zooming, & Straightening
Cropping, zooming in, and straightening a photo might just be all you need to capture a great shot! The iPhone makes it so easy to crop and straighten a crooked picture. Check out the photos below to learn how to crop a photo, how to straighten a photo, and then see how some simple cropping and zooming in can completely transform your image into a stunning shot!


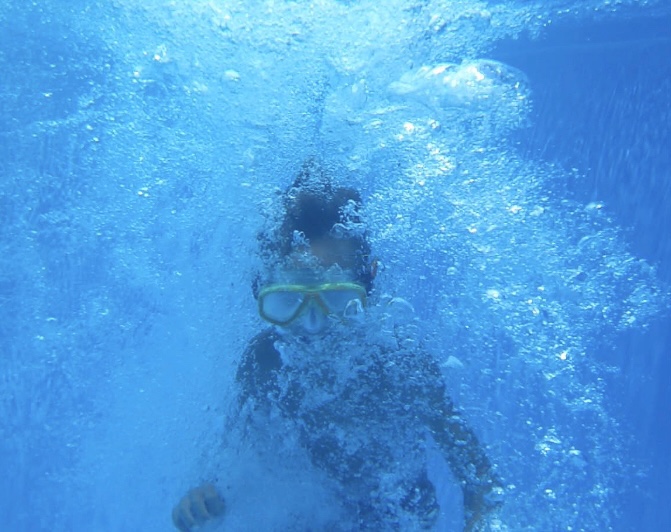
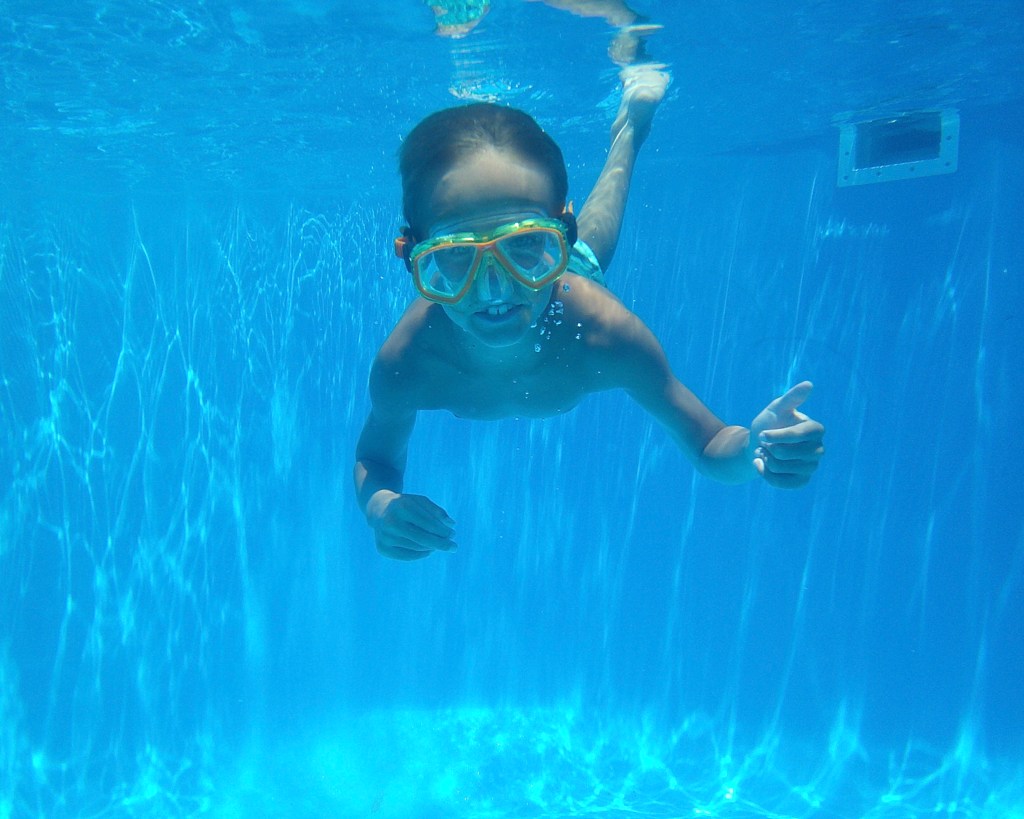
Water Shots
With the right waterproof phone case, you can take amazing shots that you might have been too scared to capture before! I just recently purchased a great case and was able to take some fun shots at the lake and in the pool of my boys, without worrying about ruining my phone! Check out some of my favorite water shots below.
Budget Friendly Camera Gear/Accessories
This post contains affiliate links of products that I love. I may earn a small commission, at no extra charge to you, if you purchase any items using the links provided.
- Camera Stand – I literally take this stand everywhere to capture our own family photos!
- Waterproof Phone Case – This has allowed us to take some cool action shots on the water!
- Cell Phone Arm Band – This has now become my “purse” and is great for traveling!
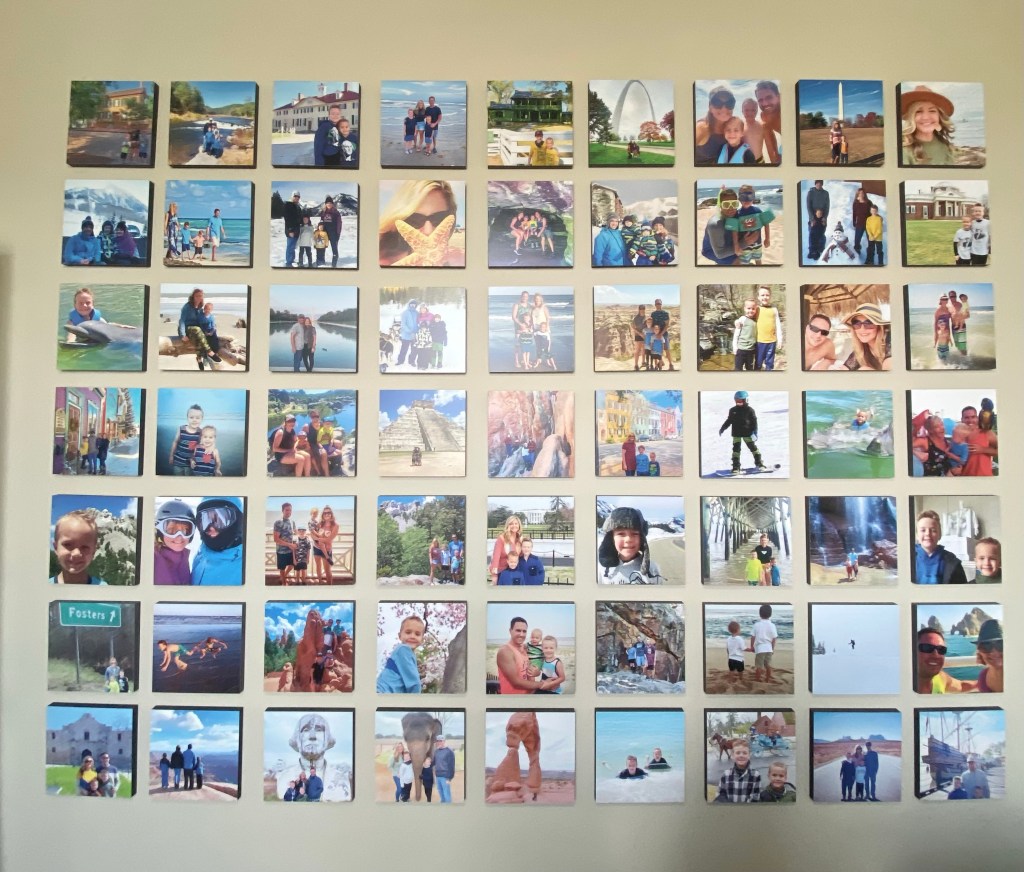
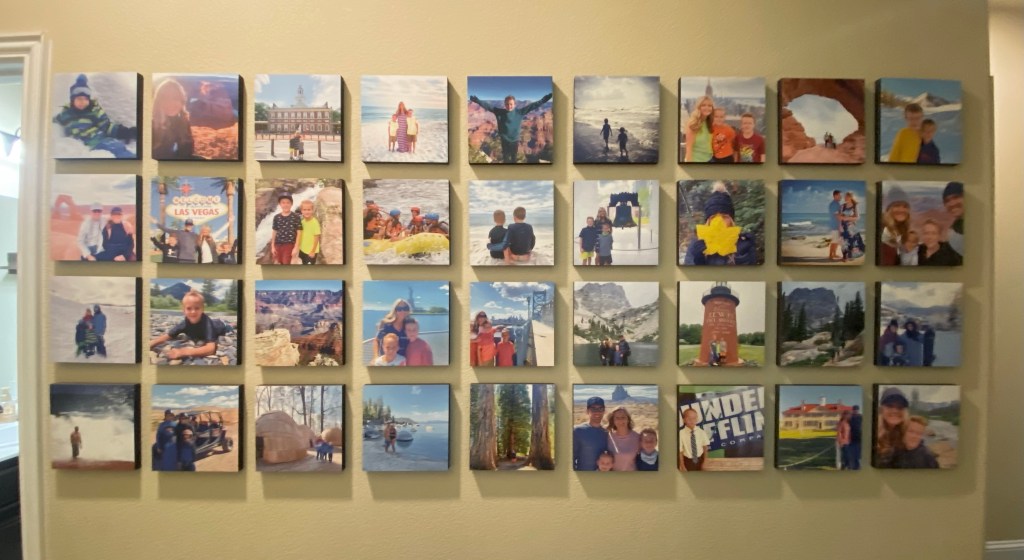
Cell Phone Image Quality
When people learn that I primarily only use my iPhone for photos, they ask about the image quality when printing pictures. I am happy to report that I have had no issues of poor quality when it comes to printing my iPhone photos! In fact, I have two walls in my home only dedicated to our travel adventure photos, and these two areas are the favorite places in our home! I use Mixtiles for most of these photos and we’ve been very pleased with the outcome. Check out the two photo walls in my house, and remember, every single printed image is from my iPhone!
Be Creative & Have Fun!
My final photo tip is to be creative and have fun trying new things with your camera! You’ll never know how great an image will turn out if you don’t at least try. Play around with editing and cropping, try out new angles and poses, and don’t give up if you aren’t successful right away. Check out some of my favorite creative shots over the past year!


I truly hope that you find these simple photo tips helpful! I am not a photographer in any way, shape, or form, but I’ve been so happy with the images I’ve captured on our adventures. I’m sure I still have a lot to learn about taking amazing photos and I would love to hear any of the photo tips you may have! What photo tip of mine are you going to try next?
Discover more from Road Trip Queen
Subscribe to get the latest posts sent to your email.

2 thoughts on “Simple Photo Tips Anyone Can Master!”