The Complete Guide to Coordinating Family Outfits & Other Photo Tips

I get a lot of questions about how I plan my family’s coordinating outfits when we travel or take family photos together. I credit my knack for coordinating outfits to my love of fashion, working as a stylist for Stitch Fix, and always paying attention to the small details.

Obviously, I try to coordinate our outfits for professional family photo shoots, but also when we’re on vacation because I know that I’ll want to frame some of the pictures from our trip. I don’t go overboard, but I do try to plan one day of coordinating outfits. Lucky for me, my kiddos and husband are pretty easy going and are used to my antics by now! Below is my complete guide to coordinating family outfits, plus tips and other things to keep in mind before you travel and/or take family photos!

Most of our photos are taken outdoors, so this guide really focuses on tips and recommendations geared for outdoor photography. Also, many of the links I’ve included are affiliate links. I may earn a small commission, at no extra charge to you, if you purchase items using any of the links provided. Thank you!

Example: We all wore green to the Grand Canyon. This color really popped with the darker tones of the canyon behind us!
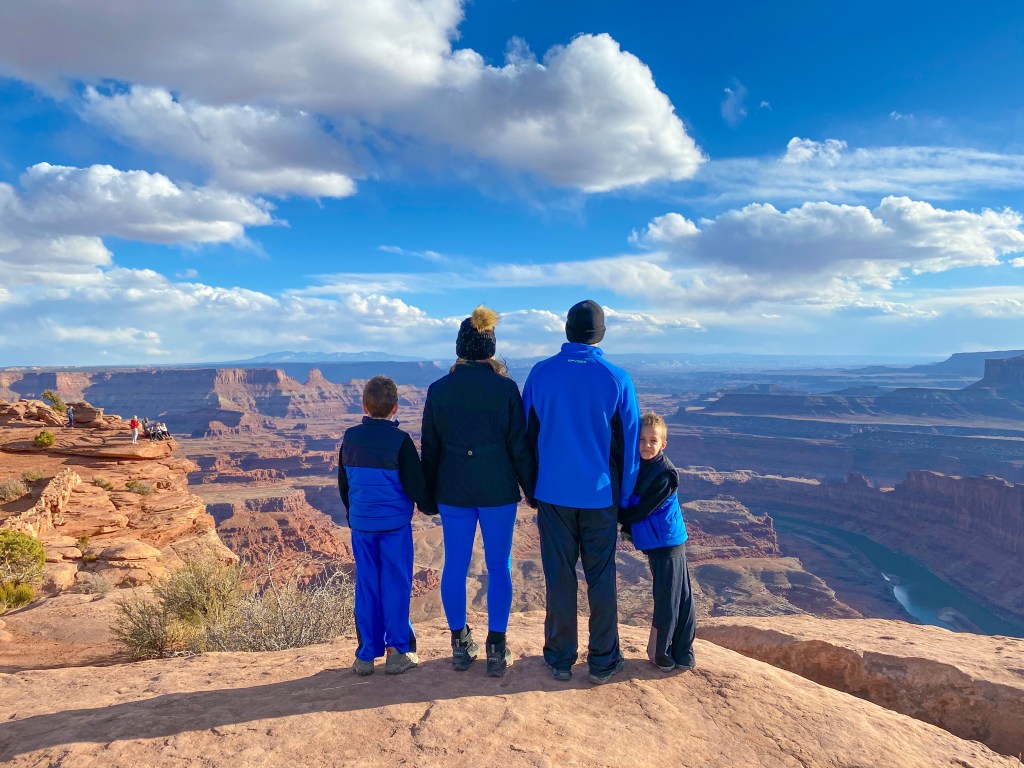
CC Beanie | Boy’s Sweatshirts | Women’s Fleece Top

Follow These Steps to Coordinate Your Family Outfits:

1. Seasons

First, I always suggest thinking about the season you’ll be taking photos in, especially if you’ll be outside. Most of the time, we opt for outdoor photos, so this information is important for choosing the right colors and the right style of clothing for the season!

Fall photos – I went with warmer tones like dark yellow and dark green and a hint of maroon.

Fall – If you’re taking photos in the fall, you might want to choose deeper fall tones, like mustard yellows or maroons. Pay attention to the current trends, like booties vs. tall boots.

Winter photos – I went with navy and beige but love the pop of pink in my sweater! Similar Women’s Sweater | Boys’ Sweaters | Similar Men’s Sweater | Women’s Snow Boots | Kids Sperry Boots

Winter – Winter photoshoots can be so fun! We finally had family photos done in Winter Park when we visited last year. I opted for navy blue because it’s easy to find and navy is often considered a neutral color. I went with beige instead of white since most of the background would be snowy!

Spring photos – I went with bright, cheerful tones that matched the beach!
Women’s Maxi Dress | Men’s Shirt | Boy’s Shirt | Teen Shirt

Spring – Spring time is a very popular time for outdoor photos, especially since flowers are in bloom! Neutrals are a great choice if you’re going to have lots of colors in the background.

Summer photos – I went with shorts, it’s hot! We all had on neutrals in either green, white, khaki, or black!
Green Tie Shorts | White Tank | Men’s Polo | Men’s Shorts

Summer – I’ve only had summer photos taken once, I mean the heat in Texas is almost unbearable to be outdoors for too long! But, we opted for shorts, neutral colors, and only spent about 10-15 minutes on this sunflower photo shoot.

2. Ladies First

Once you know what season you’re working with, I highly recommend all the ladies in the group find their outfit first! Then you can coordinate the men’s and children’s outfits after you nail down your pieces. I always feel like I am the hardest to shop for, so getting my outfit and shoes picked out first is always super helpful and eases the stress!

Example: For our winter photos, I started with my sweater first! As soon as I found it online (Old Navy), I began looking for complimentary colors for the boys. They are so much easier to shop for! I knew it would be easy to find navy and beige for them. Then I added in the hats, gloves, and snow boots!

Example: When shopping for our recent beach trip, I found the green maxi dress. I was drawn to that color because I know the waters in Orange Beach are often emerald green. Once I purchased my dress (Amazon) I started looking for tops for the boys that would match. I found Jake’s first (Old Navy) and was able to use it to add more colors for Jereme and Jett. I made this screenshot to double check how the colors would look together

3. Colors

Black is my favorite color! These outfits are more casual, but I am so happy with this photo! Similar shorts | Bodysuit | Boys V-necks |Men’s Top

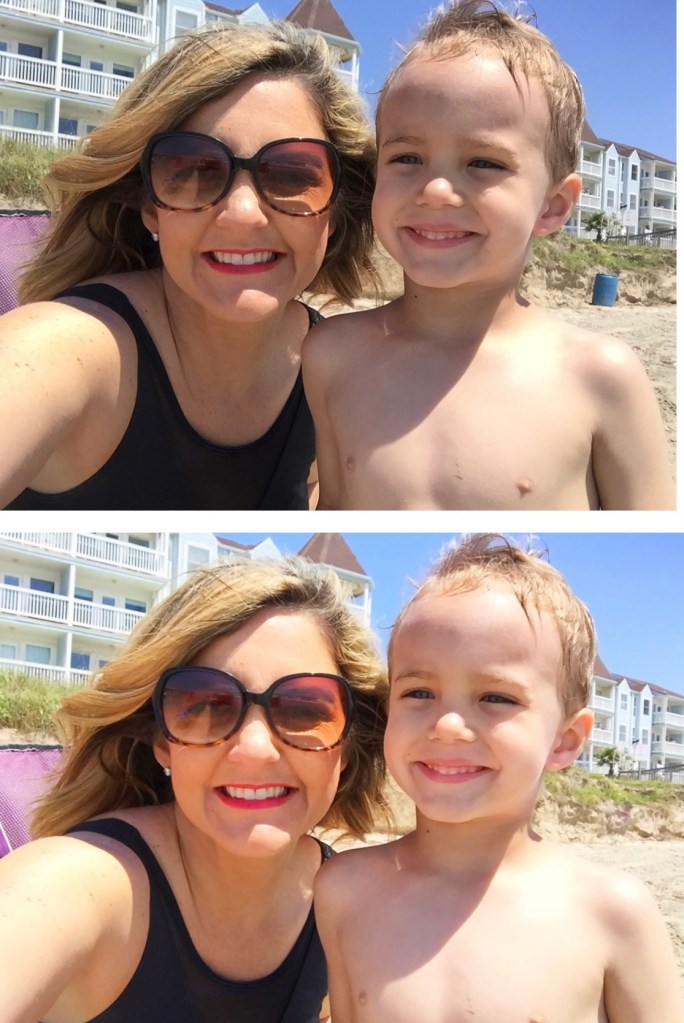
Even though certain colors are associated with certain seasons (I’m thinking of those warm fall tones here), I cannot recommend enough to wear the colors that you feel your best in! I love wearing black, so we’ve had several photos in blacks and grays. Keep in mind what colors look best with your skin tone and eye color. If you’re wearing pastel colors, make sure everyone in the photo is also in pastels. Do the same with warm and light color tones, too.

4. Styles

Sometimes I feel like all photos start to look the same. Adding in a trendy hat can change the feel of a photo!
Fall Hat | Similar Style Sweater

If you’re like me, then you’re probably already up to date on the current styles and trends! I know that I prefer to be very trendy and wear the current styles of each season. But, sometimes keeping a more classic look for photos will pay off in the end since these trends are constantly changing! Ultimately, you should always wear what makes you feel your best, and be mindful of everyone’s style preferences in your group! And, can you continue wearing these outfits or pieces even after the trip or photoshoot?

5. Solids vs. Prints

We spent the day exploring tide pools and wanted to look cute but be comfy. Boys are in solid green sweatshirts and I’m wearing a printed sweatshirt with green flowers.
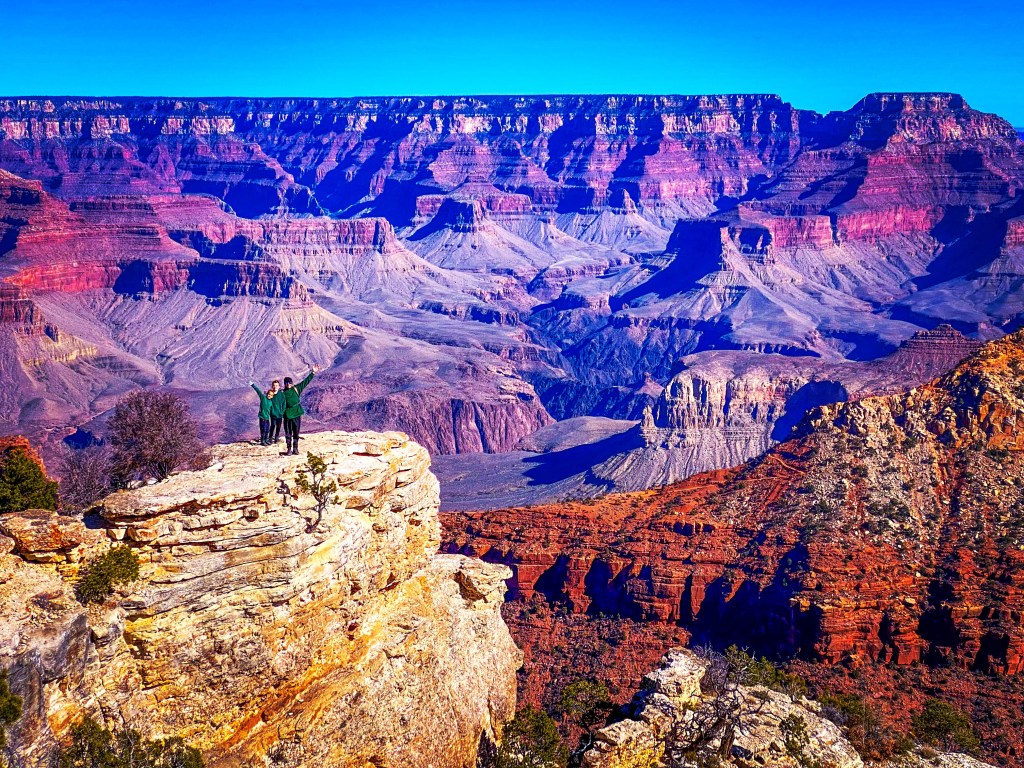
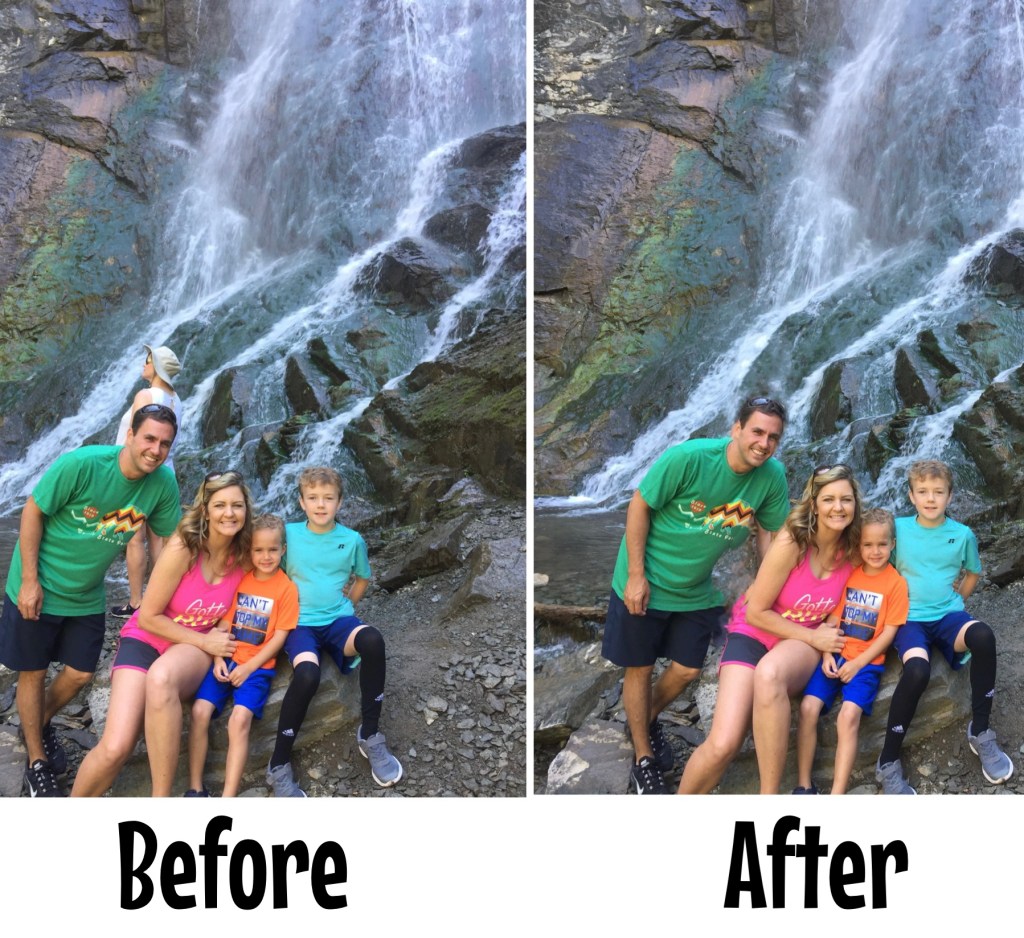
Men’s Green Sweatshirt | Boys Green Sweatshirts | Women’s Green Yoga Pants | Women’s Top

For me, I think this is a personal choice. I tend to stick with solids for photoshoots with a photographer, but we wear prints and dress more casually when we’re taking photos on vacation. I try to envision the background when deciding on going with prints or solids! If the background is going to be busy, stick with solids. Often, my boys will wear solids and I’ll wear a matching colored top with print!

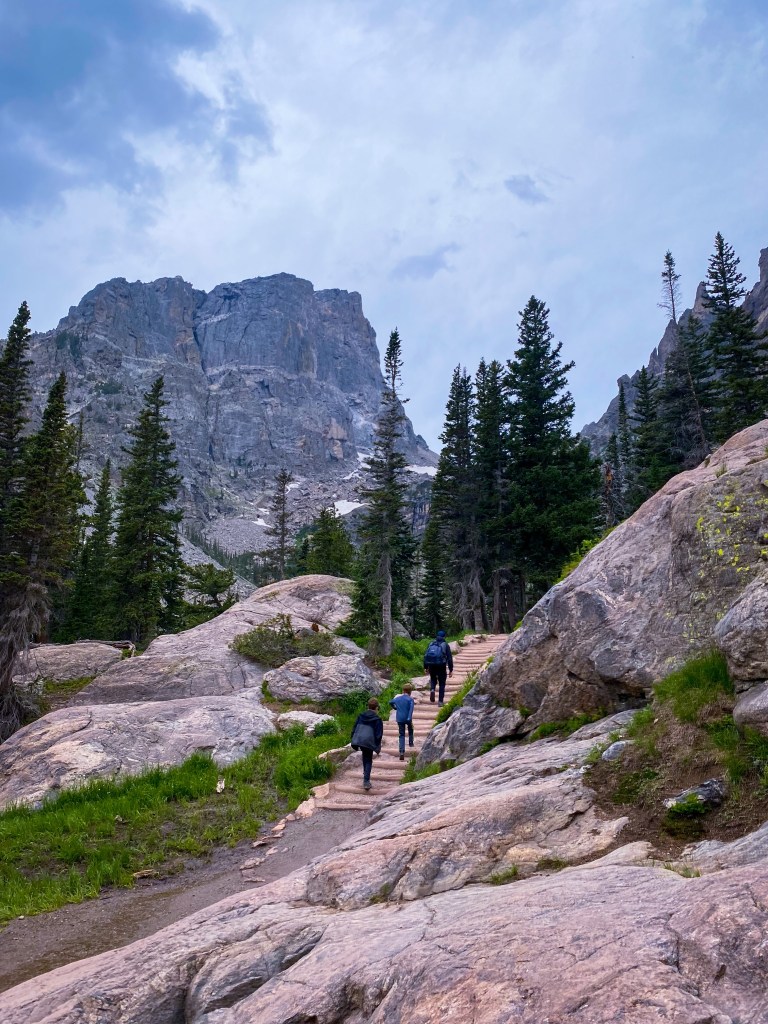
6. Background/Scenery

Continuing on with choosing solids, prints, and colors, you need to know what the background is going to be. Think about what colors will be in the photo and then plan your outfits based on the landscape and prints that will complement the background. Helpful tip, it’s better to stand out than blend in with your surroundings!

7. Printing & Framing

The colors in these photos go perfectly with our home decor!

This may sound crazy, but I also plan outfits based on what colors will go with our home décor. I love to print our family photos! But I want everything to match the aesthetic of our house.

8. Accessories

Oh geez, this necklace! Ha!!

This is a big one! Sometimes less is more. I cringe at some of my past photos and the accessories that I wore. Keep in mind that styles are constantly changing and those colorful, chunky necklaces and bracelets may not be “in” for long!

9. Be YOU!

Most importantly, be yourself! You are beautiful and your family is precious. No matter what outfits you go with, you are going to cherish these memories and these photos forever! Let your true style and personality shine!

More Outfit & Color Ideas

Below are more of our favorite color combos and coordinating outfits for your viewing pleasure! I hope these ideas and color schemes help you coordinate the perfect outfits for your next vacation or family photo shoot!

I love these paperbag shorts from Loft! I completed my outfit of tangerine shorts, a white top, Miller sandals and then added in khaki shorts for the boys with similar colored tops that matched my shorts!

While exploring the beaches in San Francisco, we all wore jeans and navy tops. My top is the only one with print.

While exploring the Redwoods, we all wore maroon. It started with my top first, I love this print! I then completed my outfit with maroon hiking pants and a hat. From there, the boys wore different shades of gray hiking pants with maroon sweatshirts.

While hiking in Moab, we wore bright blue and black. I actually started coordinating these outfits with Jereme’s jacket first. Then I found matching hiking pants for me and the vests for the boys. Sometimes it’s easy to match a few pieces when you begin coordinating your outfits with things you already have in your closet!

I based the boy’s outfits on colors from this maxi dress. Each one is wearing a different color from the dress, but we all match very well together!

Other Important Tips & Recommendations:

  • Shoes matter, even on your kids! Make sure they’re clean and match the style of the outfits.
  • It’s perfectly fine to wear white after Labor Day.
  • Make sure that bra straps aren’t visible.
  • Don’t wear hair bands around your wrist, they can be really hard to Photoshop out!
  • You can’t go wrong in neutrals!
  • This is not, and I repeat NOT the time to cut your bangs, cut your hair off, or change your hair color just for family photos or an upcoming trip!
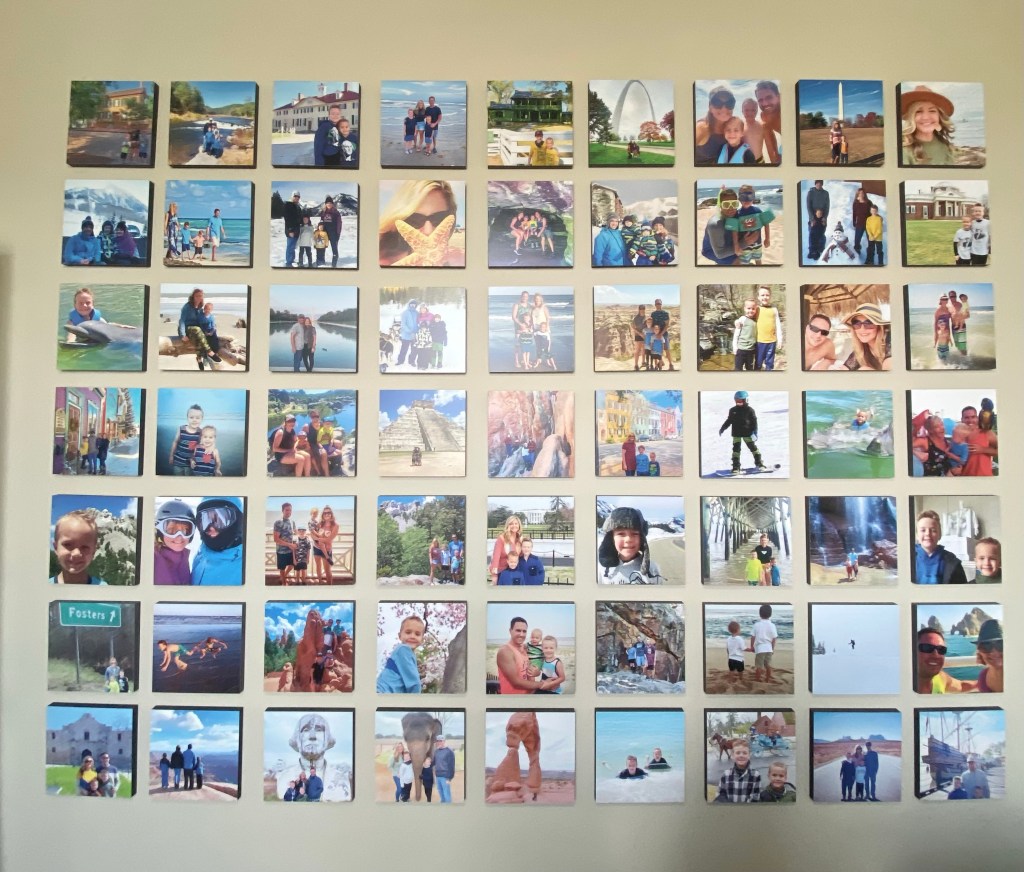
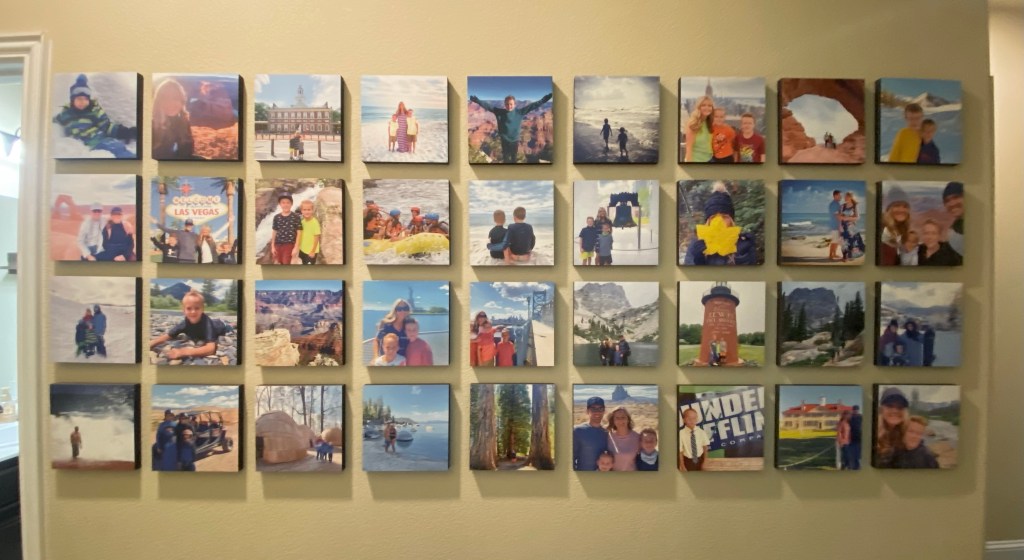
  • I love using Mixtiles to print our vacation photos!
  • I love using Smallwoods to print our professional family photos!

I hope you find some of these outfit examples and tips helpful! If you have any questions, please don’t hesitate to reach out.

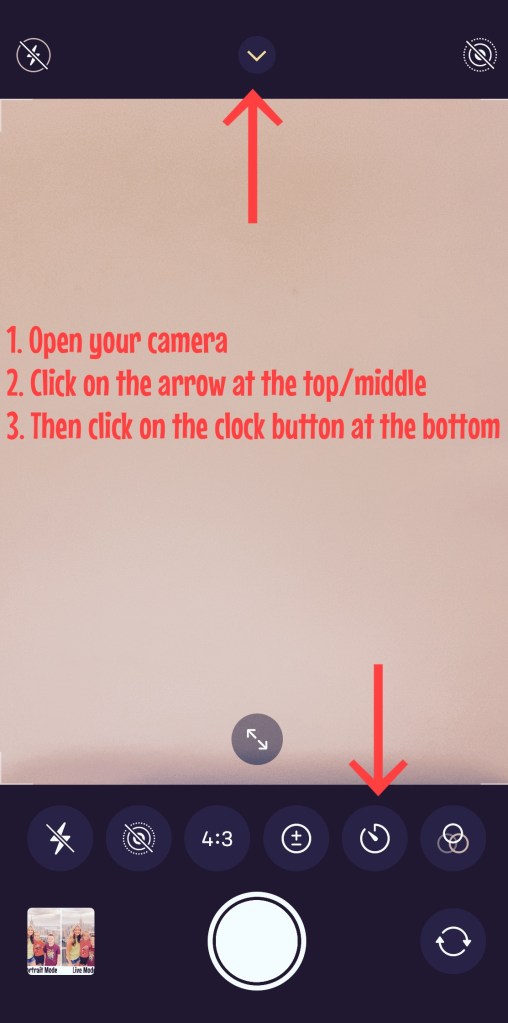
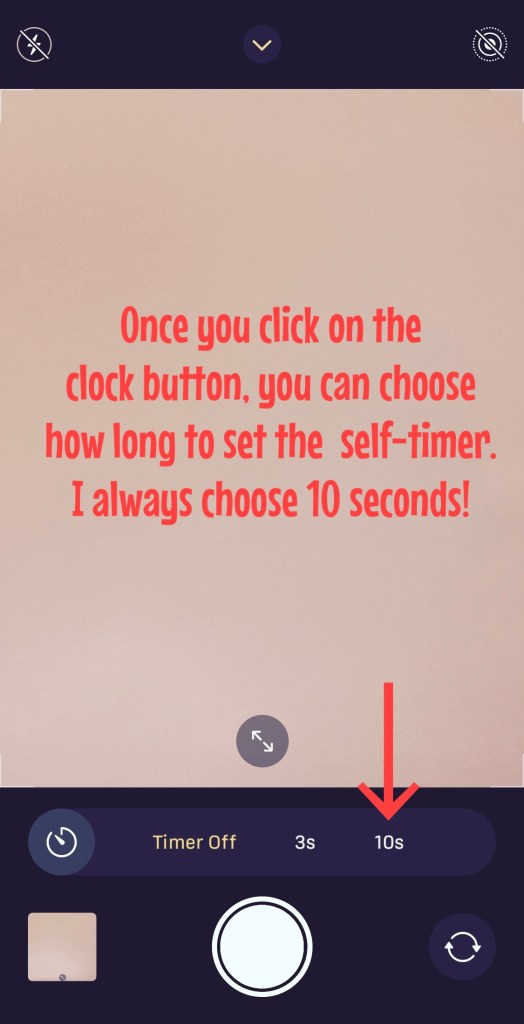
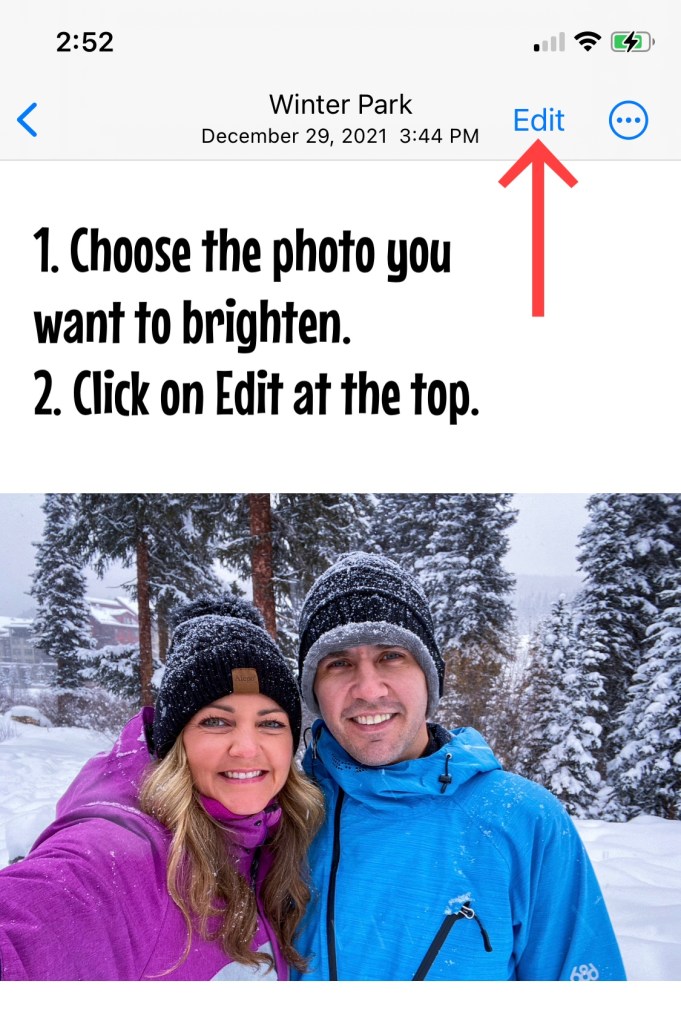
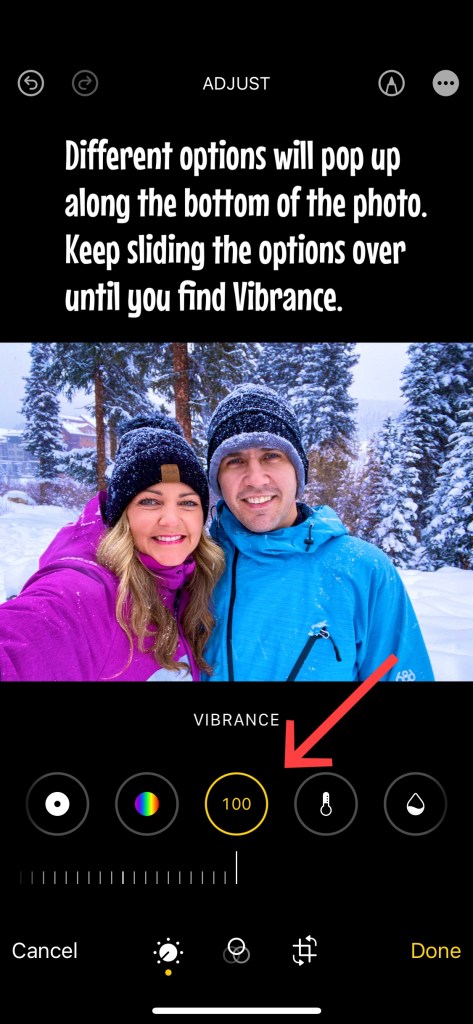
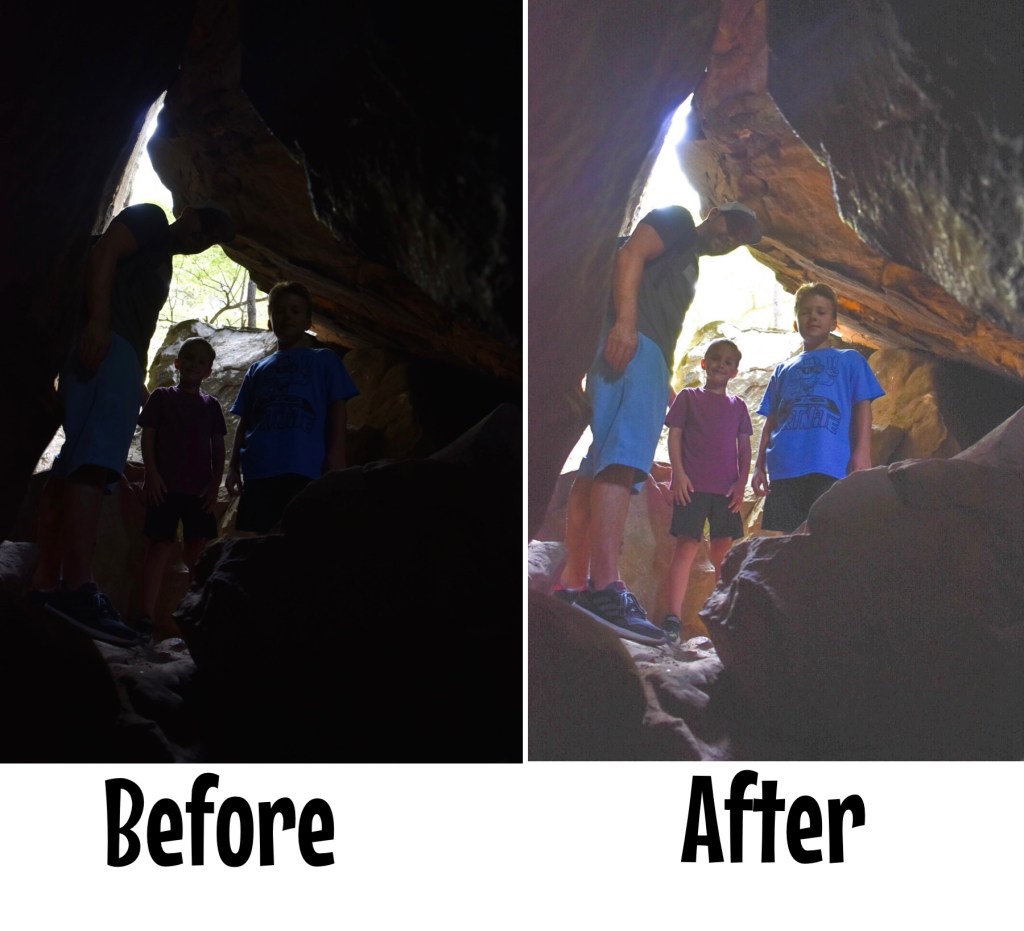
Click here for my complete guide on Simple Photo Tips Anyone Can Master!

Simple Photo Tips Anyone Can Master!

One of the questions that I’m asked most often is what kind of camera equipment I use for our travel photos. I’ll let you in on a little secret… I use my iPhone 11 for everything! And up until two years ago, I was still using my old, trusty iPhone 6! The key to capturing great photos is knowing how to use the camera that you have and taking tons of pictures!

If you follow along on our adventures, then you probably know that I’m a teacher and we travel on a budget. I would love to have professional gear, but that’s not really an option for us right now. I do have a Nikon starter camera, but to be honest it’s too big and bulky for me to lug around on our adventures. So, I’m going to show you I my best photo tips and tricks for using the iPhone camera that I have.

Shooting Modes and Angles

One of the first photo tips I like to share is shooting in different modes and from different angles. Cell phones are pretty fancy these days and even an amateur like me can simply click a button to change the mode on the camera. Below are the different modes and angles that I recommend.

Live Mode – I always take photos with Live Mode turned on. I like this feature because you can go back and make Reels clips later with these photos. I have created some really special travel vlogs specifically using mini clips from Live Mode photos. This mode is also necessary for Long Exposure photos, which I will touch on next. Check out the steps below to make sure you have your camera’s Live Mode turned on.

Live Mode Photo Tip: Open your camera and click on the circle in the top right hand corner (shown above).

Live Mode Photo Tip: If Live Mode is turned off, you will see a line through the circle (shown above).

This video clip was made only using photos that were taken with Live Mode turned on!

Long Exposure – Have you ever wondered how people transform a photo of a waterfall or a flowing river into those stunning photos with the blurry/foggy water effect? Well, I know the secret! And it all starts with shooting in Live Mode first, then editing the photo in the iPhone’s camera app to a Long Exposure. Another quick Long Exposure photo tip is to only add this option to landscape or scenery shots. I have not had the best luck with this feature if there are people in the photo because they become blurry as well! Check out the steps below to do this and look at some of my before and after photos in Long Exposure Mode! Both images of the waterfall are from the same photo, the first one was taken in Live Mode and the second image is the photo with Long Exposure.

Photo Tip: To select Long Exposure, the original photo must be taken in Live Mode.

Long Exposure photo tip: Open your camera and take a picture in Live Mode of moving water. Next, open the image from your photo gallery. Click on the down arrow next to the word Live. Choose Long Exposure!

This is the end result! It doesn’t get any easier than this!

Both landscapes are stunning! Which photo do you prefer?

Portrait Mode – I really love taking pictures in Portrait Mode! City shots are my favorite when taken in this mode. I also like to use Portrait Mode when there are crowds of people or something not that visually pleasing in the background. I highly suggest trying this photo tip, I know you will be surprised at how professional your photos turn out! Follow the steps below to put your camera in Portrait Mode and enjoy some of my favorite photos shot in this mode, too!

Photo Tip: You can find the Portrait Mode button next to the Photo button when you open your camera.

I like Natural Lighting, so I usually leave this setting alone.

Same picture, one taken in Portrait Mode and the other in Live Mode.

Self-Timer – Another one of my favorite photo tips is using your camera’s self-timer. I do have a cell phone tripod, so this mode comes in handy when I want a great family shot! I also use the self-timer when I’m taking selfies of us! This mode gives us time to get situated in the frame and for me to get the angle right. Keep reading to learn how to set the self-timer on your phone.

Angles, Vantage Points, & Perspectives – The next time you’re on vacation or somewhere scenic, play around with different angles and vantage points when you’re photographing the landscape. I like to get down really low to the ground when photographing a picturesque scene. It’s also fun to play around with different natural objects, like rocks or a water line. A good photo tip is to off-center your main subject, whether that be people or an object! Check out some of my favorite landscape photos below.

I got down low to the ground and used this drift wood to get a cool beach shot!

Again, low to the ground to get this lake shot! I had never seen pine cones scattered on the shore like seashells!

The contrast in the yellow flowers, whitecapped mountains, and blue sky made a great picture!

This is one of my favorite shots that shows the true perspective of the Grand Canyon! Notice how my subjects are off-centered and more to the left of the photo.

Photo Editing

I wish I knew all the ins and outs of Photoshop, but unfortunately I do not. However, I do know how to enhance photos to make them look more visually appealing without altering the people in the image in an unrealistic way. I exclusively use two apps besides the basic editing features in the iPhone’s picture gallery, which are the Lightroom App and the Facetune App.

iPhone Camera App – This is where I start my photo editing, right in the photo app! And typically, I brighten photos and increase the vibrancy only. These are my go to edits and are so simple and easy. Keep reading to see how I increase the brightness and vibrancy in my photos.

I increased the vibrance to 100, but as you can see, the change if very subtle.

Lightroom App – This is another one of my go-to editing apps when I have a photo that just doesn’t look like the real deal. Maybe the faces in the picture are dark because of shadows. Maybe the colors just aren’t popping like they are in real life. I don’t have any presets saved here, but I do like to increase the brightness and vibrancy with this app, too.

This app makes it so easy to enhance your photos!

Photo Tip: Using Lightroom, increase the shadow and vibrancy for these results!

Facetune App – I love Facetune when I need to make something in a photo vanish. Whether that be a pimple or a random person in the background! The patching and vanishing tools in this app are amazing! I used to like smoothing out facial features, especially when I first started noticing all of my wrinkles. But now, I’ve embraced my age and really hate that plastic look. So, I truly only use this app for the vanishing/patching tool. Check out these features and some before and after pictures below.

Photo Tip: Step one, remove the blue trash can from right side of photo with Facetune. Step two, increase the brightness on the new image with iPhone photo editing.

Not sure why this lady walked behind our photo, but it wasn’t a problem with the Facetune app!

Poses & Action Shots

Learning how to change up our poses is something that I am still trying to figure out, it can feel so awkward at times. And I really do love those traditional pictures where everyone is smiling and looking at the camera! But, I’m also finding that I really adore those action shots, too. If you’re tired of taking the same old photos, then try changing up how you pose or getting more action shots. I’ve taken photos of us walking, jumping, running, and facing away from the camera, just to name a few. Check out some of our favorite action shots and nontraditional poses below!

Photo tip: Face away from the camera, but let your kids be themselves. I love this unintentional shot with Jake looking back at the camera!

This image is actually framed in my house. It captures my boys hiking along a gorgeous trail, no posing!

Cropping, Zooming, & Straightening

Cropping, zooming in, and straightening a photo might just be all you need to capture a great shot! The iPhone makes it so easy to crop and straighten a crooked picture. Check out the photos below to learn how to crop a photo, how to straighten a photo, and then see how some simple cropping and zooming in can completely transform your image into a stunning shot!  

This is the image I shot from the beach. Wait to see the final product after some cropping & zooming! (Below)

This is the final product after some simple cropping & zooming!

Water Shots

With the right waterproof phone case, you can take amazing shots that you might have been too scared to capture before! I just recently purchased a great case and was able to take some fun shots at the lake and in the pool of my boys, without worrying about ruining my phone! Check out some of my favorite water shots below.

These underwater shots were taken in the pool!

Even in a waterproof phone case, the images from the iPhone are still so clear!

Budget Friendly Camera Gear/Accessories

This post contains affiliate links of products that I love. I may earn a small commission, at no extra charge to you, if you purchase any items using the links provided.

  • Camera Stand – I literally take this stand everywhere to capture our own family photos!  

Cell Phone Image Quality

When people learn that I primarily only use my iPhone for photos, they ask about the image quality when printing pictures. I am happy to report that I have had no issues of poor quality when it comes to printing my iPhone photos! In fact, I have two walls in my home only dedicated to our travel adventure photos, and these two areas are the favorite places in our home! I use Mixtiles for most of these photos and we’ve been very pleased with the outcome. Check out the two photo walls in my house, and remember, every single printed image is from my iPhone!

This is the wall in our office.

This is the wall in the boys’ hallway.

Be Creative & Have Fun!

My final photo tip is to be creative and have fun trying new things with your camera! You’ll never know how great an image will turn out if you don’t at least try. Play around with editing and cropping, try out new angles and poses, and don’t give up if you aren’t successful right away. Check out some of my favorite creative shots over the past year!

This shot was a spur of the moment idea when I noticed our shadows while hiking! I wasn’t sure how it would turn out, but it’s such a cool shot of our family!

Another awesome action shot taken on July 4th!

I loved the color of these flowers and decided to get super close for a photo. The sunset in the background was a nice surprise!

This was our first time seeing sand dollars on the beach!

I truly hope that you find these simple photo tips helpful! I am not a photographer in any way, shape, or form, but I’ve been so happy with the images I’ve captured on our adventures. I’m sure I still have a lot to learn about taking amazing photos and I would love to hear any of the photo tips you may have! What photo tip of mine are you going to try next?