How to Take Advantage of School Breaks Part 1: Tips for Squeezing in Travel When the Kids Are Not in School

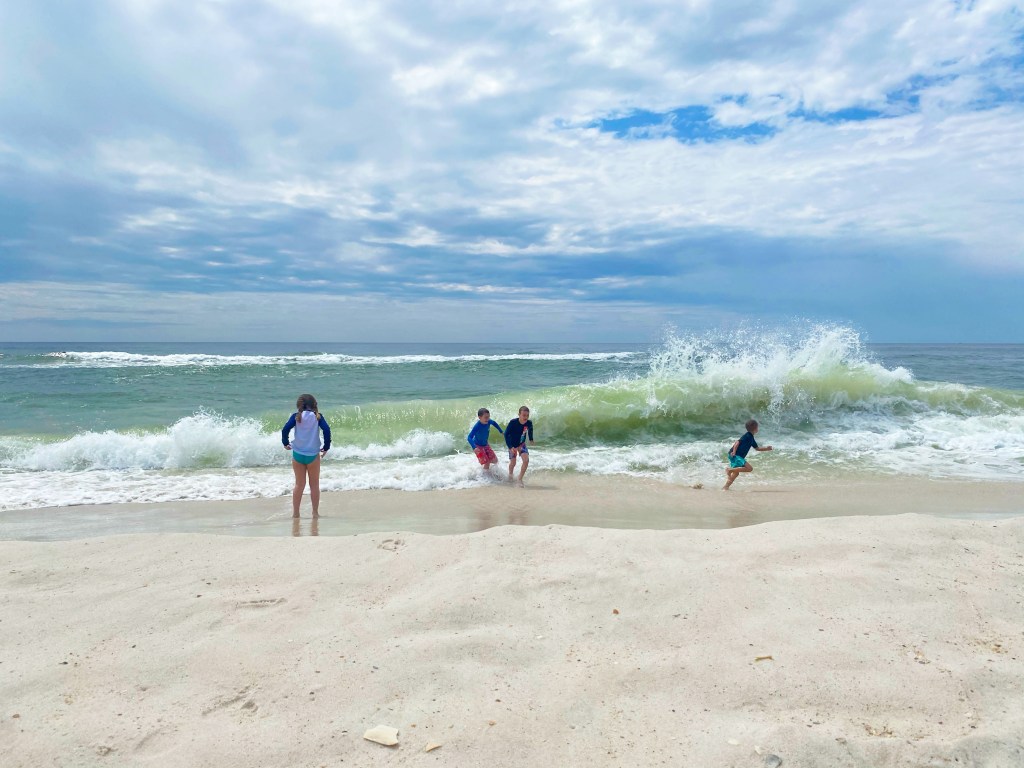
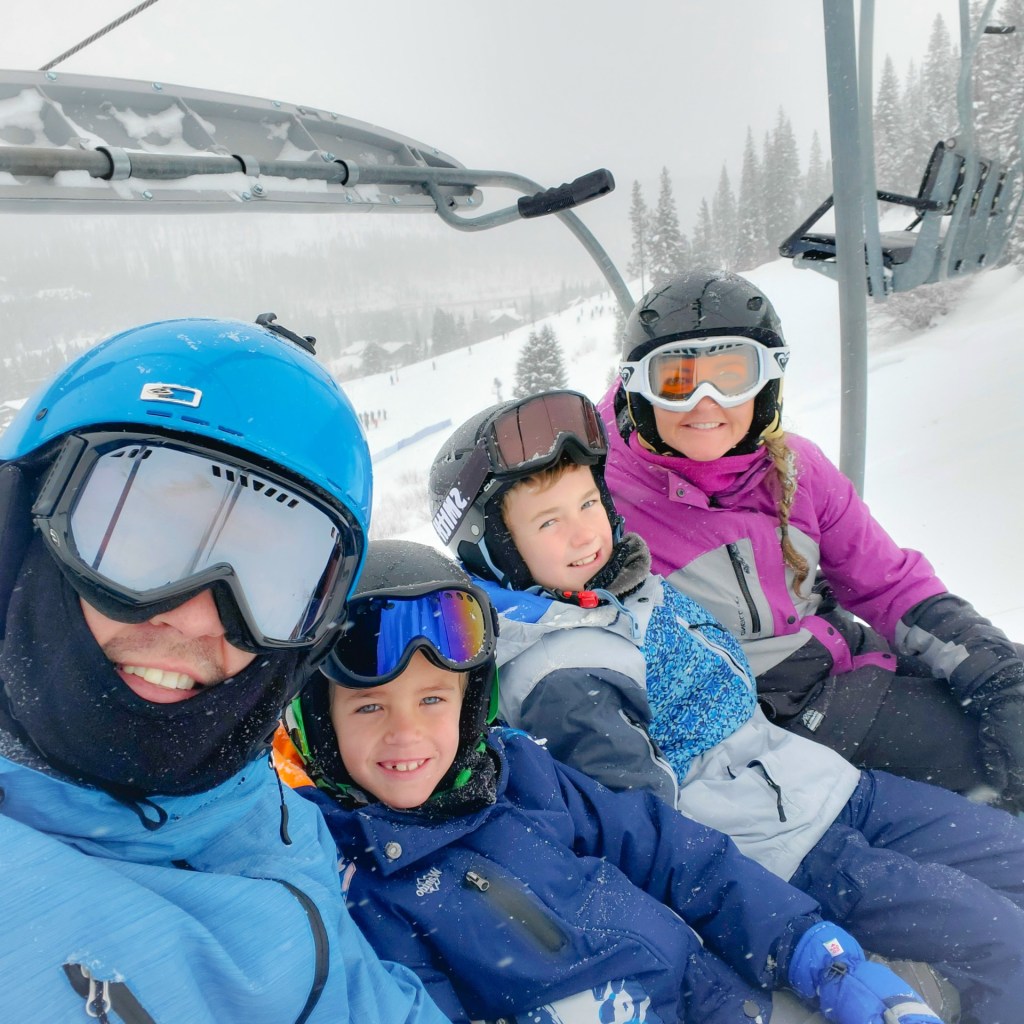
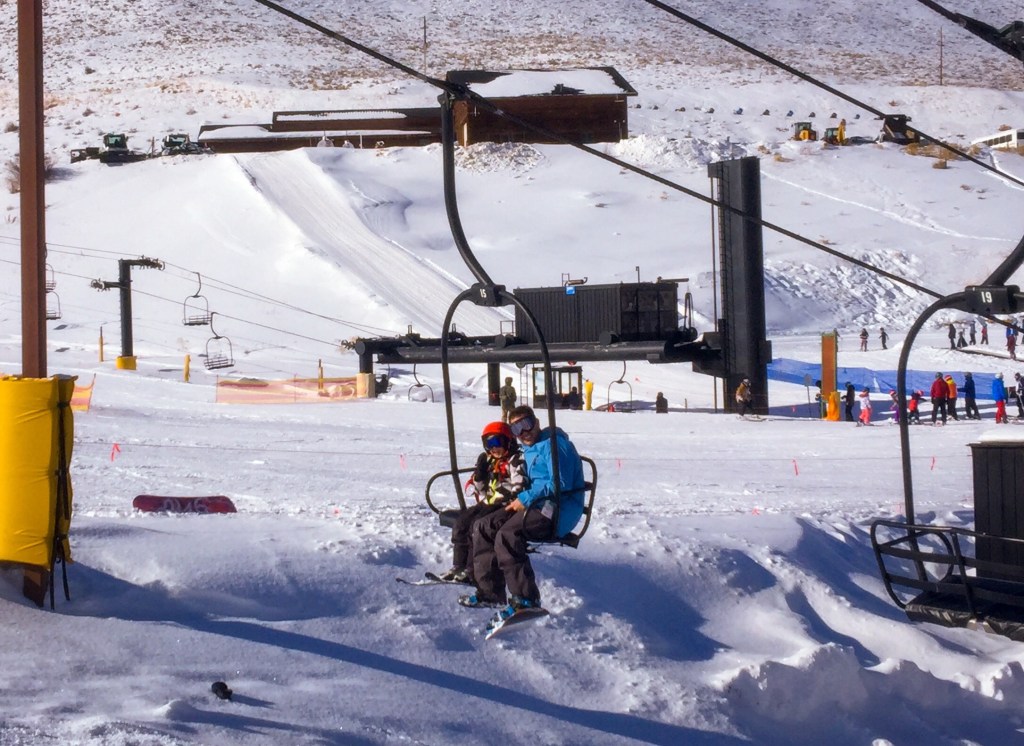
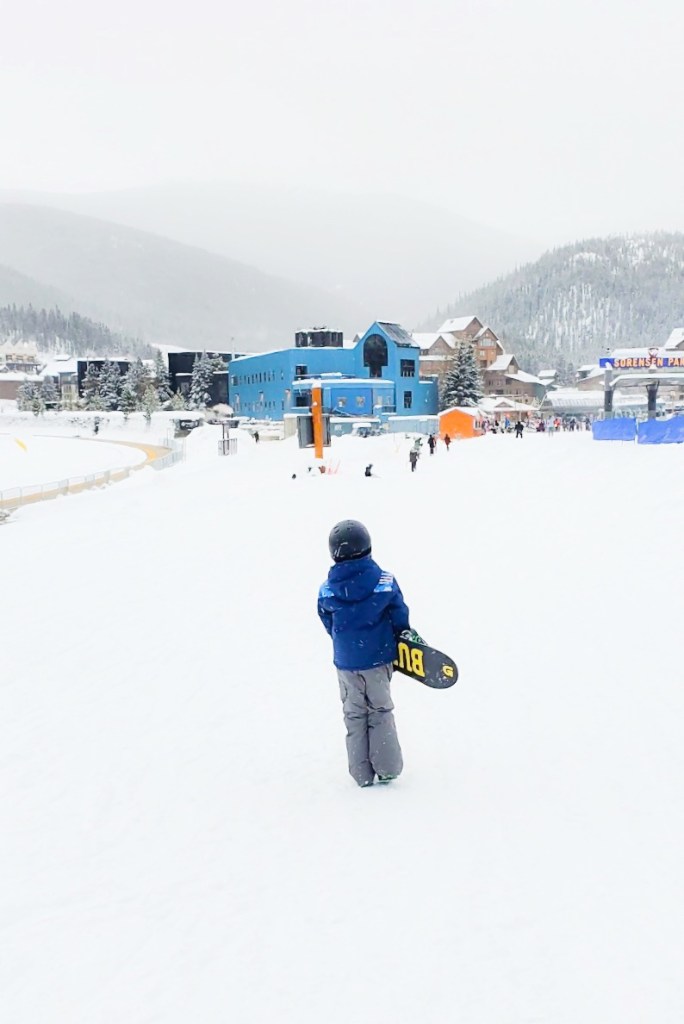
Since Jereme and I both work, and our kiddos keep us busy with school and sports, we aren’t a full time traveling family. But, I have become an expert at taking advantage of school breaks! I have several tips for squeezing in travel when the kids are not in school that I hope you find helpful!

We’ve created so many wonderful family memories traveling over school breaks!

Now, I’m not saying that you have to travel every single time your kids are on a school break. Sometimes it is so nice to rest and recharge at home. But there are several different times throughout the school year that taking a trip might be fun for you and your family, besides just during the summer! Below, I’ve included some tips and things to keep in mind when traveling over a long weekend. I’m also sharing some of our favorite travels over different school breaks that we’ve recently taken!

Tips for Traveling Over a Long Weekend

Finding the time to travel over a long weekend does involve some planning ahead, but it can be a lot more budget friendly than a longer trip! So, first things first. Get your school calendar at the beginning of the school year and take note of when you’ll have long weekends for possible travel and start making plans. When thinking about the destination you’d like to visit, the biggest consideration will be the amount of time that will be spent on the travel days. Do you have time for a road trip or will flying be the better and faster option? There are several pros and cons to weigh when traveling over a long weekend. One pro is that you don’t have to pack as much, but a con is not having a ton of time in the location you’re visiting! Below are more things to think about when taking advantage of school breaks and traveling over a long weekend.

  • Choose closer destinations to reduce the amount of time spent on traveling
  • Plan a Staycation
  • Take a day trip
  • Camping can be a fun and easy weekend getaway
  • Keep it simple – don’t try to pack in too many activities
  • Off season travel (fall/winter) can be less crowded & more budget friendly
  • Think about the weather at your destination
  • Remember that attractions are typically busier on weekends
  • Hotels can be more expensive on Friday and Saturday nights
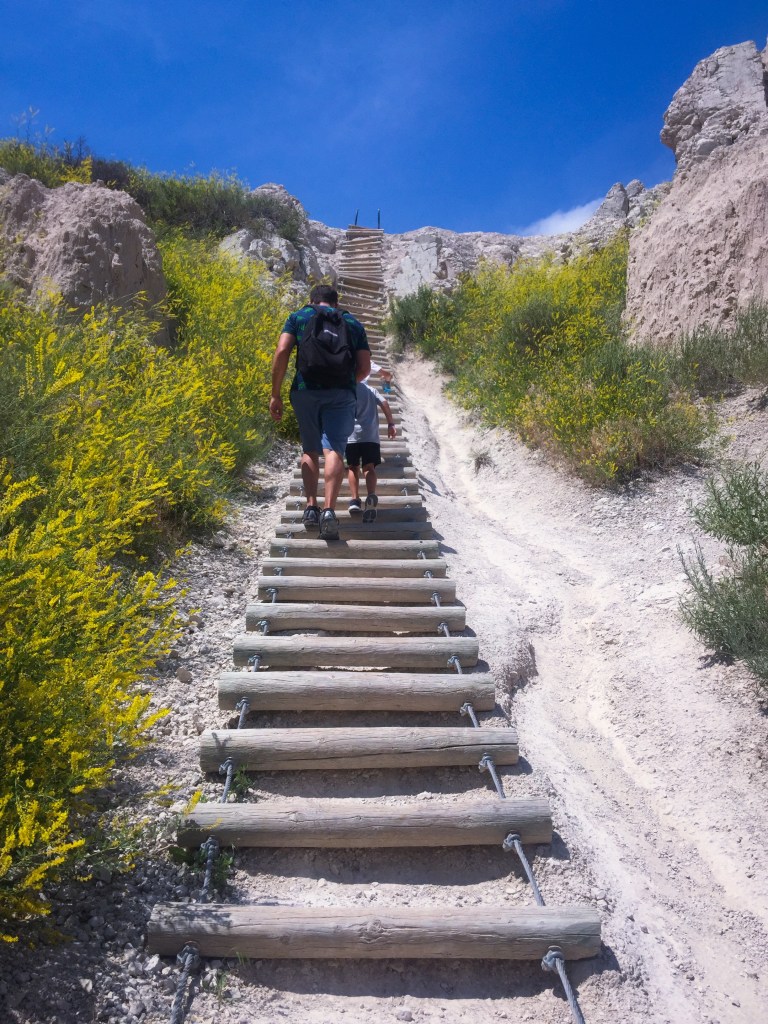
  • Visit a National or State Park

National Parks also have free entrance on certain days throughout the year. Below is the list of days for the year (2023) that you can visit the Parks for free!

  • Jan. 16 — Martin Luther King Day.
  • April 22 — First day of National Park Week.
  • Aug. 4 — Anniversary of the Great American Outdoors Act.
  • Sept. 23 — National Public Lands Day.
  • Nov. 11 — Veterans Day.
Weekend travel bonus: The shorter the trip, the less you have to pack!

Weekend Travel Destination Recommendations:

I really have become an expert at planning weekend trips! We’ve taken advantage of several school breaks and squeezed in some amazing places, just over a long weekend. Below are some of my favorite long weekend getaways!

We had no idea just how amazingly unique this National Park is!

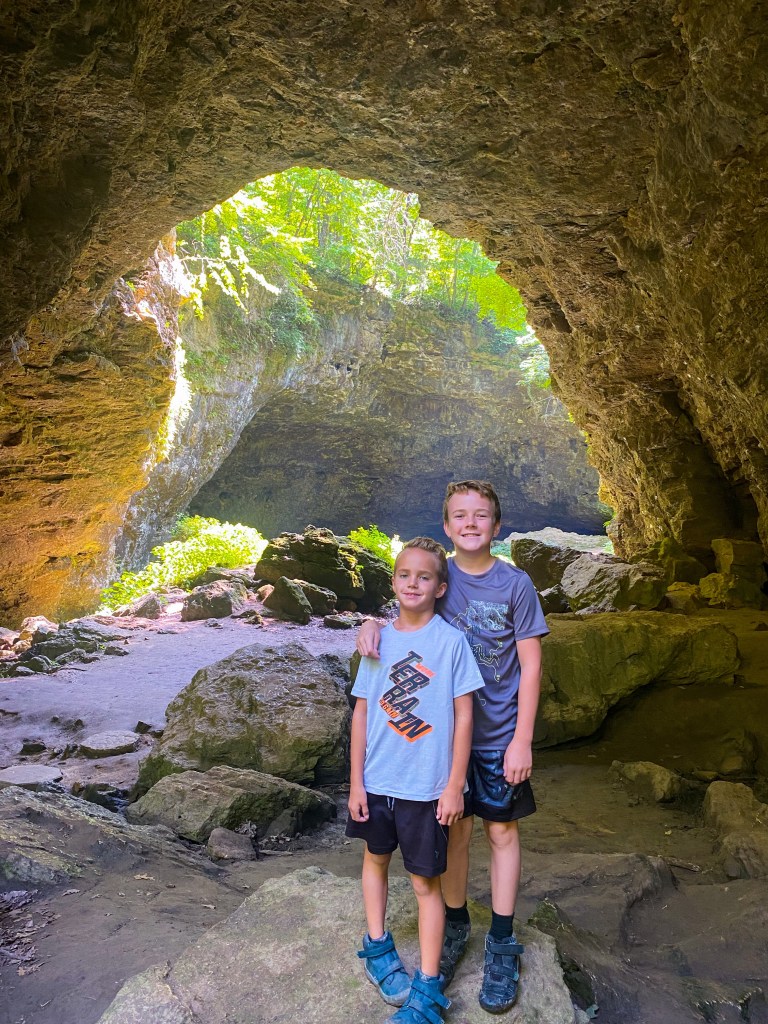
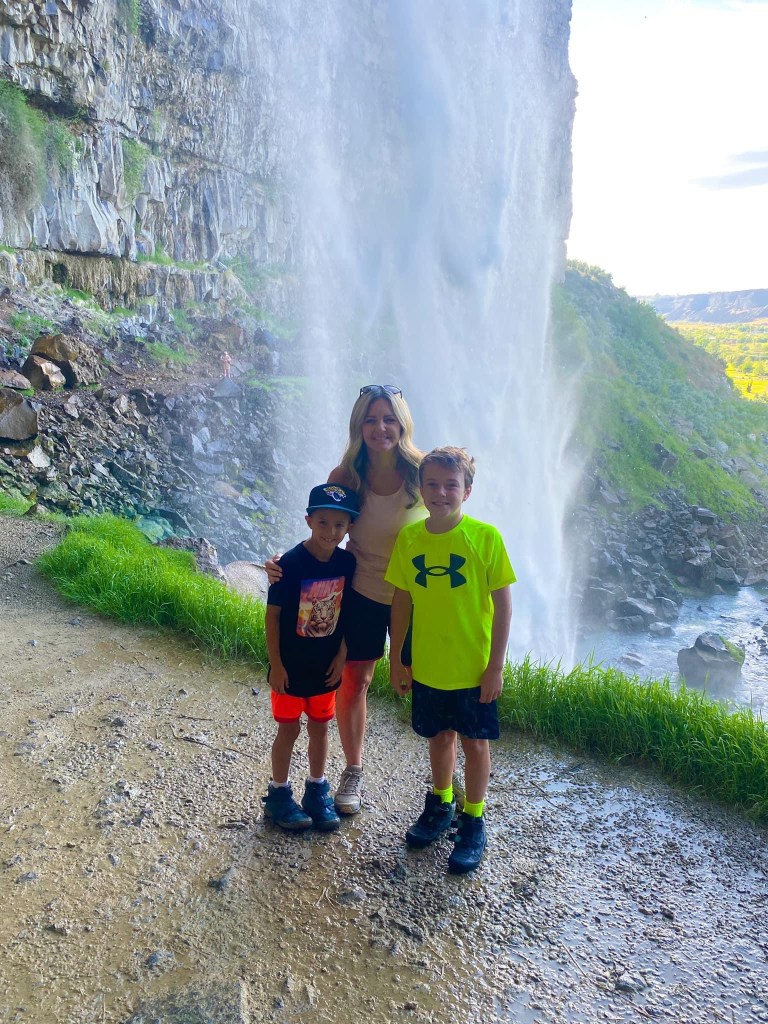
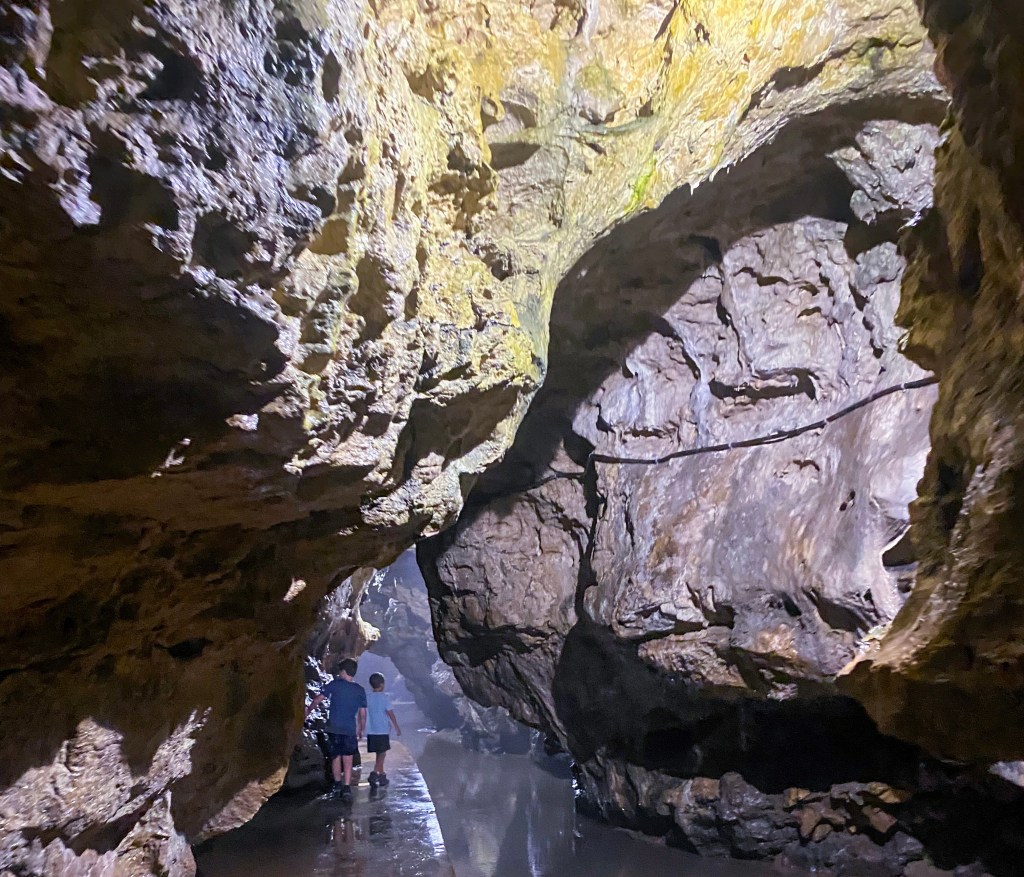
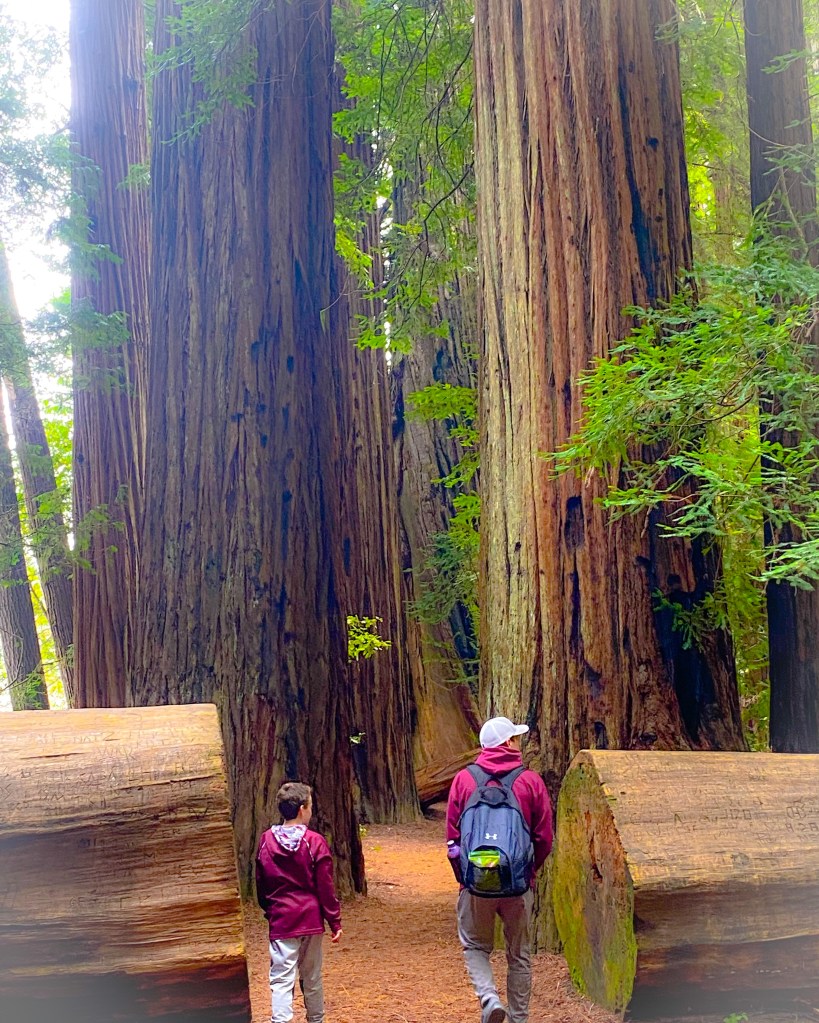
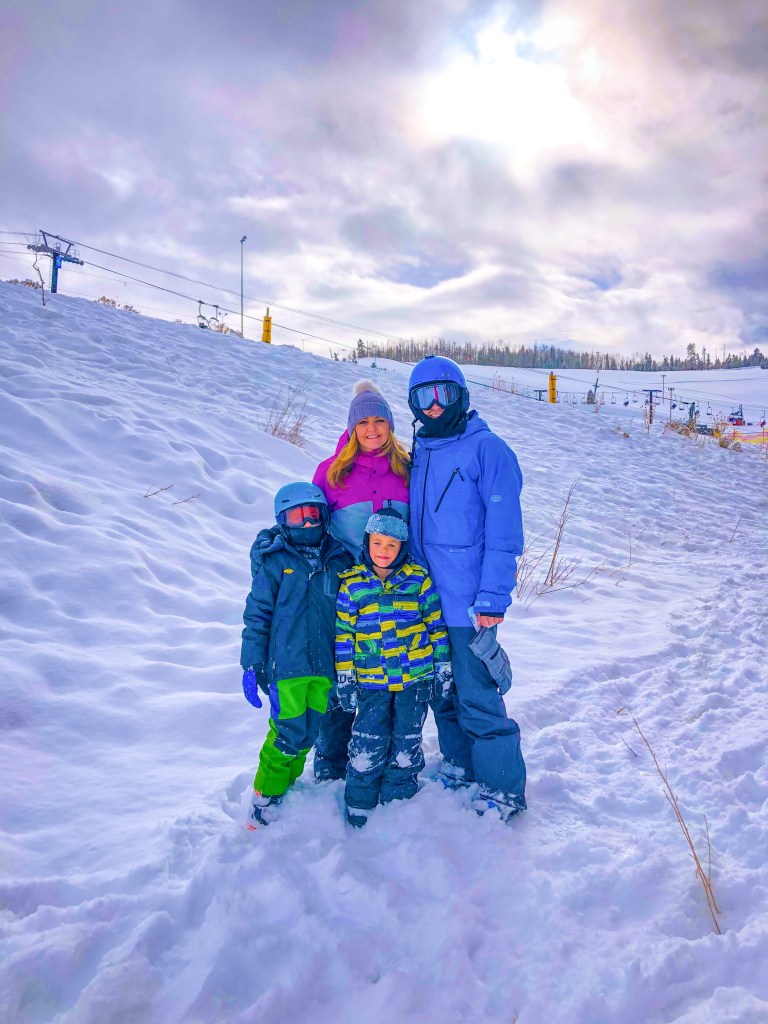
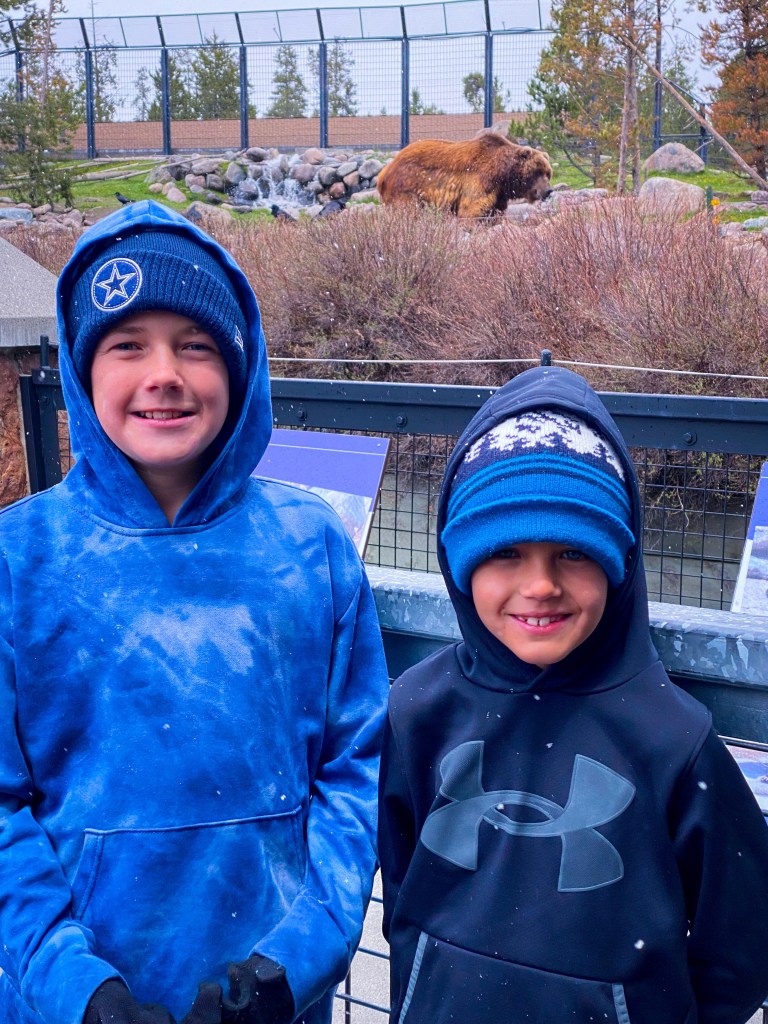
Winter: Carlsbad Caverns, NM – This is our most recent long weekend family trip that we were able to make over our school break for the Martin Luther King, Jr. holiday! This is the perfect weekend destination because you don’t need too many days to really explore these impressive caverns and the temps inside the caverns stays the same year round!! The drive for us was about seven hours, so we left out early on Saturday morning and arrived in the early afternoon. Then we explored the caverns for most of the day on Sunday and drove back home on Monday. We all were amazed inside the caverns and Jake participated in the Jr. Ranger program while we were there and earned a badge.

Inside the caverns is like what I imagine being on another planet is like!

Click here for my complete guide about visiting Carlsbad Caverns National Park!

Chicago is such a fun city!

Spring: Chicago, IL – Chicago is a great weekend destination! I’ve been lucky to find reasonable airfare to the Windy City using both Google Flights and Skyscanner. I also feel like this destination can be more budget friendly since you don’t need to rent a car! I’ve visited Chicago over the weekend, both with my boys and on a girl’s trip! The city in the spring is absolutely wonderful, the weather is perfect and the flowers are in bloom everywhere. There are so many great places to eat, some of the most impressive museums I’ve ever visited, and so many fun outdoor adventures.

I really couldn’t get over the flowers that were everywhere!

Click here for my complete on visiting Chicago!

Love that Dallas skyline!

Anytime: Dallas, TX – Our Dallas Staycation has been one of my favorite weekend trips to date! We’ve lived close to Dallas my whole life, and I had no clue how much fun exploring our nearest city would be. My family took advantage of the CityPASS and it made exploring Dallas not only fun, but extremely easy! With the CityPASS, we got ideas of where to go and then were able to skip all the entry lines with the PASS. This trip was also extremely budget friendly, since it was so close and didn’t require a lot of gas to get there. Plus, we went with friends and split the cost of parking and the hotel.

These kids thoroughly enjoyed a “fancy” hotel with a rooftop pool!

Click here for my complete guide on visiting Dallas!

Dream Lake in Rocky Mountain National Park really is a dream!

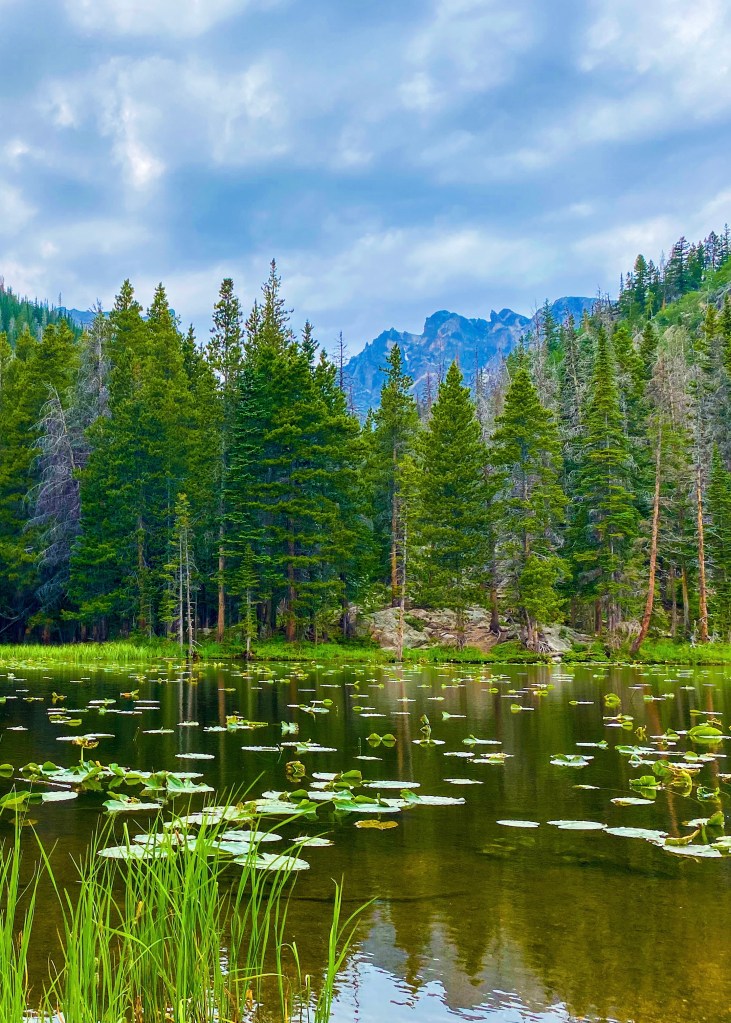
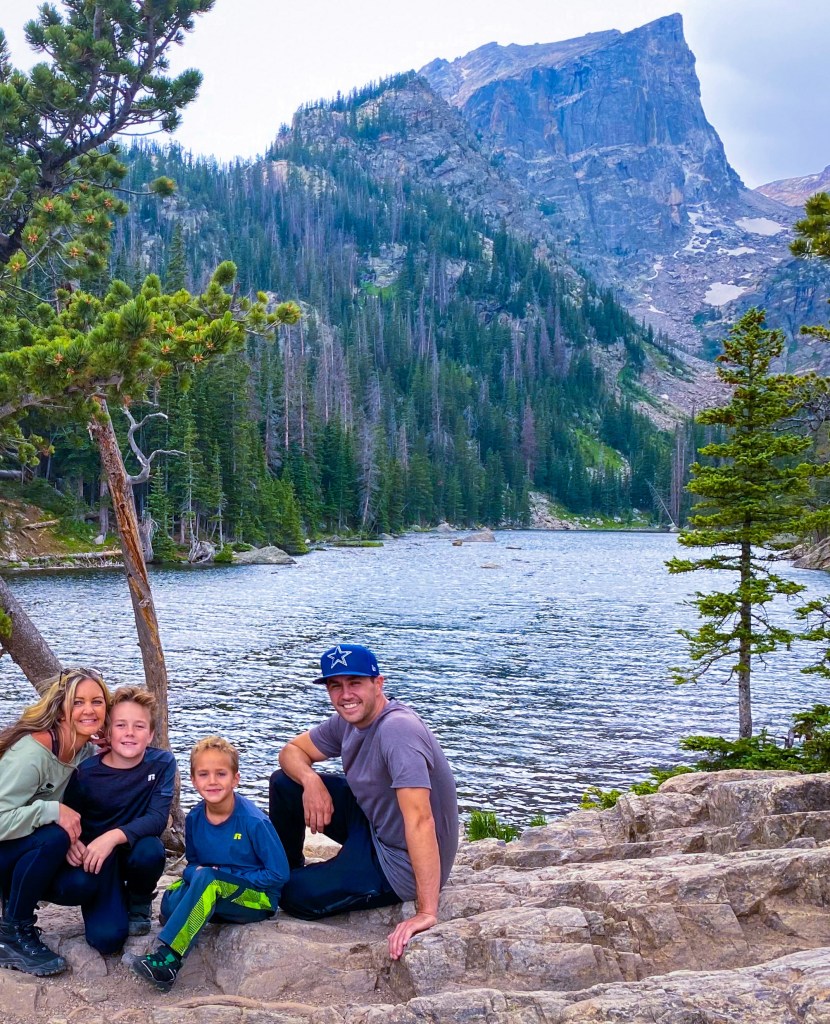
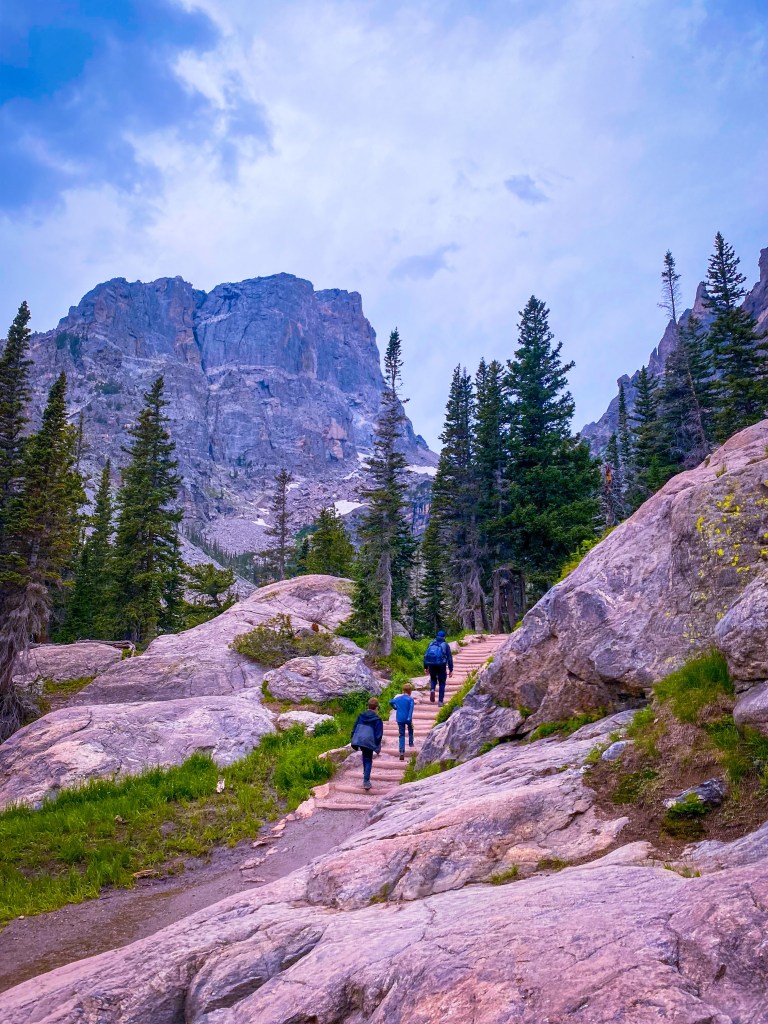
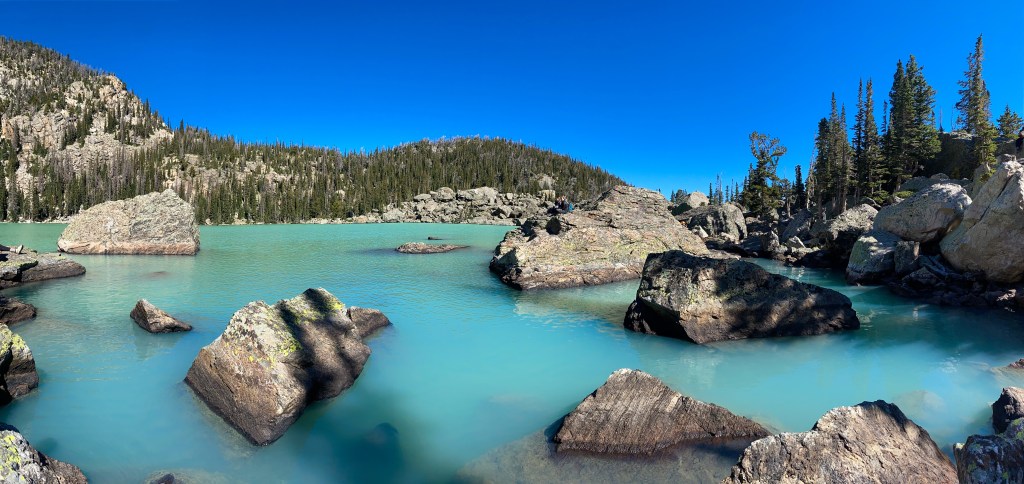
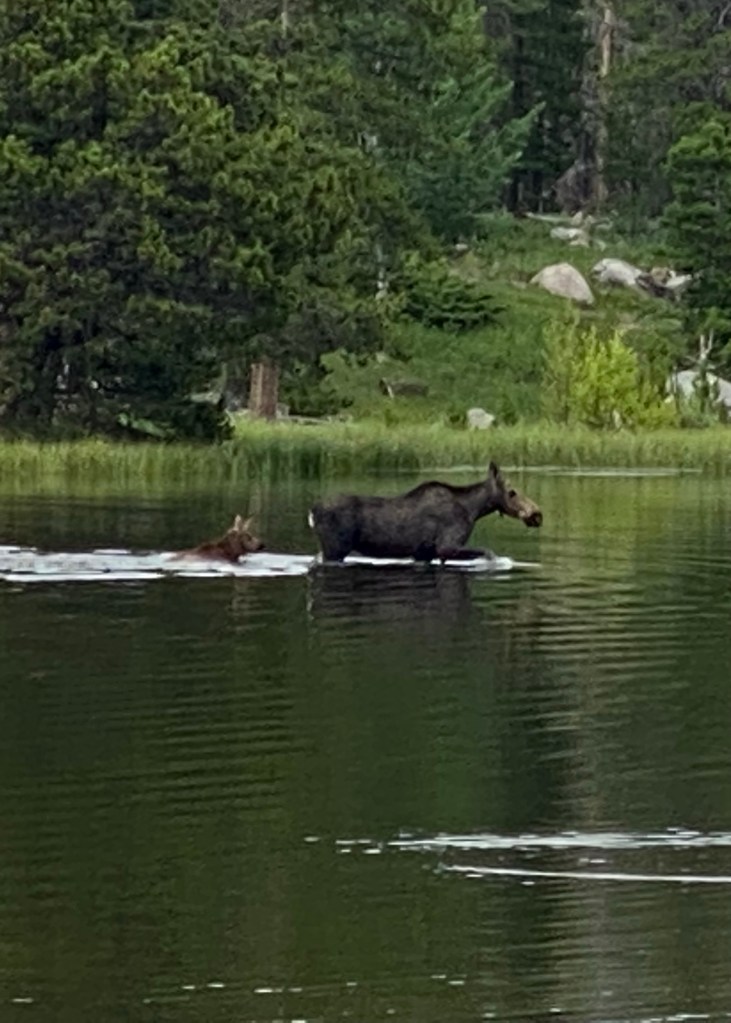
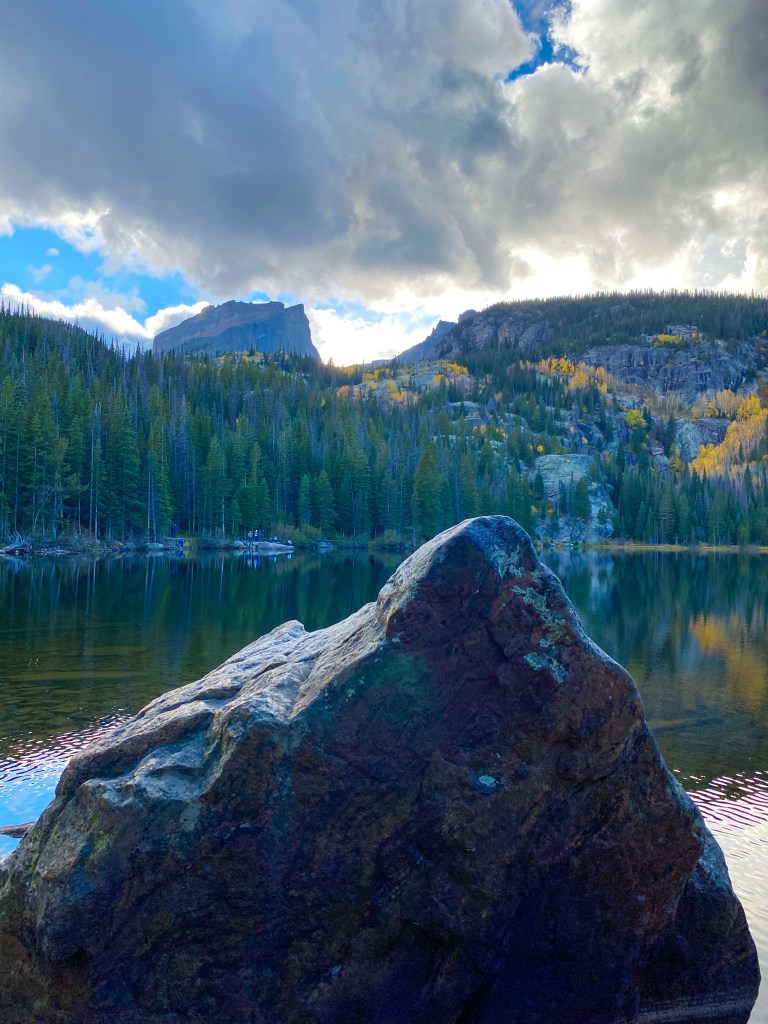
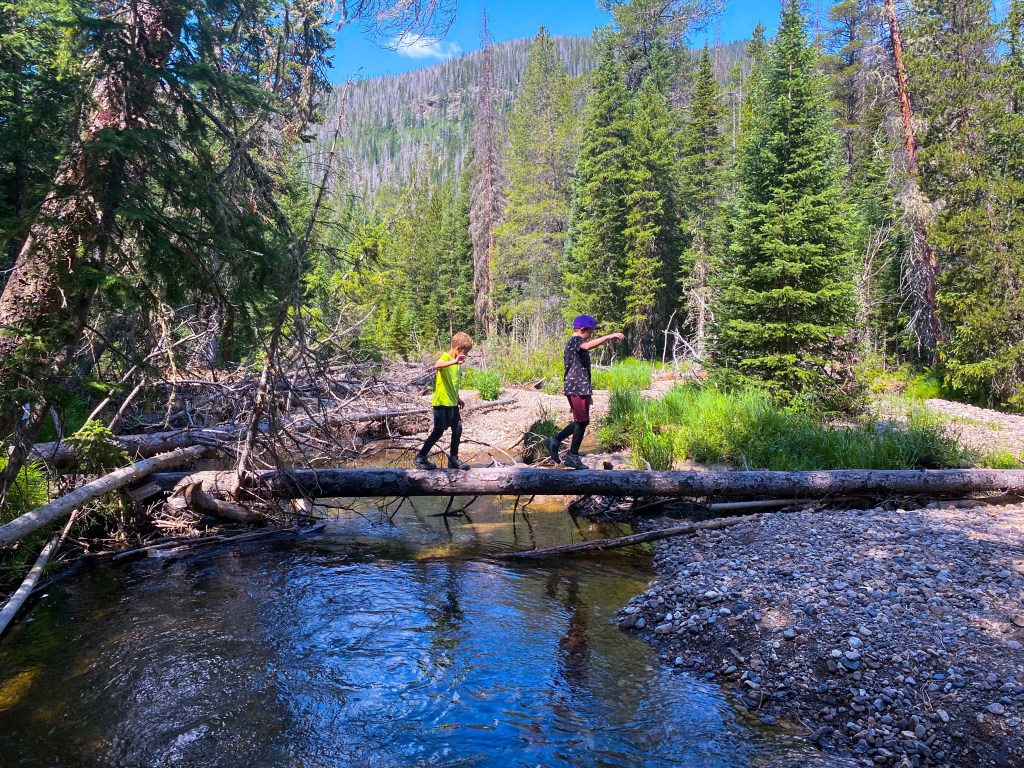
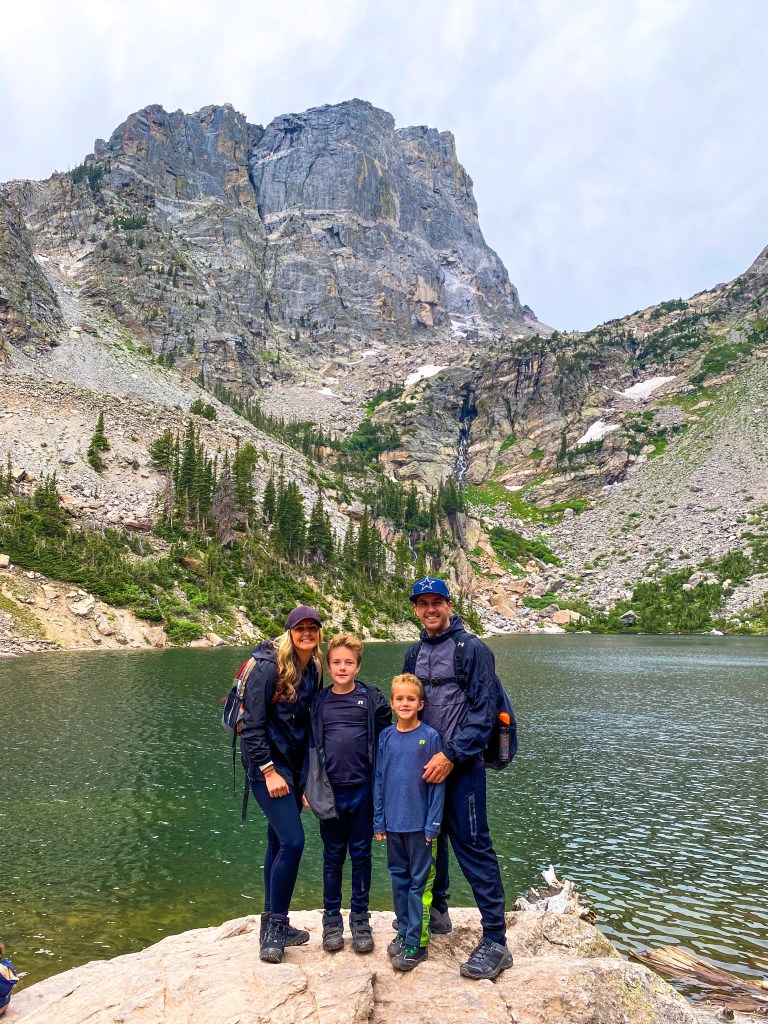
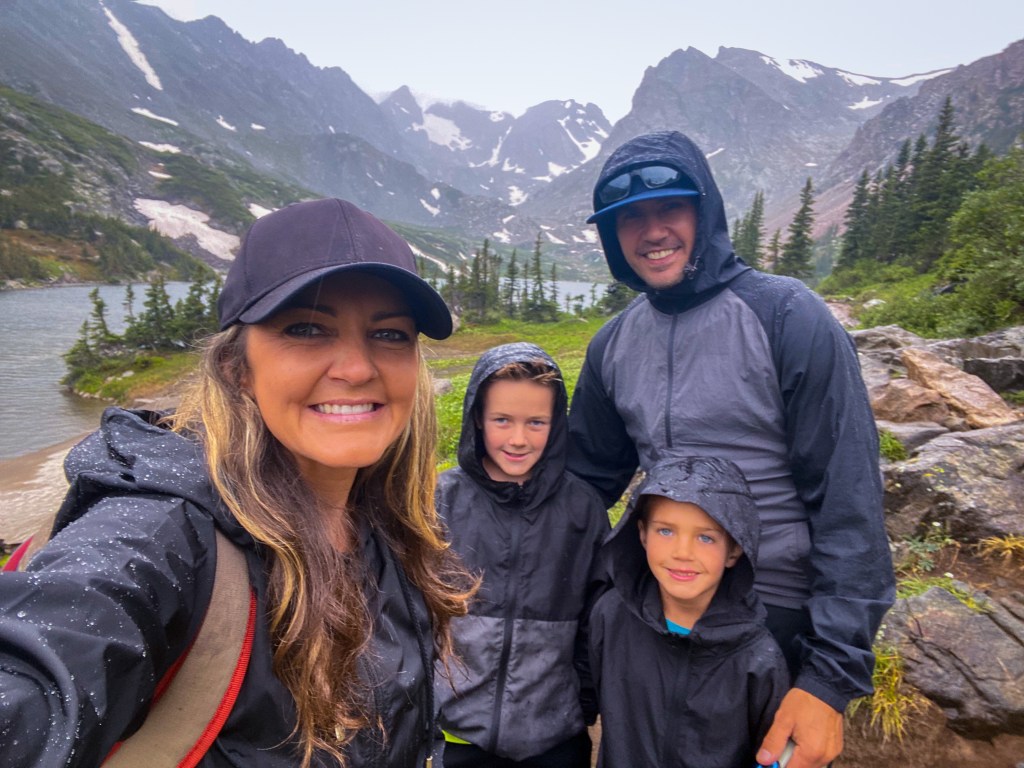
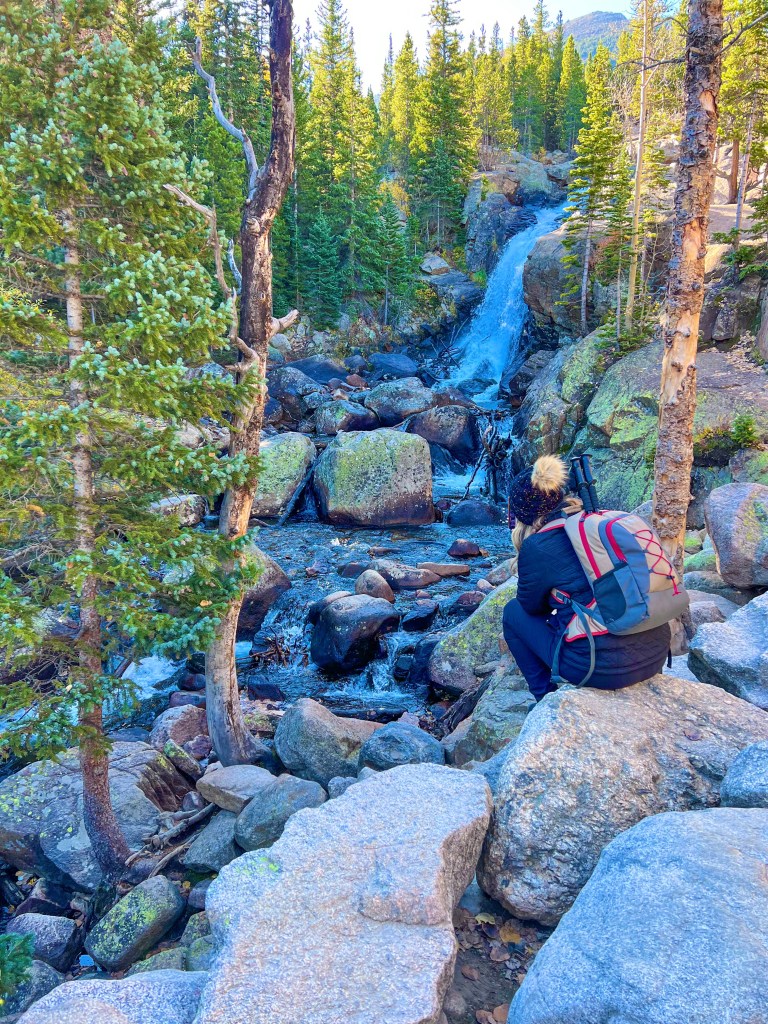
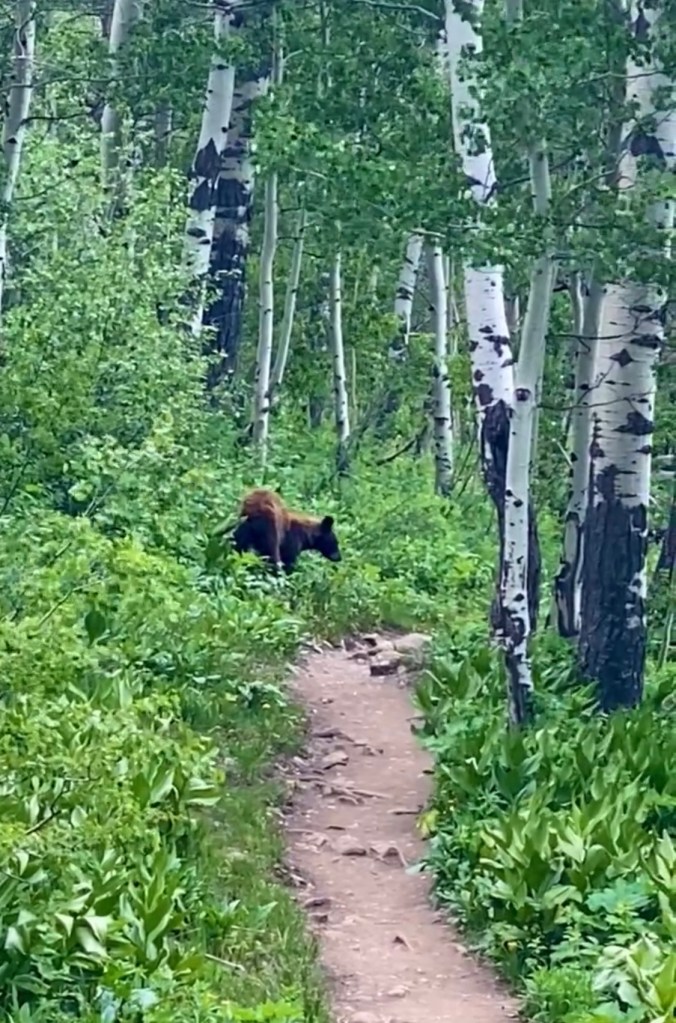
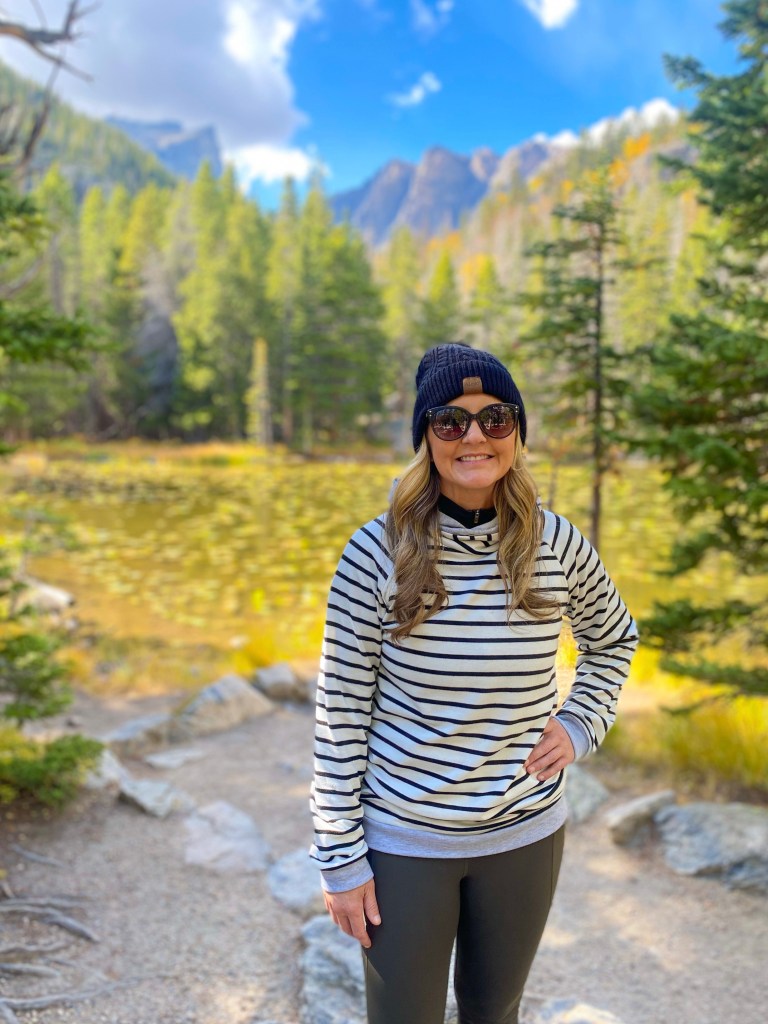
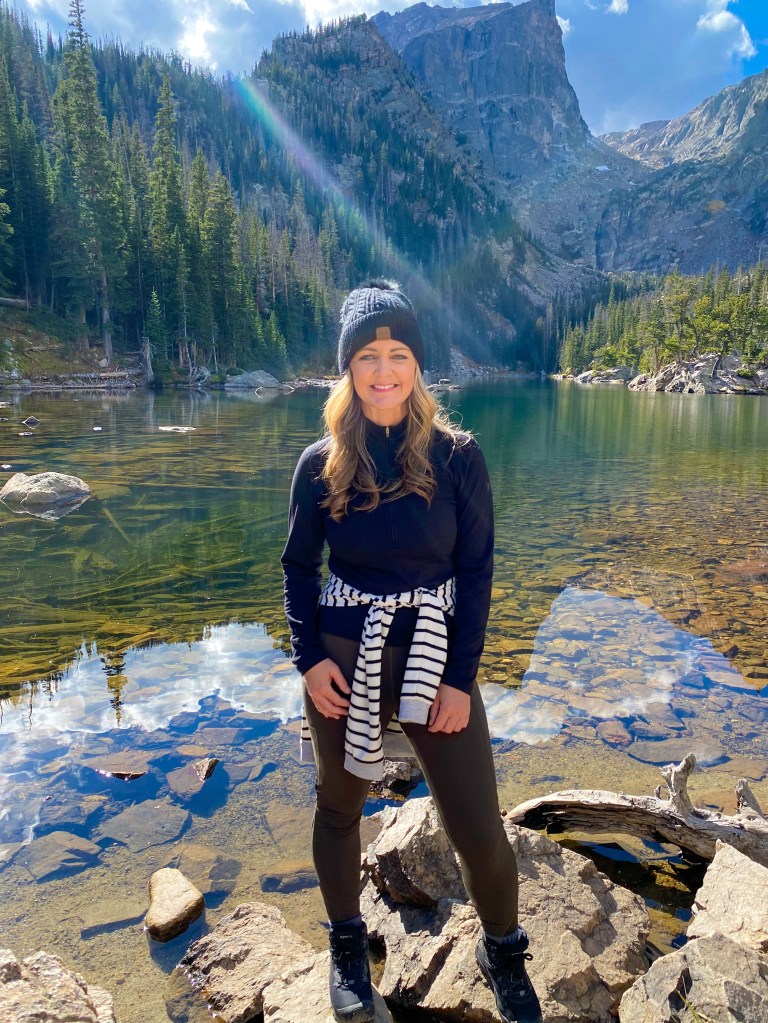
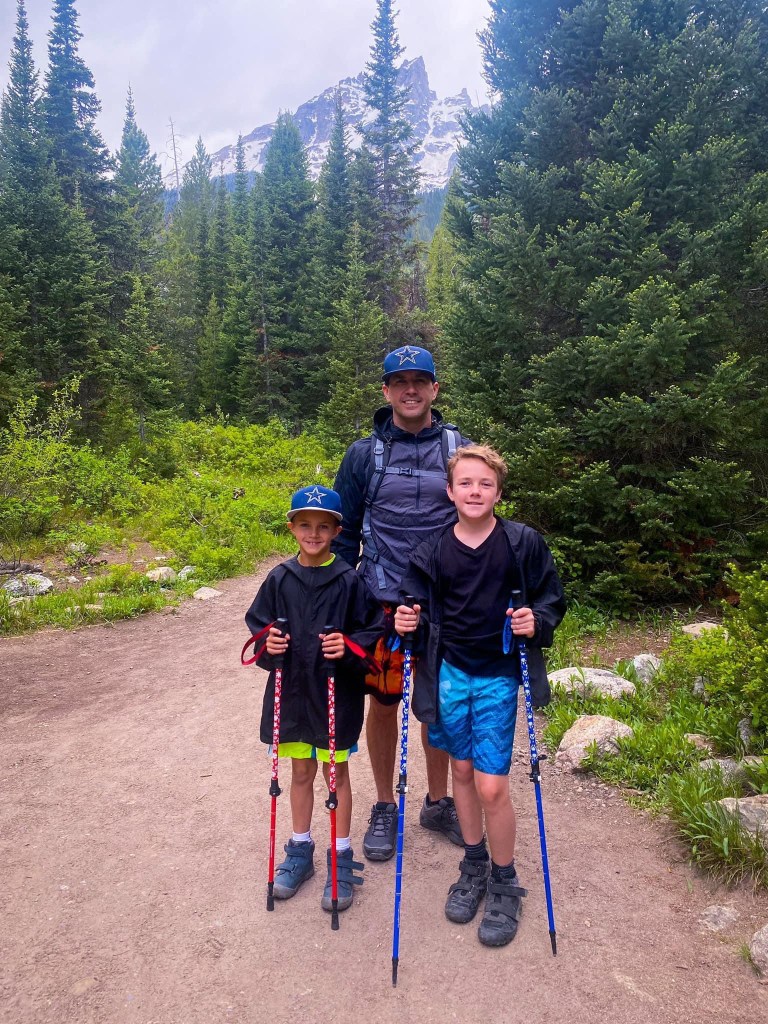
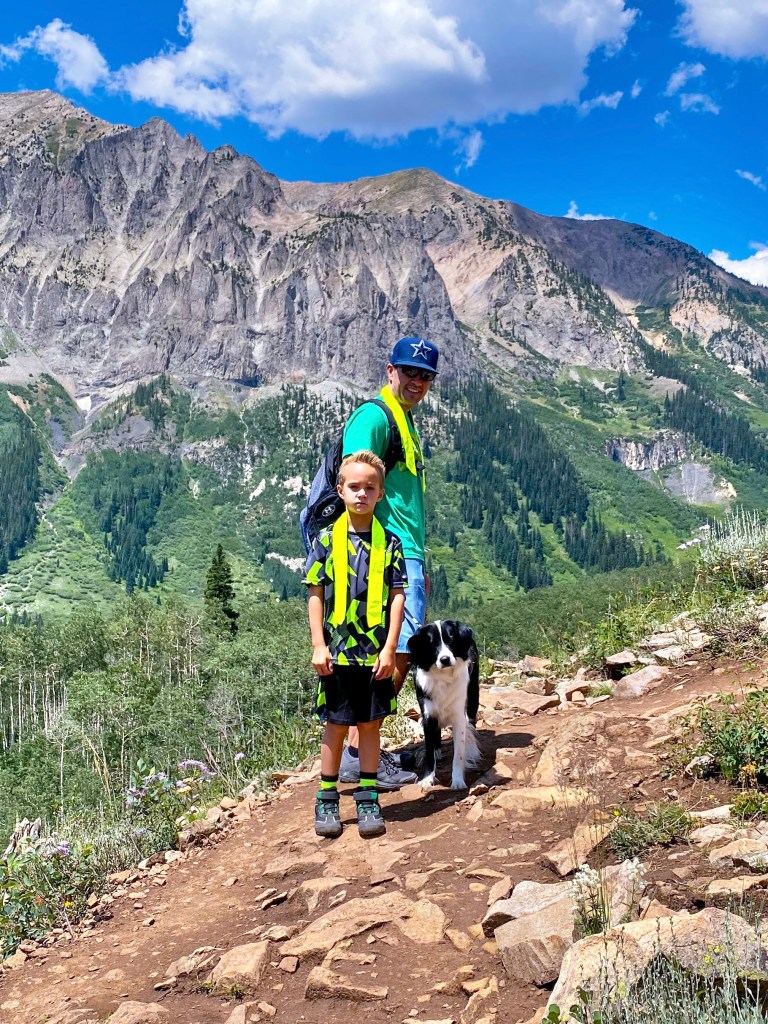
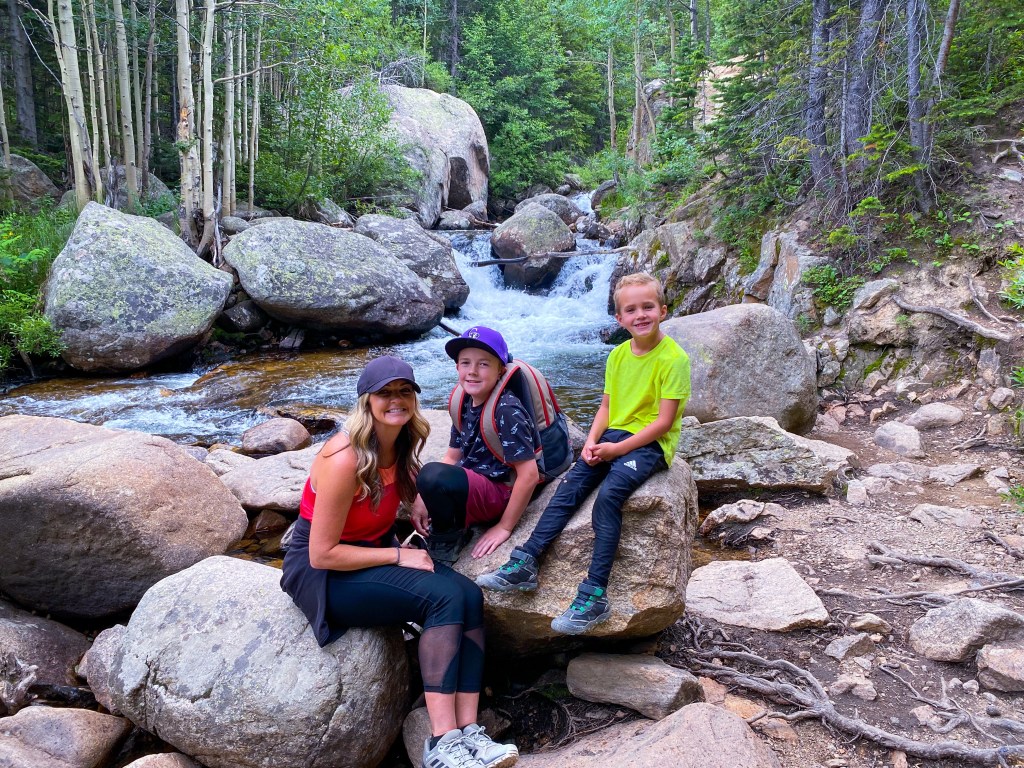
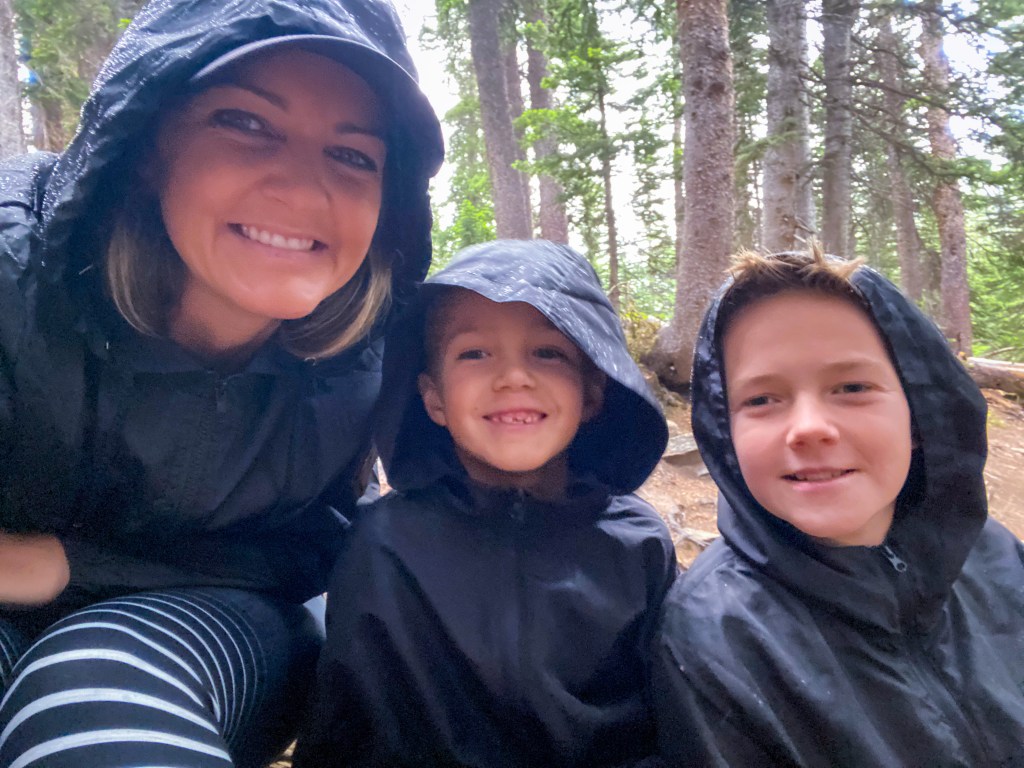
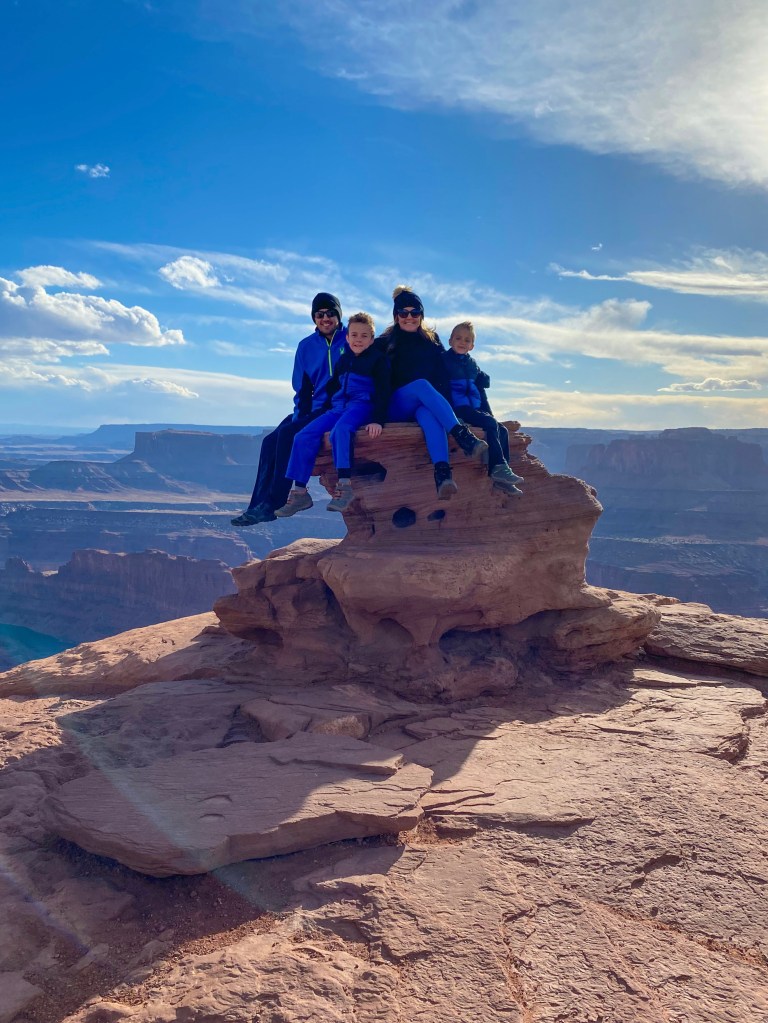
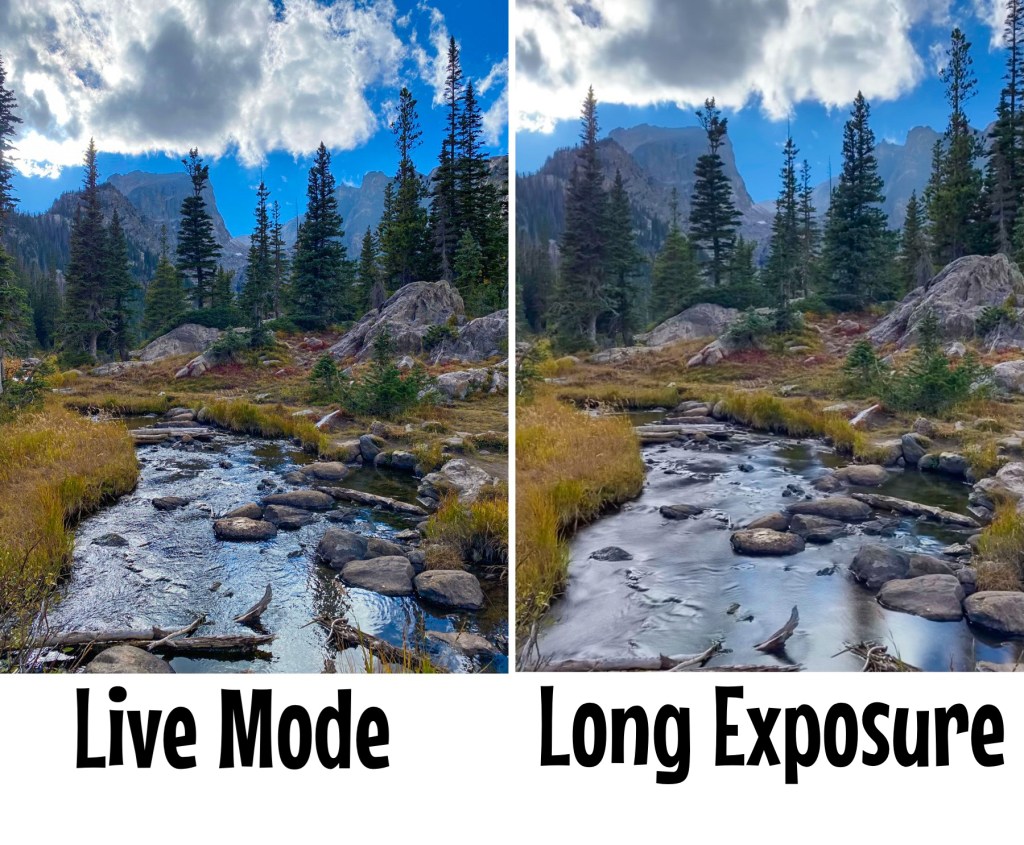
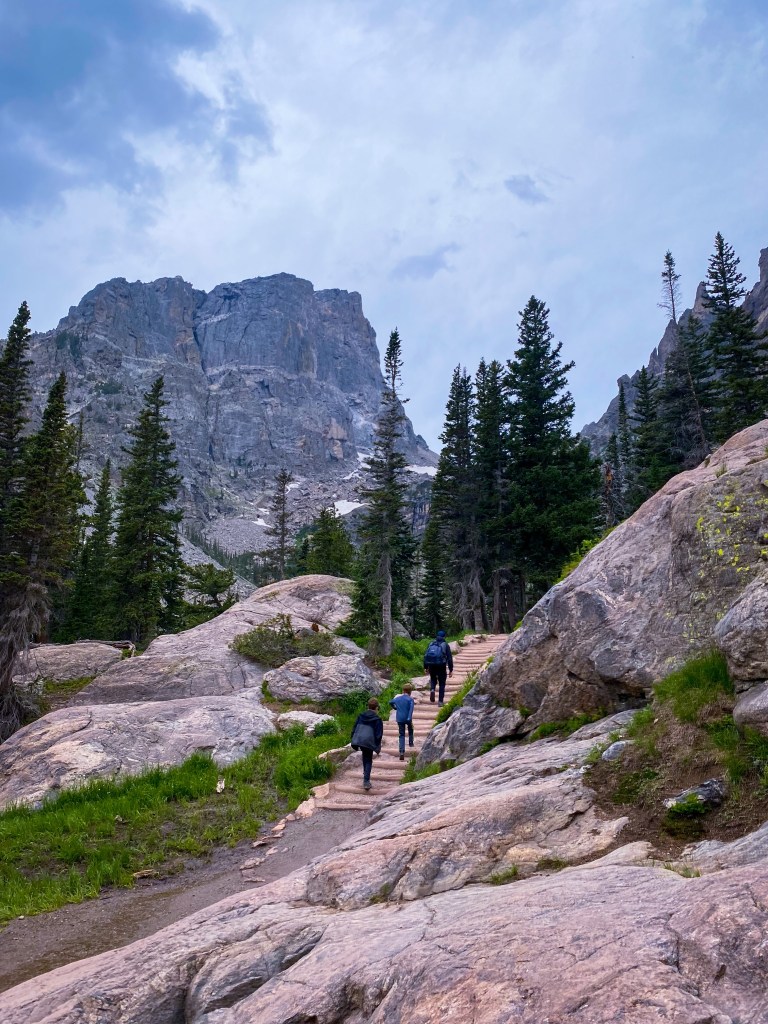
Fall: Estes Park, CO – Last fall, I traveled to Estes Park, CO on a solo road trip to the mountains. Even teachers need a break sometimes, and the long weekend we had off in October was just the time I needed to recharge. I met up with some of my girlfriends there, and together we spent our weekend hiking, watching wildlife, and being pampered! I highly recommend this destination for a long weekend getaway, either with your family or with your friends!

Emerald Lake in RMNP!

Click here for my complete guide on visiting Estes Park & the Rocky Mountains!

Plan Like a Pro!

Whether you’re traveling over a weekend or for an entire week, you should plan your trip like a pro! Here are some ways to do that!

  • Read travel blogs (like roadtripqueens.blog) for inspiration.
  • Check out Pinterest for more information specific to your destination.
  • If flying – find flights under 2-3 hours max.
  • If driving – don’t go farther than 4-6 hours unless you’re a road trip pro!
  • Google search free activities or “best attractions” at your destination.
  • If you’re visiting a city, look into the CityPASS for additional savings.
  • Have a plan in mind, choose at least one thing to do or see each day.
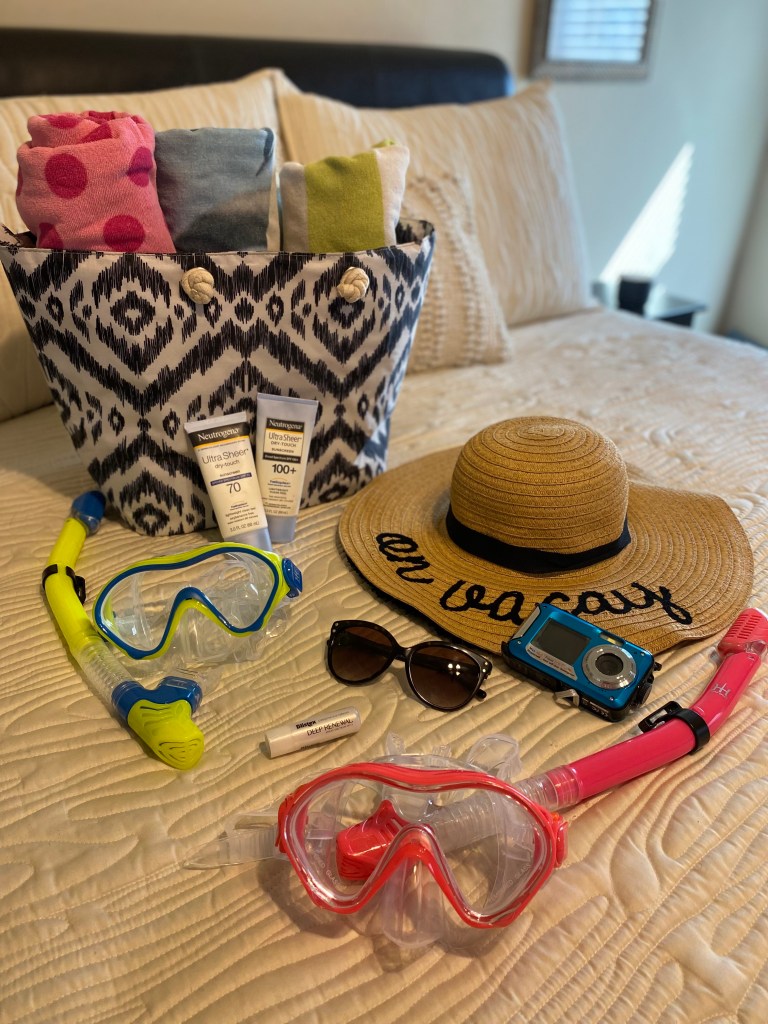
  • Make sure you pack for the right weather, check the forecasts ahead of time.
  • Allow some down time, either before, during, or after your trip.
  • Expect some travel delays and keep a positive attitude.
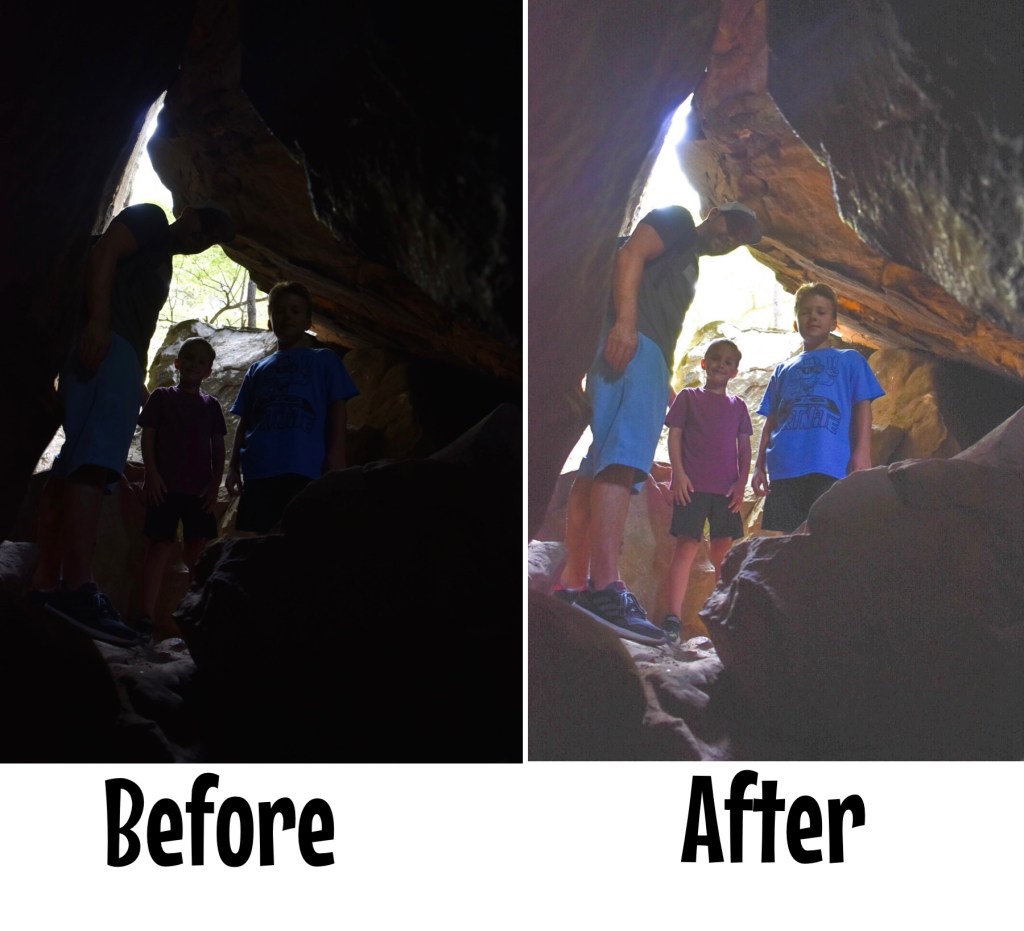
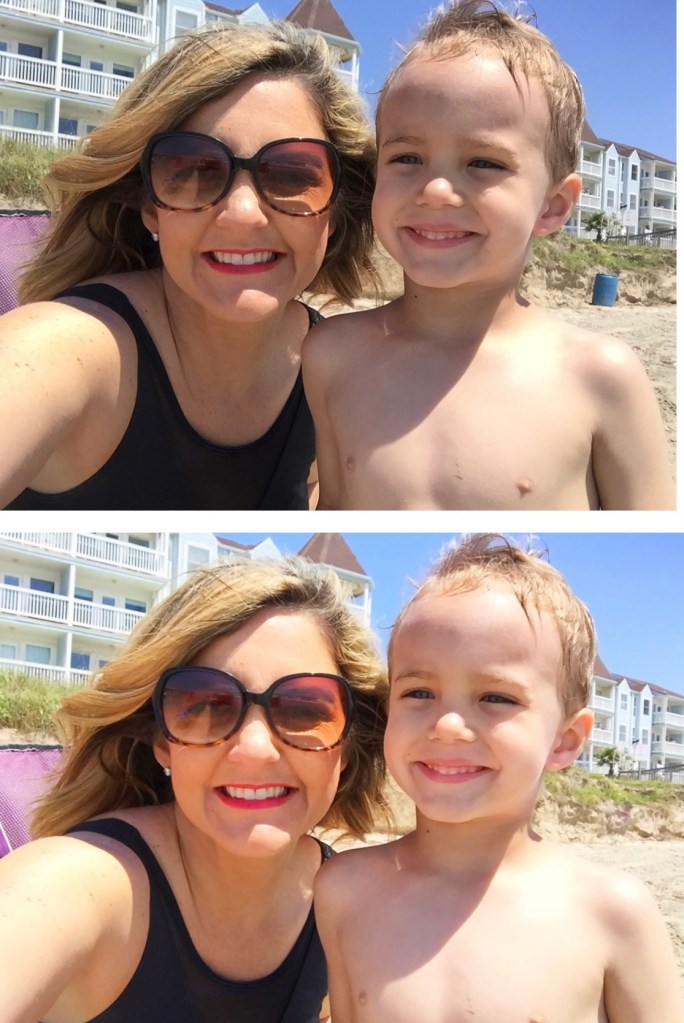
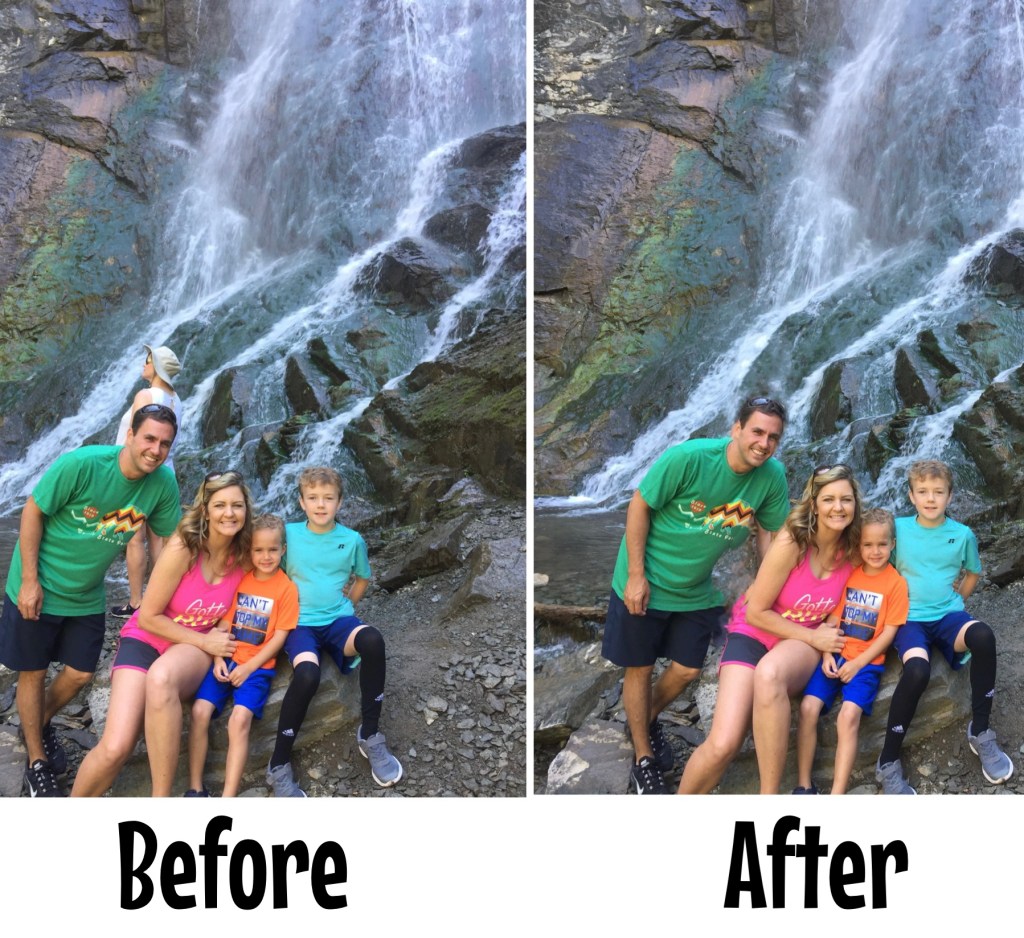
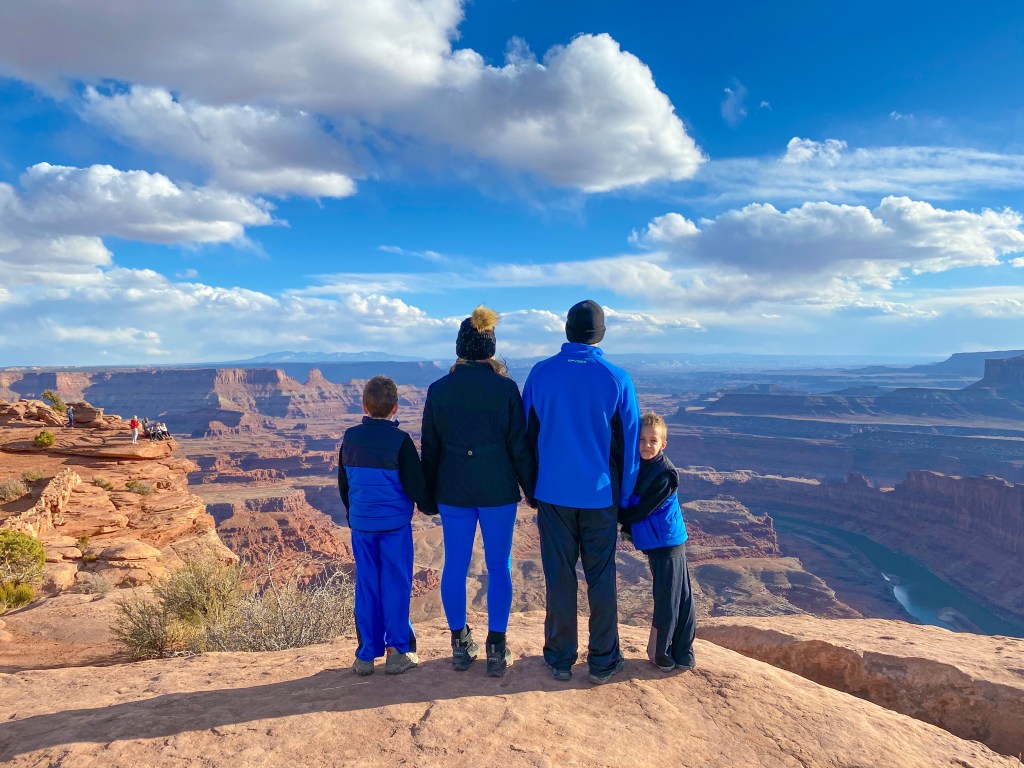
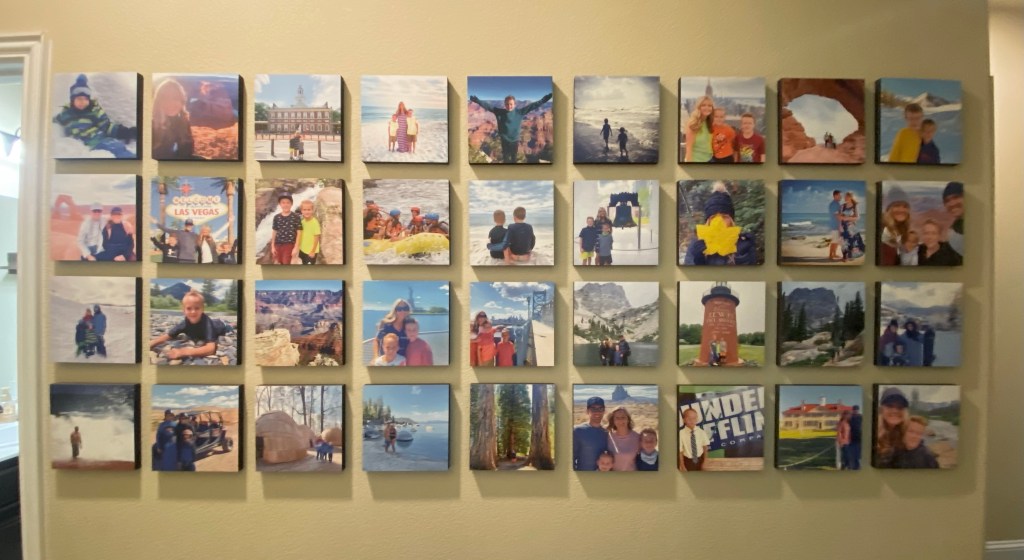
  • Take tons of photos!

I hope you have found these tips helpful and that you’re able to squeeze in some amazing adventures over the next school break! Be sure to check back soon for more tips about traveling over longer school breaks!

The Complete Guide to Coordinating Family Outfits & Other Photo Tips

I get a lot of questions about how I plan my family’s coordinating outfits when we travel or take family photos together. I credit my knack for coordinating outfits to my love of fashion, working as a stylist for Stitch Fix, and always paying attention to the small details.

Obviously, I try to coordinate our outfits for professional family photo shoots, but also when we’re on vacation because I know that I’ll want to frame some of the pictures from our trip. I don’t go overboard, but I do try to plan one day of coordinating outfits. Lucky for me, my kiddos and husband are pretty easy going and are used to my antics by now! Below is my complete guide to coordinating family outfits, plus tips and other things to keep in mind before you travel and/or take family photos!

Most of our photos are taken outdoors, so this guide really focuses on tips and recommendations geared for outdoor photography. Also, many of the links I’ve included are affiliate links. I may earn a small commission, at no extra charge to you, if you purchase items using any of the links provided. Thank you!

Example: We all wore green to the Grand Canyon. This color really popped with the darker tones of the canyon behind us!
CC Beanie | Boy’s Sweatshirts | Women’s Fleece Top

Follow These Steps to Coordinate Your Family Outfits:

1. Seasons

First, I always suggest thinking about the season you’ll be taking photos in, especially if you’ll be outside. Most of the time, we opt for outdoor photos, so this information is important for choosing the right colors and the right style of clothing for the season!

Fall photos – I went with warmer tones like dark yellow and dark green and a hint of maroon.

Fall – If you’re taking photos in the fall, you might want to choose deeper fall tones, like mustard yellows or maroons. Pay attention to the current trends, like booties vs. tall boots.

Winter photos – I went with navy and beige but love the pop of pink in my sweater! Similar Women’s Sweater | Boys’ Sweaters | Similar Men’s Sweater | Women’s Snow Boots | Kids Sperry Boots

Winter – Winter photoshoots can be so fun! We finally had family photos done in Winter Park when we visited last year. I opted for navy blue because it’s easy to find and navy is often considered a neutral color. I went with beige instead of white since most of the background would be snowy!

Spring photos – I went with bright, cheerful tones that matched the beach!
Women’s Maxi Dress | Men’s Shirt | Boy’s Shirt | Teen Shirt

Spring – Spring time is a very popular time for outdoor photos, especially since flowers are in bloom! Neutrals are a great choice if you’re going to have lots of colors in the background.

Summer photos – I went with shorts, it’s hot! We all had on neutrals in either green, white, khaki, or black!
Green Tie Shorts | White Tank | Men’s Polo | Men’s Shorts

Summer – I’ve only had summer photos taken once, I mean the heat in Texas is almost unbearable to be outdoors for too long! But, we opted for shorts, neutral colors, and only spent about 10-15 minutes on this sunflower photo shoot.

2. Ladies First

Once you know what season you’re working with, I highly recommend all the ladies in the group find their outfit first! Then you can coordinate the men’s and children’s outfits after you nail down your pieces. I always feel like I am the hardest to shop for, so getting my outfit and shoes picked out first is always super helpful and eases the stress!

Example: For our winter photos, I started with my sweater first! As soon as I found it online (Old Navy), I began looking for complimentary colors for the boys. They are so much easier to shop for! I knew it would be easy to find navy and beige for them. Then I added in the hats, gloves, and snow boots!

Example: When shopping for our recent beach trip, I found the green maxi dress. I was drawn to that color because I know the waters in Orange Beach are often emerald green. Once I purchased my dress (Amazon) I started looking for tops for the boys that would match. I found Jake’s first (Old Navy) and was able to use it to add more colors for Jereme and Jett. I made this screenshot to double check how the colors would look together

3. Colors

Black is my favorite color! These outfits are more casual, but I am so happy with this photo! Similar shorts | Bodysuit | Boys V-necks |Men’s Top

Even though certain colors are associated with certain seasons (I’m thinking of those warm fall tones here), I cannot recommend enough to wear the colors that you feel your best in! I love wearing black, so we’ve had several photos in blacks and grays. Keep in mind what colors look best with your skin tone and eye color. If you’re wearing pastel colors, make sure everyone in the photo is also in pastels. Do the same with warm and light color tones, too.

4. Styles

Sometimes I feel like all photos start to look the same. Adding in a trendy hat can change the feel of a photo!
Fall Hat | Similar Style Sweater

If you’re like me, then you’re probably already up to date on the current styles and trends! I know that I prefer to be very trendy and wear the current styles of each season. But, sometimes keeping a more classic look for photos will pay off in the end since these trends are constantly changing! Ultimately, you should always wear what makes you feel your best, and be mindful of everyone’s style preferences in your group! And, can you continue wearing these outfits or pieces even after the trip or photoshoot?

5. Solids vs. Prints

We spent the day exploring tide pools and wanted to look cute but be comfy. Boys are in solid green sweatshirts and I’m wearing a printed sweatshirt with green flowers.
Men’s Green Sweatshirt | Boys Green Sweatshirts | Women’s Green Yoga Pants | Women’s Top

For me, I think this is a personal choice. I tend to stick with solids for photoshoots with a photographer, but we wear prints and dress more casually when we’re taking photos on vacation. I try to envision the background when deciding on going with prints or solids! If the background is going to be busy, stick with solids. Often, my boys will wear solids and I’ll wear a matching colored top with print!

6. Background/Scenery

Continuing on with choosing solids, prints, and colors, you need to know what the background is going to be. Think about what colors will be in the photo and then plan your outfits based on the landscape and prints that will complement the background. Helpful tip, it’s better to stand out than blend in with your surroundings!

7. Printing & Framing

The colors in these photos go perfectly with our home decor!

This may sound crazy, but I also plan outfits based on what colors will go with our home décor. I love to print our family photos! But I want everything to match the aesthetic of our house.

8. Accessories

Oh geez, this necklace! Ha!!

This is a big one! Sometimes less is more. I cringe at some of my past photos and the accessories that I wore. Keep in mind that styles are constantly changing and those colorful, chunky necklaces and bracelets may not be “in” for long!

9. Be YOU!

Most importantly, be yourself! You are beautiful and your family is precious. No matter what outfits you go with, you are going to cherish these memories and these photos forever! Let your true style and personality shine!

More Outfit & Color Ideas

Below are more of our favorite color combos and coordinating outfits for your viewing pleasure! I hope these ideas and color schemes help you coordinate the perfect outfits for your next vacation or family photo shoot!

I love these paperbag shorts from Loft! I completed my outfit of tangerine shorts, a white top, Miller sandals and then added in khaki shorts for the boys with similar colored tops that matched my shorts!

While exploring the beaches in San Francisco, we all wore jeans and navy tops. My top is the only one with print.

While exploring the Redwoods, we all wore maroon. It started with my top first, I love this print! I then completed my outfit with maroon hiking pants and a hat. From there, the boys wore different shades of gray hiking pants with maroon sweatshirts.

While hiking in Moab, we wore bright blue and black. I actually started coordinating these outfits with Jereme’s jacket first. Then I found matching hiking pants for me and the vests for the boys. Sometimes it’s easy to match a few pieces when you begin coordinating your outfits with things you already have in your closet!

I based the boy’s outfits on colors from this maxi dress. Each one is wearing a different color from the dress, but we all match very well together!

Other Important Tips & Recommendations:

  • Shoes matter, even on your kids! Make sure they’re clean and match the style of the outfits.
  • It’s perfectly fine to wear white after Labor Day.
  • Make sure that bra straps aren’t visible.
  • Don’t wear hair bands around your wrist, they can be really hard to Photoshop out!
  • You can’t go wrong in neutrals!
  • This is not, and I repeat NOT the time to cut your bangs, cut your hair off, or change your hair color just for family photos or an upcoming trip!
  • I love using Mixtiles to print our vacation photos!
  • I love using Smallwoods to print our professional family photos!

I hope you find some of these outfit examples and tips helpful! If you have any questions, please don’t hesitate to reach out.

Click here for my complete guide on Simple Photo Tips Anyone Can Master!

The BEST Hiking Trails in Rocky Mountain National Park for Kids

Rocky Mountain National Park is one of my favorite Parks in the whole country! There’s just something about Colorado that fills my soul with peace. So, taking my boys to Rocky Mountain National Park was very high on my adventure list.

Before we visited RMNP, my boys had only done a few hikes here and there. This Park actually created a new love of hiking for our entire family. I wasn’t really sure what to expect, but I wanted to see picturesque scenery and I wanted some beautiful family photos of our adventures! We got all of that and more, so keep reading below to learn about the best hiking trails in Rocky Mountain National Park for kids!

Click here for my best tips for hiking for kids!

The Best Hiking Trails in RMNP

Most of our favorite trails are in the Bear Lake Corridor, I’ll touch on this more below.

If I only had one day in the Park, the next three hikes would be on my list!

Nymph Lake

Nymph Lake – To access this hike, the trailhead starts at Bear Lake. This trail is only about a one mile out & back hike and is generally considered a fairly easy route. The Lilly pads were our favorite feature at this lake! If you keep going along this trail around the lake, you will end up at Dream Lake, which is my next favorite stop in RMNP!

Dream Lake

Dream Lake – Dream Lake truly is a dream! It’s close to a mile past Nymph Lake, so a total of 1.9 miles out & back from the trailhead at Bear Lake. There are a lot of flat rocks around the lake, so we found a spot and had some snacks and a quick rest before venturing on to Emerald Lake, which is breathtaking!

The trail to Emerald Lake

Emerald Lake – This trail is the absolute best! It’s about three miles out & back from the trailhead at Bear Lake. If you plan to make this hike, you will see Nymph Lake and Dream Lake along the way! We actually combined all three of these trails into one day of hiking and it only took us about 3.5 hours to complete! I would rate this entire three mile trail as moderate, but it was definitely easy enough for my boys to hike without complaining! The views along the entire way are absolutely amazing!

Emerald Lake

Alberta Falls

Alberta Falls – Alberta Falls is a beautiful hike to a beautiful waterfall! You definitely don’t want to miss this one. The trail to the falls is 1.6 miles out & back and only takes about an hour or so. It’s a little harder on the way back in than on the way out. My boys not only loved the waterfall, but they loved all the chipmunks in the area around the falls. This one also starts in the Bear Lake Corridor. We hiked the first three trails (Nymph, Dream, and Emerald Lakes) on our first day in the Park and then hiked Alberta Falls on the second day. I’m not sure my boys could’ve combined all four trails into one day but it is an option if you have limited time here!

This is a great place to stop, rest, take in the falls, & have a picnic!

Lake Haiyaha – This is probably the most gorgeous lake I’ve ever seen in person, but the trail to get to it is super tough. It’s about two miles of walking up a mountain and then scrambling over large boulders to reach the water. The total trail is about 4 miles out & back and is considered a challenging hike. Currently, the water is this amazing shade of blue caused by a recent rock slide last summer! If your kids can handle getting to the top and like climbing on rocks, then you should go for it! The hike back down is very easy since it’s all downhill!

Lake Haiyaha

Easier Trails in RNMP

Sprague Lake around 4:45 pm in July

Sprague Lake Loop – If you want the chance to see a moose, then be sure to add a visit to Sprague Lake to your day! This is the easiest trail, it’s more of a loop around the lake. It’s on flat ground and is less than a mile. There’s even benches and different areas to sit down and take in the landscape! We arrived right around 4:30 and saw a moose and her baby within fifteen minutes! It was the highlight of the trip for sure! We hiked to Alberta Falls first and then ended our day at Sprague Lake. This area is also a great place to watch the sunrise or sunset!

Bear Lake

Bear Lake – This is the first lake you will encounter on the trails at Bear Lake. It’s also an easy loop around the lake and is less than a mile around. We only spent about fifteen minutes here before hiking on to Emerald Lake. If you want to see beautiful scenery without much hiking, then this is the place to be!

Colorado River Trail

Colorado River Trail – This is one of the only trails that we hiked that wasn’t in the Bear Lake Corridor. We definitely prefer the Bear Lake area, but if you’re unable to get a permit to enter (more info. below), then I suggest driving along Trail Ridge Road and then hiking this trail! The entire loop is about 4.2 miles, but we only hiked about half of that before turning around. The part we did was very easy and flat. The boys liked walking across the river on downed trees and we saw a lot of cool animal tracks in the mud here!

General Information About RMNP

Timed-Entry Permit Details

Rocky Mountain National Park now requires a timed-entry permit to enter the Park from May 26, 2023 through October 22, 2023. Always check out the NPS websites, which include valuable information, closures, webcams, etc. There are two separate areas of the Park, Bear Lake Corridor and “the rest of the Park”. Kind of confusing right, especially for first-timers! So, hopefully I can break this down for you in an easier way. Timed-entry permits are available on the first of the month for the following month, so I got our permits on June 1st for our July trip. They are $2 for each day that you want to enter, plus you have to pay the park entrance fee once at the gate & I believe this is $35 for the week. The Park only releases a certain amount of permits each day and hold a couple hundred that go live at 5:00 pm for the following day. So, for example, if I wanted tickets for July 15th I could go online (on the Park’s website) on July 14th at 5:00 pm and TRY to get tickets for the following day. But these tickets go fast, so you need to be online and logged in to your account for a quick purchase. Click here for the website to get your timed-entry permit! Bear Lake Corridor is the area of the Park that we enjoyed the most. I highly suggest getting your timed-entry reservations for this area as soon as they are released!

There are a couple of different entrances to get into the Park, we always used the Beaver Meadows entrance coming in from Estes Park, it is very close to the Bear Lake Corridor Entrance. You will need timed-entry permits for all entrances. When you enter here, you can drive along Trail Ridge Road from one end of the park to another, roughly 45 miles I believe. The views are stunning and there are several different areas to pull over and park to check out views or hike trails. You can get a Park map at the entrance and everything is nicely marked off with signs. I highly recommend driving this road at least once on your visit! We found so many neat places to stop for photos and some really great trails with short hikes! Make sure you have a full tank of gas if you plan to drive this road!

If you have any questions about visiting RMNP, please don’t hesitate to reach out! I am happy to help you plan an epic adventure, just leave a comment and I will get back to you!

Happy Trails, my friends!

Hiking for Beginners: Tips for Finding Trails, What to Pack, and More!

Have you found yourself wanting to explore more of the great outdoors, but you aren’t sure where to start? I was in the exact same place as you just a few years ago! Now, I’m so much more confident when it comes to planning epic hiking trips and we’ve clocked over 85 miles of hiking over the past year alone! Keep reading to discover how I find the best trails and learn more about the hiking essentials we never leave behind!

Emerald Lake Trail in Rocky Mountain National Park, about 3 miles out & back.

Hiking Trails

Are you capable of making the climb on this trail?

Tips for Finding the Right Hiking Trails

Finding the best hiking trails for you and your family involves some planning ahead. You definitely need to assess your abilities and should never choose a trail that is too challenging or too long. I highly recommend starting out with shorter hikes first, especially if there will be any elevation changes.

Most trails are very well marked!

When we first started hiking, I wasn’t really sure where to go. I looked on Pinterest, read other blogs, and followed hikers on Instagram for inspiration. This led us to hiking in different National and State Parks across the country! If you aren’t sure where to start, then look into hiking at the closest National or State Park near you. These Parks are pretty remarkable, which is why the land has been protected for all of us to enjoy. Most of these Parks have trails for just about any skill level and the trailheads are well marked. Plus, you can chat with the Park Rangers stationed at most of the popular trailheads for more tips and guidance!

The AllTrails app logo

I exclusively use the app AllTrails to help find the best hiking trails for my family once we’ve chosen our destination. Jereme and I are able to hike more strenuous and longer trails, but our kids are not quite there yet. When all of us are hiking, we choose trails that range from one to three miles and are rated as easy or moderate. I really like using this app because it includes detailed information about the trail, photos from other hikers, driving directions to the trailhead, and even a map so you won’t get lost while you’re hiking!

This is an example of the information about a trail in the AllTrails app!

Permits

When you decide on your destination, I recommend checking out their website for any permits you might need to park or enter the trailhead. Several places, including some National Parks, require timed-entry permits during the peak summer months. Others require you to pre-purchase a parking pass. So, always visit the website to learn more about where you’re going and to ensure that you are prepared for your visit!

What to Pack

Glad we had our raincoats on this trail!

Adult Hiking Gear

The following affiliate links are products that we actually have and love! I may earn a small commission, at no extra charge to you, if you purchase any of these items using the links provided. Thank you!

I have had my Hiking Back Pack for years & still love it!

Having the right gear is also essential when you’re hiking. We don’t have much, but what we do have really makes a huge difference in how enjoyable our hiking trips are.

  • Hiking Boots – I cannot stress the importance of hiking boots enough! Make sure that you purchase a pair that are waterproof and sturdy around your ankles. Another important tip is to break these hiking boots in before you hit the trails to prevent blisters!
  • Hiking Poles – Jereme really enjoys hiking with poles. I feel like they get in my way, but that might be because I’m always trying to take photos while we’re hiking.
  • Large Hiking Back Pack – Jereme carries a larger hiking back pack that holds more items, like raincoats, a towel, and my camera stand.
  • Cooler Back Pack I carry a smaller hiking backpack that holds plenty of food, snacks and water along with the first aid kit.
  • Layers – You can hike in just about clothing, but we try to stick with layers. Often, we will start hiking early in the morning and it can be quiet chilly, so we bring along sweatshirts, gloves, and hats.

Kids Hiking Gear

The boys with their Hiking Boots and Hiking Poles

I have found that making sure that my boys have the right gear is also extremely important in ensuring that the day goes smoothly. All bets are off if they get cold, wet, and miserable! Below are the things that I make sure my kiddos have before we leave for a hike!

  • Kids Hiking Boots – My boys love to explore and climb and these hiking boots have done the job! They’re also waterproof, which has been amazing since they love splashing in water.
  • Dry Fit Clothes – I like to have the boys in dry fit clothing, just in case it rains or they decide to get into water along the trails.
  • Gloves – I always pack thin gloves when we go hiking. We got really cold one summer hiking in the mountains in Colorado. Sometimes at the top of a mountain, or when a pop-up rain shower happens, it gets cold quick!
  • Raincoats – We always bring our raincoats, too. We don’t let a little rain stop our fun!
  • Kids Hiking Poles – The boys really like hiking with these hiking poles and have said that they are actually helpful when they are tired and have to walk up and downhill.
  • Cooling Bandanas – This was also a great purchase a few years ago! The boys love bringing these along on summer hikes. We usually put them in the freezer the night before we hike and they stay pretty cold!
These Cooling Bandanas were a great purchase!

In My Backpack

This is why you need Bear Spray!

I really try not to weigh our hiking back packs down with too much, but there are several things that everyone should bring along with them when hiking. This is what we pack in our back packs before we hit the trails!

  • First Aid Kit – This is another must have! It never fails, my oldest always end up with a cut, scrape, or splinter on our hikes. This travel first aid kit goes along with us on hikes, road trips, and even to the beach!
  • Bug Spray – If you’re going to hike in the forest, or really anywhere outdoors, then don’t forget to pack the bug spray! You’ll thank me later!
  • Bear Spray – We had our first bear encounter last summer in Grand Teton National Park! It was amazing to see a bear in nature, but a little scary at the same time. We felt a lot more secure having bear spray with us! Remember to open the bear spray and clip it somewhere with easy access instead of packing in your back pack!
  • Sunscreen – It’s so important to pack the sunscreen, no matter the season or temps!
  • Binoculars – We love taking along our binoculars! Sometimes the boys get a little bored during certain parts of a hike, so having these on hand is useful for many different reasons!
  • Cell Phone – I take along my cell phone for photos, but also in case of emergencies and to have a map/GPS. I suggest bringing it along at all times in case you need to call emergency services for assistance on the trails.
  • Camera Stand – Obviously not everyone will want to bring a camera stand along, but I don’t go many places without mine since I use it for our family photos! The one I have even fits in my smaller hiking back pack and isn’t too heavy to hike with!
  • Biodegradable Wet Wipes – I won’t mention any names, but my little one always has to use the bathroom when we’re hiking! These wipes really come in handy when nature calls!
  • Extra Cell Phone Battery Pack – Don’t forget an extra battery pack! My phone dies quick as it is, but especially when I’m taking photos and videos and using the GPS.
  • Head Lamps – I am so happy that we purchased these headlamps a few years ago! So far, we’ve used them for sunset/sunrise hikes, crabbing at the beach, and also at Carlsbad Caverns!

In the Car

My boys will find any water to play in, which is why I recommend bringing towels & dry clothes!
  • National Park Pass – While not every hike will be in a National Park, you might be surprised at how many places will accept a NP Pass for parking! I keep mine in the car at all times!
  • Towels – I highly recommend taking some towels with you just in case you’re caught in rain, take a dip in a water source, or get muddy on the trails!
  • Change of clothes – A change of clothes, including dry socks, is also highly recommended. Most trailheads have restrooms, but we’ve also been known to change in the car!
  • Dry shoes – We like to take off our hiking boots when the hike is over. Sometimes they’re wet, dirty, and sweaty. The boys like to throw on their crocks when we get in the car.
  • Phone Chargers – Make sure you have your car charger, especially if you don’t have an extra battery pack.
  • Battery Charger/Jumper Cables – We travel with a battery charger/jumper cables just in case of car trouble! I highly recommend, especially since most trails are off the beaten path.

Leave No Trace Principles

So thankful I found this new love for hiking!

When hiking or recreating outdoors, always be sure to follow the seven Leave No Trace Principles.

  • Plan Ahead & Prepare
  • Travel & Camp on Durable Surfaces
  • Dispose of Waste Properly
  • Leave What You Find
  • Minimize Campfire Impacts
  • Respect Wildlife
  • Be Considerate of Other Visitors

For more information, visit the National Park Service website!

Layers are also a good idea!

We have seen some of the most stunning landscapes and wildlife on our hiking adventures! The memories we’ve made along the trails are some that I will cherish forever. If you’ve been hesitant to plan a hiking trip, I hope this information helps! While hiking is not for everyone, hitting the trails and getting in some exercise and fresh air is never a bad idea. If you have any questions for me, please don’t hesitate to a leave a comment. Travel safe, my friends!

What I Packed for the Beach

This post contains affiliate links of products that we use and love! I may earn a small commission, at no charge to you, if you purchase any of the items using the links provided. Thank you!

Since we changed our spring break plans very last minute, I thought I would share some of the items that I packed for the beach that turned out to be extremely useful.  Consider this a pre-made packing list for your next beach getaway!

For the Road Trip

This fits right in the floorboard of the car between the boys and is easy to carry to the room when we arrive!

If you’re wondering what we take on our road tripping adventures, you might be surprised that it’s not much. I tried all the fancy gadgets at one point and felt like they all got in the way! Now days, we keep it pretty simple.

  • Snacks – We never leave for a trip without a basket of snacks! Not only is this super helpful for those long stints of driving, we usually have plenty to last us in the hotel for our whole stay!
  • Gatorades – Boxes of Gatorade are easy to pack in the car and we also usually have several leftover that we can drink while we’re in the room!
  • Phone chargers – I make sure to pack a charger for each of us. This way we all have one, there are extras if one stops working, and the boys aren’t ever arguing about whose turn it is to charge their devices!
  • Screen shot of hotel confirmation – I always make sure to either take a screenshot or print out the hotel confirmation for my records. Another word of advice, you can call the hotel ahead of time to make sure that they have your reservation on file!
  • GPS – We typically use the maps on our phones for directions to wherever we are going, which is another reason we need to bring along our chargers.
  • Bag of Quarters – We encountered a toll road right as we got close to Orange Beach. I knew this ahead of time, so I made sure to have a bag of quarters. I like bringing quarters along for multiple reasons, which includes money for tolls, money for the hotel vending machines, money for laundry if it’s needed, and finally having money if we need to air up our tires for any reason!
  • Pillows & Blankets – My boys are pros at sleeping in the car on our road trips. So we like to have travel pillows and blankets for them. We also bring along our own pillows to sleep with at night to ensure that we get a good night’s rest!
  • Portable Car Battery Jump Starter & Jumper Cables – Jereme has a portable battery charger that we bring along with us on our travels. It’s mostly just extra security to ease anxiety after having car trouble one time several states away from home. This one includes a set of jumper cables.

In My Beach Bag

This photo makes me want to go to the beach! Also, I got an underwater camera for Christmas & I never even used it on this trip lol!

I feel like I haven’t had to pack a beach bag in forever! And when I was going through the one I already have, I realized it was full of summer stuff that we never really needed. So, I cleaned it out and started fresh with things that I knew we would need and that my boys would want and actually use!

  • Beach bag – The bag I took was kind of too small & we all ended up having to carry our towels. So I upgraded to this one when we got home & love it! The cooler is going to be so nice!
  • Sunscreen – Sunscreen is so very important, every single day, but especially at the beach. My whole family loves the Neutrogena brand because it goes on smooth and doesn’t burn or irritate our skin when we reapply.
  • Chapstick with SPF – I am someone that has a freckle on my lip and I don’t want anymore. So, this chapstick has been a game changer for me!
  • Sunglasses – We made sure to bring sunglasses for all of us! I recommend buying a cheap pair for the beach, I swear someone always loses theirs in the ocean when we travel to the beach!
  • Waterproof phone case – This is another product that I love because I am able to get out in the water with the kids and take fun photos and videos without worrying about my phone getting ruined. I kept my phone in this case most of the time on the beach to protect it from the sand, too!
  • Goggles & Snorkels – We got these goggle and snorkel sets for this beach trip and the boys loved using them in the ocean and at the pool!
  • Extra beach towels – For some reason I have never taken extra beach towels with us, but this time I did and it was a game changer! We were only at the beach for three full days, so having two days with fresh towels was great! On the last day, we were able to reuse the towels from the first day after hanging them outside to dry.

Health & Beauty

I have learned to be very intentional when packing for longer trips in regards to health & beauty. Make sure to bring your usual day and nighttime beauty routine items and don’t forget any of the medications that you or your kiddos might need. There is nothing worse than feeling ill on vacation, so we make sure to have headache meds, allergy pills, and tummy ache medication too!

  • First aid kit – I am so thankful we invested in a first aid kit. My oldest seems to always get a scrape, burn, or splinter! This travel kit is perfect for the beach, hiking, camping, or any kind of traveling!
  • Sunburn relief gel – Hopefully you’ll never need this, but we make sure to bring ours on every outdoor adventure! We like to keep it in the refrigerator so it’s nice cold if we need it for a burn!
  • Face moisturizer – This is the face moisturizer that my dermatologist recommended for everyday use! I try to use it each night and morning.
  • Tanning foam – You can bet that I bring along this tanning foam since I cannot lay out and get a natural tan anymore! I put it on right before bed and actually sleep with it on all night and then rinse it off in the morning. I usually only need to reapply once on vacation! I buy the dark tanning lotion.
  • Tanning firming lotion – I use this firming body lotion any time I am going to be in shorts or a dress! I buy the medium to dark tone.
  • Medications – Bring along all the medications that your family might need! I usually just pack a large Ziploc bag full of anything we might use during the week. I always make sure to include something to help me sleep, like Tylenol PM or Benadryl because I have a really hard time sleeping in a new place.  

Family Photo Outfits

Family beach photo 2023

I usually always bring along at least one matching family outfit for photos. Several people ask how I go about coordinating these outfits. I always start by picking out what I am going to wear first. Then I find tops for the boys that will match me. I take screenshots of what I have picked out to make sure they all somewhat match before purchasing. I usually also send the screenshot to one of my best friends to check out and send me feedback, too! Thank you Amy D!

This is how I ensure all the pieces will match!

Swim Suits

I brought along three different swimsuits for this trip and loved how I felt in all of them! All of these had great coverage and were comfortable for a day of lounging and playing in the ocean!

Miscellaneous Items

These items are kind of random, but totally useful and I am so glad that we had them with us on this trip! And this is just one more reason I love road tripping! I can take so many things with us when we drive verse flying.

  • Travel Steamer – My dress really needed to be steamed after I packed it. It was full of wrinkles, but this travel steamer worked great! Just be careful not to fill it with too much water, it leaks when the water is past the fill line.
  • Cordless Vacuum – I use this on all of our road trips to remove crumbs mostly, but this time I used in both the car and in the room for sand! You know everyone and everything is always covered in sand when traveling to the beach. I cannot stand sand on my feet in the hotel or anywhere near the bed! This came in so handy!
  • Cell Phone Camera Stand – This is the stand I use for all of our family photos! I highly recommend if you want to try to take some of your own photos with your phone! It’s easy to use and easy to pack! This one fit in my beach bag and we also take it on hikes with us and it fits in my hiking backpack.

I hope you find all of these items as helpful and useful as we do! What items to do you take to the beach that I need to add my list? I’d love for you to leave a comment for any must haves that we need!

Happy travels, my friends!

Great Places to Eat in Orange Beach, Alabama

We are a family that loves to eat seafood, but especially when we’re at the beach and it’s fresh! Besides hanging out at the beach all day, the only other activity on our to-do list was finding great places to eat each evening! Lucky for us, we had amazing locals give us some suggestions on their favorite places to eat while we were in Orange Beach! I am sharing all of the places we dined at this past spring break trip and am including a few other favorites of ours!

Coastal

Outdoor seating at Coastal

This was our first time eating at Coastal, it appears to be a fairly new restaurant in Orange Beach right on the beachside of the highway. All of the tables were outside, there was a live band playing, and we all had delicious seafood! We enjoyed our shrimp tacos and drinks, the boys had the grouper plate and popcorn shrimp. The grouper was huge and Jett loved it! We enjoyed the outdoor atmosphere and the live music while we ate!

Can you ever really go wrong with yummy drinks on the beach?
Jereme & I both had shrimp tacos
Grouper plate
Kid’s fried shrimp plate

Bubba’s Seafood

Bubba’s Seafood Restaurant

It’s become a tradition of ours to eat at Bubba’s on our first night in Orange Beach! I’m not sure if it’s because we’ve been in the car for 10 hours and this place is one of the first you see when you’re driving through Orange Beach or what. My boys both said that it’s their favorite place that we’ve eaten at here. Jett loves the crab and shrimp plate! I had shrimp, Jake had the kids fish plate, and Jereme had shrimp tacos. We liked the fun décor in the restaurant and the adult beverages! The kids like the non-alcoholic daiquiris, too!

This kid ate this entire shrimp & crab plate!
Jake’s fried fish kid’s meal
Jereme’s fish tacos
My fried shrimp plate
Cheers, we’re at the beach!

Doc’s Seafood and Steaks

Doc’s Seafood Restaurant

Doc’s was my personal favorite place we ate at on this trip! I really loved the boiled shrimp we had for an appetizer. We also really enjoyed the outdoor games, like corn hole, and listening to live music while we ate and played! Jereme had a fish plate and loaded bake potato that was really good. I had the grilled shrimp plate, which is an Orange Beach favorite dish! And the boys had shrimp and fish. It was all so good! We will definitely return to this restaurant next time we’re at the beach!

This boiled shrimp appetizer was to die for!
Grilled shrimp plate
Fried fish plate
Fun outdoor games

Luna’s

Luna’s Restaurant

This restaurant turned out to be Jereme’s favorite of the trip! We ate here because the boys saw an advertisement fly above us on the beach and wanted to eat here because they thought the airplane with the Luna’s banner was so cool! We ate outside here, too and there’s an outdoor area for kids to play at that includes a sandbox. The boys loved the special shark drink and I especially loved the home style sides that came with my fish plate. Jereme said his sandwich was the bomb! The crab dip was amazing and it had so much crab meat! This was some really great southern, home style cooking that we all really enjoyed!

Delicious crab dip
Jereme’s sandwich
Fried fish bites with green beans, mashed potatoes, and fried okra
Kid’s fried fish plate
Kid’s mac and cheese
Special shark drinks

The Hangout

The Hangout

We didn’t eat at the Hangout this time on the trip, but I feel like it’s such a fun atmosphere for kids so I had to include it! I can’t really say that I’ve had any dish that just blew me away, but my boys always have so much fun eating here! They especially love the foam party each hour! So, if you’re looking for a fun environment, you should check this place out!

Foam party fun

Lulu’s

Outdoor seating at Lulu’s

We loved Lulu’s the last time we visited! It’s such a fun place to dine and I really enjoyed the food and drinks here! The shrimp tacos that I had were amazing and so was the atmosphere! There was a lot for the kids to check out and they had a blast while we were here.

Cactus Cantina

The only pic I took here, Texas tacos

We needed a little break from all the seafood we were eating, so we decided to eat at Cactus Cantina for lunch one day while it was raining. I had Texas tacos and they were surprisingly really good! Jereme and the boys shared nachos that they said were pretty good!

The Yard Milkshake Bar

Happy boys with their milkshakes

If you like huge milkshakes, then be sure to visit The Yard while you’re here! These are fun desserts, especially on hot beach days! There are so many fun choices, there’s a milkshake here for anyone!

So much sugar
But worth it!

Other Dining Recommendations:

These were the other restaurants that were recommended by some locals that we just didn’t have time to eat at! We’ll be trying some of these places next time we visit!

16 Tips for Hiking with Kids

Hiking with kids is not for the faint of the heart, especially if they’re young! We’ve been hiking with our boys for several years now and each hike seems to get easier and easier. Keep reading to learn my best tips for hiking with kids!

Hiking in Grand Teton National Park in Wyoming

This post contains affiliate links for products that we truly love! I may earn a small commission, at no extra charge to you, if you purchase any items using the links provided.

1. Start Them Young –This is one of my biggest tips, start traveling and hiking with your kids when they’re young! If you follow along on our adventures, then you know that we are a road tripping family. I’m constantly asked, “How do you get your kids to ride in a car that long?” We started them out really young and they don’t know any different. I suggest this with all aspects of travel, whether that be driving, flying, hiking, snowboarding, etc. If you start them young, it will simply become a part of their muscle memory and will be a familiar activity.

Jett’s first hike, DeGray Lake State Park in Arkansas

2. Know Your Kids – You know your kids best, so make sure this is something that they will not only enjoy, but can also handle. Hiking is not for everyone and that is okay. I am all about pushing my kids to try new things and be adventurous, but I also want to have a great time on vacation! Hiking would be no fun for anyone if your kids were miserable the whole time. Know their abilities and their limits and ultimately do what’s best for your family. That might even be waiting until they’re older or hiking without them.

Hiking in Rocky Mountain National Park in Colorado

3. Break in Hiking Shoes –This is a great tip for anyone hiking, even adults! There is nothing worse than having uncomfortable shoes or blisters when you’re walking. It can be even worse for kids. And if you have kids, then you know that they are going to outgrow their hiking gear just about every season. We purchase these sporty, waterproof hiking shoes for our boys and they play outside in them for several days or weeks before we leave for our next hiking adventure! Trust me on this, do not hike in brand new hiking boots before breaking them in!

Hiking in Maquoketa Caves State Park in Iowa

4. Fuel Up – This is another great tip for everyone in your group. Hiking can be strenuous. Make sure to eat a big breakfast or lunch, depending on what time of the day you plan to go hiking. There is nothing worse than trying to have a fun family day and one of your kids is in a whole mood because they’re hangry. This happened to us with our little one and I can promise you, it was not one bit of fun once he got hungry. We refuse to leave for the trails until we know that our kids are well fed and full!

The little one is hangry, just look at his face!

5. Bring Lots of Snacks, Food, and Water –We bring a whole hiking backpack full of snacks and water for the trails. Again, we’ve had a pretty tough experience with our youngest one and learned our lesson. We buy these hiking snacks, which my kids love. I also bring sandwiches and Lunchables and lots of beef jerky for extra protein. And we load everything up in our cooler backpack to keep all the food and drinks cool.

Image from Amazon.com

6. Start with Shorter Hikes First – Another really important hiking tip is to start with shorter hikes first. This allows you to assess your kids’ hiking abilities and see if they’re enjoying themselves. You can also practice short hikes or walks around your neighborhood or in a nearby park to see how long your kiddos can last before getting tired or bored! Once you’ve done some shorter hikes, then you can start adding longer trails to your itinerary!

Hiking in Sedona, Arizona

7. Bring a First Aid Kit – I cannot recommend bringing a first aid kit when traveling enough! It never fails, my oldest son falls on every single hike and needs a Band-Aid for his scrapes and cuts. At this point it’s become a joke in the family, but I’m always prepared. We also include sunscreen, bug spray, and bear spray in our hiking backpack!

Image from Amazon.com

8. Go at a Slow Pace – When you start hiking with your kids, you should go at a slow pace. Don’t expect your kids to be able to keep up with adults. We follow all hiking rules, but on some trails there are fun places for kids to climb and explore! I highly encourage this, hiking will be a better experience if your kids are having fun! Take breaks when you see that your kids are tired or need snacks and water! You’ll be surprised at the memories you make when you’re surrounded by nature having a nice rest and talk with your kids.

Hiking in Rocky Mountain National Park in Colorado

9. Be Flexible – Being flexible goes hand in hand with knowing your kids. If you can tell they’re struggling or not having fun, then you might need to stop more often for breaks or simply call it a day. Don’t expect for everything to go perfect, especially when you’re first starting out. I promise, it does get easier and easier the more trails you hike.

Hiking behind a waterfall in Twin Falls, Idaho

10. Plan Fun Hikes – One of the biggest hiking tips that I’ve discovered is to plan fun hikes! This not only adds to the excitement, but if you plan something fun the kids will be eager to make the hike to see it. For example, I usually plan hikes that will lead us to a swimming hole, waterfall, cave, or rocks to play on. When my kids know that something fun awaits, they don’t complain as much because they’re excited to make it to the end. Check out our Top 10 Hikes Across the US for ideas on great places to hike with your kids!

Hiking in Maquoketa Caves State Park in Iowa

11. Know the Weather – Depending on where you’re hiking, the weather can change quickly. When hiking in the mountains in the summer, chances of a pop up rain storm are pretty high in the afternoon. I suggest being prepared for any weather conditions and knowing the best time to hike at your destination. If you’re in Utah in the summer, you’re going to want to hike earlier in the day before it gets too hot in the afternoon. If you’re in the mountains, you might want to hike later in the day when it gets warmer.

Waiting out a thunderstorm in Ward, Colorado

12. Bring Extra Clothes – I highly recommend bringing extra clothes for your kids when hiking. Mine always seem to find water or mud to play in. And once they’re wet, they want dry clothes to continue hiking in. We bring raincoats, extra gloves and socks, and a change of clothes or swimsuits in case there’s a water feature. If I know there’s water to play in, I let my kids hike in their swimsuits and then they change into dry clothes once we’re back at the car.

Hiking in Redwoods National & State Parks in California

13. Keep it Engaging – We like to keep the kids engaged, especially when they seem tired or bored. We might come up with a scavenger hunt on the fly. Most of the times it’s as simple as looking for something a certain color or trying to be the first person to spot wildlife! My husband is the best at bringing small balls or a Frisbee for a quick game of catch. And once, my boys invented their own dodgeball game with a pinecone. That was pretty entertaining for all of us!

Hiking in Arches National Park in Utah

14. Let Your Kids Help Choose the Hike – I like to let my boys help decide which trails to hike once I have a destination in mind. I use the AllTrails App to find the best hikes for us. Once I narrow down a destination and a list of hikes that are easy or moderate, I will show the kids some photos and let each of them decide what trail they’d like to hike. They’re usually so proud of their choices and excited to hike the trail that they picked! And of course, Jereme and I hype it up and constantly point out how great their choice was.

Hiking in Redwoods National & State Parks in California

15. Give the Kids a Job – This is a great tip that has come in handy for us several times, especially for my youngest. If we’re hiking with our dog, we let him carry the leash and walk her. If we don’t have her with us, then he usually has the binoculars and is in charge of finding something cool to check out when we stop for breaks. Sometime, it’s the little things that make a huge difference!

Hiking in Crested Butte, Colorado

16. Have Fun – Finally, my best hiking tip is to have no expectations other than having a fun time with your family! It might all go as planned or you may have to end your day early. But being together and getting outdoors is so rewarding! Pack your patience, have a great attitude, encourage your kiddos along the way and enjoy every moment with them!

Hiking in Canyonlands National Park in Utah

Hopefully you find some of these hiking tips helpful! I really can assure you that it gets better and better each time. It doesn’t always go as perfectly as planned, but hiking is such a great experience for kids. What are your questions or hiking tips? I’d love to connect with you, so leave a comment if you have any recommendations, need help planning a hike, or have a question! Happy trails, my friends!

Simple Photo Tips Anyone Can Master!

One of the questions that I’m asked most often is what kind of camera equipment I use for our travel photos. I’ll let you in on a little secret… I use my iPhone 11 for everything! And up until two years ago, I was still using my old, trusty iPhone 6! The key to capturing great photos is knowing how to use the camera that you have and taking tons of pictures!

If you follow along on our adventures, then you probably know that I’m a teacher and we travel on a budget. I would love to have professional gear, but that’s not really an option for us right now. I do have a Nikon starter camera, but to be honest it’s too big and bulky for me to lug around on our adventures. So, I’m going to show you I my best photo tips and tricks for using the iPhone camera that I have.

Shooting Modes and Angles

One of the first photo tips I like to share is shooting in different modes and from different angles. Cell phones are pretty fancy these days and even an amateur like me can simply click a button to change the mode on the camera. Below are the different modes and angles that I recommend.

Live Mode – I always take photos with Live Mode turned on. I like this feature because you can go back and make Reels clips later with these photos. I have created some really special travel vlogs specifically using mini clips from Live Mode photos. This mode is also necessary for Long Exposure photos, which I will touch on next. Check out the steps below to make sure you have your camera’s Live Mode turned on.

Live Mode Photo Tip: Open your camera and click on the circle in the top right hand corner (shown above).

Live Mode Photo Tip: If Live Mode is turned off, you will see a line through the circle (shown above).

This video clip was made only using photos that were taken with Live Mode turned on!

Long Exposure – Have you ever wondered how people transform a photo of a waterfall or a flowing river into those stunning photos with the blurry/foggy water effect? Well, I know the secret! And it all starts with shooting in Live Mode first, then editing the photo in the iPhone’s camera app to a Long Exposure. Another quick Long Exposure photo tip is to only add this option to landscape or scenery shots. I have not had the best luck with this feature if there are people in the photo because they become blurry as well! Check out the steps below to do this and look at some of my before and after photos in Long Exposure Mode! Both images of the waterfall are from the same photo, the first one was taken in Live Mode and the second image is the photo with Long Exposure.

Photo Tip: To select Long Exposure, the original photo must be taken in Live Mode.

Long Exposure photo tip: Open your camera and take a picture in Live Mode of moving water. Next, open the image from your photo gallery. Click on the down arrow next to the word Live. Choose Long Exposure!

This is the end result! It doesn’t get any easier than this!

Both landscapes are stunning! Which photo do you prefer?

Portrait Mode – I really love taking pictures in Portrait Mode! City shots are my favorite when taken in this mode. I also like to use Portrait Mode when there are crowds of people or something not that visually pleasing in the background. I highly suggest trying this photo tip, I know you will be surprised at how professional your photos turn out! Follow the steps below to put your camera in Portrait Mode and enjoy some of my favorite photos shot in this mode, too!

Photo Tip: You can find the Portrait Mode button next to the Photo button when you open your camera.

I like Natural Lighting, so I usually leave this setting alone.

Same picture, one taken in Portrait Mode and the other in Live Mode.

Self-Timer – Another one of my favorite photo tips is using your camera’s self-timer. I do have a cell phone tripod, so this mode comes in handy when I want a great family shot! I also use the self-timer when I’m taking selfies of us! This mode gives us time to get situated in the frame and for me to get the angle right. Keep reading to learn how to set the self-timer on your phone.

Angles, Vantage Points, & Perspectives – The next time you’re on vacation or somewhere scenic, play around with different angles and vantage points when you’re photographing the landscape. I like to get down really low to the ground when photographing a picturesque scene. It’s also fun to play around with different natural objects, like rocks or a water line. A good photo tip is to off-center your main subject, whether that be people or an object! Check out some of my favorite landscape photos below.

I got down low to the ground and used this drift wood to get a cool beach shot!

Again, low to the ground to get this lake shot! I had never seen pine cones scattered on the shore like seashells!

The contrast in the yellow flowers, whitecapped mountains, and blue sky made a great picture!

This is one of my favorite shots that shows the true perspective of the Grand Canyon! Notice how my subjects are off-centered and more to the left of the photo.

Photo Editing

I wish I knew all the ins and outs of Photoshop, but unfortunately I do not. However, I do know how to enhance photos to make them look more visually appealing without altering the people in the image in an unrealistic way. I exclusively use two apps besides the basic editing features in the iPhone’s picture gallery, which are the Lightroom App and the Facetune App.

iPhone Camera App – This is where I start my photo editing, right in the photo app! And typically, I brighten photos and increase the vibrancy only. These are my go to edits and are so simple and easy. Keep reading to see how I increase the brightness and vibrancy in my photos.

I increased the vibrance to 100, but as you can see, the change if very subtle.

Lightroom App – This is another one of my go-to editing apps when I have a photo that just doesn’t look like the real deal. Maybe the faces in the picture are dark because of shadows. Maybe the colors just aren’t popping like they are in real life. I don’t have any presets saved here, but I do like to increase the brightness and vibrancy with this app, too.

This app makes it so easy to enhance your photos!

Photo Tip: Using Lightroom, increase the shadow and vibrancy for these results!

Facetune App – I love Facetune when I need to make something in a photo vanish. Whether that be a pimple or a random person in the background! The patching and vanishing tools in this app are amazing! I used to like smoothing out facial features, especially when I first started noticing all of my wrinkles. But now, I’ve embraced my age and really hate that plastic look. So, I truly only use this app for the vanishing/patching tool. Check out these features and some before and after pictures below.

Photo Tip: Step one, remove the blue trash can from right side of photo with Facetune. Step two, increase the brightness on the new image with iPhone photo editing.

Not sure why this lady walked behind our photo, but it wasn’t a problem with the Facetune app!

Poses & Action Shots

Learning how to change up our poses is something that I am still trying to figure out, it can feel so awkward at times. And I really do love those traditional pictures where everyone is smiling and looking at the camera! But, I’m also finding that I really adore those action shots, too. If you’re tired of taking the same old photos, then try changing up how you pose or getting more action shots. I’ve taken photos of us walking, jumping, running, and facing away from the camera, just to name a few. Check out some of our favorite action shots and nontraditional poses below!

Photo tip: Face away from the camera, but let your kids be themselves. I love this unintentional shot with Jake looking back at the camera!

This image is actually framed in my house. It captures my boys hiking along a gorgeous trail, no posing!

Cropping, Zooming, & Straightening

Cropping, zooming in, and straightening a photo might just be all you need to capture a great shot! The iPhone makes it so easy to crop and straighten a crooked picture. Check out the photos below to learn how to crop a photo, how to straighten a photo, and then see how some simple cropping and zooming in can completely transform your image into a stunning shot!  

This is the image I shot from the beach. Wait to see the final product after some cropping & zooming! (Below)

This is the final product after some simple cropping & zooming!

Water Shots

With the right waterproof phone case, you can take amazing shots that you might have been too scared to capture before! I just recently purchased a great case and was able to take some fun shots at the lake and in the pool of my boys, without worrying about ruining my phone! Check out some of my favorite water shots below.

These underwater shots were taken in the pool!

Even in a waterproof phone case, the images from the iPhone are still so clear!

Budget Friendly Camera Gear/Accessories

This post contains affiliate links of products that I love. I may earn a small commission, at no extra charge to you, if you purchase any items using the links provided.

  • Camera Stand – I literally take this stand everywhere to capture our own family photos!  

Cell Phone Image Quality

When people learn that I primarily only use my iPhone for photos, they ask about the image quality when printing pictures. I am happy to report that I have had no issues of poor quality when it comes to printing my iPhone photos! In fact, I have two walls in my home only dedicated to our travel adventure photos, and these two areas are the favorite places in our home! I use Mixtiles for most of these photos and we’ve been very pleased with the outcome. Check out the two photo walls in my house, and remember, every single printed image is from my iPhone!

This is the wall in our office.

This is the wall in the boys’ hallway.

Be Creative & Have Fun!

My final photo tip is to be creative and have fun trying new things with your camera! You’ll never know how great an image will turn out if you don’t at least try. Play around with editing and cropping, try out new angles and poses, and don’t give up if you aren’t successful right away. Check out some of my favorite creative shots over the past year!

This shot was a spur of the moment idea when I noticed our shadows while hiking! I wasn’t sure how it would turn out, but it’s such a cool shot of our family!

Another awesome action shot taken on July 4th!

I loved the color of these flowers and decided to get super close for a photo. The sunset in the background was a nice surprise!

This was our first time seeing sand dollars on the beach!

I truly hope that you find these simple photo tips helpful! I am not a photographer in any way, shape, or form, but I’ve been so happy with the images I’ve captured on our adventures. I’m sure I still have a lot to learn about taking amazing photos and I would love to hear any of the photo tips you may have! What photo tip of mine are you going to try next?

9 Tips for Saving Money on Ski Trips

This post contains affiliate links. I may earn a small commission, at no charge to you, if you purchase any items using the links provided. I only share shoppable links to items that I love!

My husband and Jett are getting ready to go on their first snowboarding guys trip together! I’m so excited for them, but kind of jealous, too! This is one of my favorite winter activities, but often times it’s our most pricey trip of the entire year. I am sharing our top tips for saving money on your next ski/snowboarding trip!

1. Book Early

Such a dreamy ski lodge!

This is one of the best tips I can share when it comes to saving money on your next ski trip. We often have our lodging package booked by September for travel in the upcoming winter. Most ski resorts start offering discounts on lodging packages in the summer! Take advantage of these discounts and secure your stay early, it’s one less stress to worry about. To find out about these discounted packages, sign up for emails from different ski resorts that you’re interested in visiting. You’ll begin receiving emails when the resorts start offering sales.

2. Don’t Book Peak Dates or Weekends

Traveling over school breaks and on holidays are considered peak dates and rates will be the most expensive at this time. If you can, try booking your trip in January, it’s often the most affordable month for skiing and snowboarding. It’s also best to book your stay midweek and not over a weekend. I know this can be tough when it comes to kids missing school. Before we had kids, we used to go on our annual trip in early December every year. Now when we go over the Christmas break, we are paying more than double for the exact same trip!

3. Look for Ski & Stay Packages

Expired advertisement provided as example of deals to look for courtesy of Bend Vacation Rentals.

Expired advertisement provided as example of deals to look for courtesy of Bend Vacation Rentals.

There are many resorts that will offer free lift tickets with a lodging package. These will usually not ever be offered during those peak dates or on weekends. Some places also offer packages that allow kids to stay and ski for free! Again, I recommend signing up for email notifications from different ski resorts to learn more about discounts and packages that are offered!

4. Go as a Group

A ski trip is the perfect trip to take with friends! There are so many condo options available with several bedrooms and bathrooms that are very affordable when you split the cost!

5. Lift Tickets

This is our first ever family ride on a ski lift!

Besides lodging, purchasing lift tickets is typically the next most expensive item on a ski trip. I have a couple of different tips for this. First, purchase your lift tickets in advance. They will always cost more if you wait and purchase them at the ticket window. You can use websites like liftopia to pre-purchase and save money!

There are several different options for saving money on your child’s lift tickets! I recommend looking into an Epic School Kids Pass if you’re traveling to Colorado, Utah, or Whistler. If you’re only considering a trip to Colorado, check out the Kids Ski Passport for kids in third through sixth grade. This passport is $59 and includes 80 days on the slopes!  

Jake and Jereme on the bunny lift at Granby, CO!

Skiing or boarding at smaller resorts will also save you money! If you’re going to a bigger resort, look into purchasing an Epic Pass!  Keep in mind, lift tickets are usually cheaper on Mondays-Thursdays!

Finally, consider purchasing just a half-day lift ticket instead of a full day ticket. This is usually the ticket that I get for myself and my youngest. Jereme and Jett like to board all day long, so it makes more sense for them to have a full day ticket.

6. Invest in Gear

Jereme and Jake boarding together!

Since we like to go boarding every year, it made sense for Jereme and me to invest in our own gear instead of renting each ski season. We both have our own snowboards, helmets, goggles, and boots. This has saved us tons of money over the years! It’s a little trickier when it comes to kids’ gear since they are constantly growing. We still rent for our boys at this time.

If you need to rent gear, renting right at the base of the mountain is always a more convenient option. But with that convenience comes higher costs. If you want to save money on ski or snowboard rentals, try renting from an outfitter off the mountain.

7. Driving vs. Flying

We prefer having our 4 wheel drive once we get up to those mountain passes!

For us, driving is always the cheaper option. For one, we have our own gear so that’s an additional luggage fee. Plus, winter clothes are just way bulkier and take up more space. So, we save money by not having to pay for a rental car or shuttle to the resort, not having to pay luggage fees, and not having to pay for flights!  We also like to take our own groceries, and that’s easier when we’re driving!

8. Get a Kitchen

We loved this condo in Crested Butte & returned to the same unit 3 years in a row!

Continuing on about groceries, I highly recommend booking a room or condo with a full kitchen. Cooking some of your own meals is a huge way to save money! Since we like to stay for a full week when we go snowboarding, it would cost a ton to feed all four of us, three times a day! We usually travel with a lot of our own food, too. That saves some money because everything costs a little more at the mountains, including the groceries!

We have a really good routine at the mountain. On the days that we are going to hit the slopes, Jereme and Jett get up early and are at the lifts as soon as they open. Jake and I sleep in and then I cook breakfast when we get up. The boys make a few runs on the mountain and then come back for breakfast. We eat together and then all four of us will head back out and board until we get hungry again! We’ll return to the condo for lunch and make a few more runs if there’s time. Then, we go out for dinner… if we aren’t too tired after being on the mountain all day!

Jett doing his thing before Jake and I are even awake!

We also cook meals that we can eat on for a few days, like spaghetti, chili, soups, and more! When I’m on vacation, I like to be on vacation and not do too much work. However, if we want to stay a week or longer, we have to make some sacrifices and often cooking a few meals is one that I’ll gladly make!

9. Shop Amazon

My last big tip is to shop for ski clothes on Amazon. I know, I know. We all want to look like the cutest little ski bunnies on the slopes! You can find super cute waterproof gear online, I promise. Everything my boys wear at the mountains has come from Amazon and it’s all held up very well. In fact, Jake has been wearing Jett’s previous ski gear year after year!

My favorite winter gear purchases from Amazon:

All gear from Amazon! Besides the rentals.

Below you will find the top five most affordable ski resorts in Colorado, Utah, and New Mexico!

5 Affordable Ski Resorts in Colorado

5 Affordable Ski Resorts in Utah

5 Affordable Ski Resorts in New Mexico

Ski trips are always a fun time! If you’ve never been, I hope you’ll give it a try sometime. And just remember, these trips don’t have to break the bank. With the right planning, you can have an epic adventure! If you have any more tips for saving money while traveling, I’d love for you to share them in the comments! Happy travels, my friends!

7 Things to do Outside Yellowstone National Park

Hey there! I am finally catching up on the blog and didn’t really know how I wanted to organize & share all of our Yellowstone information. If you follow along on our travels on Facebook or Instagram, then you may know that we arrived at West Yellowstone, MT 3 hours after the National Park Service closed Yellowstone for the first time in 34 years. We were so confused because the weather in the area was absolutely beautiful and there was no indication that Yellowstone had received flooding rains. But then we saw the footage and realized the severity of the situation way north of us. We were sad to say the least, I had spent over a year planning this trip. So, we got to work making new plans while praying that the Park would open while we were still there (which it did not). We definitely made the best of the situation and had tons of fun doing and seeing things that we would not have if Yellowstone had been open. At the end of the day, Jereme and I both agreed that our boys probably had more fun on these excursions than they would have driving around in Yellowstone for 5 days. So, if you find yourself in the area and want a variety of things to do, read on for a list of family friendly ideas and our top 7 things to do outside of Yellowstone National Park!

West Yellowstone, MT

Lodging – First things first, we absolutely LOVED The Kelly Inn in West Yellowstone. The staff was so amazing and accommodating with the situation of Yellowstone being closed. They offered us some ideas on things to do in the area, which we appreciated so much! And the location was ideal, we were actually able to walk to dinner and shopping right from the hotel. It was nice to be out of the car and walking after our 20+ hour drive from Texas. Our room was so large and roomy, the free breakfast buffet was one of the best that we’ve had at a hotel, and we enjoyed the pool and hot tub during our down time. I highly recommend this lodging, which also happens to be right outside of the West entrance into Yellowstone National Park!

We got lucky, our room had a bear peeking in the window!

Dining – Our favorite restaurant in West Yellowstone was the Buffalo Bar. Our boys asked to go there every single night! We all tried buffalo for the first time and really, really loved it. The boys had buffalo nachos, I had the country fried buffalo steak and some buffalo balls (lol), and Jereme had the buffalo burger. We ended up eating there two times on the trip because we all loved the food so much! We also enjoyed Three Bears Restaurant and The Slippery Otter Pub.

Country Fried Buffalo Steak from the Buffalo Bar

Downtown – West Yellowstone is a quintessential tourist town lined with souvenir shops, restaurants, candy stores, etc. We were able to walk to all the shops from our lodging, which was really nice. The kids enjoyed getting out and exploring all of the little stores that lined the downtown area and main street. We found some great souvenirs and enjoyed chatting with the employees in the shops. Everyone was truly shocked about the Park being closed and it was always the topic of conversation!

Grizzly & Wolf Discovery Center – This was such a fun activity for our first full day in West Yellowstone! My youngest son’s favorite animal is a wolf and we wanted to see wolves in Yellowstone, which we knew wasn’t a guarantee in the wild. So, we really enjoyed our experience here. What I loved most about this place is that it is a non-profit organization and the animals in the center were actually rescued and have a wonderful place to live out the rest of their days. Most of the bears were orphaned as cubs and never taught how to be wild by their mothers and were getting too close to humans/trash. It was nice to hear their stories and see them doing so well. We also enjoyed the small museum inside – it was snowing on our visit… in mid-June! So, if you don’t get your bear or wolf sighting in Yellowstone, be sure to check out this place! Our tickets were good for two days, too.

  • Website: https://grizzlyctr.givecloud.co/
  • Address: 201 S. Canyon St. West Yellowstone, MT 59758
  • Phone: (406) 646-7001
  • Hours: 9:00 am – 6:00 pm Daily
  • Rates: Adults (13+) $15, Children (5-12) $10, Seniors (62+) $14, Free under 4
Sam was our favorite bear!

Island Park, ID

UTV Riding – Island Park, ID is only about 25 minutes from West Yellowstone. When we were searching for things to do, this area kept popping up and there are several different things to do here. We chose to rent a UTV for the day with High Mountain Adventures from 8:30 am to 4:45 pm. These UTVs are street legal, so we were able to go pretty much anywhere, including the convenience store for snacks and a restaurant. Did I mention that there are also over 500 miles of trails to explore? The UTV we rented came with a GPS and the employees gave us a map and highlighted their favorite trails for us to explore! We ended up going to Big Springs and to the top of Sawtell Peak, more information about these two places below.

Big Springs – One of the first places we decided to explore on the UTV was Big Springs. It’s a natural spring that provides water to the Snake River. The whole area is beautiful and the water is crystal clear. Bring some quarters and you can buy fish food right off the bridge to feed the trout – and there are a ton! It was so fascinating to watch. No fishing is allowed here, but you can hike and walk around the springs/river. And there are several UTV trails to explore as well.

The water is so clear & there are so many trout!

Sawtell Peak – We also wanted to drive up to the top of Sawtell Peak. We may have changed our mind if we knew how cold it was going to be, remember it had snowed the day before! It was a pretty mild day in Island Park and at Big Springs, but man it was freezing when we rode up the mountain. We did bring jackets and had blankets and gloves, but despite the view, it was pretty miserable at the top. We didn’t spend a lot of time here because we were too cold, but it was a very pretty ride. I think it would be more enjoyable later in the summer!

Upper Mesa Falls – Our final adventure in Idaho was to Upper Mesa Falls. We didn’t ride the UTV here, it was too far away for that. So we headed to the falls after we returned the UTV for the day and we had about a 30 minute drive from High Mountain Adventures to Ashton, ID. This waterfall is very impressive, 114 feet tall and 200 feet wide, and I am so glad that we decided to visit! I used the AllTrails app for directions, but there are also several signs on the drive for you to follow, too. The trail is pretty short and most of it is on a boardwalk that leads you to different viewpoints. There is a $5 cash only parking fee. There’s also a small store and visitor center on site.

We could not believe the size of this waterfall!

Virginia City, MT

Ghost Town – Virginia City was such a neat place to visit and only 1.5 hours from West Yellowstone. It originally became a town from pioneers and adventurers settling there during the Gold Rush period, which also brought vigilantes and bandits to the area. It is now a very well-preserved National Historic Site that is so fun to explore. And it’s completely FREE to walk around and enter the buildings on the boardwalk. There are also several different activities that you can do as well, including a train ride to Nevada City, stagecoach rides, historic fire truck tours, and museums! Click here to learn more about visiting Virginia City!

Lewis & Clark Caverns State Park, MT

Caverns – Lewis & Clark Caverns State Park is Montana’s first state park! These caverns are a little less than 2 hours away from West Yellowstone and the scenic drive through Montana was so enjoyable! You can only visit the caves with a guided tour and they offer two options, The Paradise Tour (1.5 hours) or The Classic Tour (2 hours). Tours cost $15 per adult, $10 per child (5-14) or $5 per child under four. We did the Paradise Tour, it was recommended for kids but I wish we would’ve done the Classic Tour since it’s about 30 minutes longer inside the cave. We learned a lot about caves and had a great time, then we ate a delicious late lunch at the café on site. They served burgers, sandwiches, nuggets and it was perfect after our guided tour! Click here to learn more about visiting Lewis & Clark Caverns State Park.

As you can see, we made the best of our unfortunate circumstances at Yellowstone. I wish we could’ve visited the Park, but we still had a great time and will eventually get to YNP. Please don’t hesitate to reach out with any questions that you have! And be sure to follow me on Instagram at https://www.instagram.com/road_trip_queen/ – I have more videos and helpful information there.

Our faces sum up how we all felt being so close to Yellowstone, yet unable to go in the Park!

Next up, our trip to Grand Teton National Park! Be sure to check back for details and more information about our time in Wyoming.

Tips for Securing a White House Tour

I’ve had the opportunity to visit Washington, DC three separate times over the past two years. It wasn’t until our third visit that I was actually able to get a tour of the White House. Read below to see tips on getting inside and things you should plan ahead for.

We made it behind the gates!

Start by looking at this website to get information and details for a White House visit. The first time I tried getting us a tour, I followed the steps on the website and never heard back from anyone. I realized my mistake, we were going over a long weekend and the White House only has tours on certain days during the week (Tuesday-Thursdays from 7:30 am-11:30 am and Fridays/Saturdays from 7:30 am-1:30 pm). So essentially, we would’ve only been able to get a tour for Saturday and I am sure that’s probably a busy day!

The second time I tried, we were visiting DC over Thanksgiving break. This is an absolute amazing week for a visit, the business in the city shuts down for the holiday and hotels are very reasonably priced. Read here to see more information about our Thanksgiving trip. However, you will NOT get into the White House during this week because they close all tours for Christmas decorating.

The third time I was set to visit DC I was determined to get us into the White House. And the funny part is, I was actually visiting Colonial Williamsburg over spring break but figured I was close enough to DC (2 hour drive) and decided I would try. So, I went back to the website and filled out the information needed. I also decided to give the old phone a try and I actually made a call to our local representative and worked with him over several weeks to get a tour scheduled. And fortunately for us, it worked!

Things to Know:

  • You need to request a tour 3-6 months before your visit, but you typically won’t find out if you’ve been approved until 2 weeks before your visit.
  • Requests are made through your Member of Congress – click on link to find your representative.
  • Call your representative – they want to help you get a tour and are really great to work with!
  • You MUST bring specific items for your tour or you will NOT be allowed access inside the White House – you will either have to pick up or will be mailed a “boarding pass” for entrance. Adults will also need a government issued I.D. with a photo (driver’s license or passport).
  • You are not allowed to bring a bag of any size, including purses.
  • You can bring your cell phone, but no other cameras.
  • You will go through several different checkpoints in various places before you can enter. The officers working these checkpoints are very friendly, but mean business. They ask you questions, like your full name and birthday, and will also ask your kids – no matter their age, so be sure to review this with them!
  • Be prepared to arrive early for your tour and to wait in lines to get in – these lines are all outdoors, so plan accordingly. There are also NO restrooms available for anyone to use!
  • Once inside, the tour is self-directed and there are only a few places that you will have access to.
  • The secret service agents inside are very friendly and most will interact with you and answer any questions that you have.
  • Have fun, enjoy the visit, and take tons of pictures!
  • There is a White House Museum across the street that you can visit after your tour – the Park Rangers at the White House will tell you about it before you go inside!

A Small Glimpse at What a White House Tour Looks Like!

I love that you can see the Washington Monument from the rooms in the White House!
Everything is so fancy!
The Library
Jake is refusing to smile like the Presidents in all the portraits.
The Green Room
The Red Room
I loved the columns
We had the best time touring the White House!

Good luck on securing your White House tour! This is a very memorable experience and I hope everyone that has the desire to visit is able to.