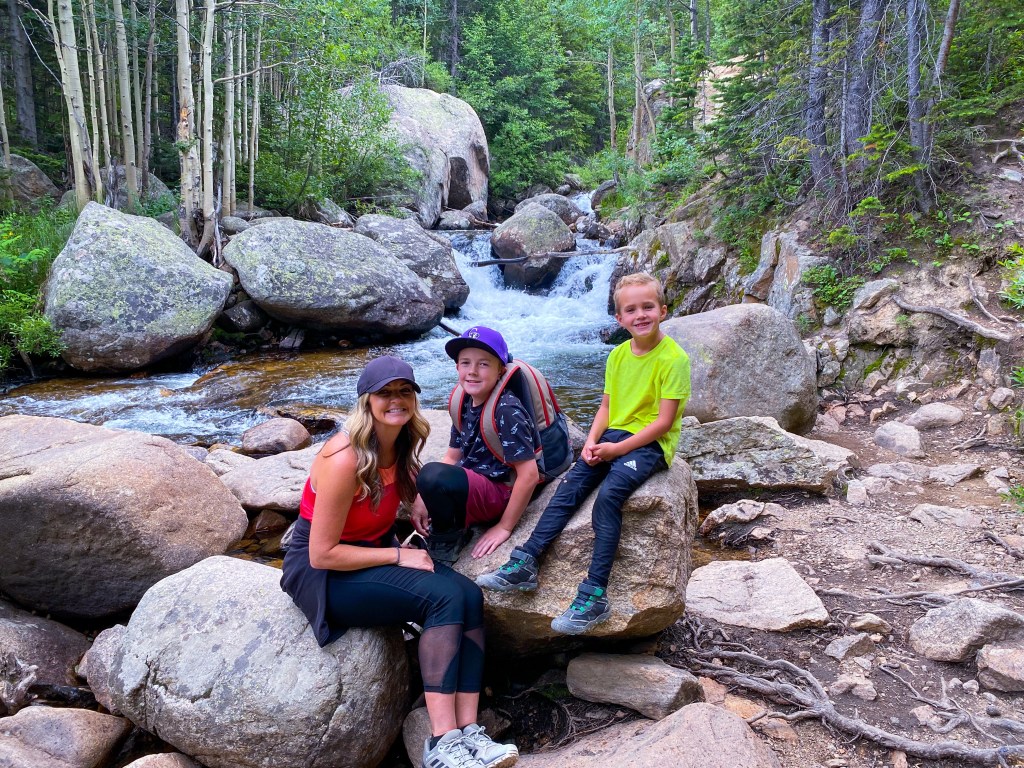
Galveston Island is the closest beach to us in north Texas. We like to travel down to the coast a couple of times a year. And we only stay at one place, Seascape Condominiums! It’s the best place to stay in Galveston!
The view from the balcony!
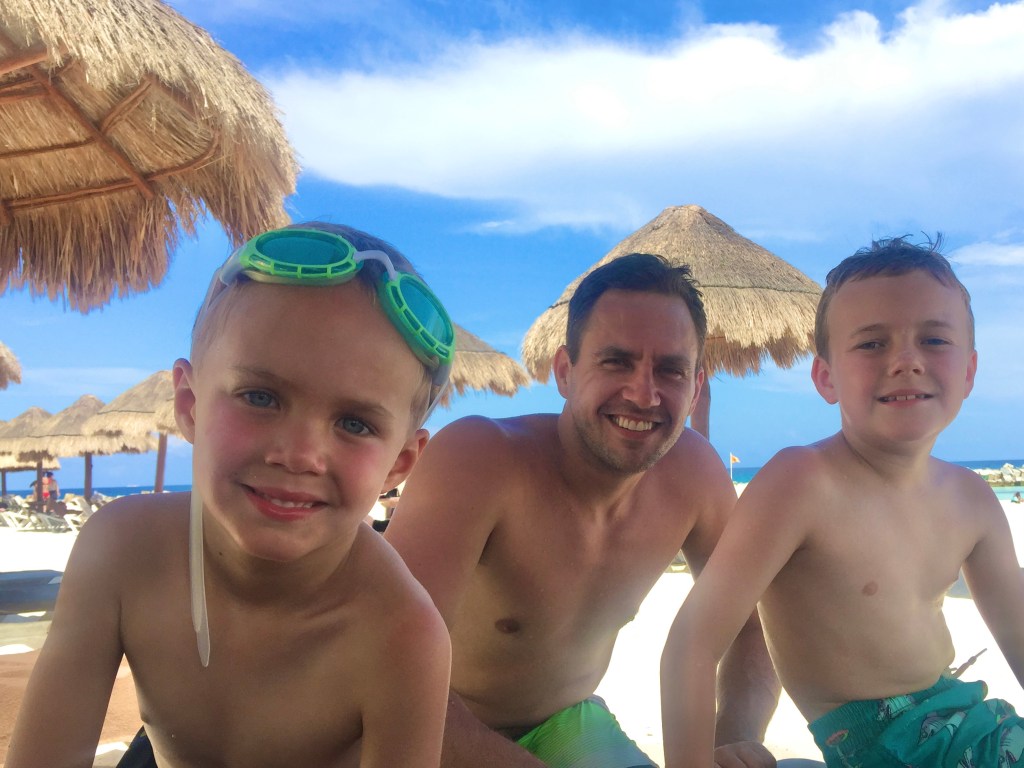
We’ve been staying at Seascape for over ten years now. Our first visit was when my oldest was almost two. Now he’s twelve! My boys LOVE this place. It holds so many special memories for us.
Galveston is our happy place!
What Makes Seascape So Great?
Beach Access – The location to the beach is the absolute best! If you’re familiar with Galveston, then you know that most of the hotels are located across the street from the beach. So on beach day, if you’re staying anywhere else, you have to lug all of your stuff across the busy Seawall to get access to the beach. Seascape Condominiums is actually one of the few places that sits right on the beach side! That means, you simply walk outside and over the boardwalk, and you’re on the beach!
The boardwalk from the grounds to the beach!
I love the convenience of being just a short walk back to our room or the restrooms by the pool. I cannot imagine having to go back and forth across the four lane road. There’s many reasons that we love Seascape Condos, but the location right on the beach is number one for me!
Seascape Condos sits right on the beach!
Space – Staying in a condo is always much more spacious than a hotel room! The units have several different floor options, but the one we return to year after year has two bedrooms, two bathrooms, a living room and full kitchen, plus two balconies! It’s very spacious for our family of four and we’ve even stayed there with friends and have easily slept up to eight with the bunk beds in the hallway and the sleeper sofa!
One of the two balconies in this unit!
Living room
Kitchen
Bunks in the hallway
Master bedroom
Master bathroom
Bathroom
Second bedroom
Bathroom
An added bonus is having a washer and dryer! I don’t particularly like doing laundry on vacation, but having a dryer is a game changer! We use the dryer for our beach towels, so each day they are nice and dry for us. We sometimes even throw our swimsuits in the dryer to remove sand and dry them for the day. There is nothing worse than putting on wet swimsuits in the morning!
Washer and dryer in the master closet
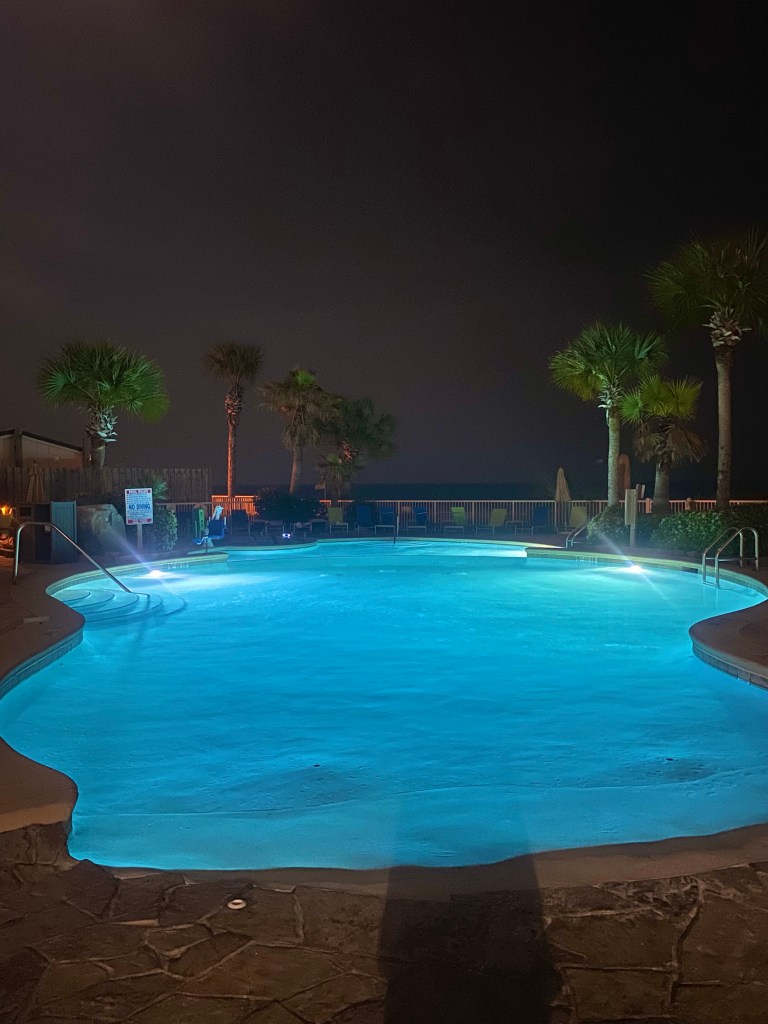
Pools – Our favorite place at Seascape Condos is the pool area! There is a large swimming pool and it’s even heated in the winter! There’s a kids pool and two hot tubs. One hot tub is open to anyone above the age of six. The other hot tub is more secluded and is only for adults age twenty-one and older. The landscape around the pool is beautifully maintained and there are plenty of lounge chairs and picnic tables! You’ll also find restrooms and vending machines near the pool area.
We love the pools!
I’ve taught both of my boys how to swim in this pool!
Safety – Finally, we always feel really safe when staying here! There is a guard that is stationed at the entrance of Seascape. These guards are on sight twenty-four hours a day, seven days a week. They monitor the vehicles coming in and out and only registered guests or condo owners are permitted. They also walk the grounds several times per day to ensure that everyone is safe and behaving appropriately.
You cannot get onto the grounds without a special gate code!
The pool area and beach area are only accessed with a special gate code that you receive upon check in. So, the beach in front of the hotel is essentially only used by guests from Seascape Condos. And guests are required to wear a bracelet while staying at Seascape to ensure that only registered guests/owners are on site and using the facilities and pools.
Address: 10811 Termini-San Luis Pass Rd, Galveston, TX 77554
Phone Number: (409) – 740 – 1245
If you’re looking for the best place to stay in Galveston, be sure to check out Seascape Condominiums! This is one of the few destinations that we keep returning to. The units are the perfect size for families of all sizes. The grounds are stunning and the location on the beach is ideal!
Nothing is better than a gorgeous Texas sunset at the beach!
Week long school breaks are my absolute favorite! I love the time we have off together and the memories we are able to make. For us, we have a fall break, winter break, and spring break. These have been fantastic times to travel for our family! Even though we don’t have as many week long breaks during the school year as we do long weekend breaks, I still try to plan some kind of getaway for each of them. Some things to keep in mind for week long travel is the weather, especially if you’re traveling in the winter (snow/ice) or spring (rain/thunderstorms). Week long breaks can also draw more crowds, so keep that in mind when choosing your destination!
More Things to Consider for Travel Over School Breaks:
Fall break tends to be a more budget friendly time to travel
Winter/Spring break travel tend to be more expensive
Pay attention to the weather during all seasons of travel & pack accordingly
Expect airports, roads, destinations to be more crowded during holiday travel
Week long travel equals more time exploring your destination
You can visit farther away destinations over week long breaks
Week long travel allows a day or two of down time before returning to school/work
Fall Break Destination Recommendations:
The week during Thanksgiving break is an excellent time to take a quick trip with the family! We like to head out over the weekend and return on Thanksgiving Day so that we don’t miss any time, or delicious food, with our families. Traveling during this week seems to be very budget friendly and the locations are not as crowded, either!
For us, returning home on Thanksgiving Day has worked out very well! We try to avoid those busy airports and road conditions the Wednesday before Thanksgiving. We like to book morning flights on Thanksgiving Day. We make it home in the early afternoon, just in time for dinner! Below are some of our favorite fall break travel destinations.
Our first family trip to DC!
Washington DC – Visiting DC over Thanksgiving break was a dream come true for my family! The weather was amazing and the crowds were small. I hear that a lot of people that work in DC leave the city for the holiday, so it’s an ideal time to visit. This is one of my most favorite family trips to date! We packed in so much during the week and saw so many historical sites. The only downside to traveling to DC during this week is that the White House is closed to tours because they are decorating for Christmas.
We couldn’t wait to show the boys all the monuments!
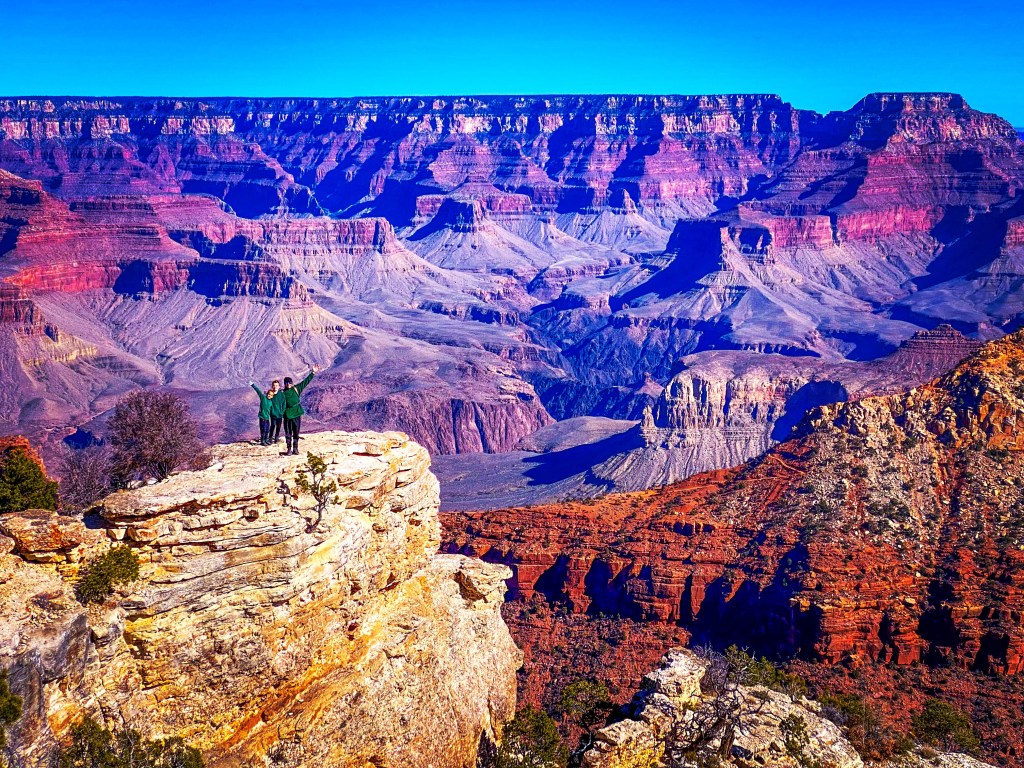
Grand Canyon, AZ – Another fantastic destination for fall break is Grand Canyon National Park! It’s a lot less crowded this time of year since it’s considered the off season. We didn’t have to fight many crowds at the viewpoints and the lodging was a lot less costly in November. We really enjoyed the weather and cooler temps while hiking, too!
We were all so excited to finally see the Grand Canyon in person!
New York, NY – Visiting the Big Apple over fall break is the most ideal time to go! Not only did we get to explore the entire city and all the famous landmarks, we also got to check out the Macy’s Thanksgiving Day Parade balloons being inflated, we got to watch the parade from our hotel room, and the entire city was also decorated for Christmas! I feel like we got the best of both worlds in regards to Thanksgiving and Christmas. This trip was truly magical and we made some memories that we will never forget!
I can’t believe we got to see the parade floats this close!
Traveling over the two week winter break can be a fun change of scenery and sometimes our trips are even a part of our Christmas gifts to our family! We love to hit the slopes and snowboard, but we’ve also traveled to other parts of the US over the holiday break and had tons of fun! Below is one of our favorite winter break destinations.
It never looks like this at Christmastime in Texas!
Winter Park, CO – Since we live in Texas, I love to hit the road and head north to the mountains to get that feel of having a white Christmas! We also love to snowboard together and my boys are having a blast learning each year we visit! Winter Park has some excellent ski and snowboarding conditions, plus there’s plenty of activities like tubing, snowshoeing, snow mobile rentals, and even dogsledding! If you’re looking for a fun winter getaway, this is the place to go!
Spring break is one of our favorite times of the year to travel! Usually for us, spring fever has set in and it’s so fun to get away with the family to regroup and recharge! We’ve traveled to several destinations over this school break, but below are my three favorites!
Utah rocks!
Moab, UT – Moab has been on my bucket list forever and I am so, so happy that we decided to visit over our spring break a few years ago. The weather was a little chilly, but it was perfect since we did a lot of hiking! We didn’t have to worry about timed-entry permits for Arches National Park and there weren’t too many crowds at all. This was our first trip Utah and it definitely won’t be our last!
California to Oregon – We spent an unforgettable week traveling from San Francisco to Cannon Beach over spring break last year. It was everything we hoped it would be and more. On our road trip, we explored San Francisco, Redwoods National Park, and Cannon Beach, Oregon. We got really lucky and had gorgeous weather the entire week. I highly recommend road tripping along the Pacific Coast Highway and I think spring break is an excellent time to go! Nothing was crowded at all and I cannot even describe the landscapes in each of these places!
Orange Beach, AL – Our most recent family trip was to Orange Beach, just last month! Again, we got extremely lucky with unseasonably warm weather so early in the season. This trip was so relaxing, we didn’t do much besides play at the beach and eat delicious food at night! If you’re looking for something a little more relaxing, check this beach destination out!
These boys had the best time!
Plan Like a Pro!
Whether you’re traveling over a weekend or for an entire week, you should plan your trip like a pro! Here are some ways to do that!
Since Jereme and I both work, and our kiddos keep us busy with school and sports, we aren’t a full time traveling family. But, I have become an expert at taking advantage of school breaks! I have several tips for squeezing in travel when the kids are not in school that I hope you find helpful!
We’ve created so many wonderful family memories traveling over school breaks!
Now, I’m not saying that you have to travel every single time your kids are on a school break. Sometimes it is so nice to rest and recharge at home. But there are several different times throughout the school year that taking a trip might be fun for you and your family, besides just during the summer! Below, I’ve included some tips and things to keep in mind when traveling over a long weekend. I’m also sharing some of our favorite travels over different school breaks that we’ve recently taken!
Tips for Traveling Over a Long Weekend
Finding the time to travel over a long weekend does involve some planning ahead, but it can be a lot more budget friendly than a longer trip! So, first things first. Get your school calendar at the beginning of the school year and take note of when you’ll have long weekends for possible travel and start making plans. When thinking about the destination you’d like to visit, the biggest consideration will be the amount of time that will be spent on the travel days. Do you have time for a road trip or will flying be the better and faster option? There are several pros and cons to weigh when traveling over a long weekend. One pro is that you don’t have to pack as much, but a con is not having a ton of time in the location you’re visiting! Below are more things to think about when taking advantage of school breaks and traveling over a long weekend.
Choose closer destinations to reduce the amount of time spent on traveling
Plan a Staycation
Take a day trip
Camping can be a fun and easy weekend getaway
Keep it simple – don’t try to pack in too many activities
Off season travel (fall/winter) can be less crowded & more budget friendly
Think about the weather at your destination
Remember that attractions are typically busier on weekends
Hotels can be more expensive on Friday and Saturday nights
Visit a National or State Park
National Parks also have free entrance on certain days throughout the year. Below is the list of days for the year (2023) that you can visit the Parks for free!
Jan. 16 — Martin Luther King Day.
April 22 — First day of National Park Week.
Aug. 4 — Anniversary of the Great American Outdoors Act.
Sept. 23 — National Public Lands Day.
Nov. 11 — Veterans Day.
Weekend travel bonus: The shorter the trip, the less you have to pack!
Weekend Travel Destination Recommendations:
I really have become an expert at planning weekend trips! We’ve taken advantage of several school breaks and squeezed in some amazing places, just over a long weekend. Below are some of my favorite long weekend getaways!
We had no idea just how amazingly unique this National Park is!
Winter: Carlsbad Caverns, NM – This is our most recent long weekend family trip that we were able to make over our school break for the Martin Luther King, Jr. holiday! This is the perfect weekend destination because you don’t need too many days to really explore these impressive caverns and the temps inside the caverns stays the same year round!! The drive for us was about seven hours, so we left out early on Saturday morning and arrived in the early afternoon. Then we explored the caverns for most of the day on Sunday and drove back home on Monday. We all were amazed inside the caverns and Jake participated in the Jr. Ranger program while we were there and earned a badge.
Inside the caverns is like what I imagine being on another planetis like!
Spring: Chicago, IL – Chicago is a great weekend destination! I’ve been lucky to find reasonable airfare to the Windy City using both Google Flights and Skyscanner. I also feel like this destination can be more budget friendly since you don’t need to rent a car! I’ve visited Chicago over the weekend, both with my boys and on a girl’s trip! The city in the spring is absolutely wonderful, the weather is perfect and the flowers are in bloom everywhere. There are so many great places to eat, some of the most impressive museums I’ve ever visited, and so many fun outdoor adventures.
I really couldn’t get over the flowers that were everywhere!
Anytime: Dallas, TX – Our Dallas Staycation has been one of my favorite weekend trips to date! We’ve lived close to Dallas my whole life, and I had no clue how much fun exploring our nearest city would be. My family took advantage of the CityPASS and it made exploring Dallas not only fun, but extremely easy! With the CityPASS, we got ideas of where to go and then were able to skip all the entry lines with the PASS. This trip was also extremely budget friendly, since it was so close and didn’t require a lot of gas to get there. Plus, we went with friends and split the cost of parking and the hotel.
These kids thoroughly enjoyed a “fancy” hotel with a rooftop pool!
Dream Lake in Rocky Mountain National Park really is a dream!
Fall: Estes Park, CO – Last fall, I traveled to Estes Park, CO on a solo road trip to the mountains. Even teachers need a break sometimes, and the long weekend we had off in October was just the time I needed to recharge. I met up with some of my girlfriends there, and together we spent our weekend hiking, watching wildlife, and being pampered! I highly recommend this destination for a long weekend getaway, either with your family or with your friends!
Check out Pinterest for more information specific to your destination.
If flying – find flights under 2-3 hours max.
If driving – don’t go farther than 4-6 hours unless you’re a road trip pro!
Google search free activities or “best attractions” at your destination.
If you’re visiting a city, look into the CityPASS for additional savings.
Have a plan in mind, choose at least one thing to do or see each day.
Make sure you pack for the right weather, check the forecasts ahead of time.
Allow some down time, either before, during, or after your trip.
Expect some travel delays and keep a positive attitude.
Take tons of photos!
I hope you have found these tips helpful and that you’re able to squeeze in some amazing adventures over the next school break! Be sure to check back soon for more tips about traveling over longer school breaks!
I get a lot of questions about how I plan my family’s coordinating outfits when we travel or take family photos together. I credit my knack for coordinating outfits to my love of fashion, working as a stylist for Stitch Fix, and always paying attention to the small details.
Obviously, I try to coordinate our outfits for professional family photo shoots, but also when we’re on vacation because I know that I’ll want to frame some of the pictures from our trip. I don’t go overboard, but I do try to plan one day of coordinating outfits. Lucky for me, my kiddos and husband are pretty easy going and are used to my antics by now! Below is my complete guide to coordinating family outfits, plus tips and other things to keep in mind before you travel and/or take family photos!
Most of our photos are taken outdoors, so this guide really focuses on tips and recommendations geared for outdoor photography. Also, many of the links I’ve included are affiliate links. I may earn a small commission, at no extra charge to you, if you purchase items using any of the links provided. Thank you!
Follow These Steps to Coordinate Your Family Outfits:
1. Seasons
First, I always suggest thinking about the season you’ll be taking photos in, especially if you’ll be outside. Most of the time, we opt for outdoor photos, so this information is important for choosing the right colors and the right style of clothing for the season!
Fall photos – I went with warmer tones like dark yellow and dark green and a hint of maroon.
Fall– If you’re taking photos in the fall, you might want to choose deeper fall tones, like mustard yellows or maroons. Pay attention to the current trends, like booties vs. tall boots.
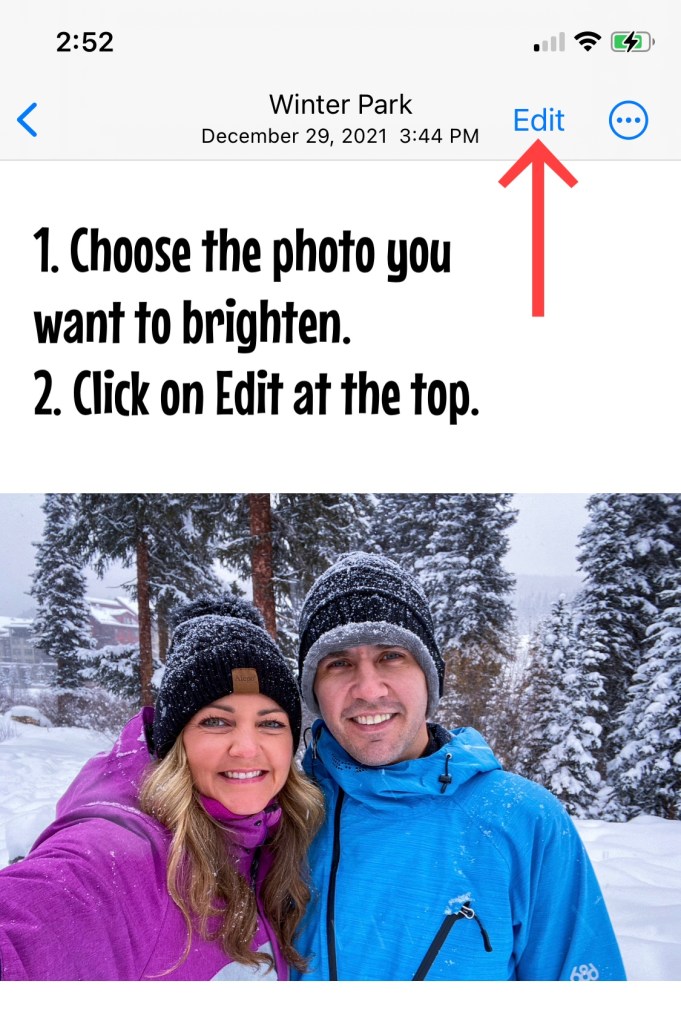
Winter – Winter photoshoots can be so fun! We finally had family photos done in Winter Park when we visited last year. I opted for navy blue because it’s easy to find and navy is often considered a neutral color. I went with beige instead of white since most of the background would be snowy!
Spring – Spring time is a very popular time for outdoor photos, especially since flowers are in bloom! Neutrals are a great choice if you’re going to have lots of colors in the background.
Summer – I’ve only had summer photos taken once, I mean the heat in Texas is almost unbearable to be outdoors for too long! But, we opted for shorts, neutral colors, and only spent about 10-15 minutes on this sunflower photo shoot.
2. Ladies First
Once you know what season you’re working with, I highly recommend all the ladies in the group find their outfit first! Then you can coordinate the men’s and children’s outfits after you nail down your pieces. I always feel like I am the hardest to shop for, so getting my outfit and shoes picked out first is always super helpful and eases the stress!
Example: For our winter photos, I started with my sweater first! As soon as I found it online (Old Navy), I began looking for complimentary colors for the boys. They are so much easier to shop for! I knew it would be easy to find navy and beige for them. Then I added in the hats, gloves, and snow boots!
Example: When shopping for our recent beach trip, I found the green maxi dress. I was drawn to that color because I know the waters in Orange Beach are often emerald green. Once I purchased my dress (Amazon) I started looking for tops for the boys that would match. I found Jake’s first (Old Navy) and was able to use it to add more colors for Jereme and Jett. I made this screenshot to double check how the colors would look together
Even though certain colors are associated with certain seasons (I’m thinking of those warm fall tones here), I cannot recommend enough to wear the colors that you feel your best in! I love wearing black, so we’ve had several photos in blacks and grays. Keep in mind what colors look best with your skin tone and eye color. If you’re wearing pastel colors, make sure everyone in the photo is also in pastels. Do the same with warm and light color tones, too.
4. Styles
Sometimes I feel like all photos start to look the same. Adding in a trendy hat can change the feel of a photo! Fall Hat | Similar Style Sweater
If you’re like me, then you’re probably already up to date on the current styles and trends! I know that I prefer to be very trendy and wear the current styles of each season. But, sometimes keeping a more classic look for photos will pay off in the end since these trends are constantly changing! Ultimately, you should always wear what makes you feel your best, and be mindful of everyone’s style preferences in your group! And, can you continue wearing these outfits or pieces even after the trip or photoshoot?
For me, I think this is a personal choice. I tend to stick with solids for photoshoots with a photographer, but we wear prints and dress more casually when we’re taking photos on vacation. I try to envision the background when deciding on going with prints or solids! If the background is going to be busy, stick with solids. Often, my boys will wear solids and I’ll wear a matching colored top with print!
6. Background/Scenery
Continuing on with choosing solids, prints, and colors, you need to know what the background is going to be. Think about what colors will be in the photo and then plan your outfits based on the landscape and prints that will complement the background. Helpful tip, it’s better to stand out than blend in with your surroundings!
7. Printing & Framing
The colors in these photos go perfectly with our home decor!
This may sound crazy, but I also plan outfits based on what colors will go with our home décor. I love to print our family photos! But I want everything to match the aesthetic of our house.
8. Accessories
Oh geez, this necklace! Ha!!
This is a big one! Sometimes less is more. I cringe at some of my past photos and the accessories that I wore. Keep in mind that styles are constantly changing and those colorful, chunky necklaces and bracelets may not be “in” for long!
9. Be YOU!
Most importantly, be yourself! You are beautiful and your family is precious. No matter what outfits you go with, you are going to cherish these memories and these photos forever! Let your true style and personality shine!
More Outfit & Color Ideas
Below are more of our favorite color combos and coordinating outfits for your viewing pleasure! I hope these ideas and color schemes help you coordinate the perfect outfits for your next vacation or family photo shoot!
I love these paperbag shorts from Loft! I completed my outfit of tangerine shorts, a white top, Miller sandals and then added in khaki shorts for the boys with similar colored tops that matched my shorts!
While exploring the beaches in San Francisco, we all wore jeans and navy tops. My top is the only one with print.
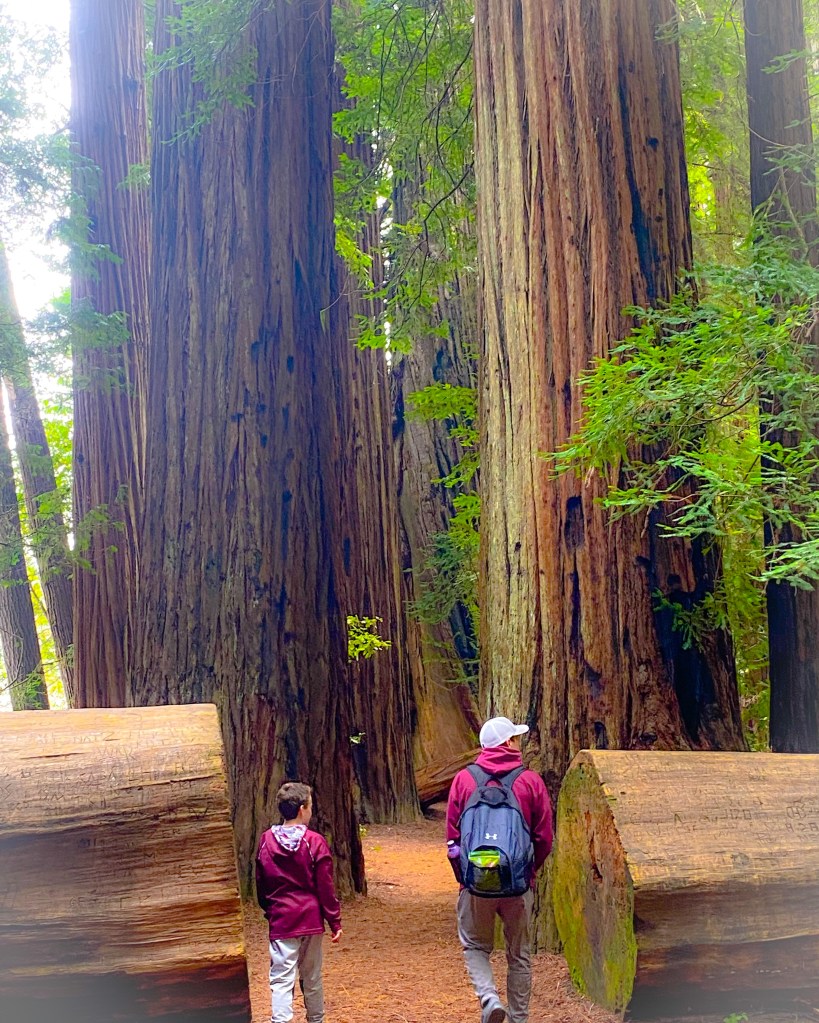
While exploring the Redwoods, we all wore maroon. It started with my top first, I love this print! I then completed my outfit with maroon hiking pants and a hat. From there, the boys wore different shades of gray hiking pants with maroon sweatshirts.
While hiking in Moab, we wore bright blue and black. I actually started coordinating these outfits with Jereme’s jacket first. Then I found matching hiking pants for me and the vests for the boys. Sometimes it’s easy to match a few pieces when you begin coordinating your outfits with things you already have in your closet!
I based the boy’s outfits on colors from this maxi dress. Each one is wearing a different color from the dress, but we all match very well together!
Other Important Tips & Recommendations:
Shoes matter, even on your kids! Make sure they’re clean and match the style of the outfits.
It’s perfectly fine to wear white after Labor Day.
Make sure that bra straps aren’t visible.
Don’t wear hair bands around your wrist, they can be really hard to Photoshop out!
You can’t go wrong in neutrals!
This is not, and I repeat NOT the time to cut your bangs, cut your hair off, or change your hair color just for family photos or an upcoming trip!
I love using Mixtiles to print our vacation photos!
I love using Smallwoods to print our professional family photos!
I hope you find some of these outfit examples and tips helpful! If you have any questions, please don’t hesitate to reach out.
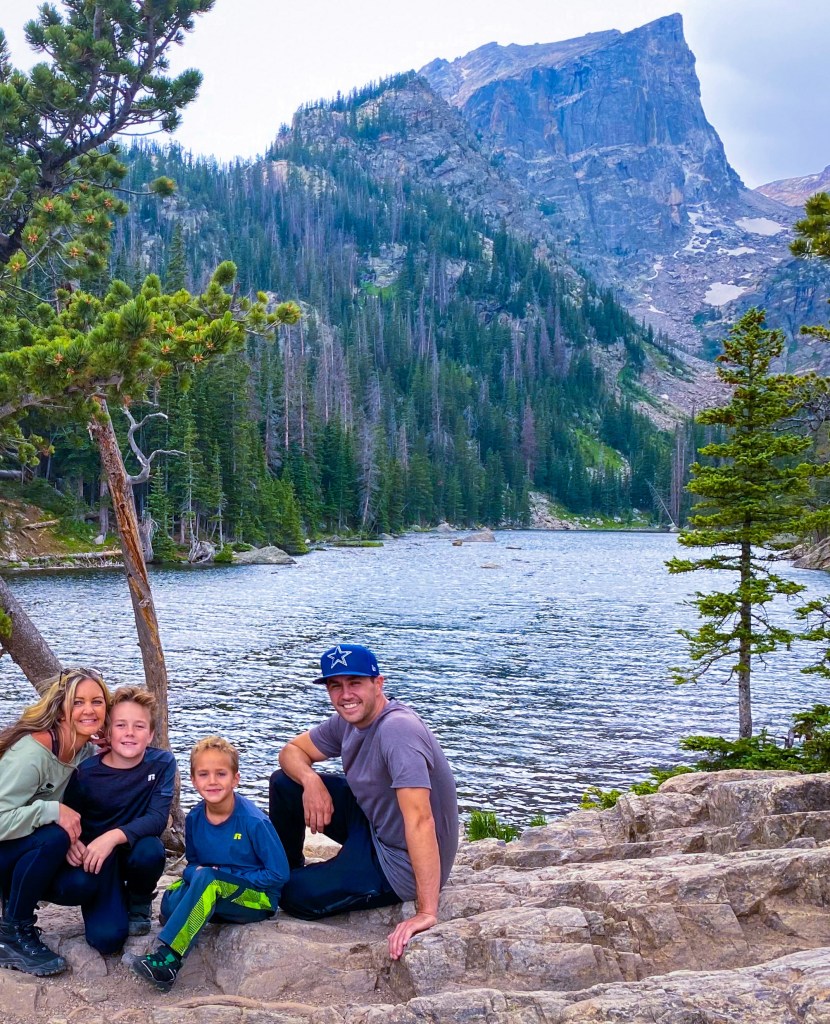
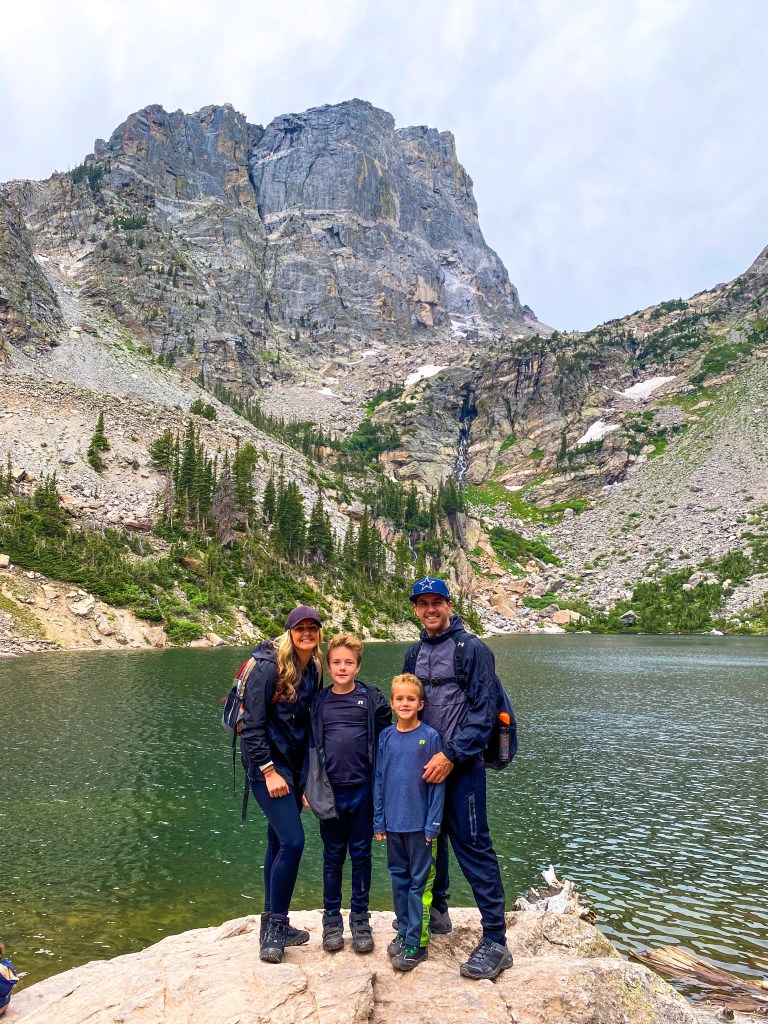
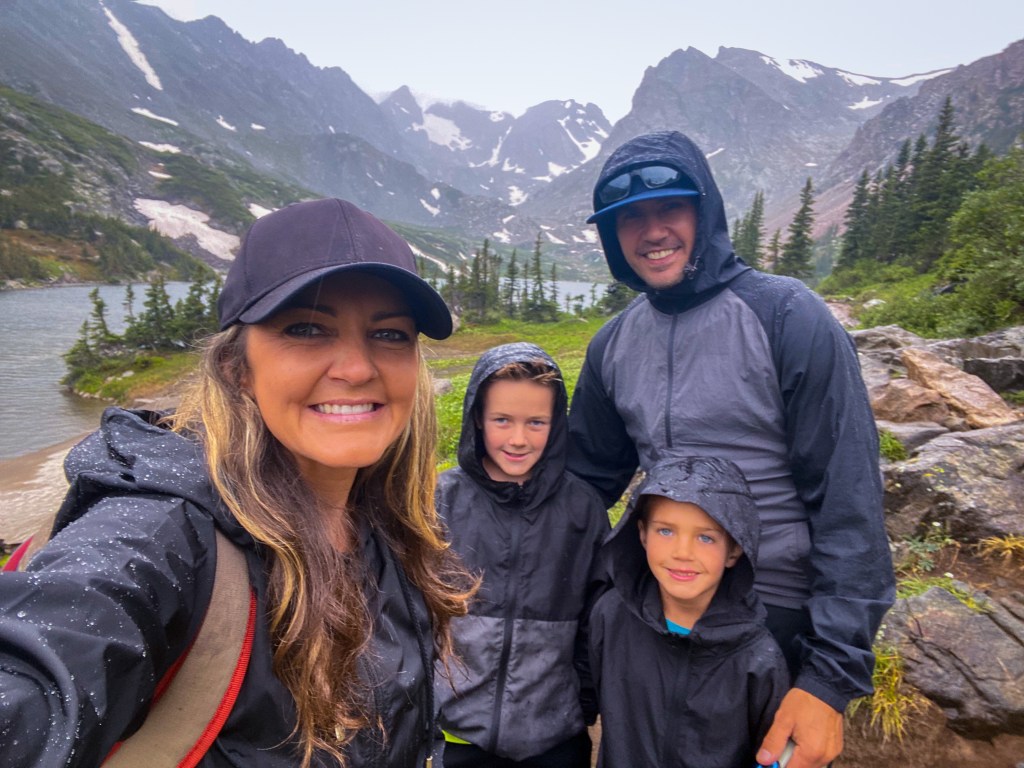
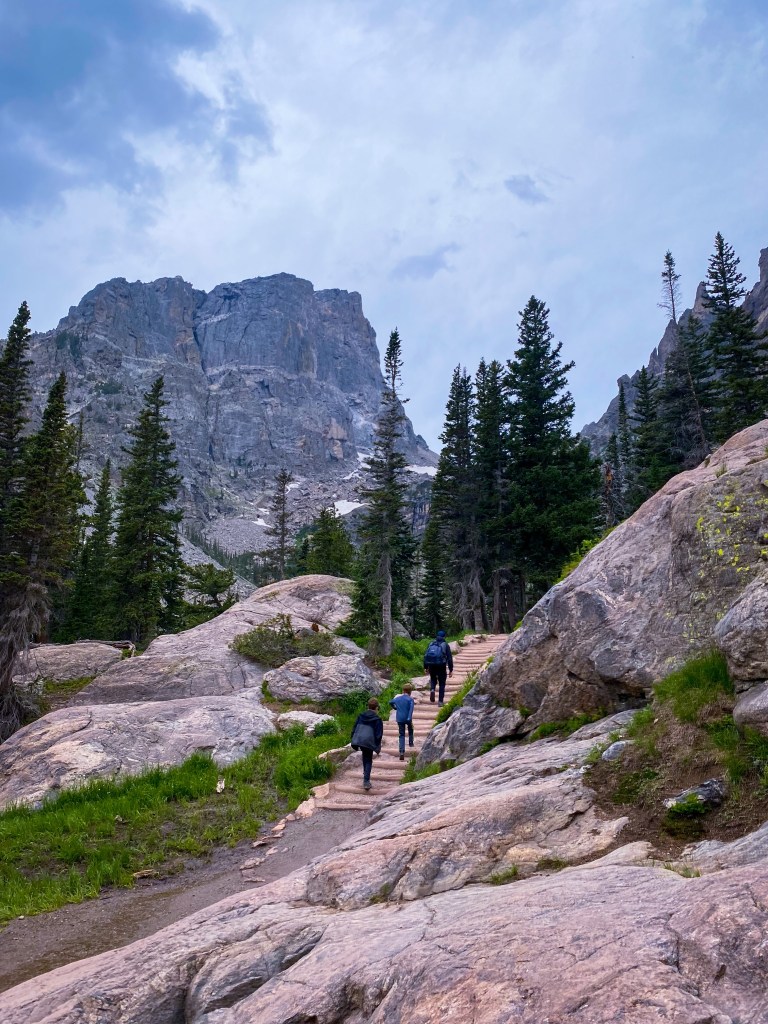
Rocky Mountain National Park is one of my favorite Parks in the whole country! There’s just something about Colorado that fills my soul with peace. So, taking my boys to Rocky Mountain National Park was very high on my adventure list.
Before we visited RMNP, my boys had only done a few hikes here and there. This Park actually created a new love of hiking for our entire family. I wasn’t really sure what to expect, but I wanted to see picturesque scenery and I wanted some beautiful family photos of our adventures! We got all of that and more, so keep reading below to learn about the best hiking trails in Rocky Mountain National Park for kids!
Most of our favorite trails are in the Bear Lake Corridor, I’ll touch on this more below.
If I only had one day in the Park, the next three hikes would be on my list!
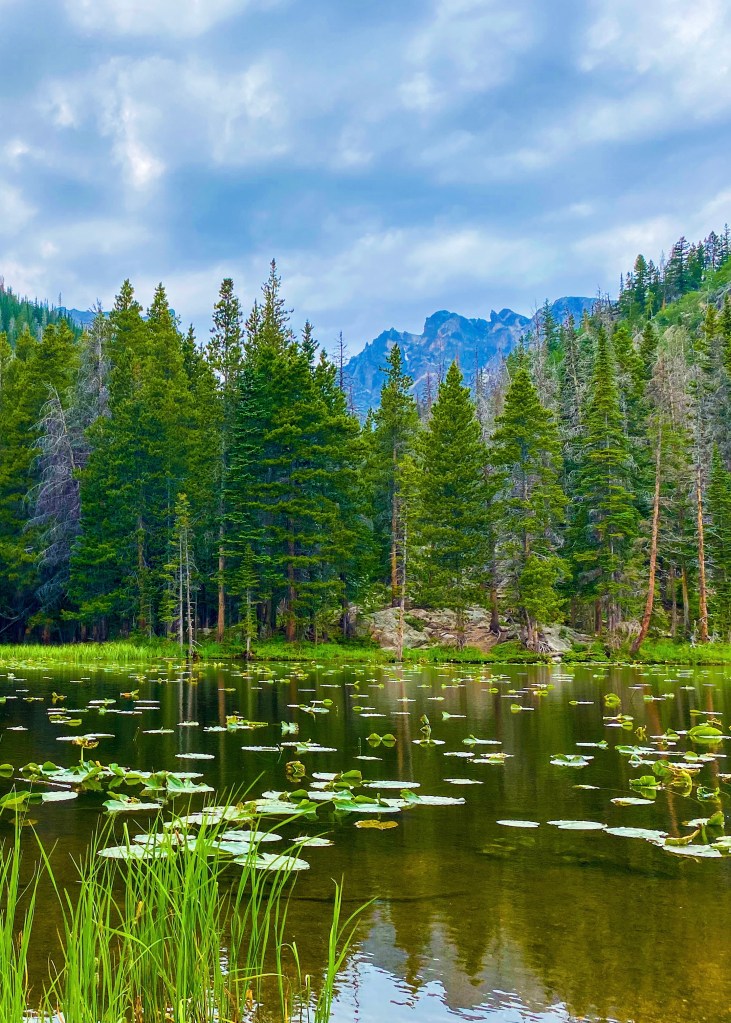
Nymph Lake
Nymph Lake – To access this hike, the trailhead starts at Bear Lake. This trail is only about a one mile out & back hike and is generally considered a fairly easy route. The Lilly pads were our favorite feature at this lake! If you keep going along this trail around the lake, you will end up at Dream Lake, which is my next favorite stop in RMNP!
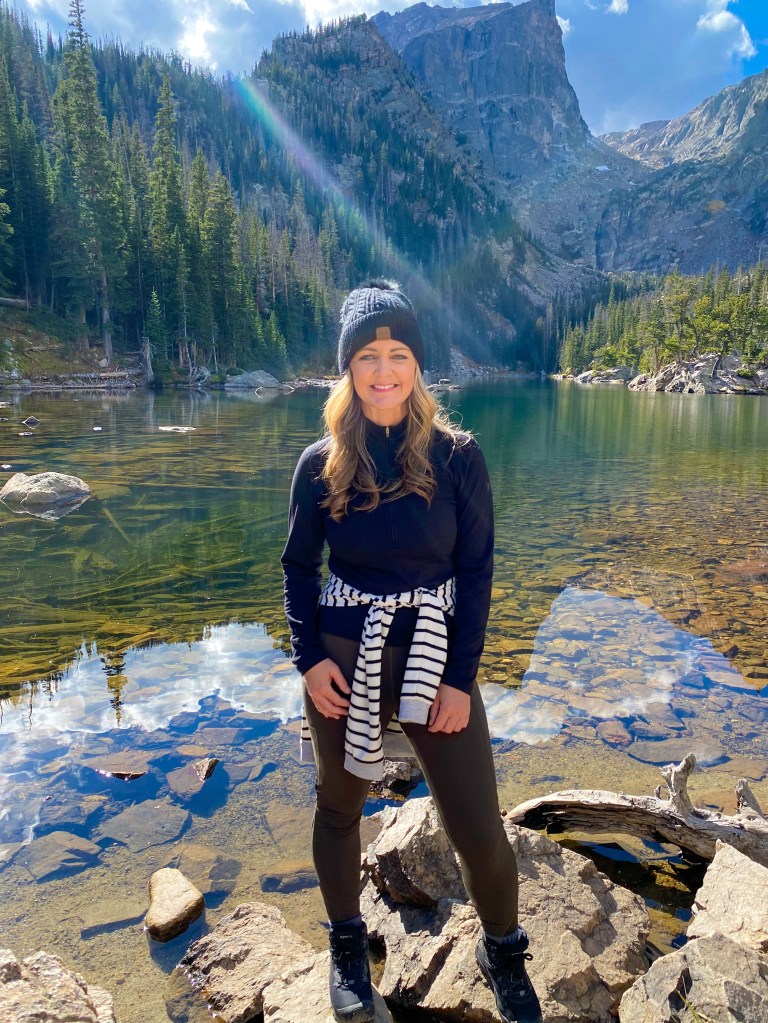
Dream Lake
Dream Lake – Dream Lake truly is a dream! It’s close to a mile past Nymph Lake, so a total of 1.9 miles out & back from the trailhead at Bear Lake. There are a lot of flat rocks around the lake, so we found a spot and had some snacks and a quick rest before venturing on to Emerald Lake, which is breathtaking!
The trail to Emerald Lake
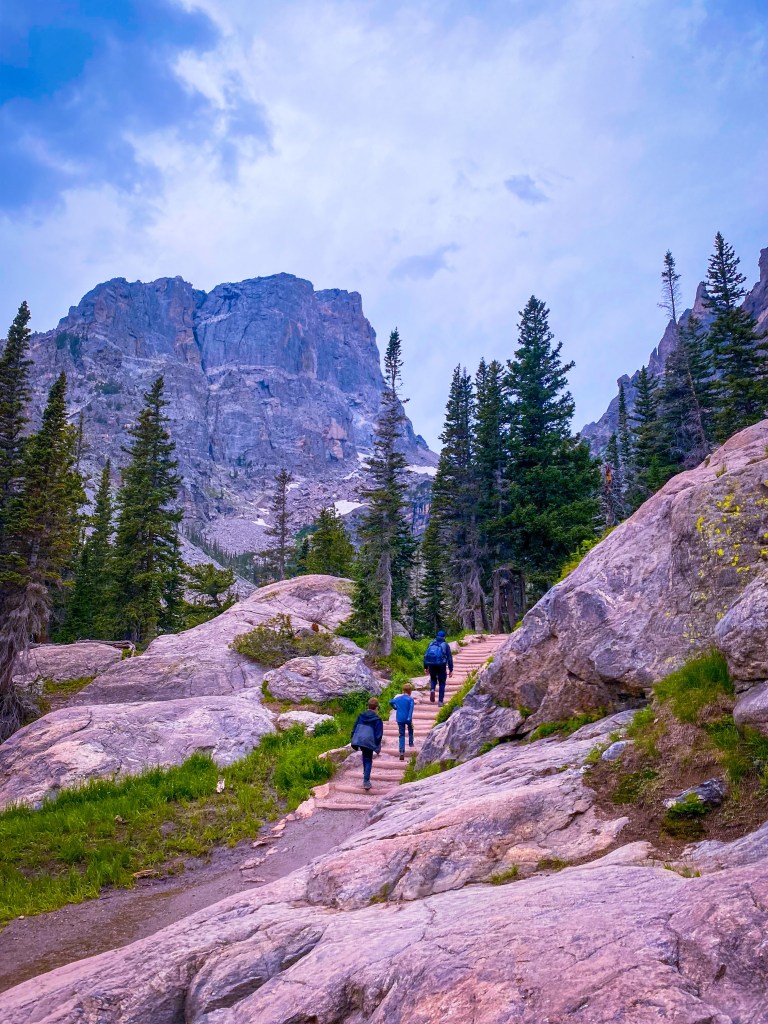
Emerald Lake – This trail is the absolute best! It’s about three miles out & back from the trailhead at Bear Lake. If you plan to make this hike, you will see Nymph Lake and Dream Lake along the way! We actually combined all three of these trails into one day of hiking and it only took us about 3.5 hours to complete! I would rate this entire three mile trail as moderate, but it was definitely easy enough for my boys to hike without complaining! The views along the entire way are absolutely amazing!
Emerald Lake
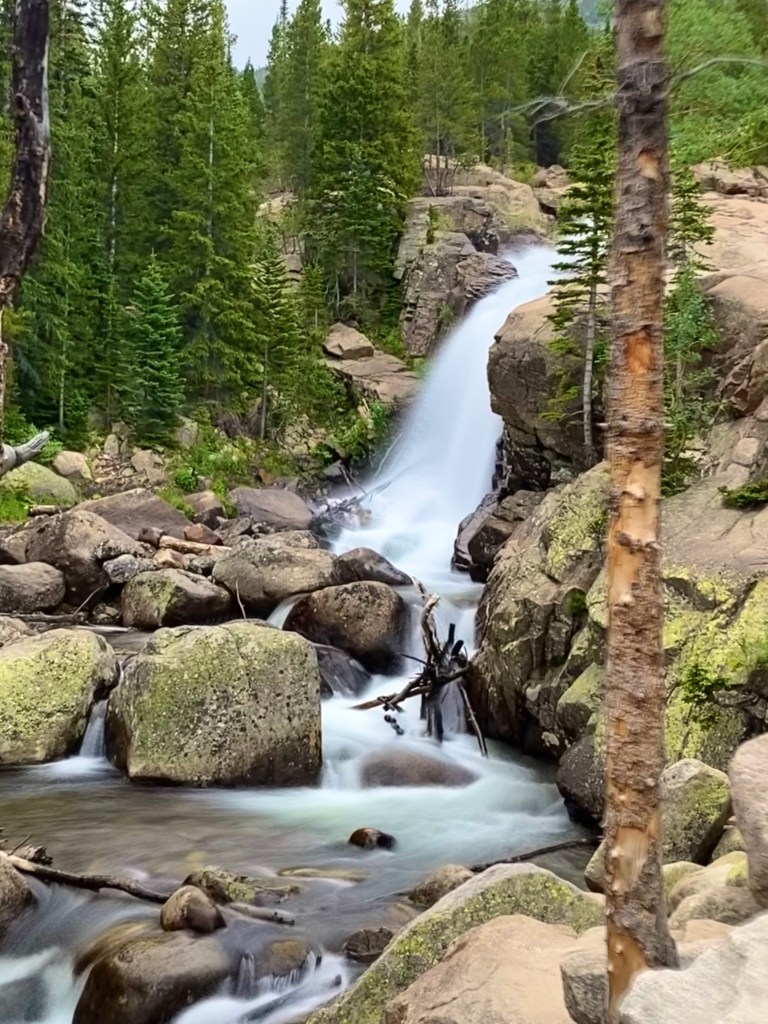
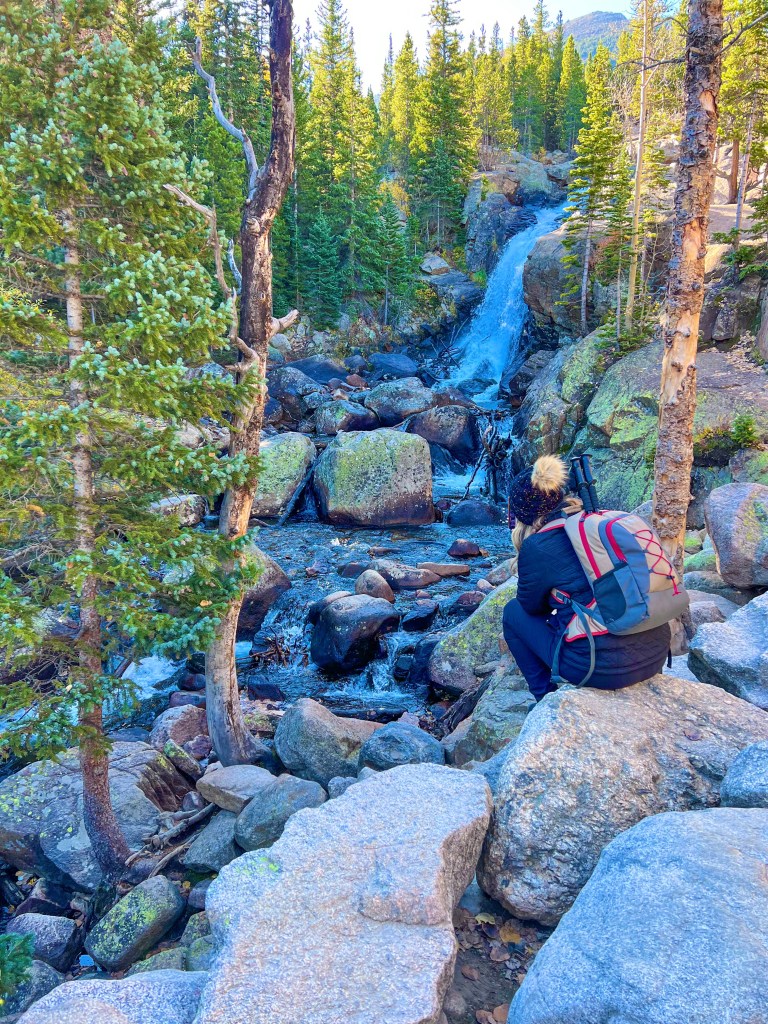
Alberta Falls
Alberta Falls – Alberta Falls is a beautiful hike to a beautiful waterfall! You definitely don’t want to miss this one. The trail to the falls is 1.6 miles out & back and only takes about an hour or so. It’s a little harder on the way back in than on the way out. My boys not only loved the waterfall, but they loved all the chipmunks in the area around the falls. This one also starts in the Bear Lake Corridor. We hiked the first three trails (Nymph, Dream, and Emerald Lakes) on our first day in the Park and then hiked Alberta Falls on the second day. I’m not sure my boys could’ve combined all four trails into one day but it is an option if you have limited time here!
This is a great place to stop, rest, take in the falls, & have a picnic!
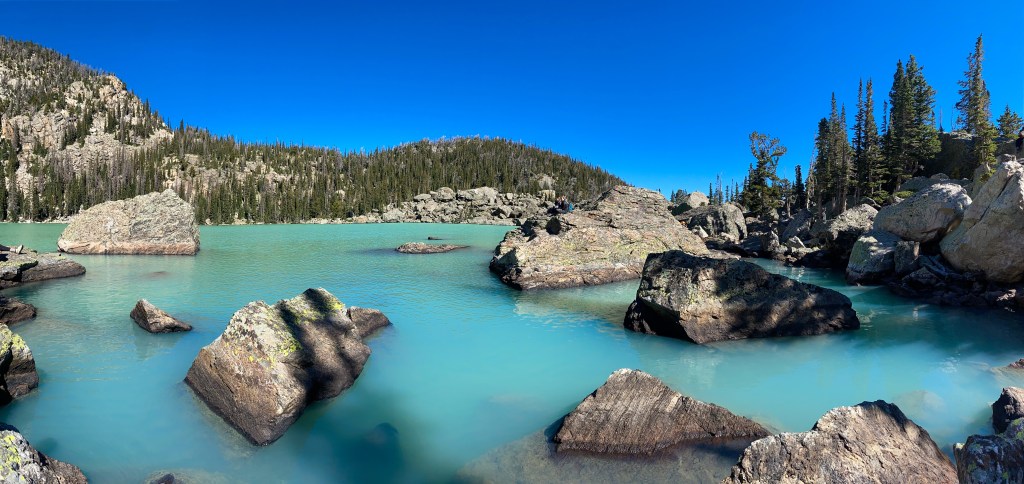
Lake Haiyaha – This is probably the most gorgeous lake I’ve ever seen in person, but the trail to get to it is super tough. It’s about two miles of walking up a mountain and then scrambling over large boulders to reach the water. The total trail is about 4 miles out & back and is considered a challenging hike. Currently, the water is this amazing shade of blue caused by a recent rock slide last summer! If your kids can handle getting to the top and like climbing on rocks, then you should go for it! The hike back down is very easy since it’s all downhill!
Lake Haiyaha
Easier Trails in RNMP
Sprague Lake around 4:45 pm in July
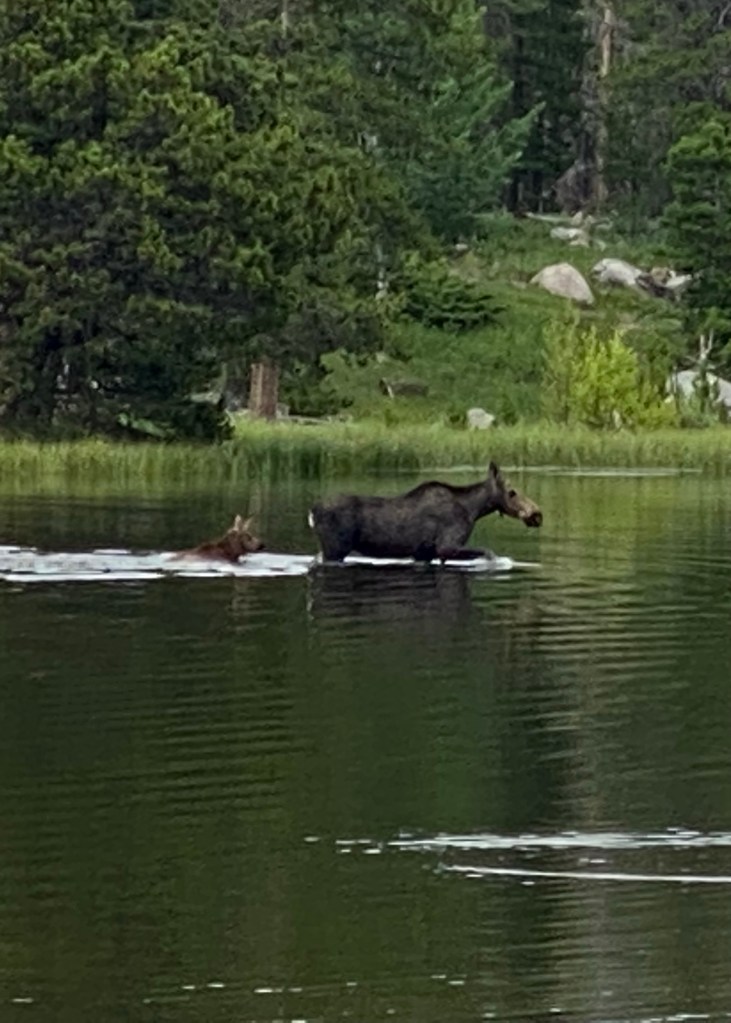
Sprague Lake Loop – If you want the chance to see a moose, then be sure to add a visit to Sprague Lake to your day! This is the easiest trail, it’s more of a loop around the lake. It’s on flat ground and is less than a mile. There’s even benches and different areas to sit down and take in the landscape! We arrived right around 4:30 and saw a moose and her baby within fifteen minutes! It was the highlight of the trip for sure! We hiked to Alberta Falls first and then ended our day at Sprague Lake. This area is also a great place to watch the sunrise or sunset!
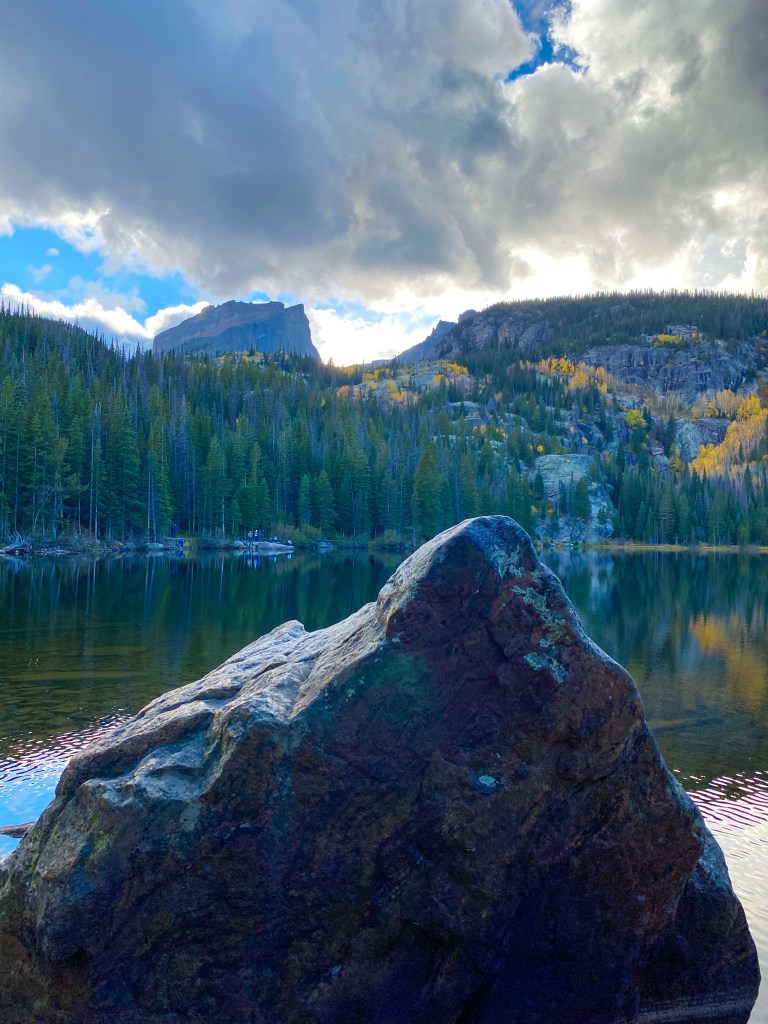
Bear Lake
Bear Lake – This is the first lake you will encounter on the trails at Bear Lake. It’s also an easy loop around the lake and is less than a mile around. We only spent about fifteen minutes here before hiking on to Emerald Lake. If you want to see beautiful scenery without much hiking, then this is the place to be!
Colorado River Trail
Colorado River Trail – This is one of the only trails that we hiked that wasn’t in the Bear Lake Corridor. We definitely prefer the Bear Lake area, but if you’re unable to get a permit to enter (more info. below), then I suggest driving along Trail Ridge Road and then hiking this trail! The entire loop is about 4.2 miles, but we only hiked about half of that before turning around. The part we did was very easy and flat. The boys liked walking across the river on downed trees and we saw a lot of cool animal tracks in the mud here!
Rocky Mountain National Park now requires a timed-entry permit to enter the Park from May 26, 2023 through October 22, 2023. Always check out the NPS websites, which include valuable information, closures, webcams, etc. There are two separate areas of the Park, Bear Lake Corridor and “the rest of the Park”. Kind of confusing right, especially for first-timers! So, hopefully I can break this down for you in an easier way. Timed-entry permits are available on the first of the month for the following month, so I got our permits on June 1st for our July trip. They are $2 for each day that you want to enter, plus you have to pay the park entrance fee once at the gate & I believe this is $35 for the week. The Park only releases a certain amount of permits each day and hold a couple hundred that go live at 5:00 pm for the following day. So, for example, if I wanted tickets for July 15th I could go online (on the Park’s website) on July 14th at 5:00 pm and TRY to get tickets for the following day. But these tickets go fast, so you need to be online and logged in to your account for a quick purchase. Click here for the website to get your timed-entry permit! Bear Lake Corridor is the area of the Park that we enjoyed the most. I highly suggest getting your timed-entry reservations for this area as soon as they are released!
There are a couple of different entrances to get into the Park, we always used the Beaver Meadows entrance coming in from Estes Park, it is very close to the Bear Lake Corridor Entrance. You will need timed-entry permits for all entrances. When you enter here, you can drive along Trail Ridge Road from one end of the park to another, roughly 45 miles I believe. The views are stunning and there are several different areas to pull over and park to check out views or hike trails. You can get a Park map at the entrance and everything is nicely marked off with signs. I highly recommend driving this road at least once on your visit! We found so many neat places to stop for photos and some really great trails with short hikes! Make sure you have a full tank of gas if you plan to drive this road!
If you have any questions about visiting RMNP, please don’t hesitate to reach out! I am happy to help you plan an epic adventure, just leave a comment and I will get back to you!
Have you found yourself wanting to explore more of the great outdoors, but you aren’t sure where to start? I was in the exact same place as you just a few years ago! Now, I’m so much more confident when it comes to planning epic hiking trips and we’ve clocked over 85 miles of hiking over the past year alone! Keep reading to discover how I find the best trails and learn more about the hiking essentials we never leave behind!
Emerald Lake Trail in Rocky Mountain National Park, about 3 miles out & back.
Hiking Trails
Are you capable of making the climb on this trail?
Tips for Finding the Right Hiking Trails
Finding the best hiking trails for you and your family involves some planning ahead. You definitely need to assess your abilities and should never choose a trail that is too challenging or too long. I highly recommend starting out with shorter hikes first, especially if there will be any elevation changes.
Most trails are very well marked!
When we first started hiking, I wasn’t really sure where to go. I looked on Pinterest, read other blogs, and followed hikers on Instagram for inspiration. This led us to hiking in different National and State Parks across the country! If you aren’t sure where to start, then look into hiking at the closest National or State Park near you. These Parks are pretty remarkable, which is why the land has been protected for all of us to enjoy. Most of these Parks have trails for just about any skill level and the trailheads are well marked. Plus, you can chat with the Park Rangers stationed at most of the popular trailheads for more tips and guidance!
The AllTrails app logo
I exclusively use the app AllTrails to help find the best hiking trails for my family once we’ve chosen our destination. Jereme and I are able to hike more strenuous and longer trails, but our kids are not quite there yet. When all of us are hiking, we choose trails that range from one to three miles and are rated as easy or moderate. I really like using this app because it includes detailed information about the trail, photos from other hikers, driving directions to the trailhead, and even a map so you won’t get lost while you’re hiking!
This is an example of the information about a trail in the AllTrails app!
Permits
When you decide on your destination, I recommend checking out their website for any permits you might need to park or enter the trailhead. Several places, including some National Parks, require timed-entry permits during the peak summer months. Others require you to pre-purchase a parking pass. So, always visit the website to learn more about where you’re going and to ensure that you are prepared for your visit!
What to Pack
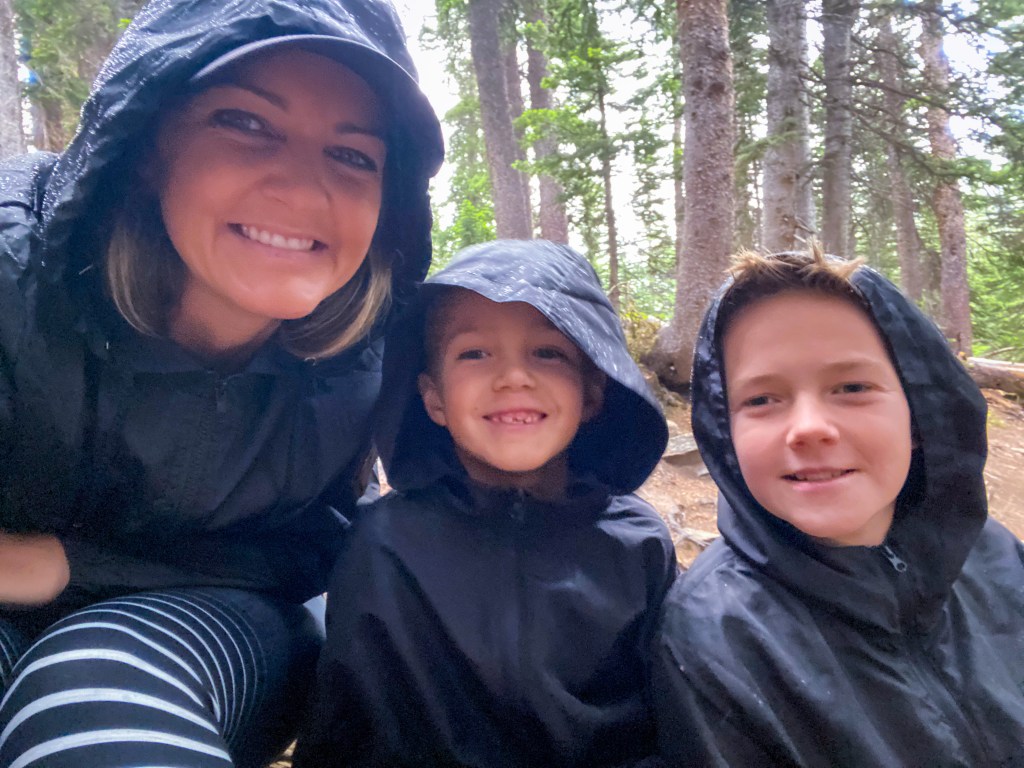
Glad we had our raincoats on this trail!
Adult Hiking Gear
The following affiliate links are products that we actually have and love! I may earn a small commission, at no extra charge to you, if you purchase any of these items using the links provided. Thank you!
Having the right gear is also essential when you’re hiking. We don’t have much, but what we do have really makes a huge difference in how enjoyable our hiking trips are.
Hiking Boots – I cannot stress the importance of hiking boots enough! Make sure that you purchase a pair that are waterproof and sturdy around your ankles. Another important tip is to break these hiking boots in before you hit the trails to prevent blisters!
Hiking Poles – Jereme really enjoys hiking with poles. I feel like they get in my way, but that might be because I’m always trying to take photos while we’re hiking.
Large Hiking Back Pack– Jereme carries a larger hiking back pack that holds more items, like raincoats, a towel, and my camera stand.
Cooler Back Pack– I carry a smaller hiking backpack that holds plenty of food, snacks and water along with the first aid kit.
Layers – You can hike in just about clothing, but we try to stick with layers. Often, we will start hiking early in the morning and it can be quiet chilly, so we bring along sweatshirts, gloves, and hats.
I have found that making sure that my boys have the right gear is also extremely important in ensuring that the day goes smoothly. All bets are off if they get cold, wet, and miserable! Below are the things that I make sure my kiddos have before we leave for a hike!
Kids Hiking Boots – My boys love to explore and climb and these hiking boots have done the job! They’re also waterproof, which has been amazing since they love splashing in water.
Dry Fit Clothes – I like to have the boys in dry fit clothing, just in case it rains or they decide to get into water along the trails.
Gloves – I always pack thin gloves when we go hiking. We got really cold one summer hiking in the mountains in Colorado. Sometimes at the top of a mountain, or when a pop-up rain shower happens, it gets cold quick!
Raincoats – We always bring our raincoats, too. We don’t let a little rain stop our fun!
Kids Hiking Poles – The boys really like hiking with these hiking poles and have said that they are actually helpful when they are tired and have to walk up and downhill.
Cooling Bandanas – This was also a great purchase a few years ago! The boys love bringing these along on summer hikes. We usually put them in the freezer the night before we hike and they stay pretty cold!
I really try not to weigh our hiking back packs down with too much, but there are several things that everyone should bring along with them when hiking. This is what we pack in our back packs before we hit the trails!
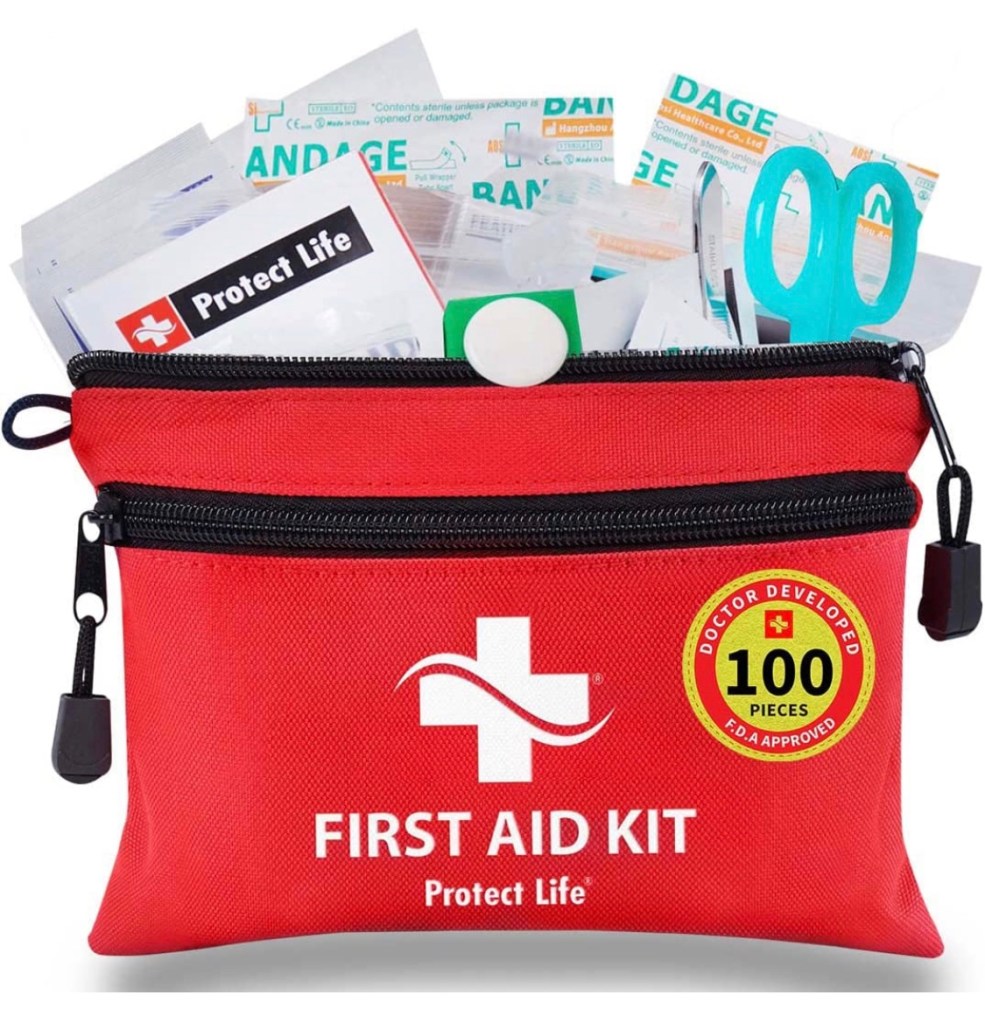
First Aid Kit– This is another must have! It never fails, my oldest always end up with a cut, scrape, or splinter on our hikes. This travel first aid kit goes along with us on hikes, road trips, and even to the beach!
Bug Spray – If you’re going to hike in the forest, or really anywhere outdoors, then don’t forget to pack the bug spray! You’ll thank me later!
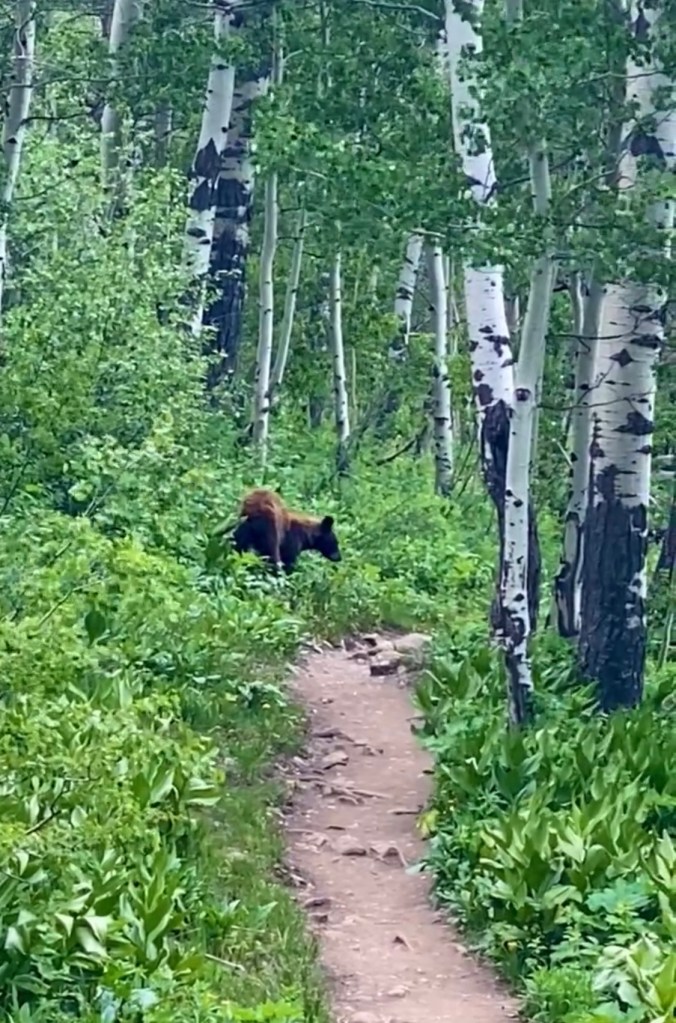
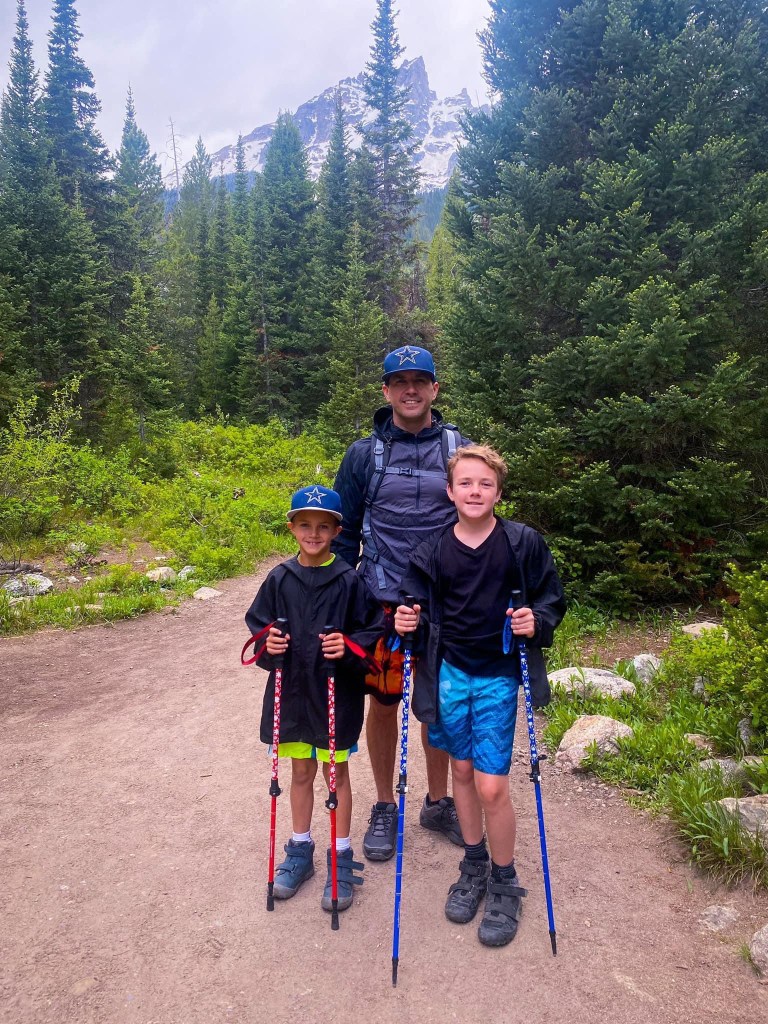
Bear Spray– We had our first bear encounter last summer in Grand Teton National Park! It was amazing to see a bear in nature, but a little scary at the same time. We felt a lot more secure having bear spray with us! Remember to open the bear spray and clip it somewhere with easy access instead of packing in your back pack!
Sunscreen – It’s so important to pack the sunscreen, no matter the season or temps!
Binoculars – We love taking along our binoculars! Sometimes the boys get a little bored during certain parts of a hike, so having these on hand is useful for many different reasons!
Cell Phone – I take along my cell phone for photos, but also in case of emergencies and to have a map/GPS. I suggest bringing it along at all times in case you need to call emergency services for assistance on the trails.
Camera Stand– Obviously not everyone will want to bring a camera stand along, but I don’t go many places without mine since I use it for our family photos! The one I have even fits in my smaller hiking back pack and isn’t too heavy to hike with!
Biodegradable Wet Wipes– I won’t mention any names, but my little one always has to use the bathroom when we’re hiking! These wipes really come in handy when nature calls!
Extra Cell Phone Battery Pack– Don’t forget an extra battery pack! My phone dies quick as it is, but especially when I’m taking photos and videos and using the GPS.
Head Lamps– I am so happy that we purchased these headlamps a few years ago! So far, we’ve used them for sunset/sunrise hikes, crabbing at the beach, and also at Carlsbad Caverns!
In the Car
My boys will find any water to play in, which is why I recommend bringing towels & dry clothes!
National Park Pass– While not every hike will be in a National Park, you might be surprised at how many places will accept a NP Pass for parking! I keep mine in the car at all times!
Towels – I highly recommend taking some towels with you just in case you’re caught in rain, take a dip in a water source, or get muddy on the trails!
Change of clothes – A change of clothes, including dry socks, is also highly recommended. Most trailheads have restrooms, but we’ve also been known to change in the car!
Dry shoes – We like to take off our hiking boots when the hike is over. Sometimes they’re wet, dirty, and sweaty. The boys like to throw on their crocks when we get in the car.
Phone Chargers – Make sure you have your car charger, especially if you don’t have an extra battery pack.
Battery Charger/Jumper Cables– We travel with a battery charger/jumper cables just in case of car trouble! I highly recommend, especially since most trails are off the beaten path.
Leave No Trace Principles
So thankful I found this new love for hiking!
When hiking or recreating outdoors, always be sure to follow the seven Leave No Trace Principles.
We have seen some of the most stunning landscapes and wildlife on our hiking adventures! The memories we’ve made along the trails are some that I will cherish forever. If you’ve been hesitant to plan a hiking trip, I hope this information helps! While hiking is not for everyone, hitting the trails and getting in some exercise and fresh air is never a bad idea. If you have any questions for me, please don’t hesitate to a leave a comment. Travel safe, my friends!
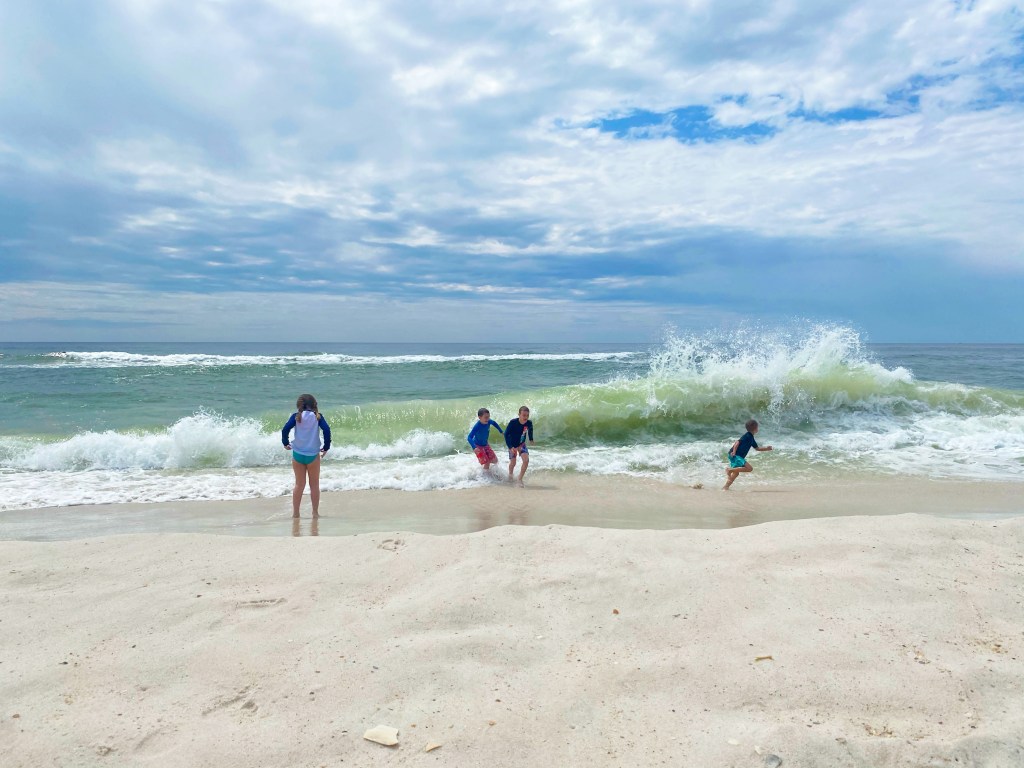
There’s nothing like a trip to the beach, especially for a busy family! While we love adventuring, hiking, and exploring, it’s sometimes really nice to plan a low-key vacation to a beautiful destination. And then, when you get to that beautiful destination, it’s perfectly alright to do absolutely nothing except enjoy where you are and who you’re with! I think that’s why we love going to the beach. It never involves too much planning and we usually return feeling relaxed and rejuvenated. I’m including some of our favorite beach destinations, both in the US and south of the border. This doesn’t cover every beach we’ve visited, but it’s a nice start if you’re getting ready to plan a trip to the beach!
United States
The US has some fantastic beach destinations, some more unique than others! I am fascinated with the different landscapes from coast to coast. Below are just a few of our favorite beaches in the United States and why we love them!
Orange Beach, Alabama
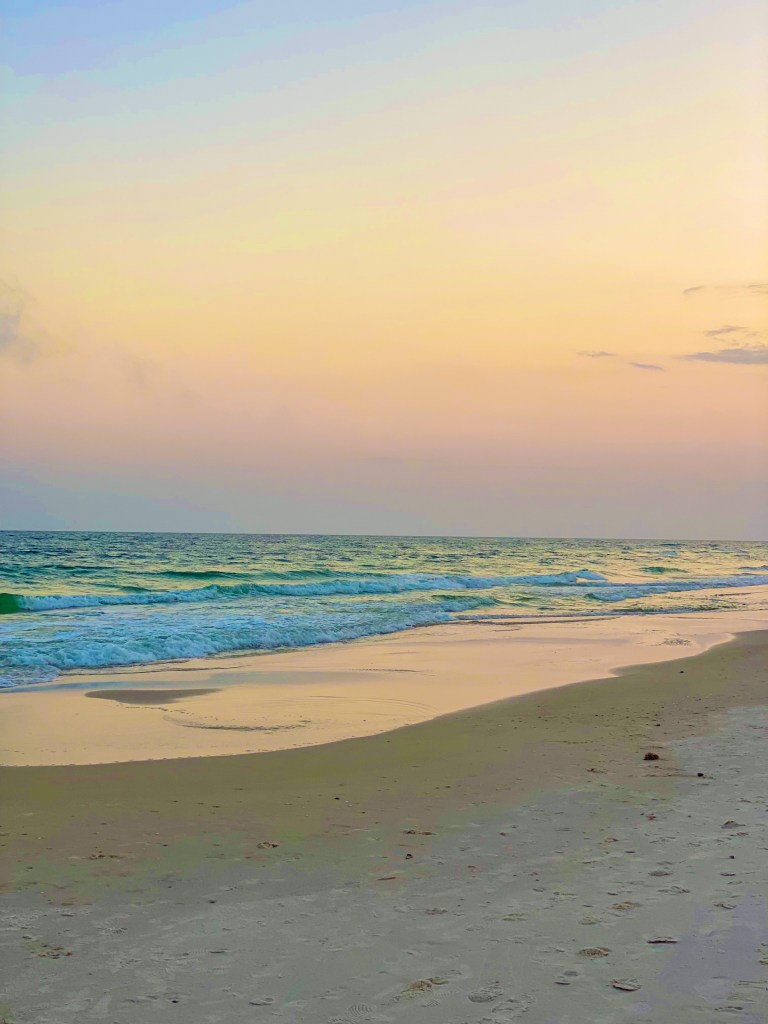
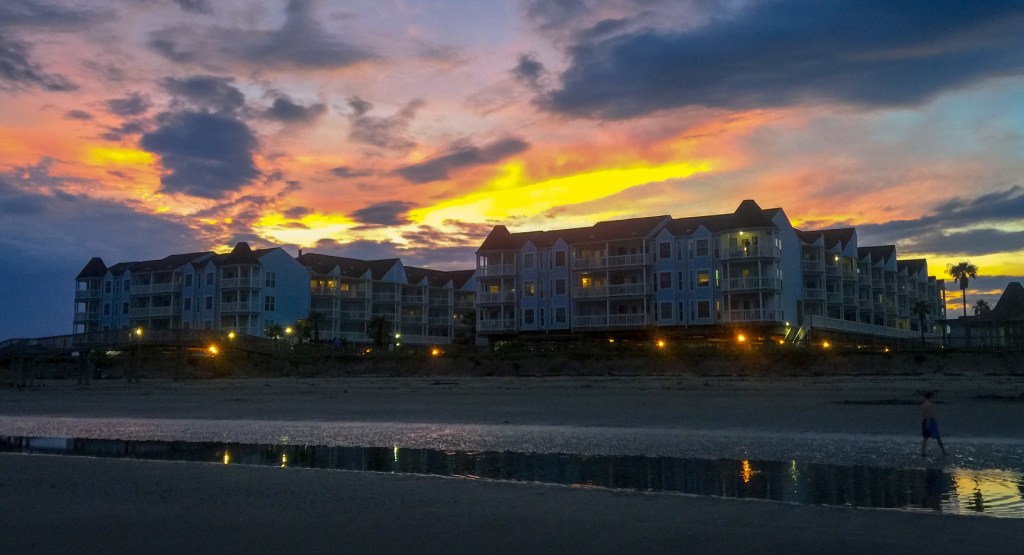
Beautiful beach sunset
This is our most recent beach vacation, and even though we’ve been traveling to Orange Beach for over twelve years now, we still enjoy each and every visit! This is one of those places that has beautiful white sands, emerald waters, delicious food, and isn’t very crowded if you plan your trip out right! The past two visits to Orange Beach have been in March and April and the crowds were basically non-existent. It looks a little different during those peak summer months, though. We love Orange Beach because we keep it super low-key and chill. You can find us hanging out at the beach, boogie boarding on the waves, warming up in the hot tub, and trying new seafood restaurants each evening. The boys love that we start each day with no major plans!
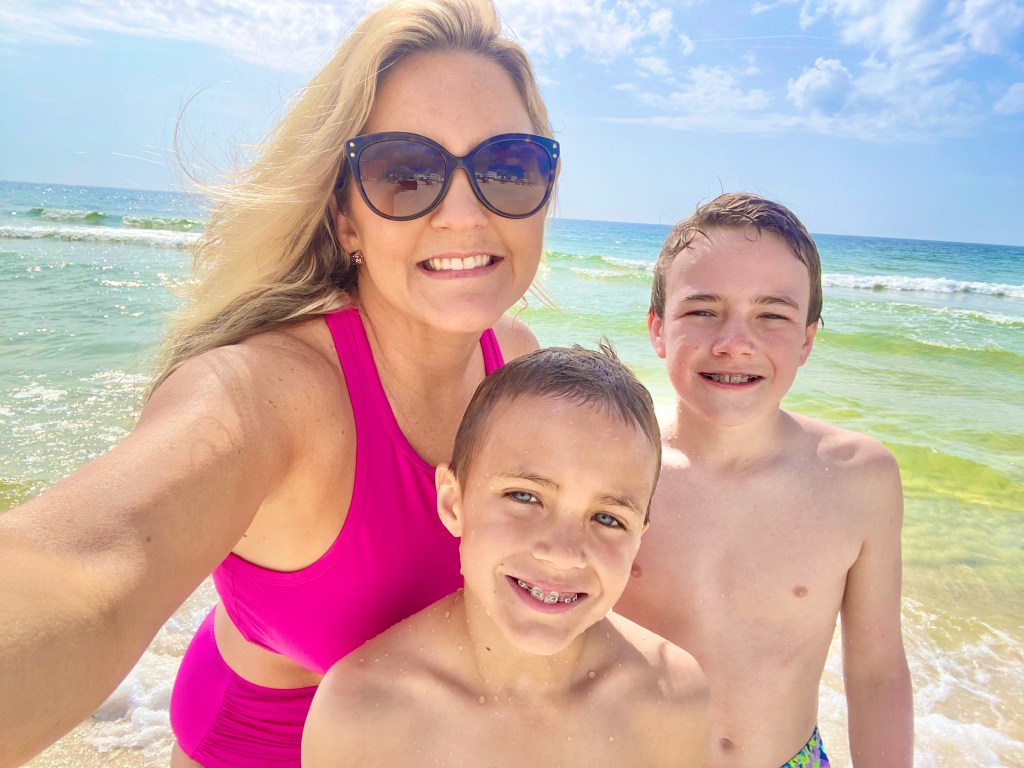
My favorite boys at one of our favorite places!
Those waves though!
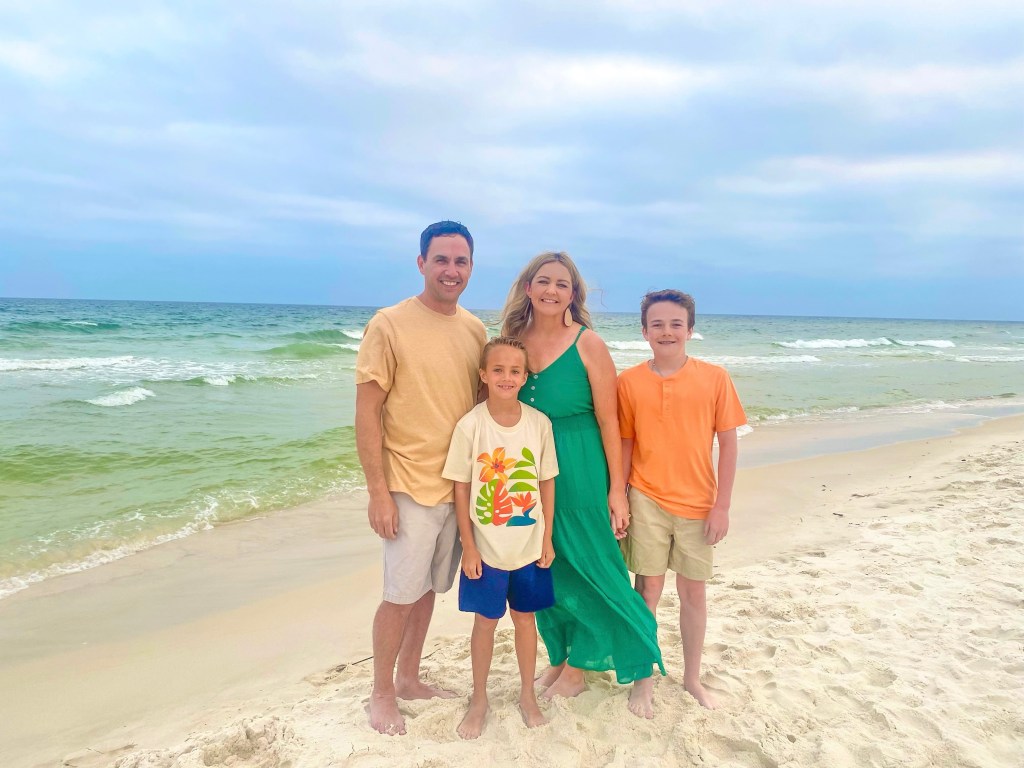
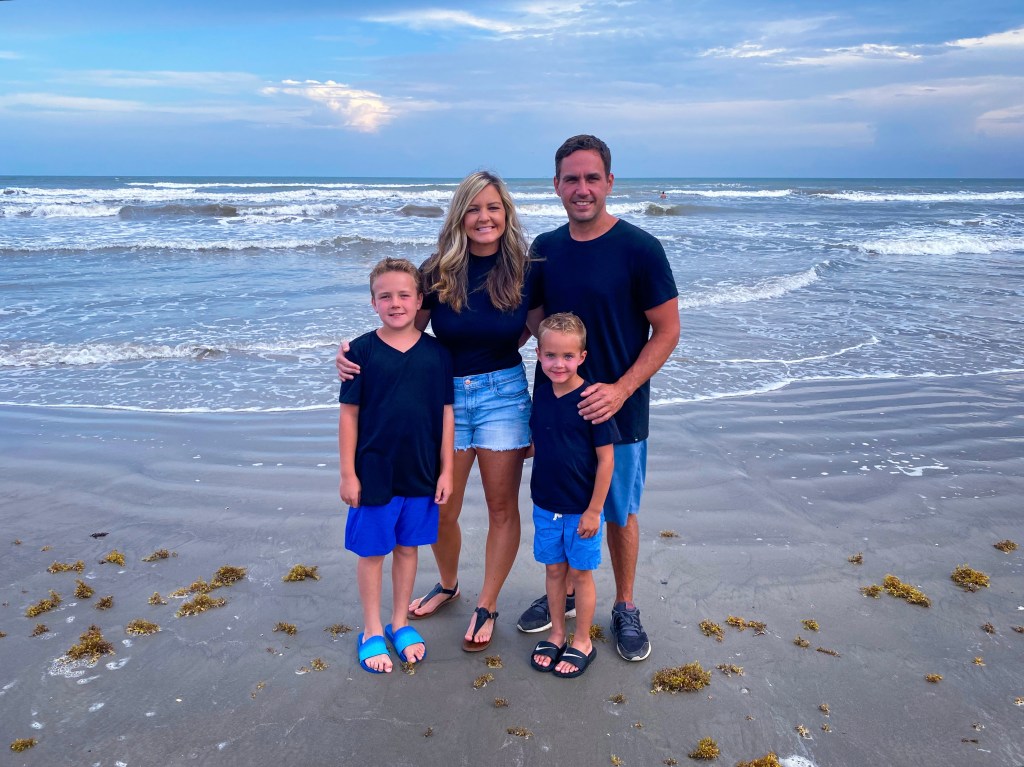
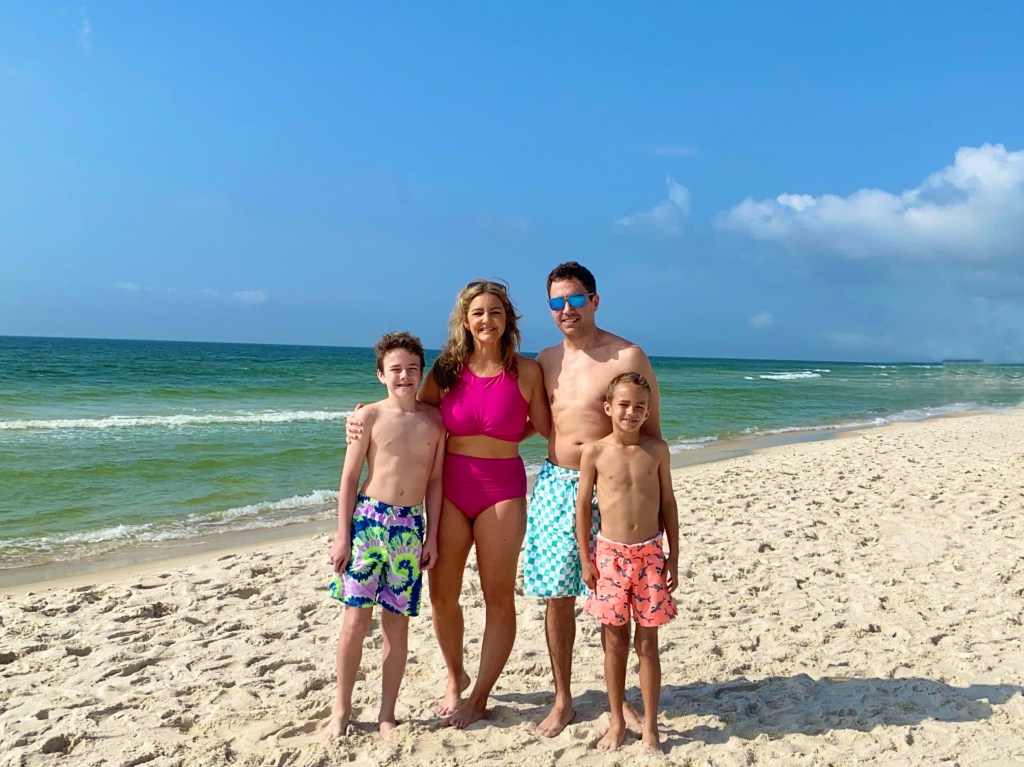
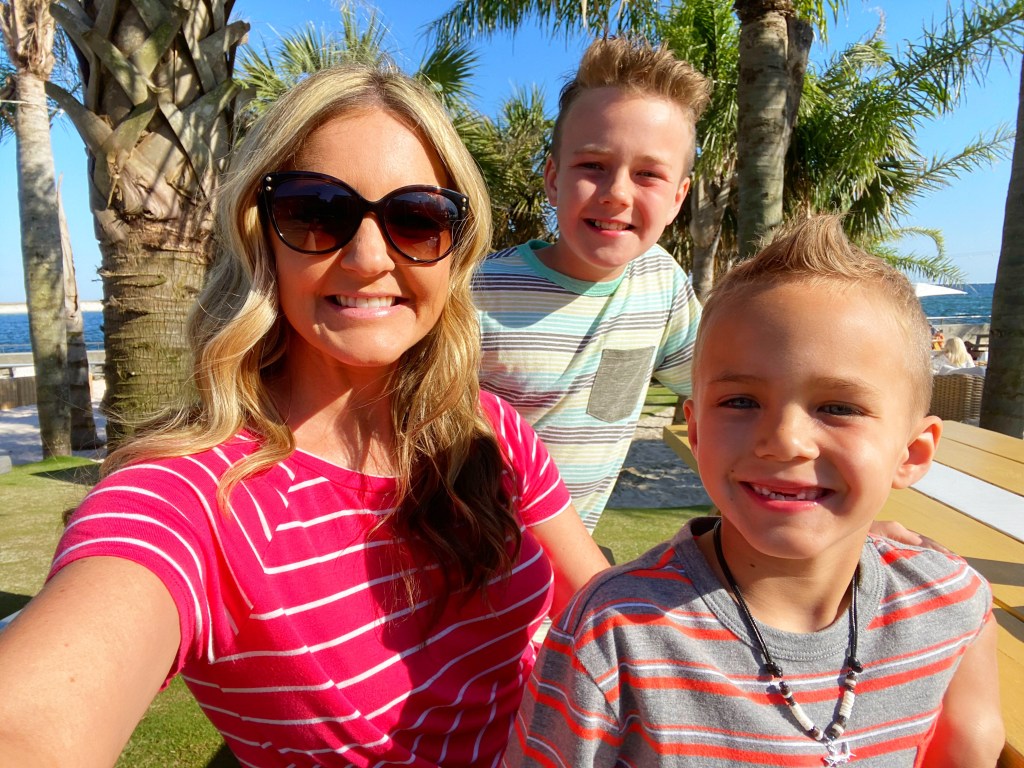
Our most recent family photo, Orange Beach 2023.
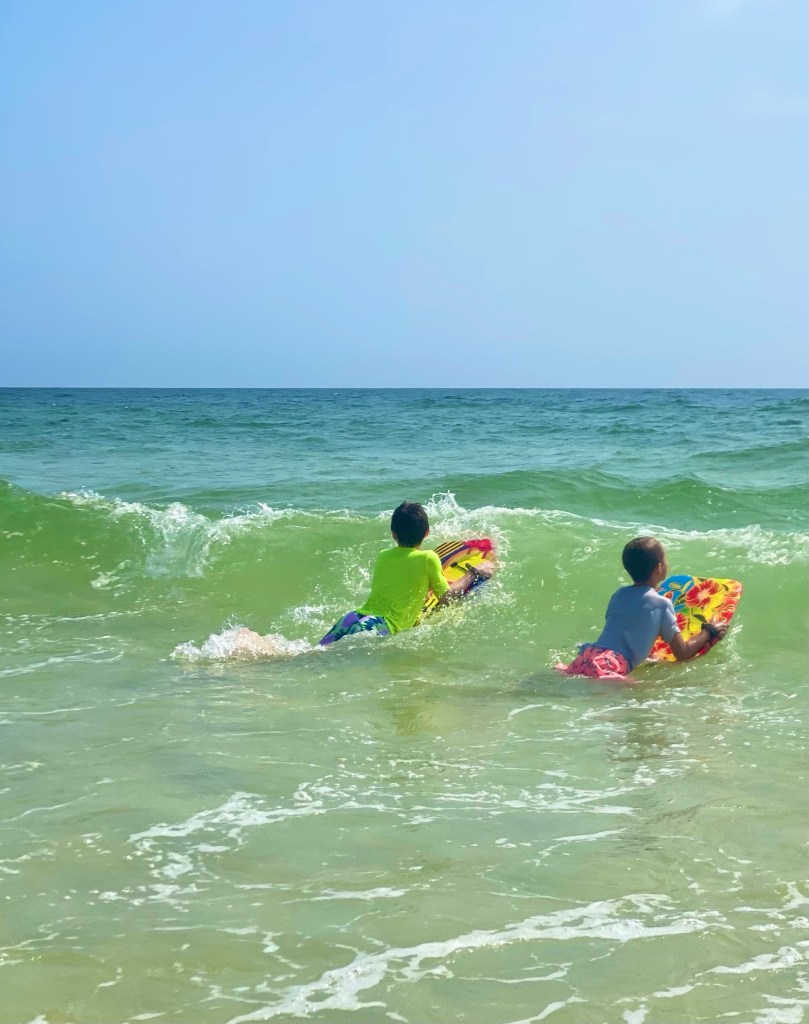
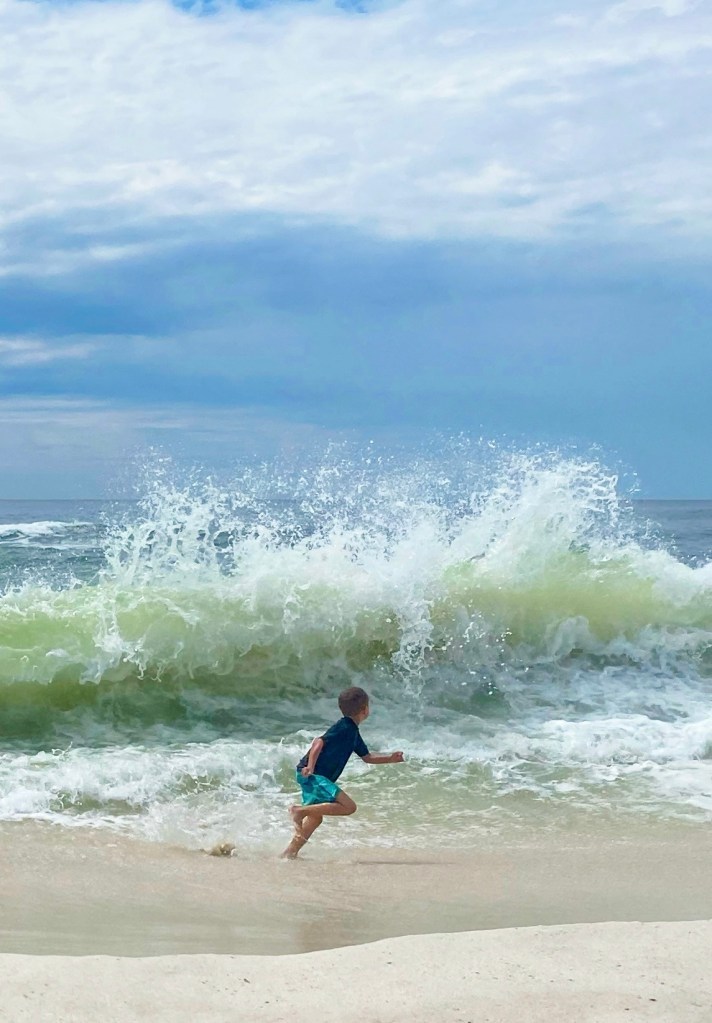
These boys stayed in the ocean for basically three days straight!
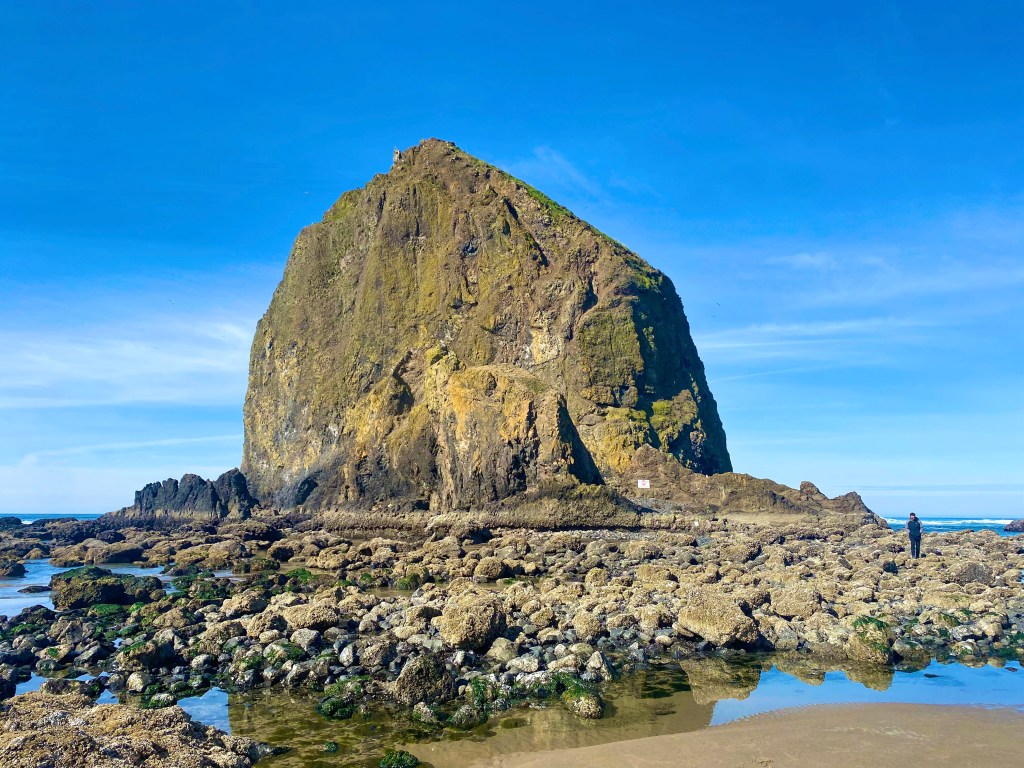
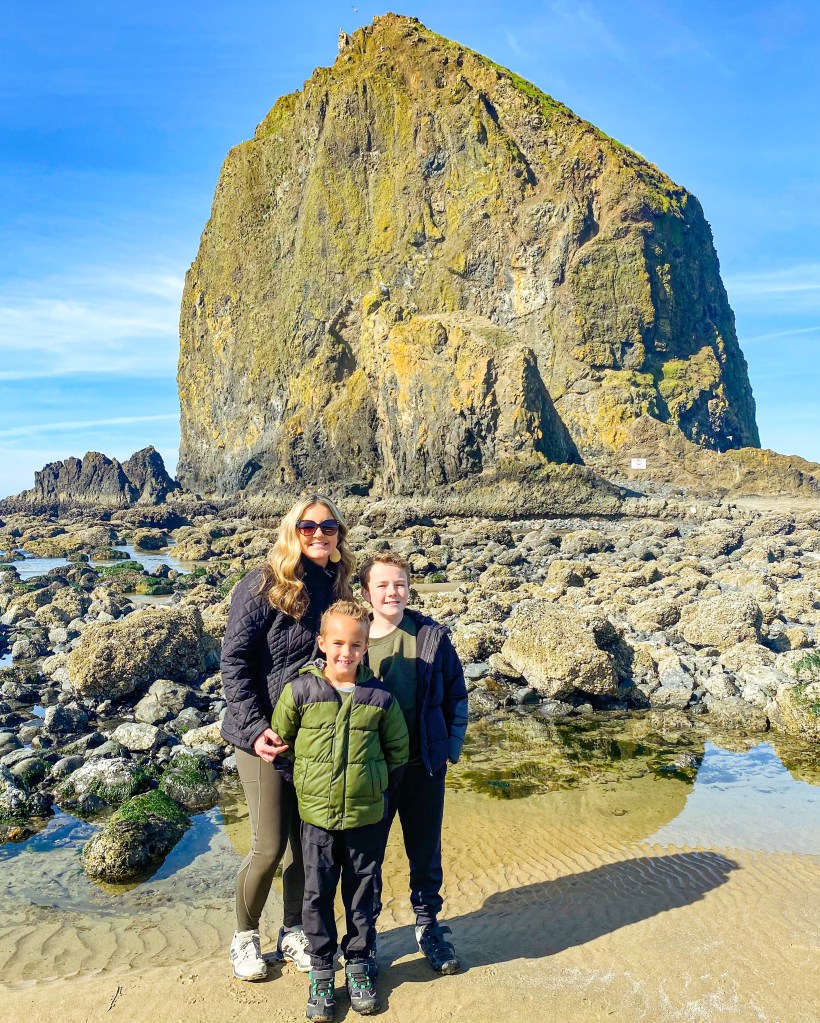
Jereme walking along the tide pools at Haystack Rock
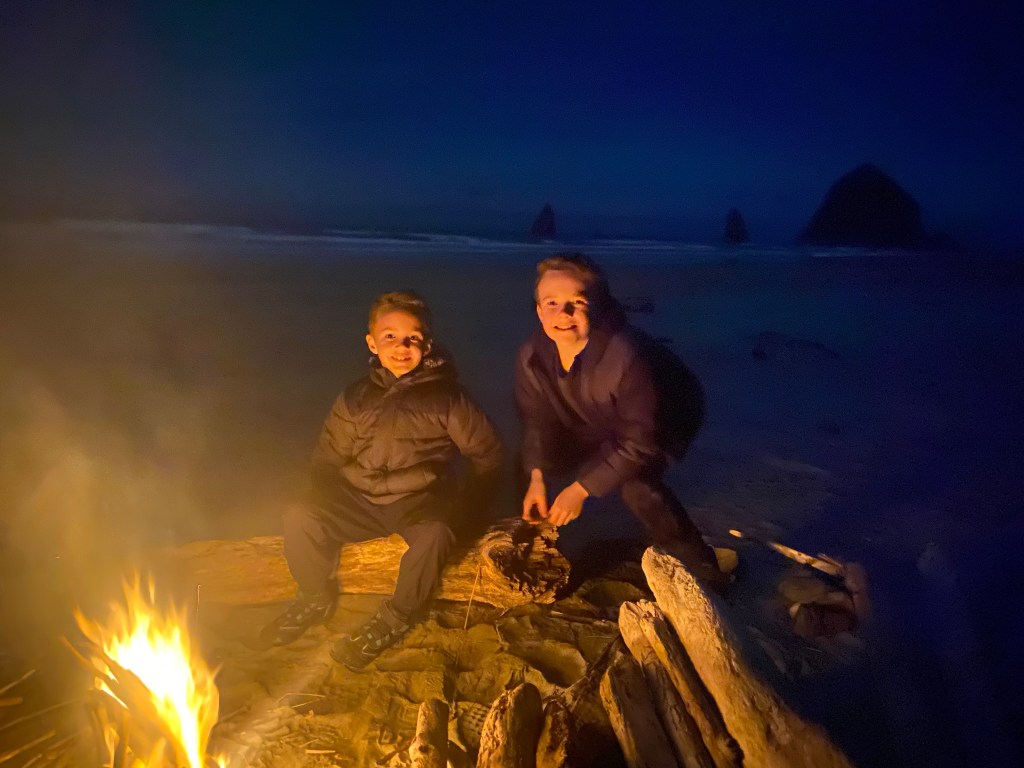
I have wanted to visit Cannon Beach for forever and I finally got the chance last March over our spring break. We visited as part of a Pacific Coast Highway road trip and we all agreed that we wished we would’ve had more time here at this beach. We adored the little beach cottage we stayed in and the town is super quaint and welcoming! The tide pools made my whole life and the boys still talk about having bonfires on the beach in the evenings. We have big plans to return to Cannon Beach and stay at the exact same cottage one day!
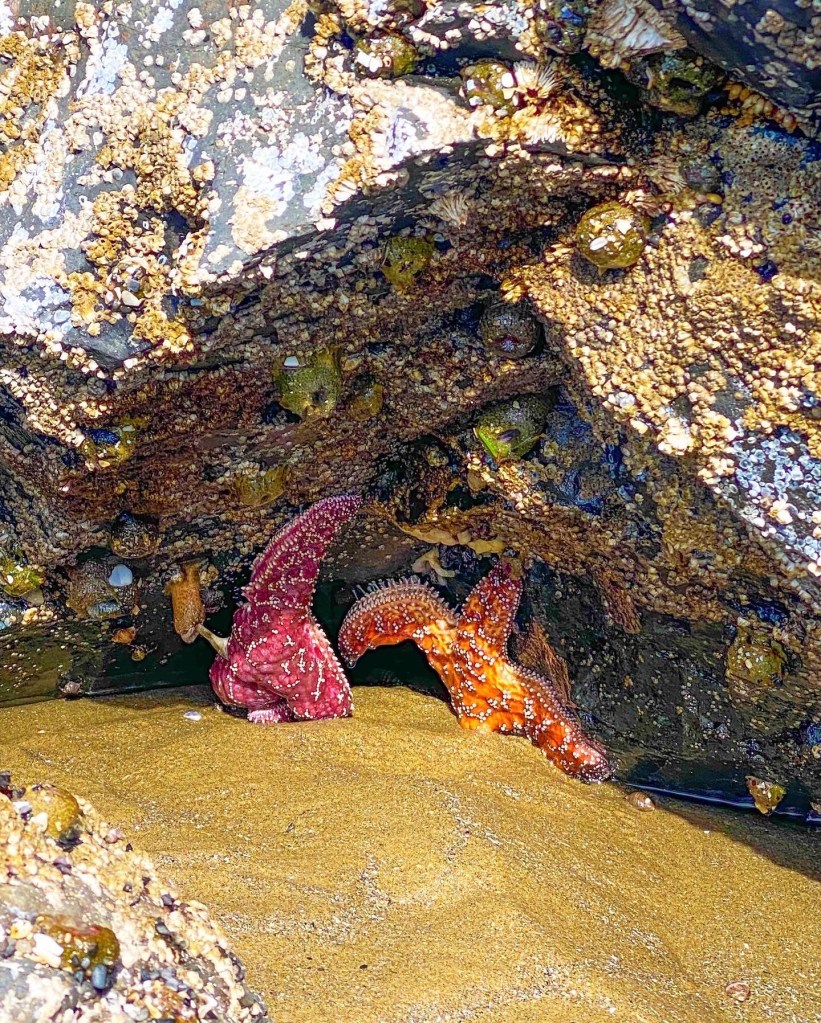
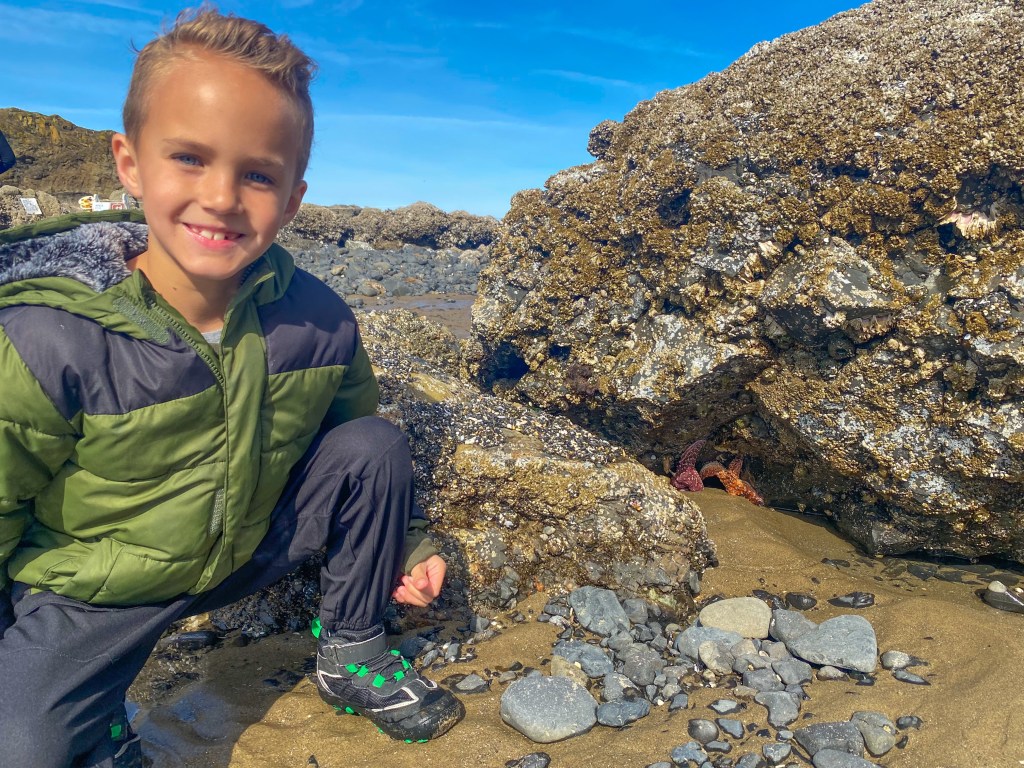
The first ever tide pools and starfish I’ve seen in nature!
We were all amazed at the marine life!
It was a little chilly at this beach, but we still loved it!
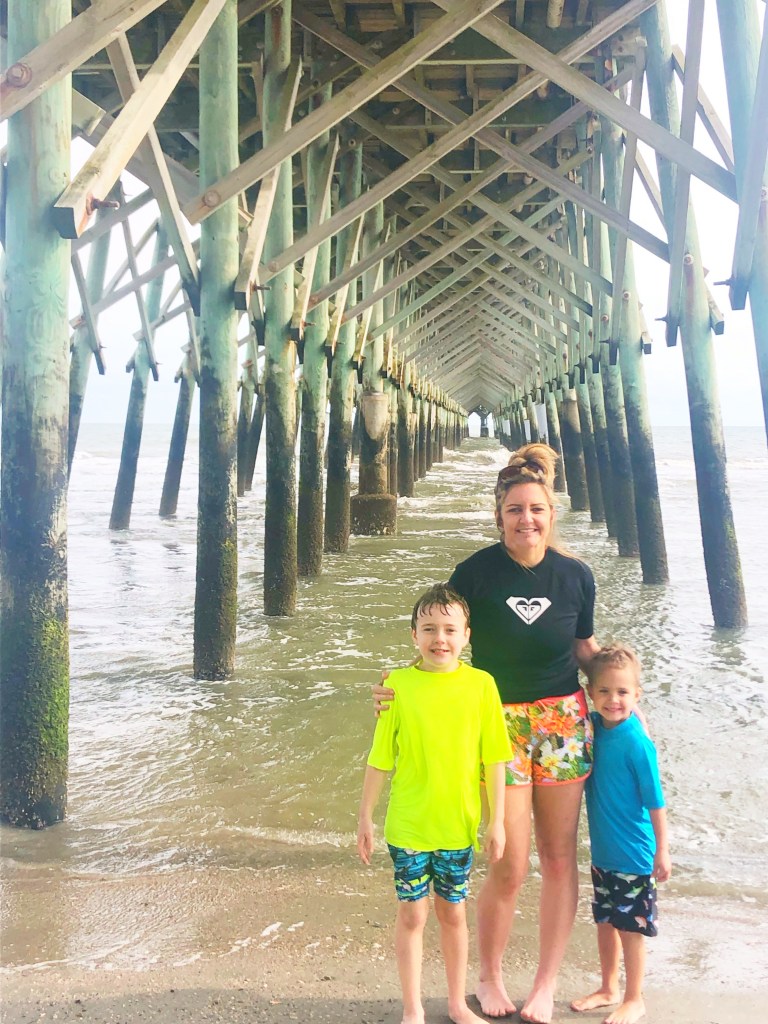
Folly Beach was our first ever trip to South Carolina and it was a great one! We loved the hotel we stayed at and I highly recommend it for families! Folly Beach is also known for amazing finds, like shark teeth and shells. So if you have kiddos that love sharks or shells, check this destination out! I also loved the proximity to Charleston and some of the plantations and historical sites in the area. Overall, this is a really fun family destination. South Carolina is such a beautiful state!
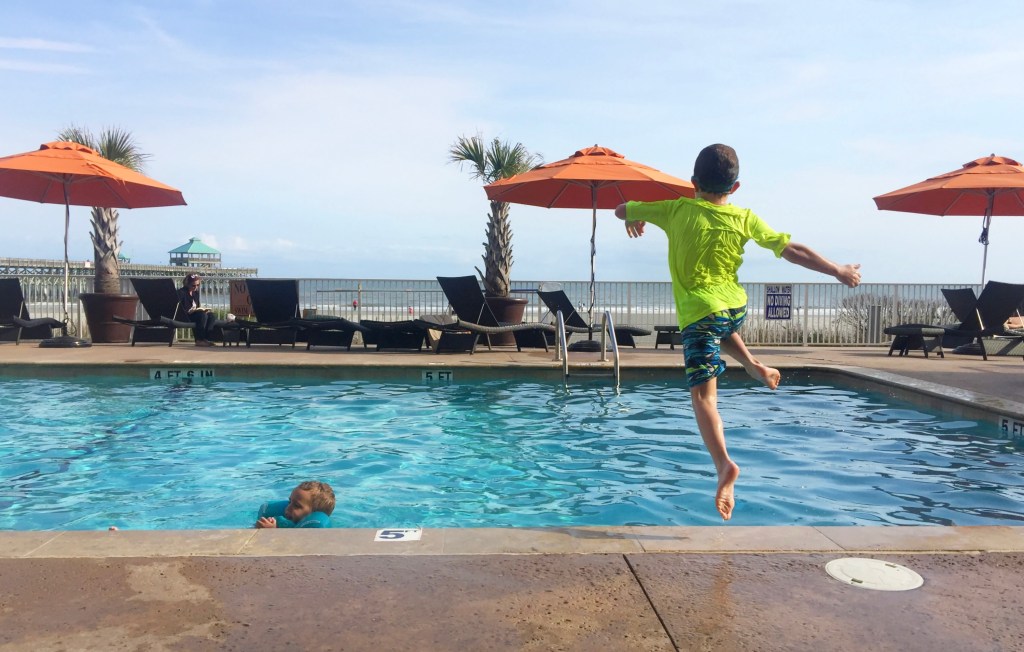
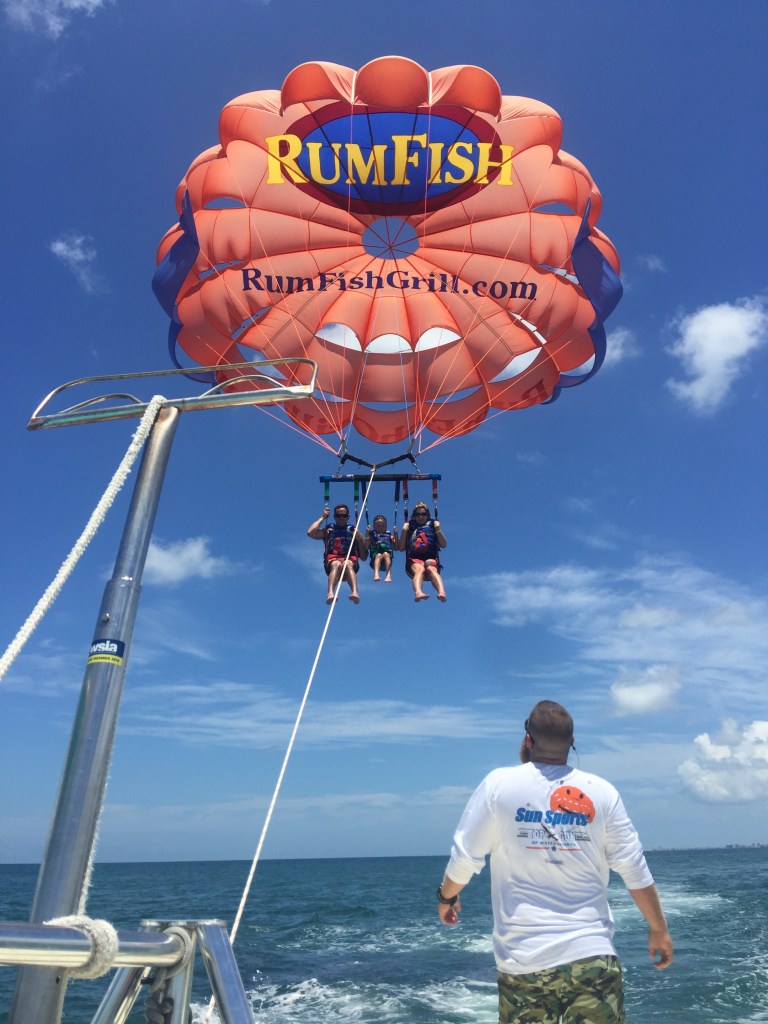
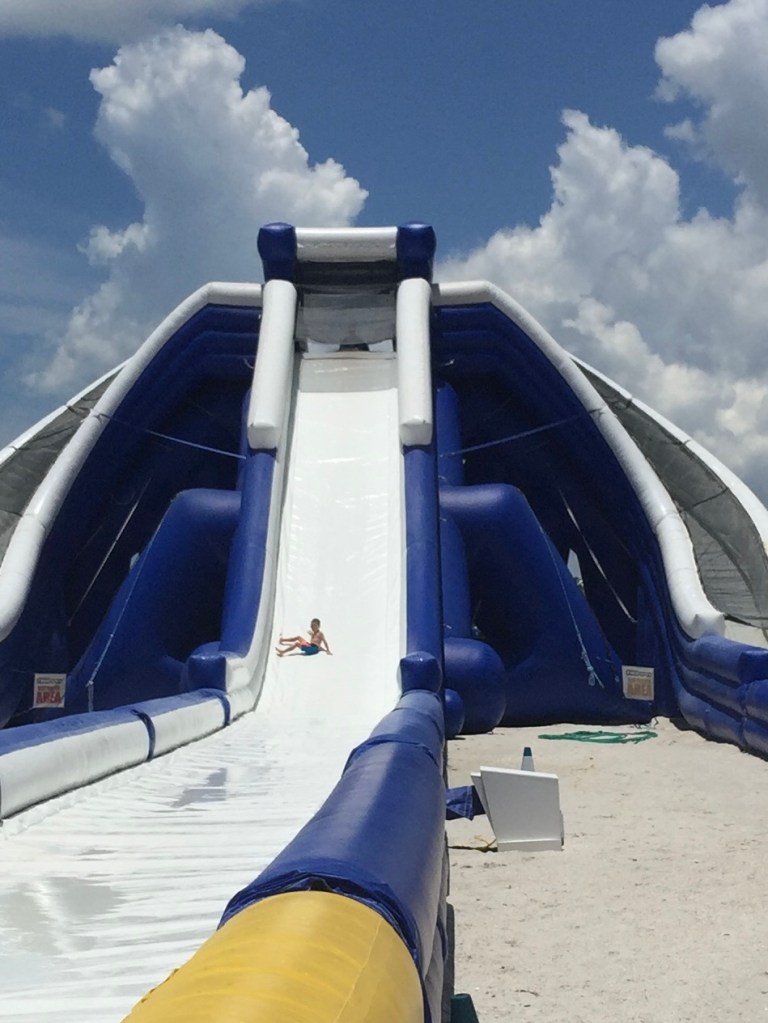
This destination has it all! You can visit just to relax at the beach all day, but there’s also a vast amount of water sports, shopping, & dining! We visited a few summers ago and the boys still ask to go back. We had a blast parasailing, sliding on some of the inflatable slides outside of the hotel, relaxing, and eating amazing seafood! The water is also stunning and so blue! It was a little crowded, but we were there during the peak summer months, so that’s to be expected when you’re visiting just about any beach in Florida! The hotel really made the stay worthwhile and we didn’t even leave this resort much because it truly had everything! We also really enjoyed the beach’s proximity to Tampa.
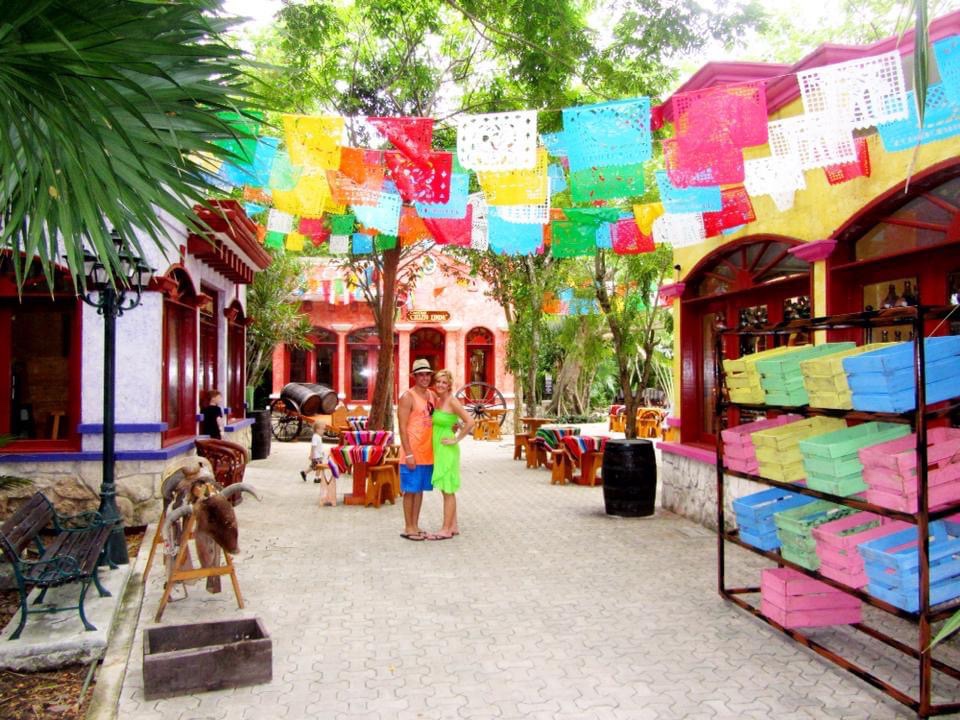
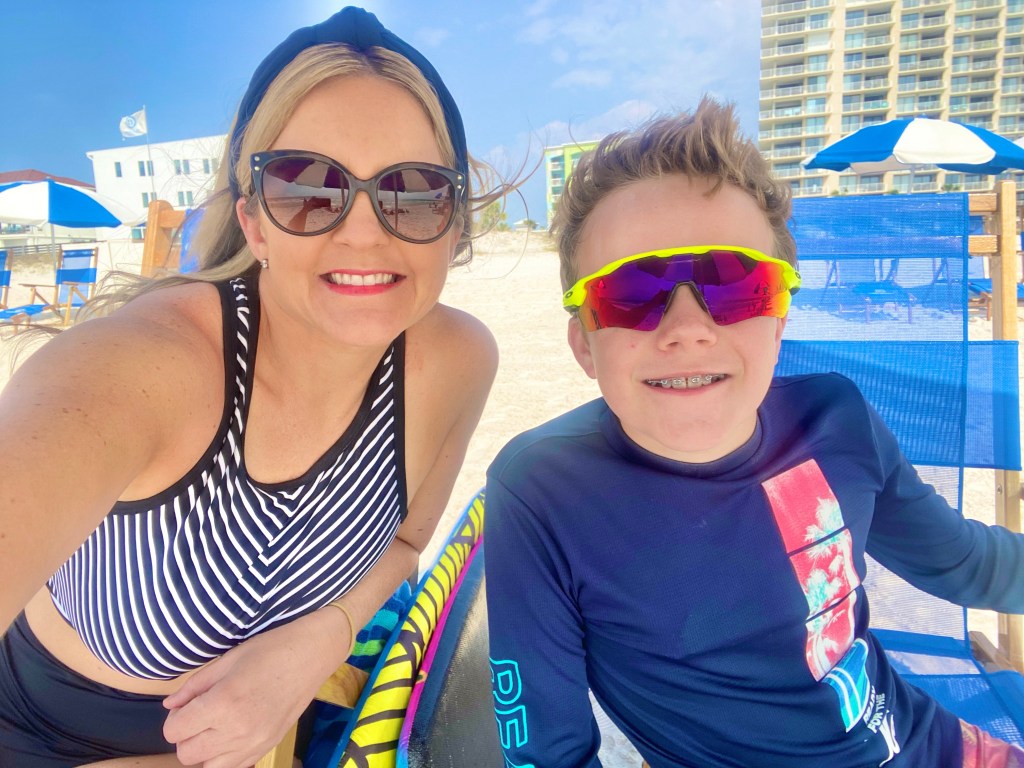
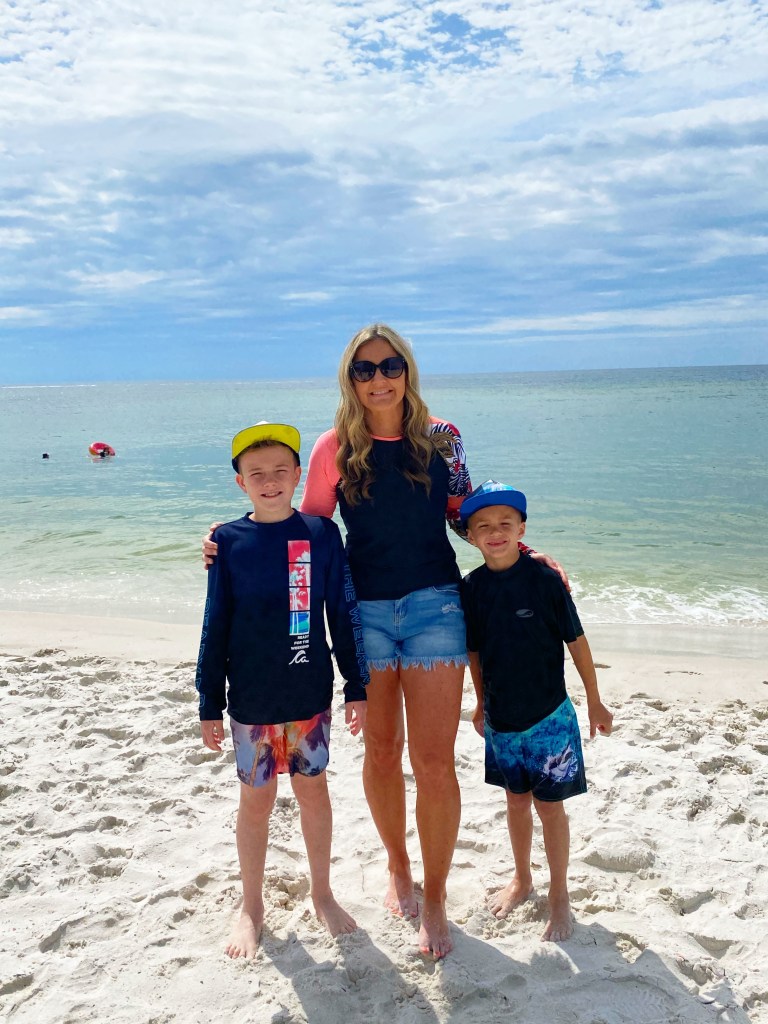
If you live in Texas, then visiting Galveston is a must since it’s in our state! Even though Galveston is not known for white sand beaches and clear, blue waters, it’s still my kiddos’ favorite beach destination! We always have such an awesome time when we visit. I think my boys love it so much because it doesn’t require a lot of driving to get there and it holds such special memories for us. We’ve visited for just a weekend and even stayed once for ten days!
There’s something really special about those all-inclusive beach resorts in the Caribbean and our family has had many wonderful experiences visiting Mexico! So far, we’ve had the chance to take our boys to Cozumel, Cabo, and Cancun. Each destination offers many excursions and activities that are fun for all ages! The resorts in Mexico make it so easy for travelers and usually have people assisting you upon arrival to find the perfect excursions for you family!
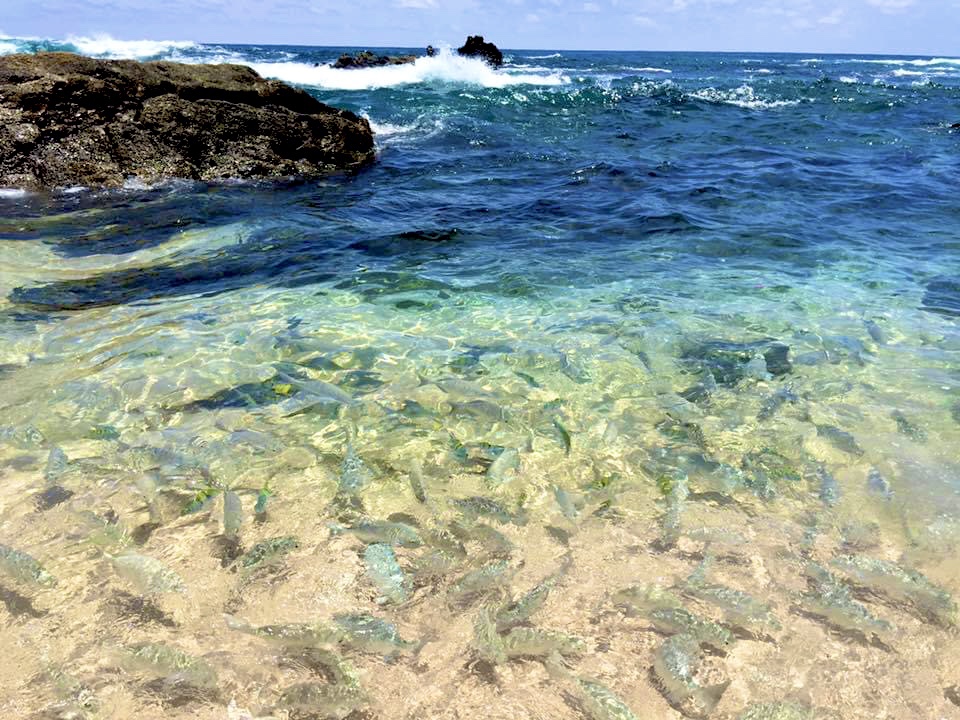
Cozumel, Mexico
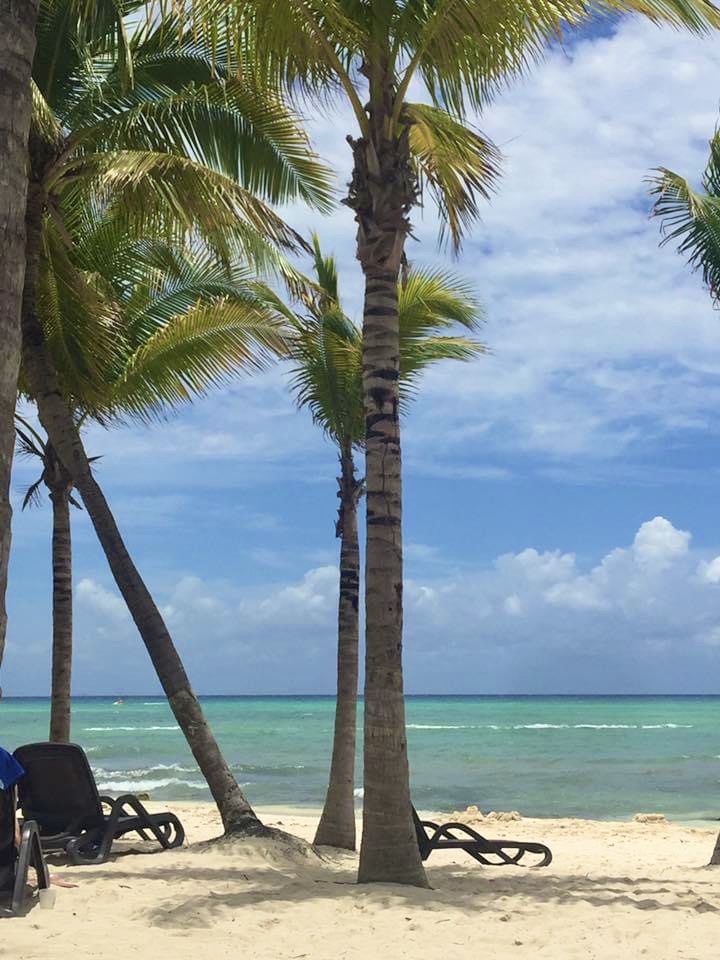
Love the water and those palm trees
We really love this little island. Jereme and I have traveled to Cozumel at least five times on our own and with our kids. The people are amazing and we have made many special memories exploring the island. I cannot get over the water! It’s so clear and you can literally see fish swimming everywhere, right from the shore!
Cabo is one of my personal favorite destinations in Mexico! I love the how the desert meets the ocean here. And watching whales right from our hotel balcony was a truly amazing experience. It’s not always the best place to swim in the ocean and finding a hotel where this is available involves some planning. But it’s such a beautiful destination and there’s something here for everyone to enjoy!
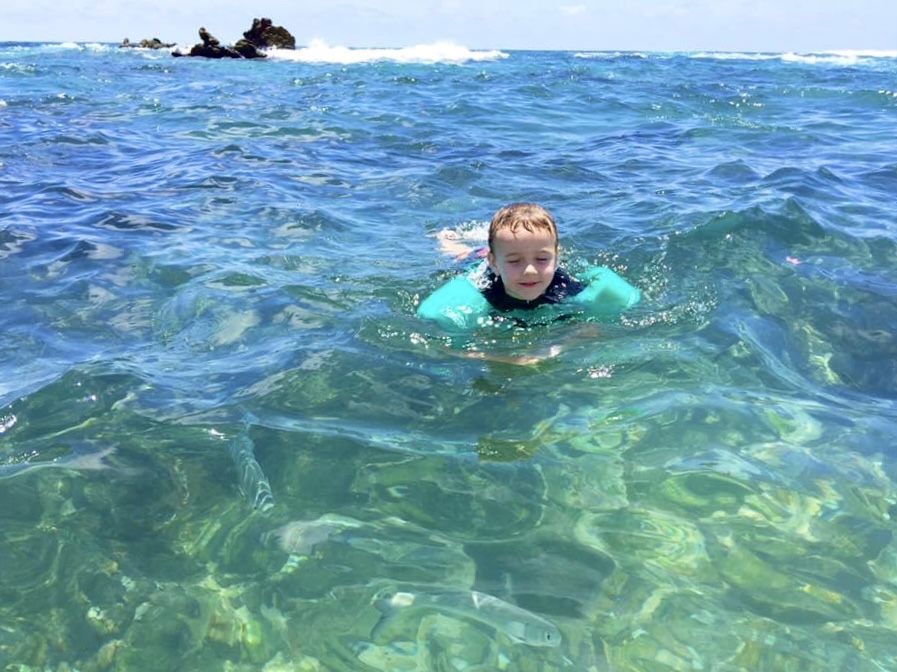
Look at these fish right off the shore of the resort
Cancun is a wonderful place to visit, especially since the international airport is located here! We’ve actually only stayed in Cancun once as a family, but it has been one of our favorite vacations to date! On our first night here, we were able to help a local group release baby sea turtles back into the ocean and this experience is one that I will never forget!
We use the fabulous travel agent, Alexa Spahr to book our trips to Mexico and beyond. She comes highly recommended and has helped us book several trips. She really works within your budget and travel dates and it’s always been such a smooth and easy process with her help. You can contact Alexa via email at alexa@travelwithalexa.com and be sure to check out her website www.travelwithalexa.com. If you reach out to Alexa, please let her know I sent you her way!
As you can see, beach destinations can be a low-key and relaxing trip, but there are also a ton of activities to explore! We like a nice balance, so we’ll usually spend a day at the resort and then a day packed full of excursions and continue that pattern! If you’re interested in planning a trip to the beach and are in need of any ideas or recommendations, please reach out! I’m happy to answer any questions you may have, so leave me a comment. I’d also love to hear about your favorite family beach destinations!
This post contains affiliate links of products that we use and love! I may earn a small commission, at no charge to you, if you purchase any of the items using the links provided. Thank you!
Since we changed our spring break plans very last minute, I thought I would share some of the items that I packed for the beach that turned out to be extremely useful. Consider this a pre-made packing list for your next beach getaway!
For the Road Trip
This fits right in the floorboard of the car between the boys and is easy to carry to the room when we arrive!
If you’re wondering what we take on our road tripping adventures, you might be surprised that it’s not much. I tried all the fancy gadgets at one point and felt like they all got in the way! Now days, we keep it pretty simple.
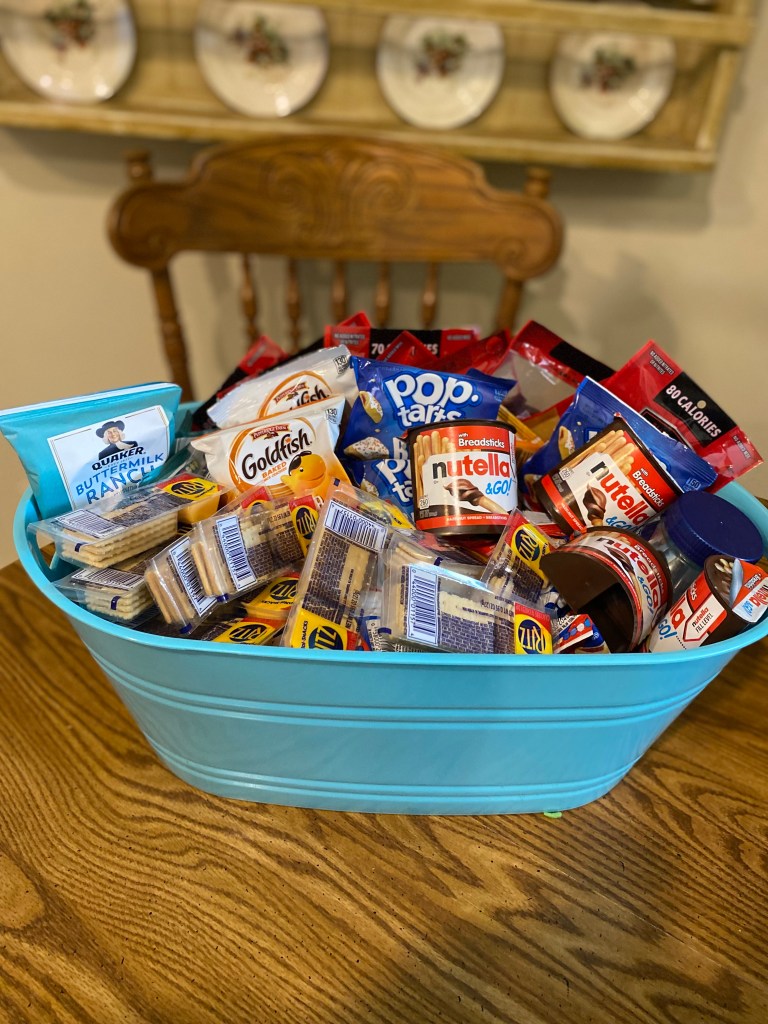
Snacks – We never leave for a trip without a basket of snacks! Not only is this super helpful for those long stints of driving, we usually have plenty to last us in the hotel for our whole stay!
Gatorades – Boxes of Gatorade are easy to pack in the car and we also usually have several leftover that we can drink while we’re in the room!
Phone chargers – I make sure to pack a charger for each of us. This way we all have one, there are extras if one stops working, and the boys aren’t ever arguing about whose turn it is to charge their devices!
Screen shot of hotel confirmation – I always make sure to either take a screenshot or print out the hotel confirmation for my records. Another word of advice, you can call the hotel ahead of time to make sure that they have your reservation on file!
GPS – We typically use the maps on our phones for directions to wherever we are going, which is another reason we need to bring along our chargers.
Bag of Quarters – We encountered a toll road right as we got close to Orange Beach. I knew this ahead of time, so I made sure to have a bag of quarters. I like bringing quarters along for multiple reasons, which includes money for tolls, money for the hotel vending machines, money for laundry if it’s needed, and finally having money if we need to air up our tires for any reason!
Pillows & Blankets – My boys are pros at sleeping in the car on our road trips. So we like to have travel pillows and blankets for them. We also bring along our own pillows to sleep with at night to ensure that we get a good night’s rest!
Portable Car Battery Jump Starter & Jumper Cables– Jereme has a portable battery charger that we bring along with us on our travels. It’s mostly just extra security to ease anxiety after having car trouble one time several states away from home. This one includes a set of jumper cables.
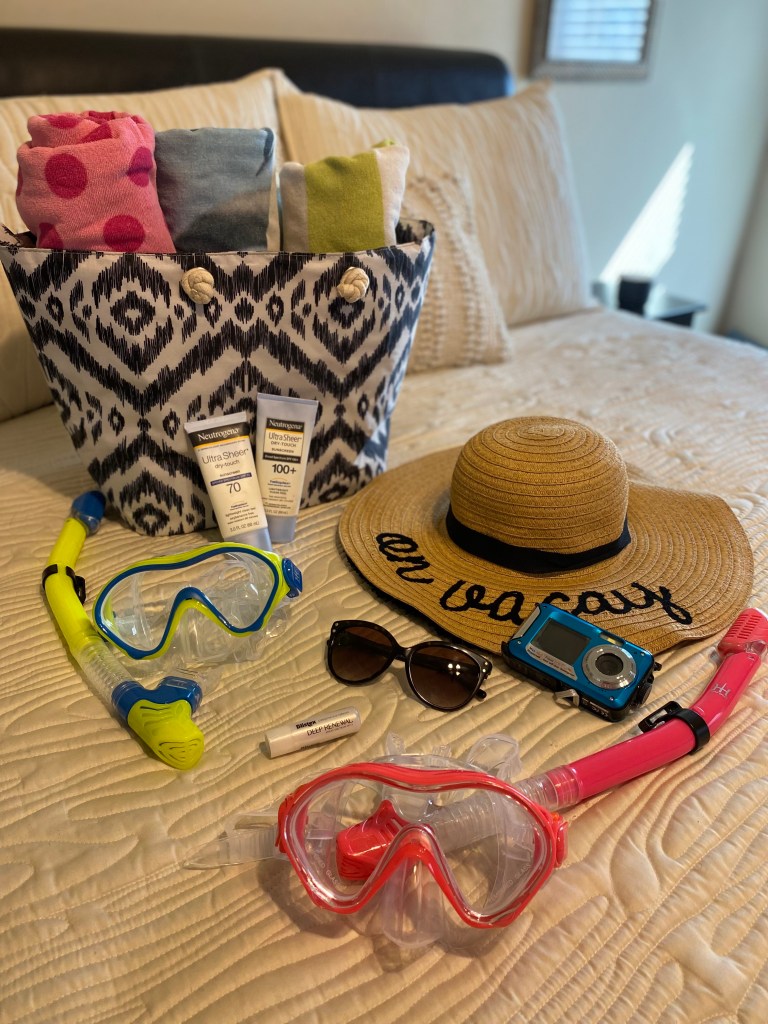
In My Beach Bag
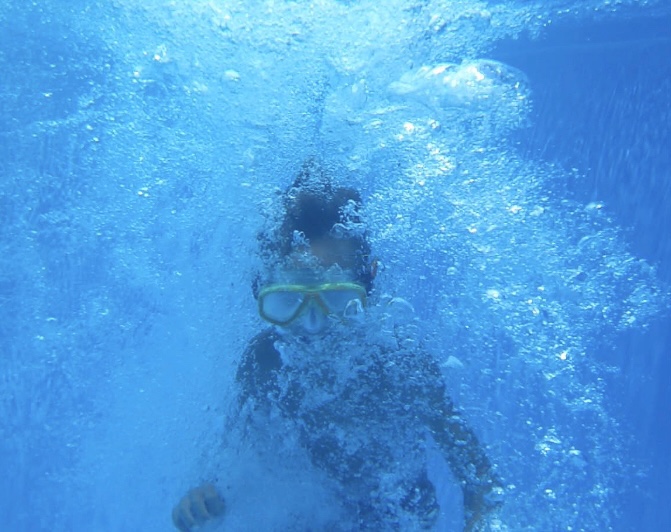
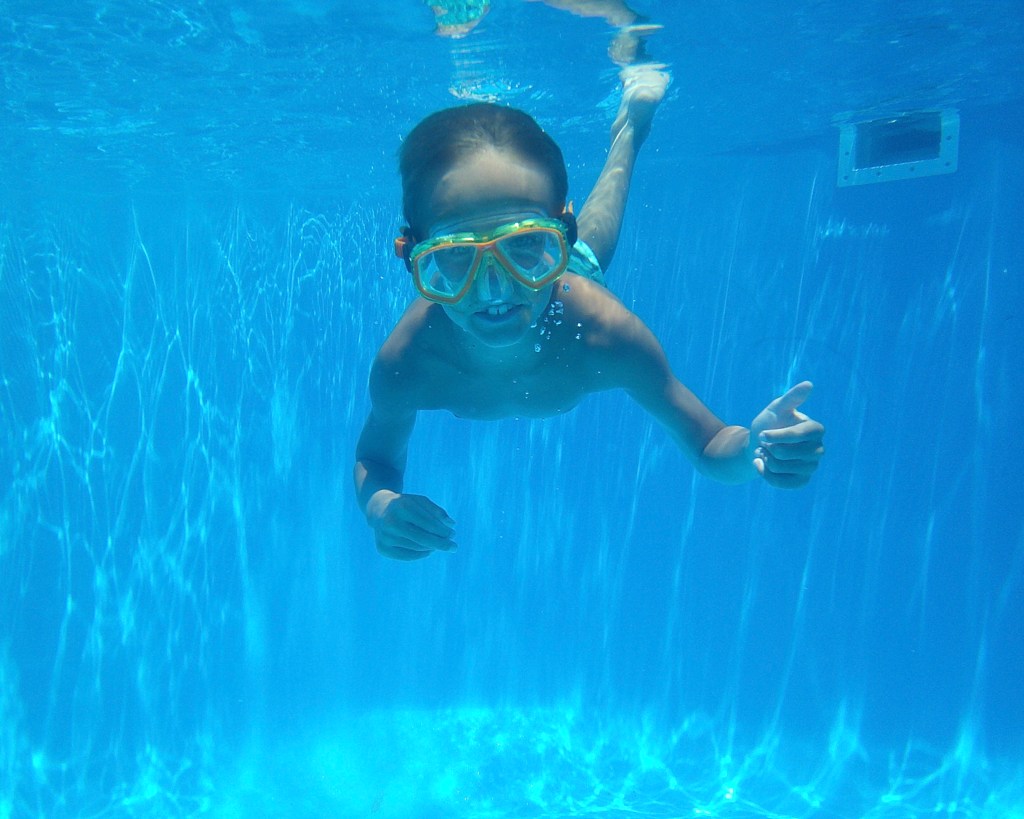
This photo makes me want to go to the beach! Also, I got an underwater camera for Christmas & I never even used it on this trip lol!
I feel like I haven’t had to pack a beach bag in forever! And when I was going through the one I already have, I realized it was full of summer stuff that we never really needed. So, I cleaned it out and started fresh with things that I knew we would need and that my boys would want and actually use!
Beach bag – The bag I took was kind of too small & we all ended up having to carry our towels. So I upgraded to this one when we got home & love it! The cooler is going to be so nice!
Sunscreen– Sunscreen is so very important, every single day, but especially at the beach. My whole family loves the Neutrogena brand because it goes on smooth and doesn’t burn or irritate our skin when we reapply.
Chapstick with SPF– I am someone that has a freckle on my lip and I don’t want anymore. So, this chapstick has been a game changer for me!
Sunglasses – We made sure to bring sunglasses for all of us! I recommend buying a cheap pair for the beach, I swear someone always loses theirs in the ocean when we travel to the beach!
Waterproof phone case – This is another product that I love because I am able to get out in the water with the kids and take fun photos and videos without worrying about my phone getting ruined. I kept my phone in this case most of the time on the beach to protect it from the sand, too!
Goggles & Snorkels– We got these goggle and snorkel sets for this beach trip and the boys loved using them in the ocean and at the pool!
Extra beach towels – For some reason I have never taken extra beach towels with us, but this time I did and it was a game changer! We were only at the beach for three full days, so having two days with fresh towels was great! On the last day, we were able to reuse the towels from the first day after hanging them outside to dry.
Health & Beauty
I have learned to be very intentional when packing for longer trips in regards to health & beauty. Make sure to bring your usual day and nighttime beauty routine items and don’t forget any of the medications that you or your kiddos might need. There is nothing worse than feeling ill on vacation, so we make sure to have headache meds, allergy pills, and tummy ache medication too!
First aid kit – I am so thankful we invested in a first aid kit. My oldest seems to always get a scrape, burn, or splinter! This travel kit is perfect for the beach, hiking, camping, or any kind of traveling!
Sunburn relief gel – Hopefully you’ll never need this, but we make sure to bring ours on every outdoor adventure! We like to keep it in the refrigerator so it’s nice cold if we need it for a burn!
Face moisturizer– This is the face moisturizer that my dermatologist recommended for everyday use! I try to use it each night and morning.
Tanning foam– You can bet that I bring along this tanning foam since I cannot lay out and get a natural tan anymore! I put it on right before bed and actually sleep with it on all night and then rinse it off in the morning. I usually only need to reapply once on vacation! I buy the dark tanning lotion.
Tanning firming lotion– I use this firming body lotion any time I am going to be in shorts or a dress! I buy the medium to dark tone.
Medications – Bring along all the medications that your family might need! I usually just pack a large Ziploc bag full of anything we might use during the week. I always make sure to include something to help me sleep, like Tylenol PM or Benadryl because I have a really hard time sleeping in a new place.
Family Photo Outfits
Family beach photo 2023
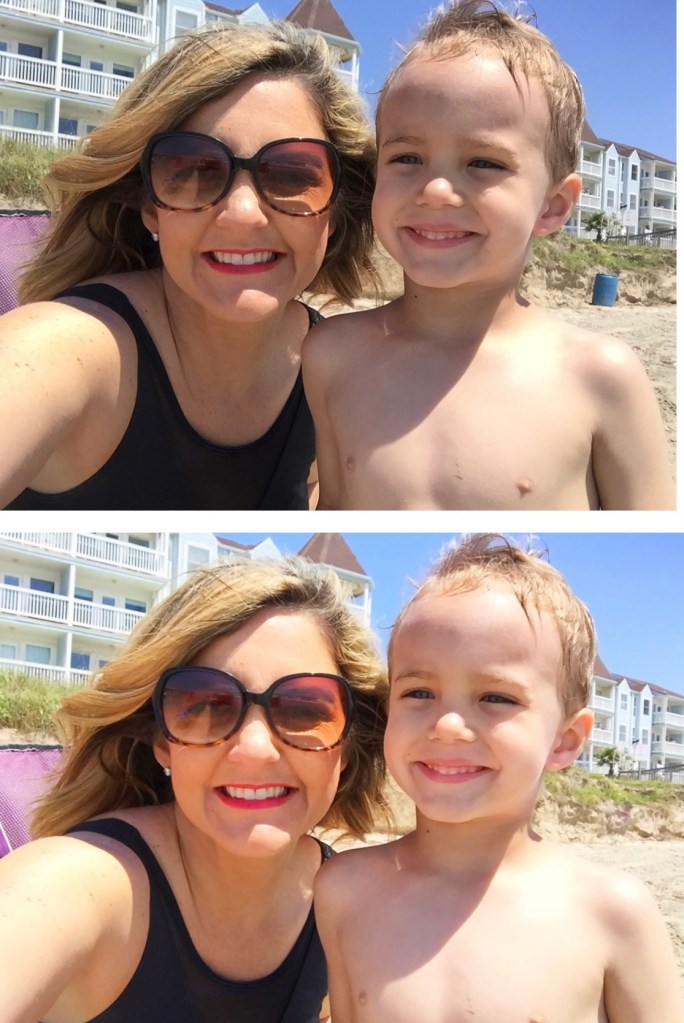
I usually always bring along at least one matching family outfit for photos. Several people ask how I go about coordinating these outfits. I always start by picking out what I am going to wear first. Then I find tops for the boys that will match me. I take screenshots of what I have picked out to make sure they all somewhat match before purchasing. I usually also send the screenshot to one of my best friends to check out and send me feedback, too! Thank you Amy D!
I brought along three different swimsuits for this trip and loved how I felt in all of them! All of these had great coverage and were comfortable for a day of lounging and playing in the ocean!
These items are kind of random, but totally useful and I am so glad that we had them with us on this trip! And this is just one more reason I love road tripping! I can take so many things with us when we drive verse flying.
Travel Steamer – My dress really needed to be steamed after I packed it. It was full of wrinkles, but this travel steamer worked great! Just be careful not to fill it with too much water, it leaks when the water is past the fill line.
Cordless Vacuum– I use this on all of our road trips to remove crumbs mostly, but this time I used in both the car and in the room for sand! You know everyone and everything is always covered in sand when traveling to the beach. I cannot stand sand on my feet in the hotel or anywhere near the bed! This came in so handy!
Cell Phone Camera Stand– This is the stand I use for all of our family photos! I highly recommend if you want to try to take some of your own photos with your phone! It’s easy to use and easy to pack! This one fit in my beach bag and we also take it on hikes with us and it fits in my hiking backpack.
I hope you find all of these items as helpful and useful as we do! What items to do you take to the beach that I need to add my list? I’d love for you to leave a comment for any must haves that we need!
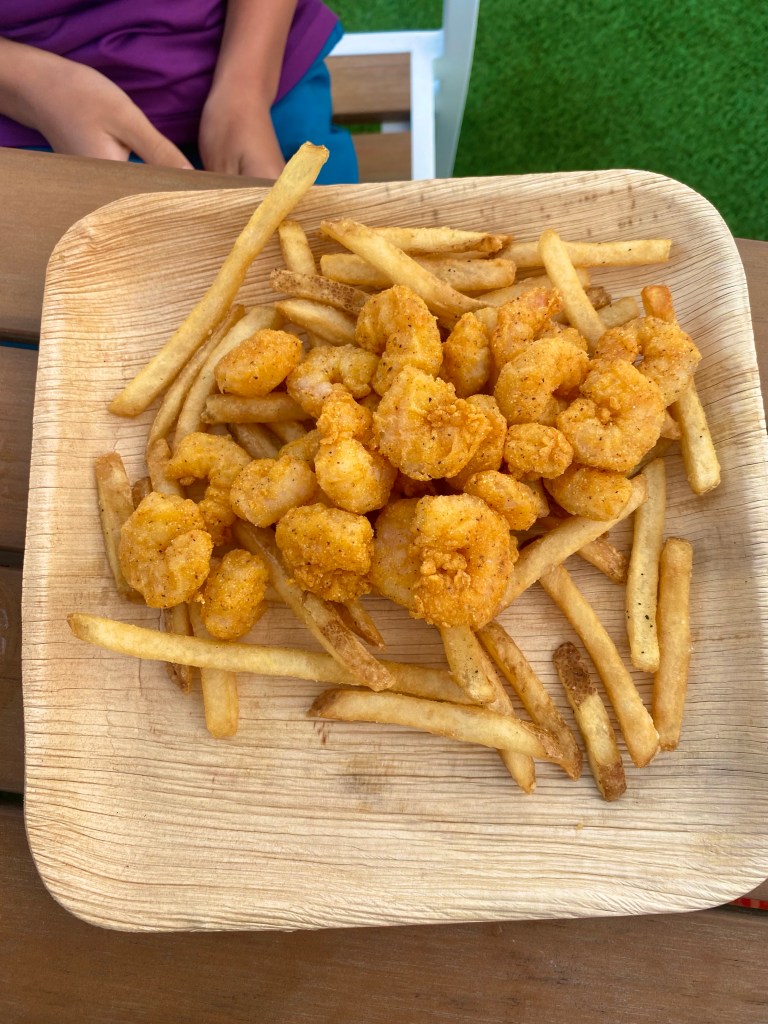
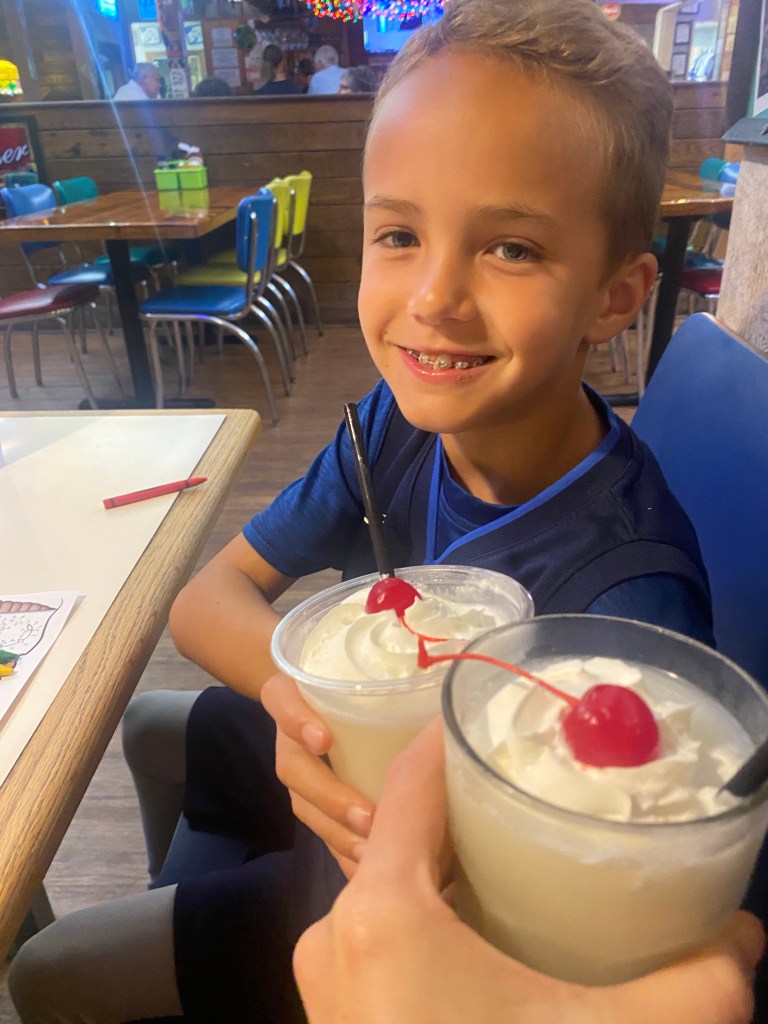
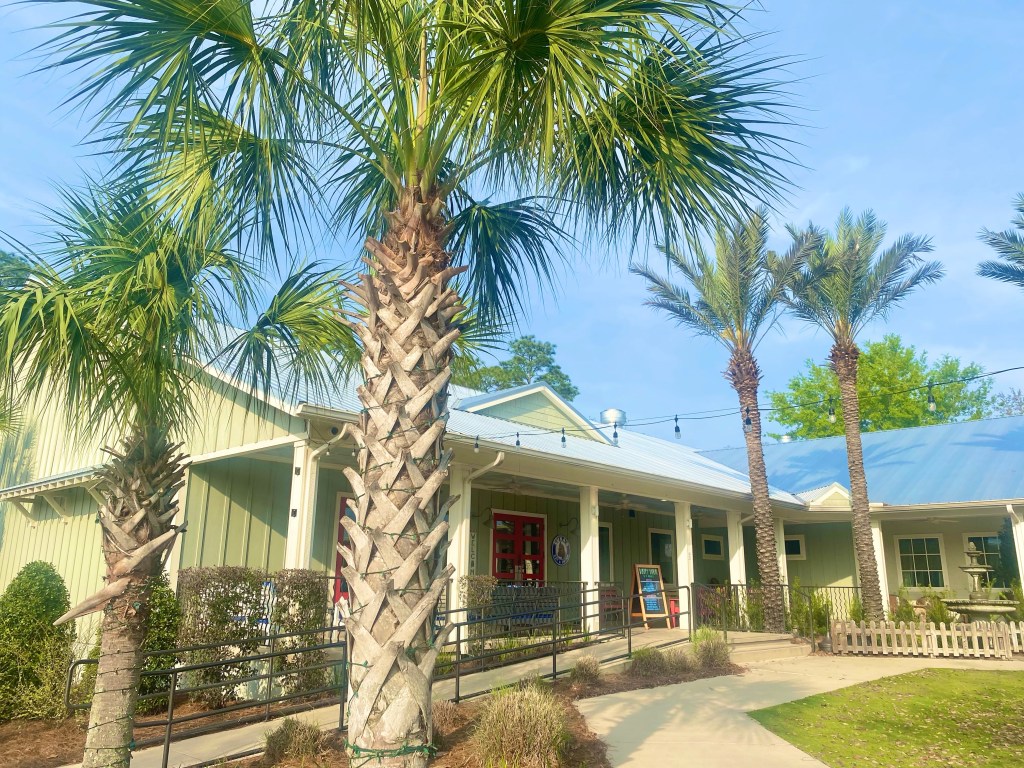
We are a family that loves to eat seafood, but especially when we’re at the beach and it’s fresh! Besides hanging out at the beach all day, the only other activity on our to-do list was finding great places to eat each evening! Lucky for us, we had amazing locals give us some suggestions on their favorite places to eat while we were in Orange Beach! I am sharing all of the places we dined at this past spring break trip and am including a few other favorites of ours!
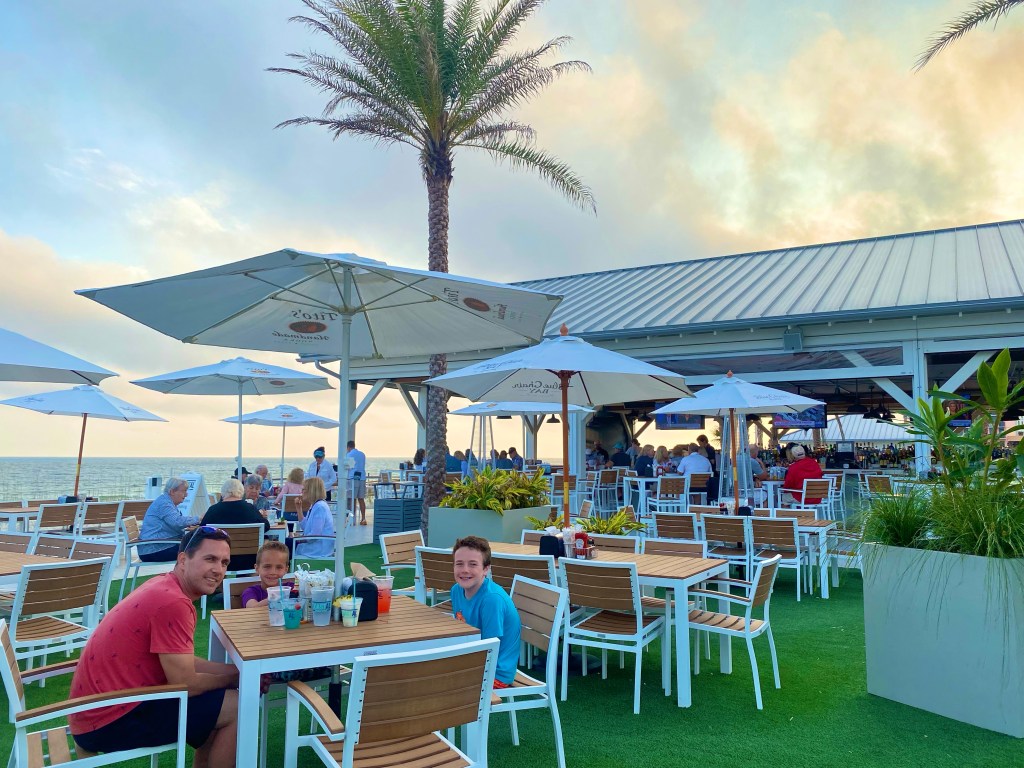
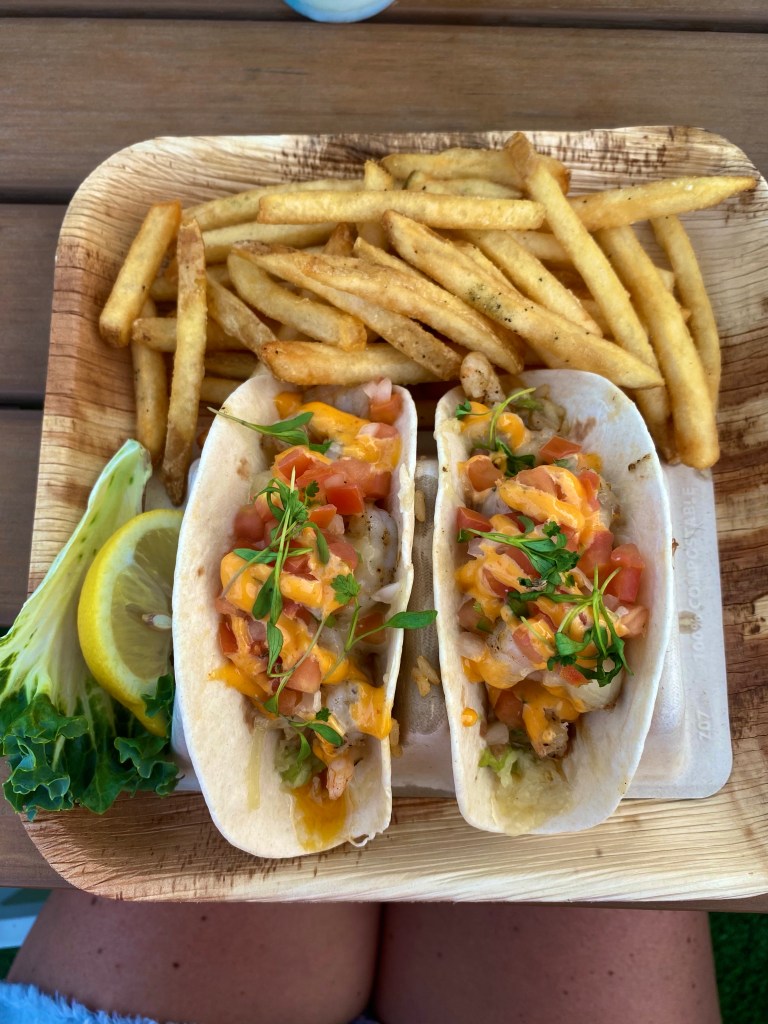
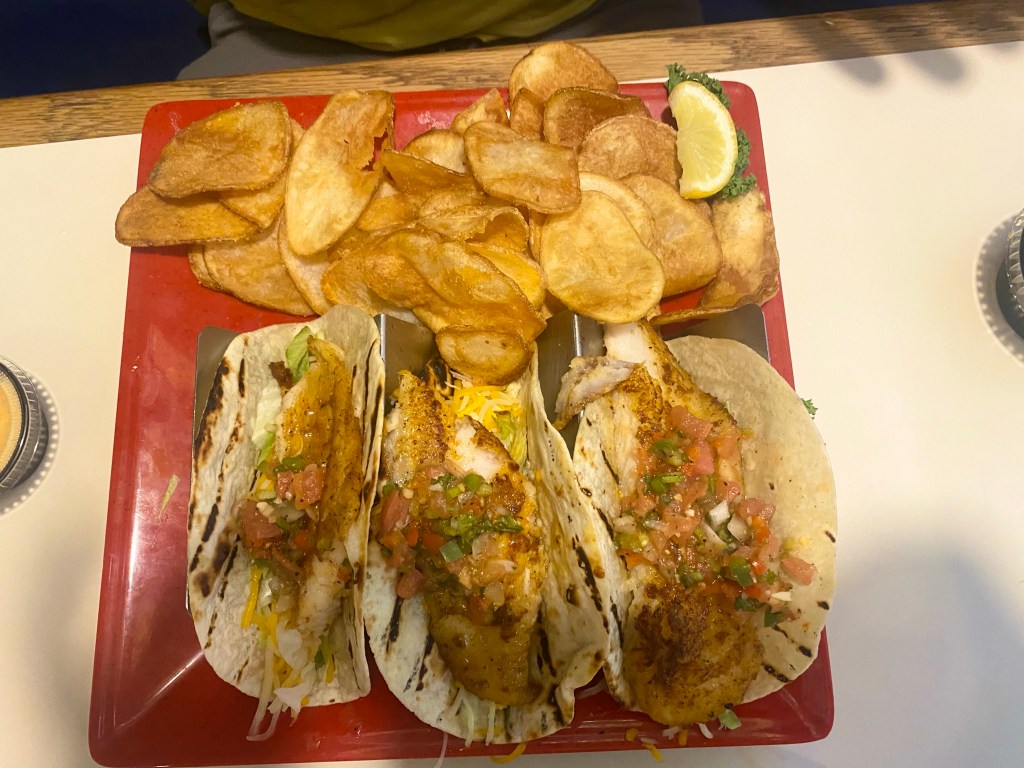
This was our first time eating at Coastal, it appears to be a fairly new restaurant in Orange Beach right on the beachside of the highway. All of the tables were outside, there was a live band playing, and we all had delicious seafood! We enjoyed our shrimp tacos and drinks, the boys had the grouper plate and popcorn shrimp. The grouper was huge and Jett loved it! We enjoyed the outdoor atmosphere and the live music while we ate!
Can you ever really go wrong with yummy drinks on the beach?
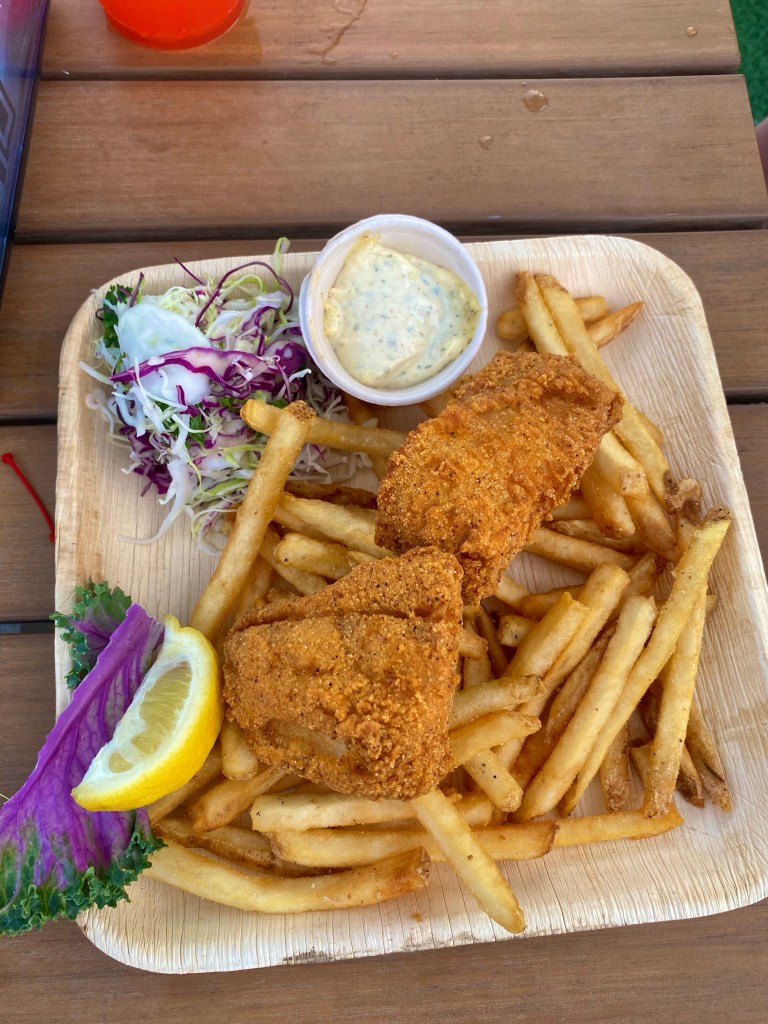
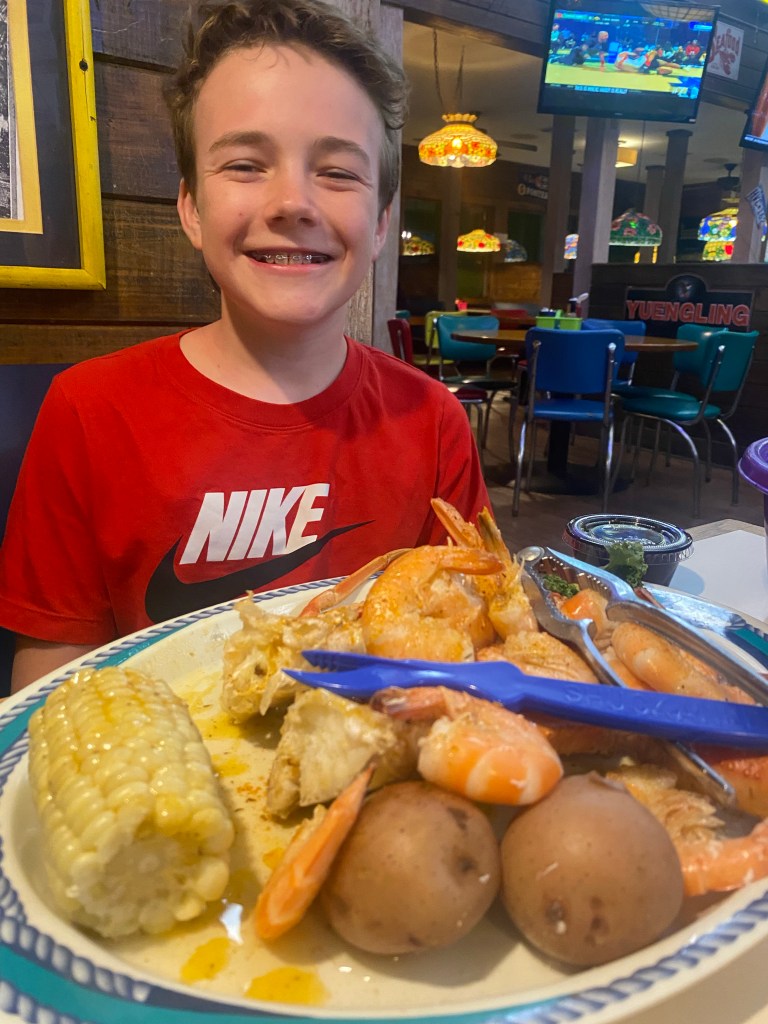
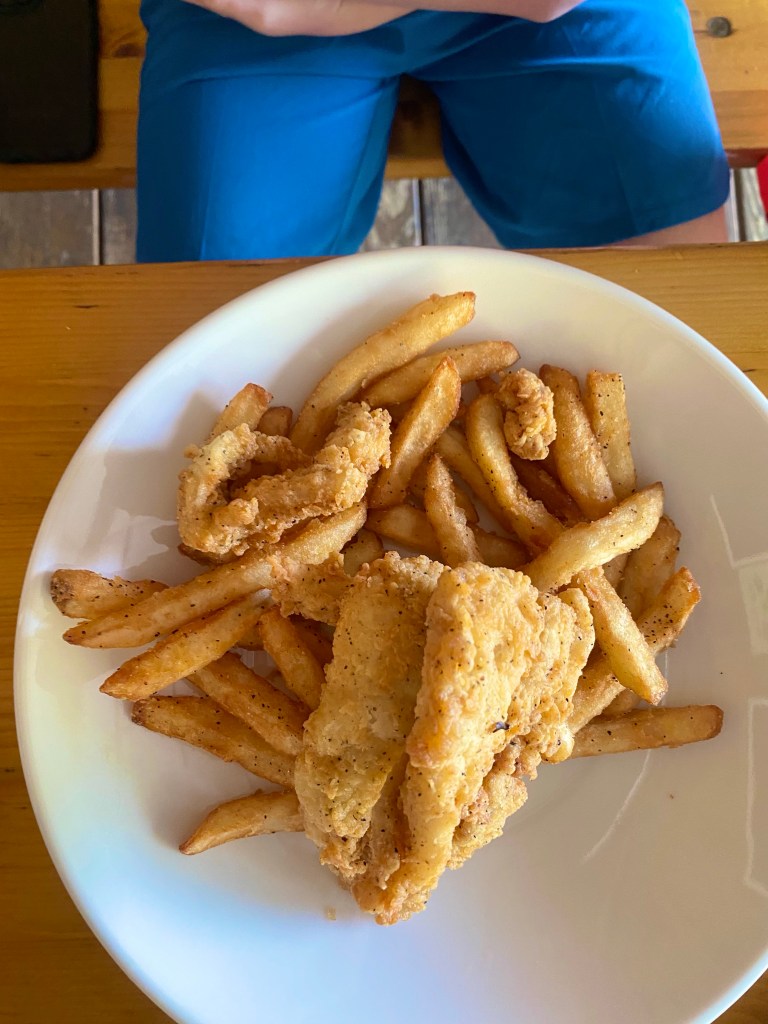
It’s become a tradition of ours to eat at Bubba’s on our first night in Orange Beach! I’m not sure if it’s because we’ve been in the car for 10 hours and this place is one of the first you see when you’re driving through Orange Beach or what. My boys both said that it’s their favorite place that we’ve eaten at here. Jett loves the crab and shrimp plate! I had shrimp, Jake had the kids fish plate, and Jereme had shrimp tacos. We liked the fun décor in the restaurant and the adult beverages! The kids like the non-alcoholic daiquiris, too!
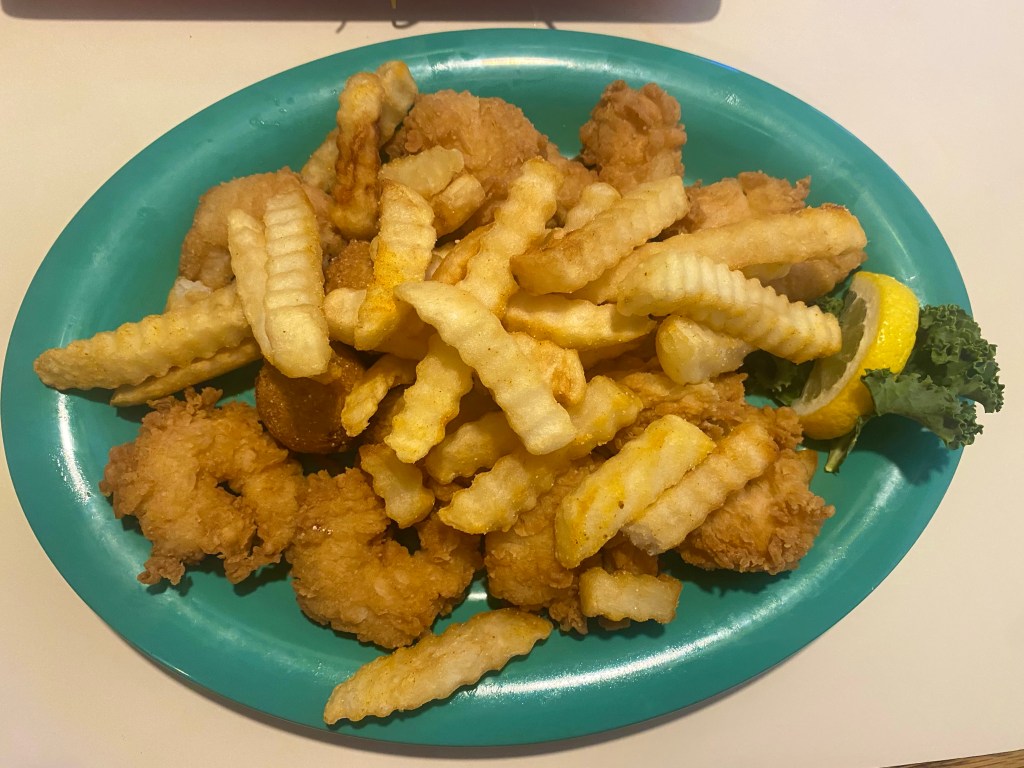
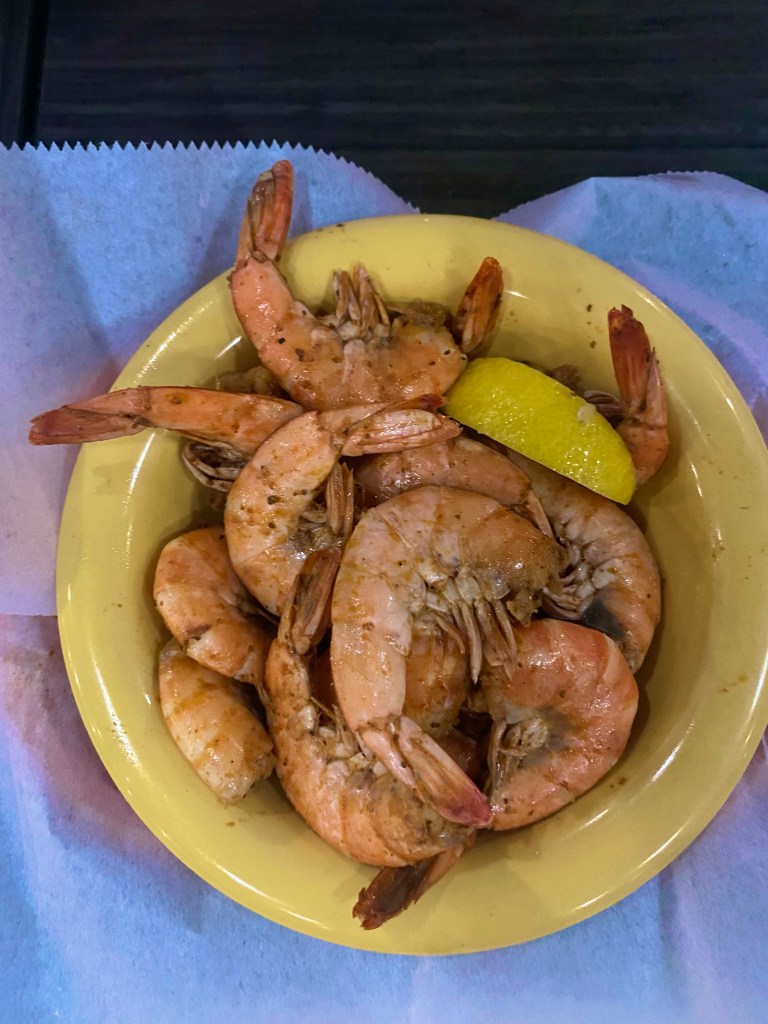
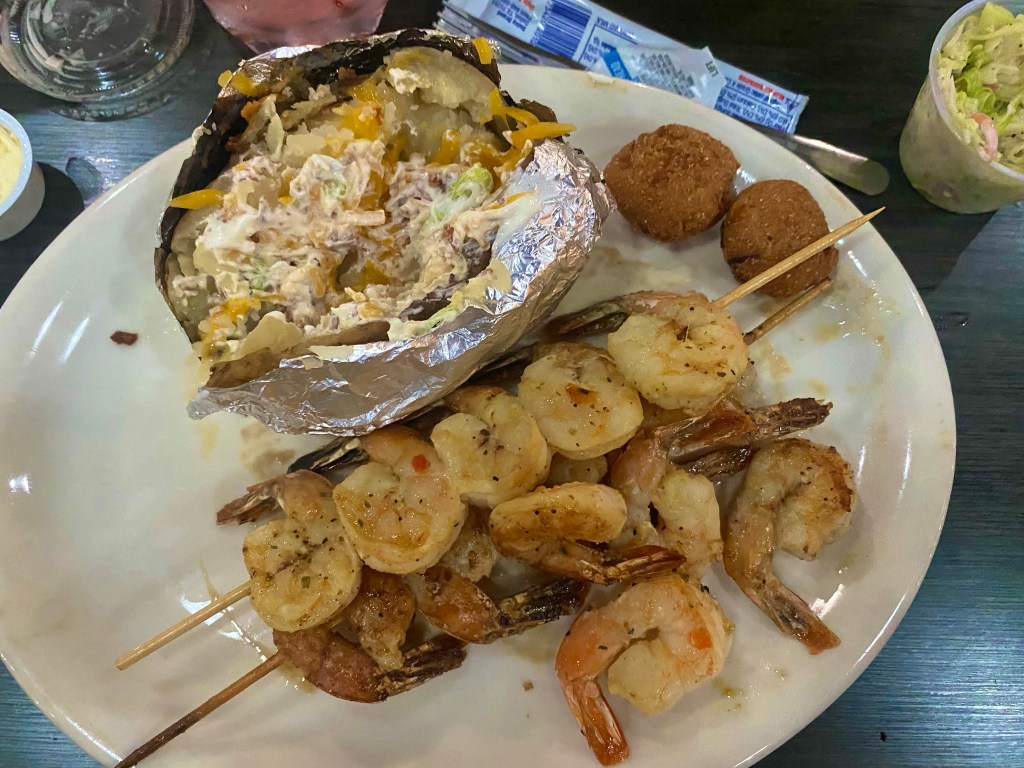
Doc’s was my personal favorite place we ate at on this trip! I really loved the boiled shrimp we had for an appetizer. We also really enjoyed the outdoor games, like corn hole, and listening to live music while we ate and played! Jereme had a fish plate and loaded bake potato that was really good. I had the grilled shrimp plate, which is an Orange Beach favorite dish! And the boys had shrimp and fish. It was all so good! We will definitely return to this restaurant next time we’re at the beach!
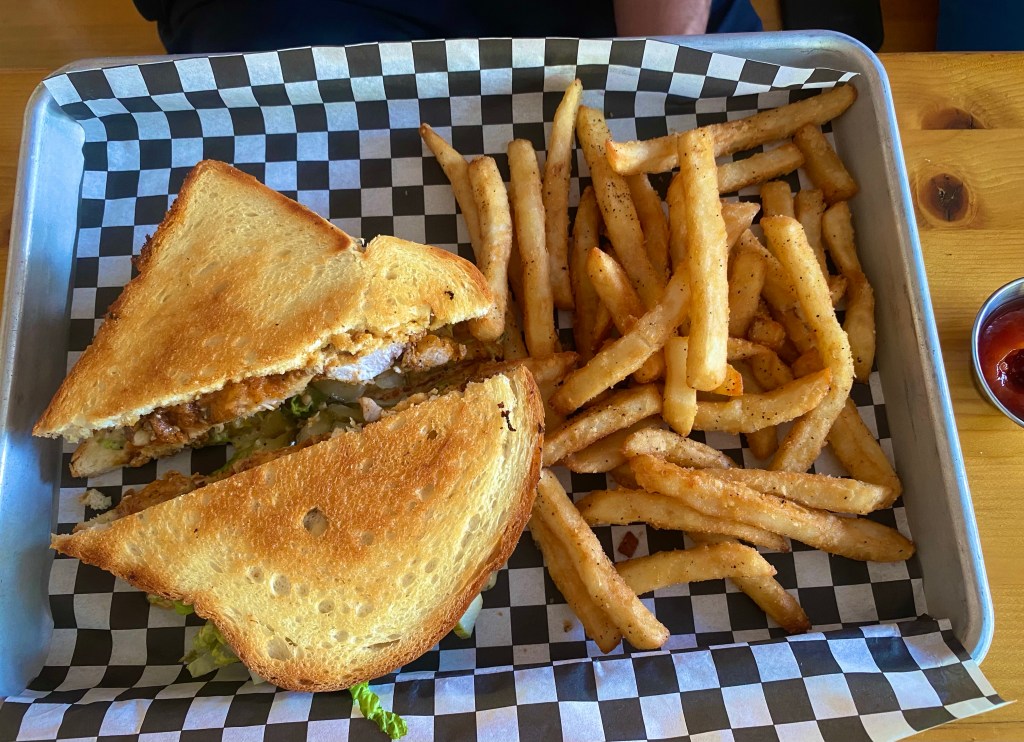
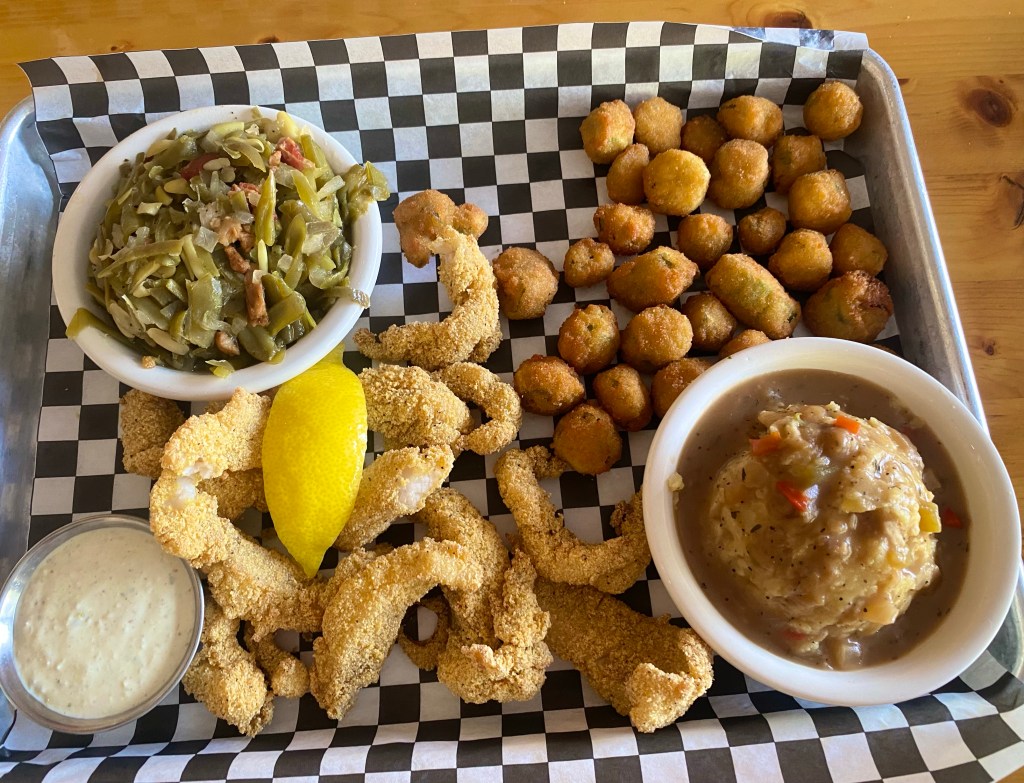
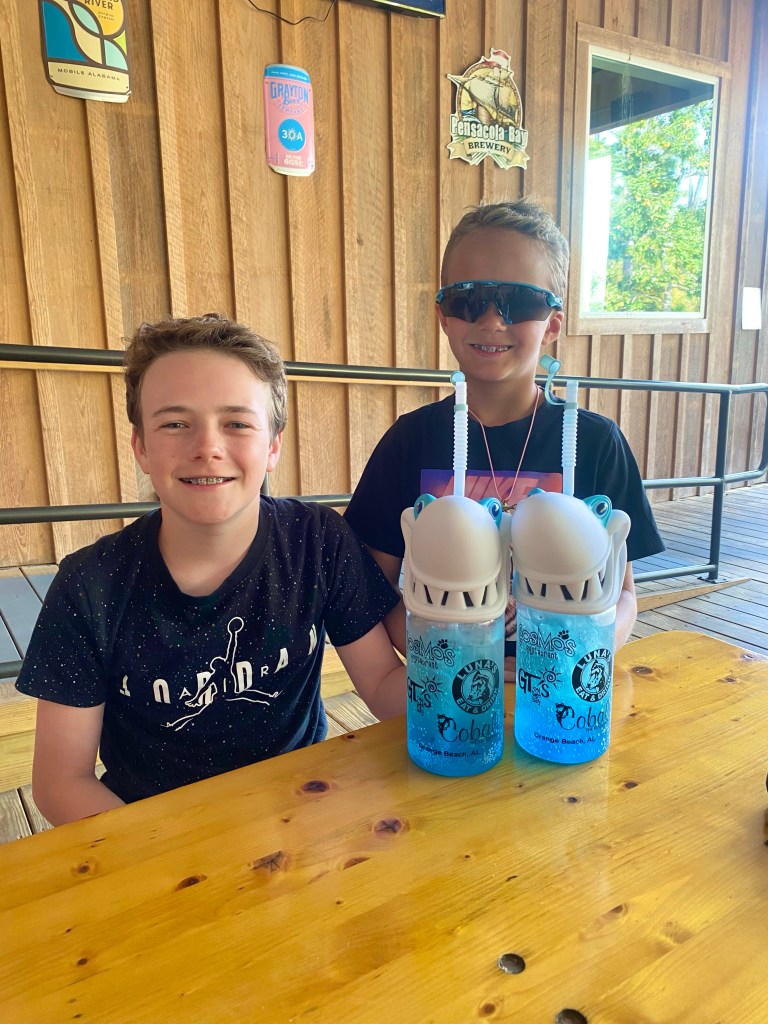
This restaurant turned out to be Jereme’s favorite of the trip! We ate here because the boys saw an advertisement fly above us on the beach and wanted to eat here because they thought the airplane with the Luna’s banner was so cool! We ate outside here, too and there’s an outdoor area for kids to play at that includes a sandbox. The boys loved the special shark drink and I especially loved the home style sides that came with my fish plate. Jereme said his sandwich was the bomb! The crab dip was amazing and it had so much crab meat! This was some really great southern, home style cooking that we all really enjoyed!
Delicious crab dip
Jereme’s sandwich
Fried fish bites with green beans, mashed potatoes, and fried okra
We didn’t eat at the Hangout this time on the trip, but I feel like it’s such a fun atmosphere for kids so I had to include it! I can’t really say that I’ve had any dish that just blew me away, but my boys always have so much fun eating here! They especially love the foam party each hour! So, if you’re looking for a fun environment, you should check this place out!
We loved Lulu’s the last time we visited! It’s such a fun place to dine and I really enjoyed the food and drinks here! The shrimp tacos that I had were amazing and so was the atmosphere! There was a lot for the kids to check out and they had a blast while we were here.
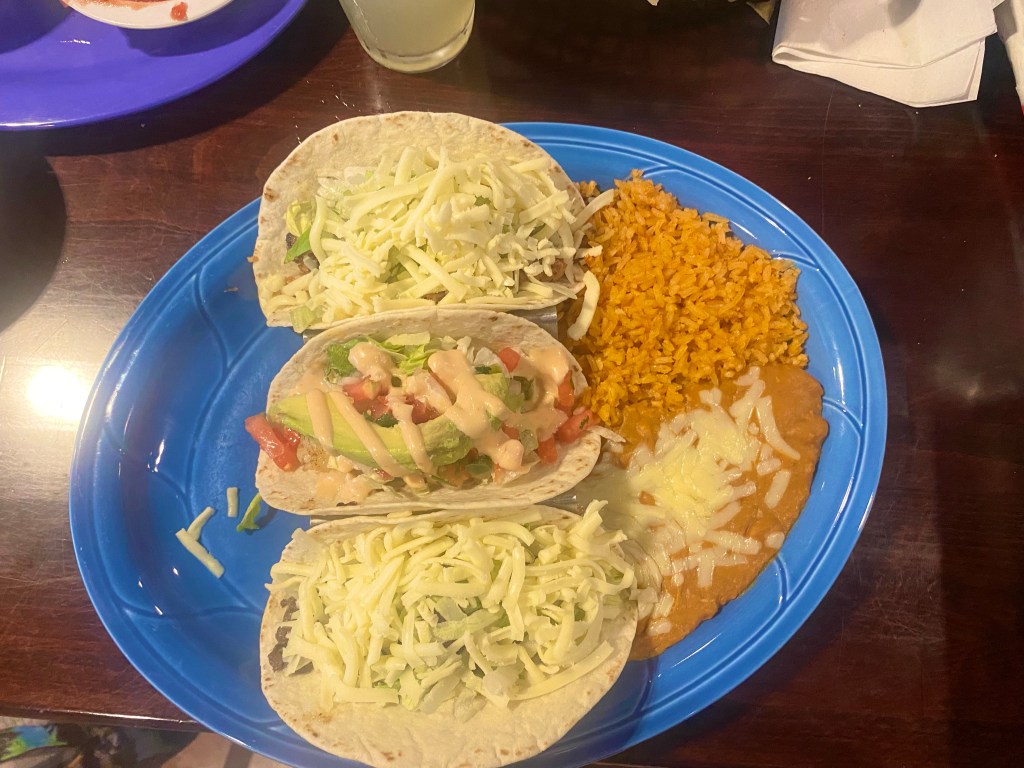
We needed a little break from all the seafood we were eating, so we decided to eat at Cactus Cantina for lunch one day while it was raining. I had Texas tacos and they were surprisingly really good! Jereme and the boys shared nachos that they said were pretty good!
If you like huge milkshakes, then be sure to visit The Yard while you’re here! These are fun desserts, especially on hot beach days! There are so many fun choices, there’s a milkshake here for anyone!
So much sugar
But worth it!
Other Dining Recommendations:
These were the other restaurants that were recommended by some locals that we just didn’t have time to eat at! We’ll be trying some of these places next time we visit!
We just returned home from an amazing week at one of our favorite beaches in Alabama! If you haven’t visited Orange Beach, I highly recommend it. You won’t be disappointed with the white sand and emerald waters, I promise!
We actually had plans to travel to Utah over the break, but two weeks before the trip I pulled up a long range forecast online and it was predicted to be freezing cold. I looked over at Jereme and basically told him that I didn’t want to hike in those weather conditions. So, I got busy planning something else and my boys said they really wanted to go to the beach and do nothing except play in the ocean. I wasn’t sure how warm the weather would be, but I quickly started making arrangements for Orange Beach. We got extremely lucky with unseasonably warm weather and an overall great trip!
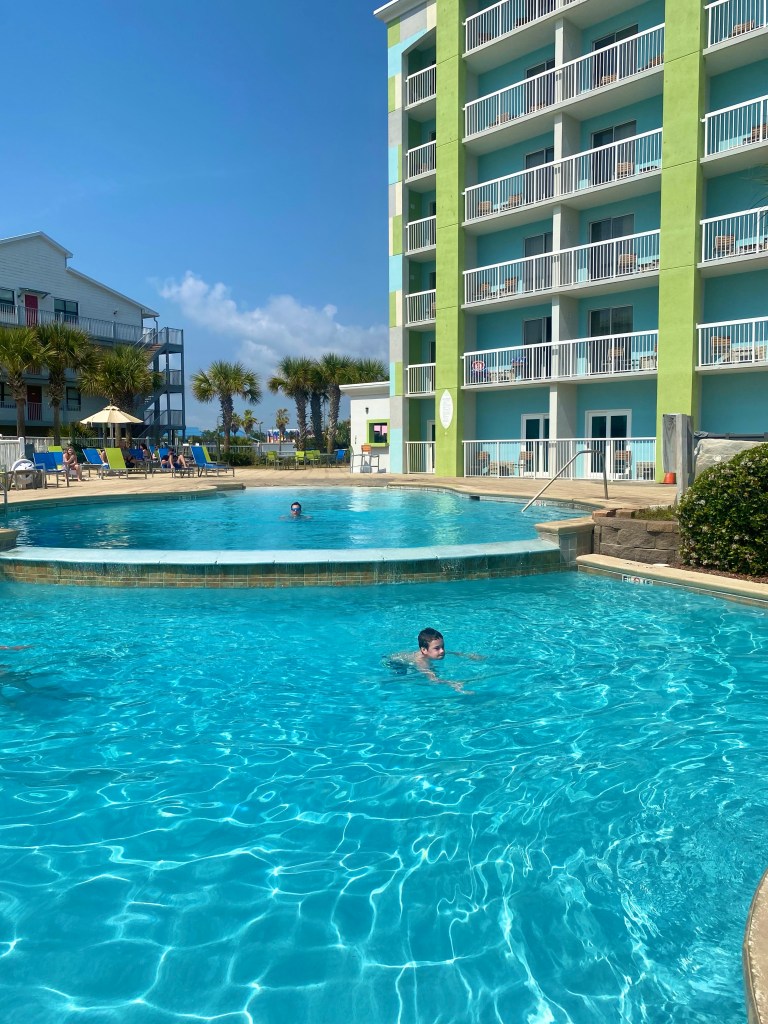
Since I only had two weeks to make arrangements, I quickly started looking for a place to stay on the beach. I really debated between a condo/beach house or a hotel. What sold me on booking a hotel were two things. One was having a pool and hot tub. Not every beach house has one. The other, was having free breakfast in the mornings. I decided that I didn’t really want to cook on this vacation, so I began looking at different hotels. We had actually stayed at the Holiday Inn Express at Orange Beach years ago and had a wonderful time, so I ended up booking a room for us there for the week! Below are the things we loved about this hotel!
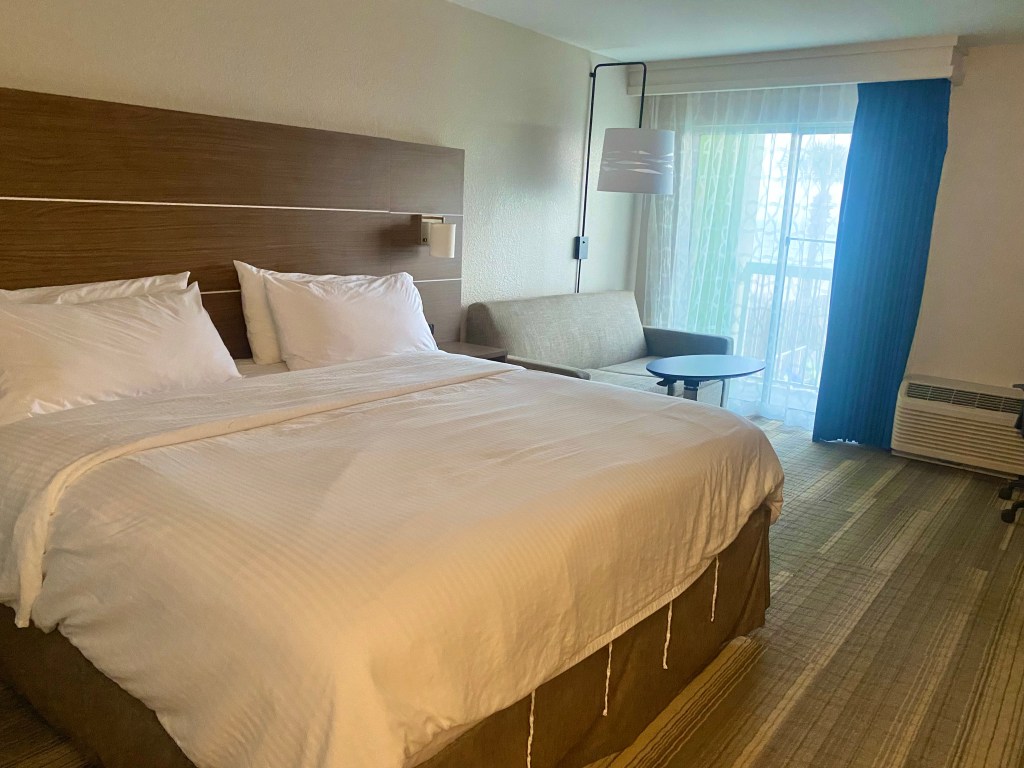
The Room
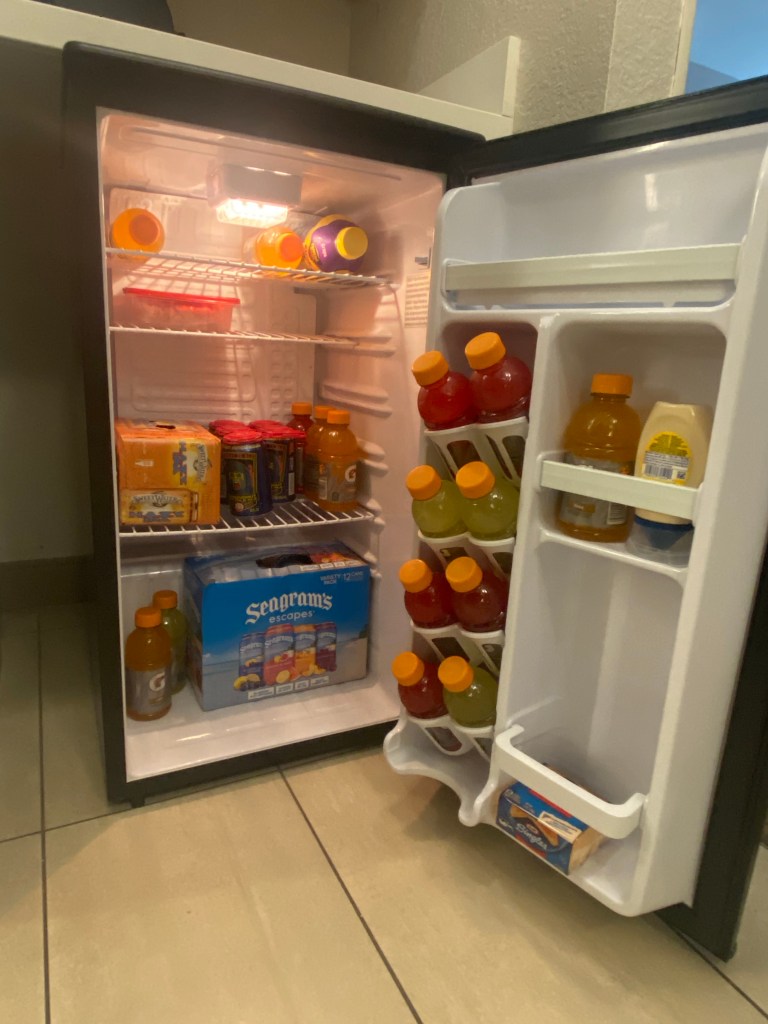
We had a clean and spacious beach view room with a king bed and a sofa sleeper for the boys. It was really roomy during the day when we had the “living room” set up. We didn’t spend a ton of time in the room, but it was very clean and the king bed was comfortable. The boys slept very well, but they both said the sleeper sofa wasn’t as comfortable as their beds at home. I loved having a refrigerator and microwave, too! We got groceries and snacks at the local Walmart our first night in town and had plenty of room to store items for sandwiches and drinks for the beach! At night, we’d make popcorn and watch a movie before bedtime. The bathroom was also pretty large and clean. We had no trouble getting ready for the day and night, there was so much counter space and more than one mirror!
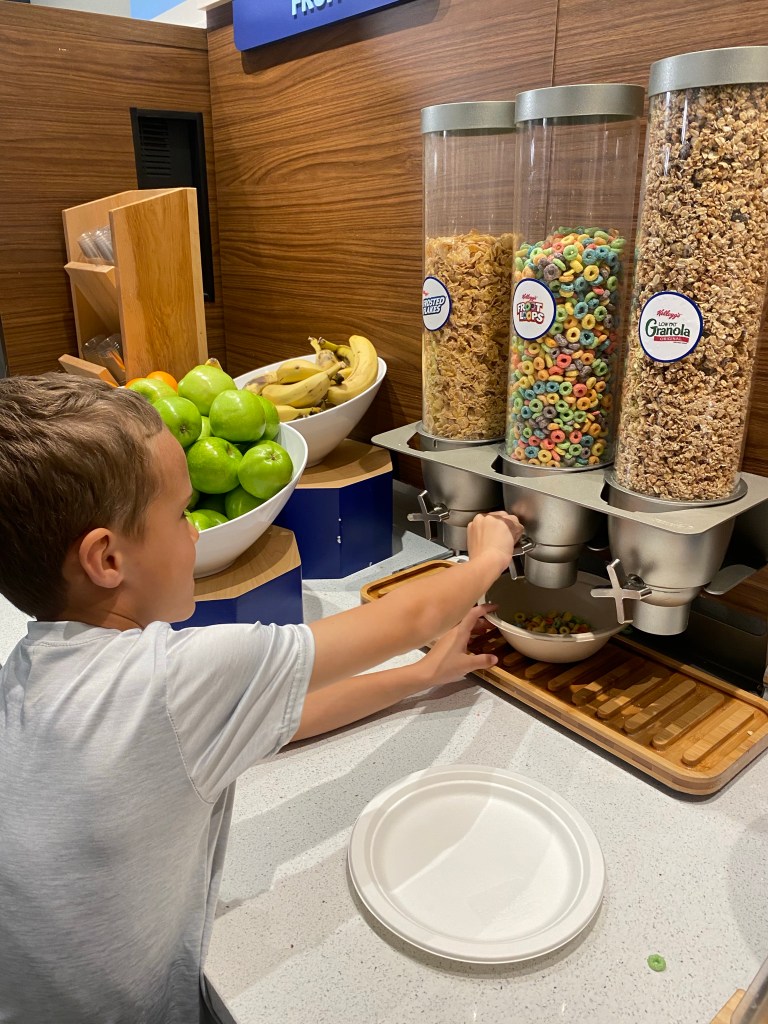
The Free Breakfast
A big selling point for our family is free breakfast! Let me tell you, this free breakfast is the best one we’ve ever had! They provided such a large assortment for everyone. Each morning there were biscuits and gravy, either sausage or bacon, and eggs. The egg choices were either cheesy omelets, egg white omelets with peppers, cheesy scrambled eggs, or boiled eggs. There were also cereals, pancakes, yogurts, fruits, and cinnamon rolls! We left completely stuffed and ready for a day at the beach!
The Hotel Staff & Guests
Another big plus besides having clean accommodations is a nice hotel staff. Check in was so smooth and everyone was so friendly. Our room was cleaned each day and someone from the staff was sure to check in on us each morning to see if we needed any items, like extra towels or soap. The hotel guests were also an added bonus! There were several retired couples at this hotel that spend the winter there. They shared all the good places to eat and we left with necklaces and a starfish from one couple! It was nice to have friends to chat with at the pools and on the beach!
The Beach & Pool
The beach access from the hotel was great! All we had to do was walk down a short boardwalk from the property and we were on the beach. At the beach in front of the hotel are chairs and umbrellas to rent for the day. The price is $40 for one day, $70 for two days, and $90 for three days. We did rent chairs, I needed to stay under an umbrella as much as possible. And it was easy, we had the same set up each day and we didn’t have to do any work setting up chairs and an umbrella or taking them down each evening. We spent most of our time at the beach, the boys played in the ocean for hours and hours! It was so relaxing.
When we needed to warm up after being in the ocean for a bit, we would walk up to the pool and hot tub for a quick dip! The pool is pretty big and there are tons of chairs and tables. We also liked the pool side bar and grill! They made yummy adult drinks and mocktails for kids. They also had hot dogs and snacks. I think the menu is a little bigger in the summer, we were there in the off season. The only part that I didn’t like was the hot tub seating. It was so rough and scratchy. If you go, grab a pool towel from the bin and sit on it while you’re in the hot tub. I was so worried I would snag my swimsuit on the rough seats. Other than that, it was nice and hot!
Rating
Based on our experience, I give this hotel 4.5 stars! It was clean, spacious, in a great location, and the beach views were amazing! If you’re looking for a nice, budget friendly place to stay then I would highly suggest checking this place out. We would definitely return to this property!
If you’re planning a trip to Orange Beach, let me know if you need any tips or recommendations! This was at least our fifth or sixth visit and it’s one of our favorite family beach destinations in the US.
Hiking with kids is not for the faint of the heart, especially if they’re young! We’ve been hiking with our boys for several years now and each hike seems to get easier and easier. Keep reading to learn my best tips for hiking with kids!
Hiking in Grand Teton National Park in Wyoming
This post contains affiliate links for products that we truly love! I may earn a small commission, at no extra charge to you, if you purchase any items using the links provided.
1. Start Them Young –This is one of my biggest tips, start traveling and hiking with your kids when they’re young! If you follow along on our adventures, then you know that we are a road tripping family. I’m constantly asked, “How do you get your kids to ride in a car that long?” We started them out really young and they don’t know any different. I suggest this with all aspects of travel, whether that be driving, flying, hiking, snowboarding, etc. If you start them young, it will simply become a part of their muscle memory and will be a familiar activity.
Jett’s first hike, DeGray Lake State Park in Arkansas
2. Know Your Kids – You know your kids best, so make sure this is something that they will not only enjoy, but can also handle. Hiking is not for everyone and that is okay. I am all about pushing my kids to try new things and be adventurous, but I also want to have a great time on vacation! Hiking would be no fun for anyone if your kids were miserable the whole time. Know their abilities and their limits and ultimately do what’s best for your family. That might even be waiting until they’re older or hiking without them.
Hiking in Rocky Mountain National Park in Colorado
3. Break in Hiking Shoes –This is a great tip for anyone hiking, even adults! There is nothing worse than having uncomfortable shoes or blisters when you’re walking. It can be even worse for kids. And if you have kids, then you know that they are going to outgrow their hiking gear just about every season. We purchase these sporty, waterproof hiking shoes for our boys and they play outside in them for several days or weeks before we leave for our next hiking adventure! Trust me on this, do not hike in brand new hiking boots before breaking them in!
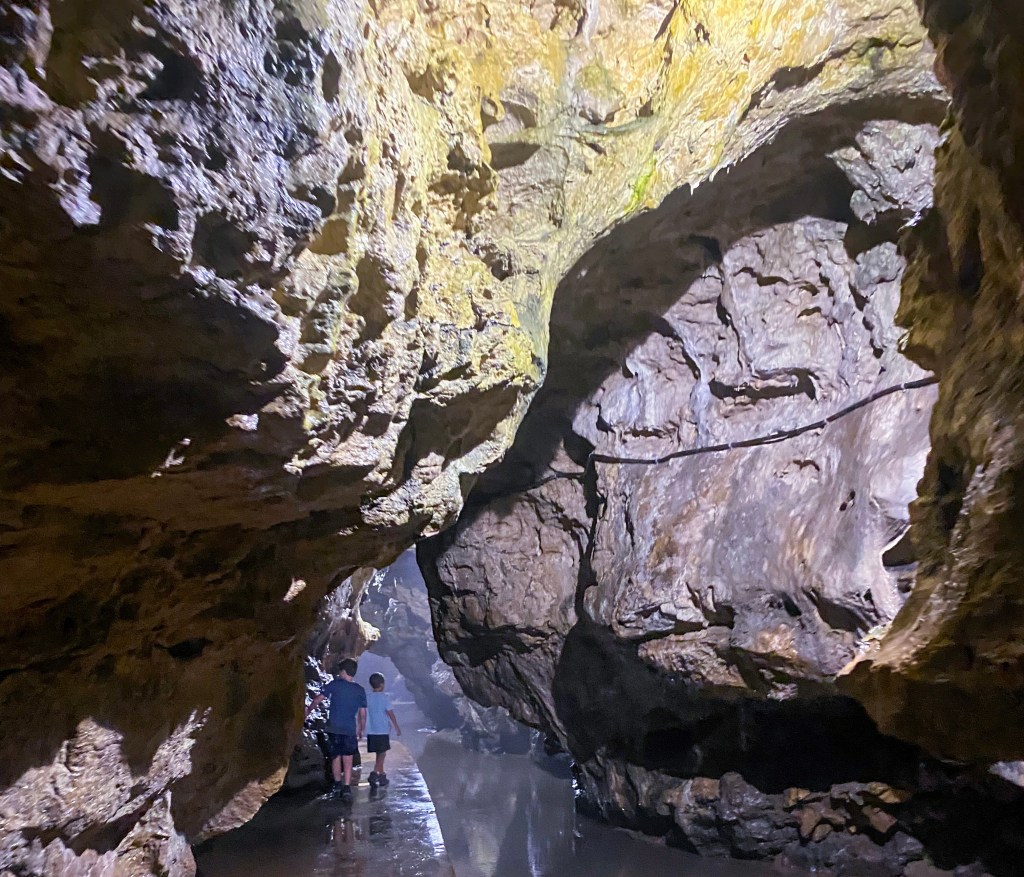
Hiking in Maquoketa Caves State Park in Iowa
4. Fuel Up – This is another great tip for everyone in your group. Hiking can be strenuous. Make sure to eat a big breakfast or lunch, depending on what time of the day you plan to go hiking. There is nothing worse than trying to have a fun family day and one of your kids is in a whole mood because they’re hangry. This happened to us with our little one and I can promise you, it was not one bit of fun once he got hungry. We refuse to leave for the trails until we know that our kids are well fed and full!
The little one is hangry, just look at his face!
5. Bring Lots of Snacks, Food, and Water –We bring a whole hiking backpack full of snacks and water for the trails. Again, we’ve had a pretty tough experience with our youngest one and learned our lesson. We buy these hiking snacks, which my kids love. I also bring sandwiches and Lunchables and lots of beef jerky for extra protein. And we load everything up in our cooler backpack to keep all the food and drinks cool.
Image from Amazon.com
6. Start with Shorter Hikes First – Another really important hiking tip is to start with shorter hikes first. This allows you to assess your kids’ hiking abilities and see if they’re enjoying themselves. You can also practice short hikes or walks around your neighborhood or in a nearby park to see how long your kiddos can last before getting tired or bored! Once you’ve done some shorter hikes, then you can start adding longer trails to your itinerary!
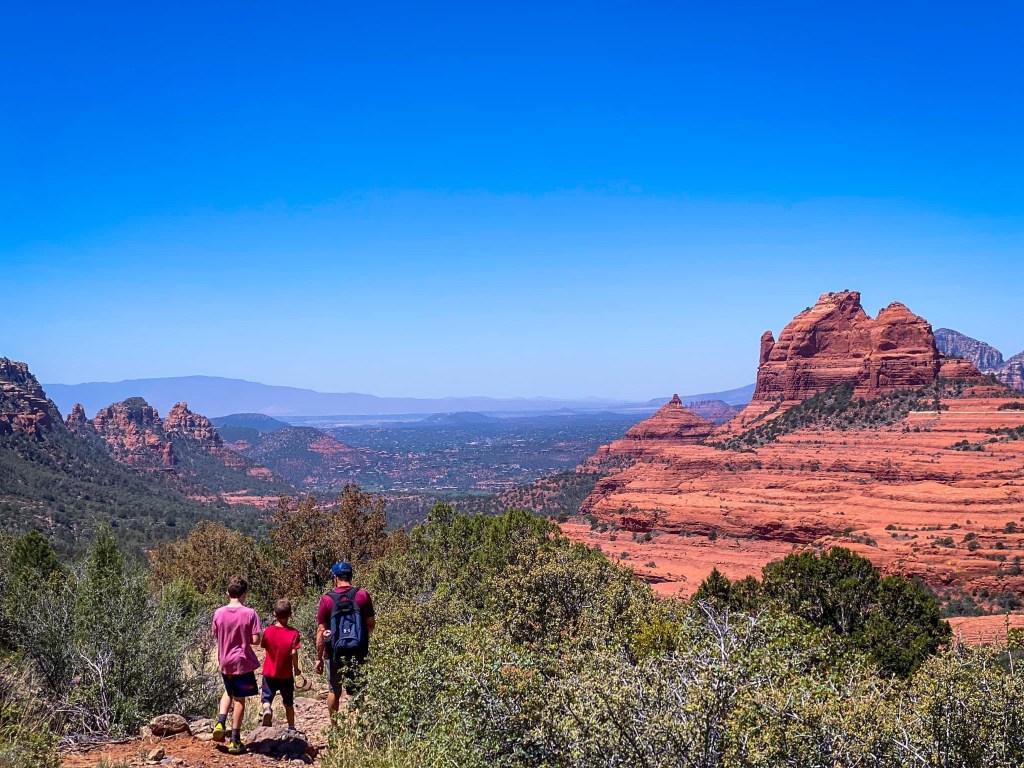
Hiking in Sedona, Arizona
7. Bring a First Aid Kit – I cannot recommend bringing a first aid kit when traveling enough! It never fails, my oldest son falls on every single hike and needs a Band-Aid for his scrapes and cuts. At this point it’s become a joke in the family, but I’m always prepared. We also include sunscreen, bug spray, and bear spray in our hiking backpack!
Image from Amazon.com
8. Go at a Slow Pace – When you start hiking with your kids, you should go at a slow pace. Don’t expect your kids to be able to keep up with adults. We follow all hiking rules, but on some trails there are fun places for kids to climb and explore! I highly encourage this, hiking will be a better experience if your kids are having fun! Take breaks when you see that your kids are tired or need snacks and water! You’ll be surprised at the memories you make when you’re surrounded by nature having a nice rest and talk with your kids.
Hiking in Rocky Mountain National Park in Colorado
9. Be Flexible – Being flexible goes hand in hand with knowing your kids. If you can tell they’re struggling or not having fun, then you might need to stop more often for breaks or simply call it a day. Don’t expect for everything to go perfect, especially when you’re first starting out. I promise, it does get easier and easier the more trails you hike.
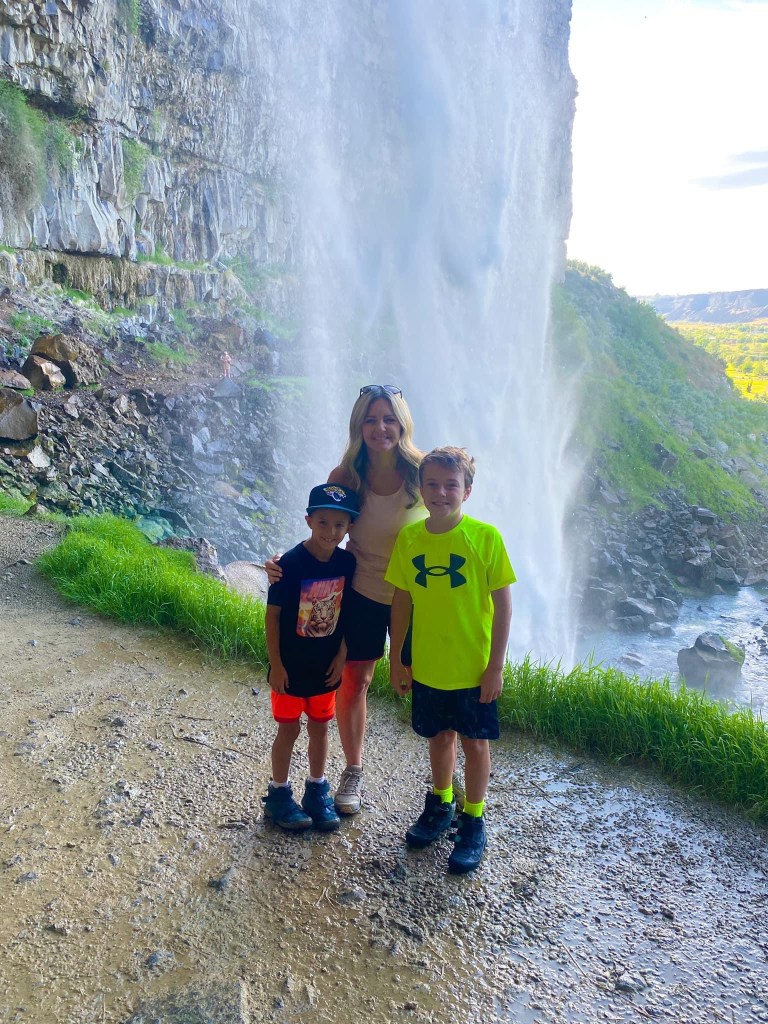
Hiking behind a waterfall in Twin Falls, Idaho
10. Plan Fun Hikes – One of the biggest hiking tips that I’ve discovered is to plan fun hikes! This not only adds to the excitement, but if you plan something fun the kids will be eager to make the hike to see it. For example, I usually plan hikes that will lead us to a swimming hole, waterfall, cave, or rocks to play on. When my kids know that something fun awaits, they don’t complain as much because they’re excited to make it to the end. Check out our Top 10 Hikes Across the US for ideas on great places to hike with your kids!
Hiking in Maquoketa Caves State Park in Iowa
11. Know the Weather – Depending on where you’re hiking, the weather can change quickly. When hiking in the mountains in the summer, chances of a pop up rain storm are pretty high in the afternoon. I suggest being prepared for any weather conditions and knowing the best time to hike at your destination. If you’re in Utah in the summer, you’re going to want to hike earlier in the day before it gets too hot in the afternoon. If you’re in the mountains, you might want to hike later in the day when it gets warmer.
Waiting out a thunderstorm in Ward, Colorado
12. Bring Extra Clothes – I highly recommend bringing extra clothes for your kids when hiking. Mine always seem to find water or mud to play in. And once they’re wet, they want dry clothes to continue hiking in. We bring raincoats, extra gloves and socks, and a change of clothes or swimsuits in case there’s a water feature. If I know there’s water to play in, I let my kids hike in their swimsuits and then they change into dry clothes once we’re back at the car.
Hiking in Redwoods National & State Parks in California
13. Keep it Engaging – We like to keep the kids engaged, especially when they seem tired or bored. We might come up with a scavenger hunt on the fly. Most of the times it’s as simple as looking for something a certain color or trying to be the first person to spot wildlife! My husband is the best at bringing small balls or a Frisbee for a quick game of catch. And once, my boys invented their own dodgeball game with a pinecone. That was pretty entertaining for all of us!
Hiking in Arches National Park in Utah
14. Let Your Kids Help Choose the Hike – I like to let my boys help decide which trails to hike once I have a destination in mind. I use the AllTrails App to find the best hikes for us. Once I narrow down a destination and a list of hikes that are easy or moderate, I will show the kids some photos and let each of them decide what trail they’d like to hike. They’re usually so proud of their choices and excited to hike the trail that they picked! And of course, Jereme and I hype it up and constantly point out how great their choice was.
Hiking in Redwoods National & State Parks in California
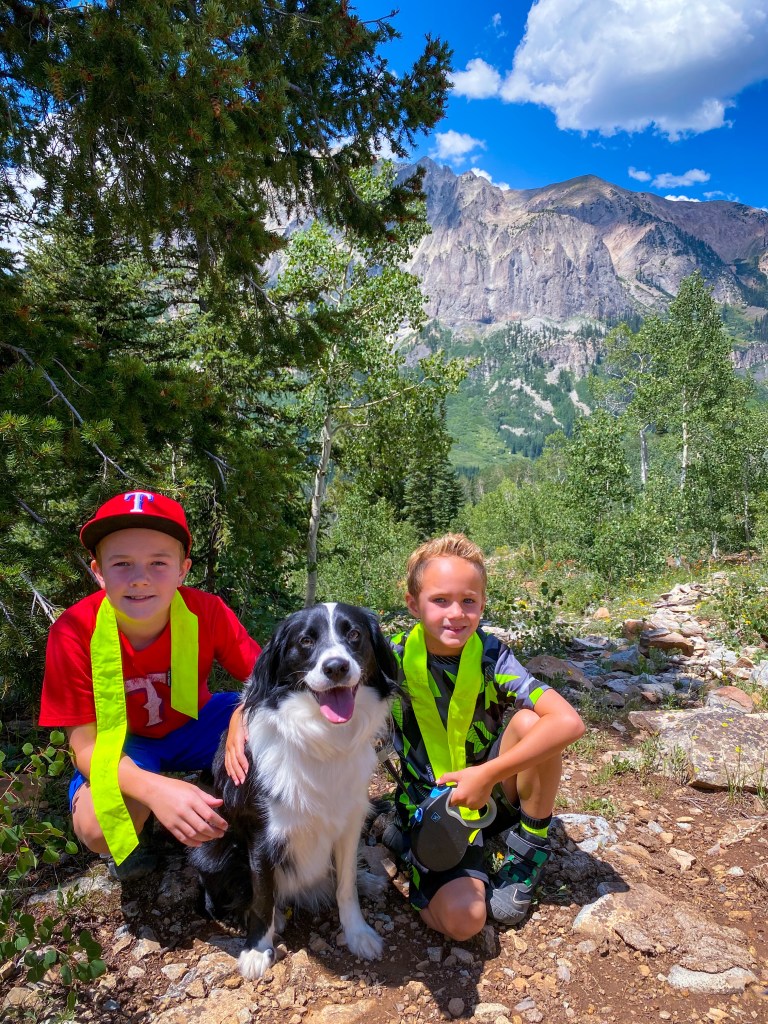
15. Give the Kids a Job – This is a great tip that has come in handy for us several times, especially for my youngest. If we’re hiking with our dog, we let him carry the leash and walk her. If we don’t have her with us, then he usually has the binoculars and is in charge of finding something cool to check out when we stop for breaks. Sometime, it’s the little things that make a huge difference!
Hiking in Crested Butte, Colorado
16. Have Fun – Finally, my best hiking tip is to have no expectations other than having a fun time with your family! It might all go as planned or you may have to end your day early. But being together and getting outdoors is so rewarding! Pack your patience, have a great attitude, encourage your kiddos along the way and enjoy every moment with them!
Hiking in Canyonlands National Park in Utah
Hopefully you find some of these hiking tips helpful! I really can assure you that it gets better and better each time. It doesn’t always go as perfectly as planned, but hiking is such a great experience for kids. What are your questions or hiking tips? I’d love to connect with you, so leave a comment if you have any recommendations, need help planning a hike, or have a question! Happy trails, my friends!
One of the questions that I’m asked most often is what kind of camera equipment I use for our travel photos. I’ll let you in on a little secret… I use my iPhone 11 for everything! And up until two years ago, I was still using my old, trusty iPhone 6! The key to capturing great photos is knowing how to use the camera that you have and taking tons of pictures!
If you follow along on our adventures, then you probably know that I’m a teacher and we travel on a budget. I would love to have professional gear, but that’s not really an option for us right now. I do have a Nikon starter camera, but to be honest it’s too big and bulky for me to lug around on our adventures. So, I’m going to show you I my best photo tips and tricks for using the iPhone camera that I have.
Shooting Modes and Angles
One of the first photo tips I like to share is shooting in different modes and from different angles. Cell phones are pretty fancy these days and even an amateur like me can simply click a button to change the mode on the camera. Below are the different modes and angles that I recommend.
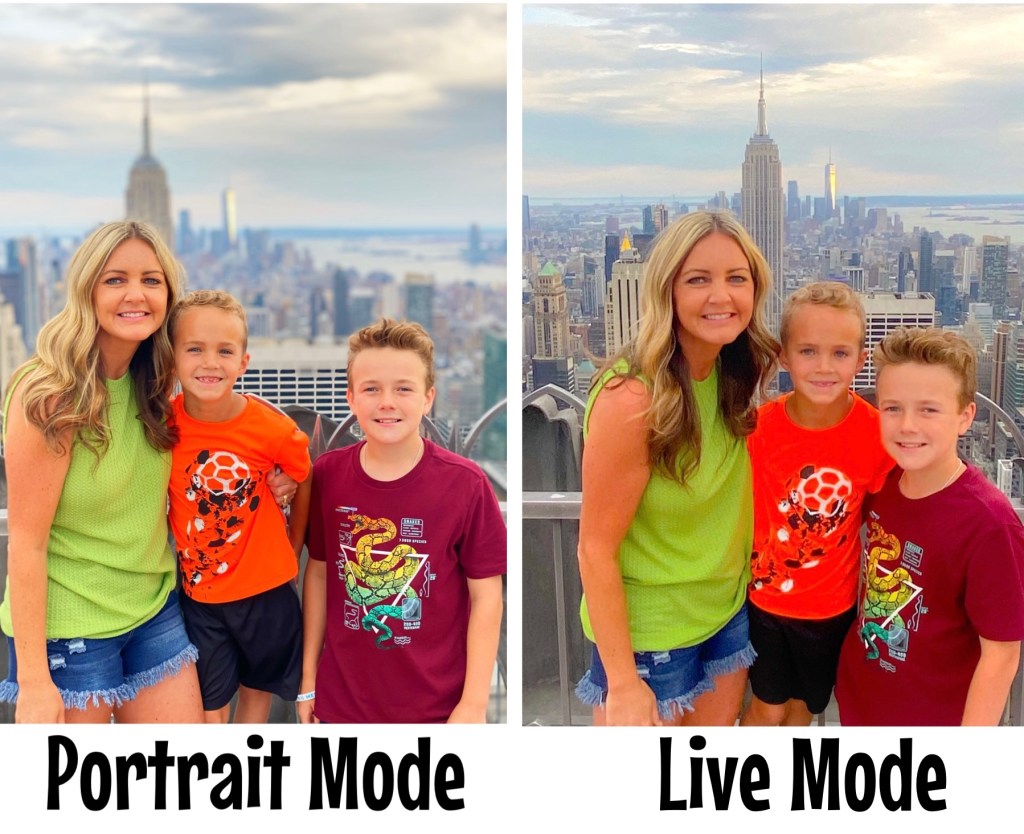
Live Mode – I always take photos with Live Mode turned on. I like this feature because you can go back and make Reels clips later with these photos. I have created some really special travel vlogs specifically using mini clips from Live Mode photos. This mode is also necessary for Long Exposure photos, which I will touch on next. Check out the steps below to make sure you have your camera’s Live Mode turned on.
Live Mode Photo Tip: Open your camera and click on the circle in the top right hand corner (shown above).
Live Mode Photo Tip:If Live Mode is turned off, you will see a line through the circle (shown above).
This video clip was made only using photos that were taken with Live Mode turned on!
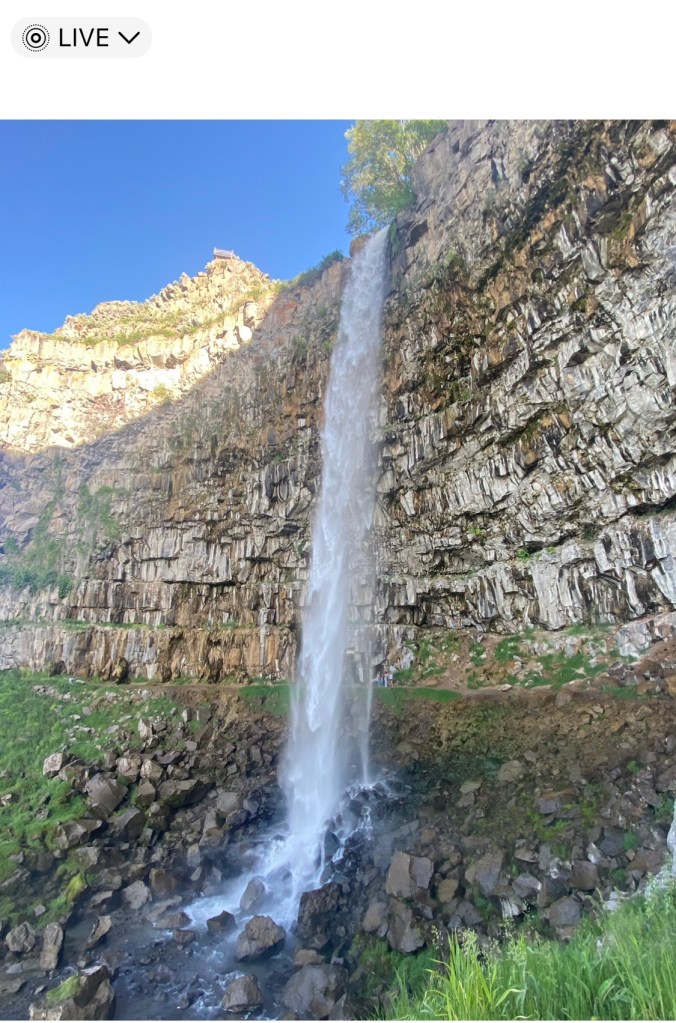
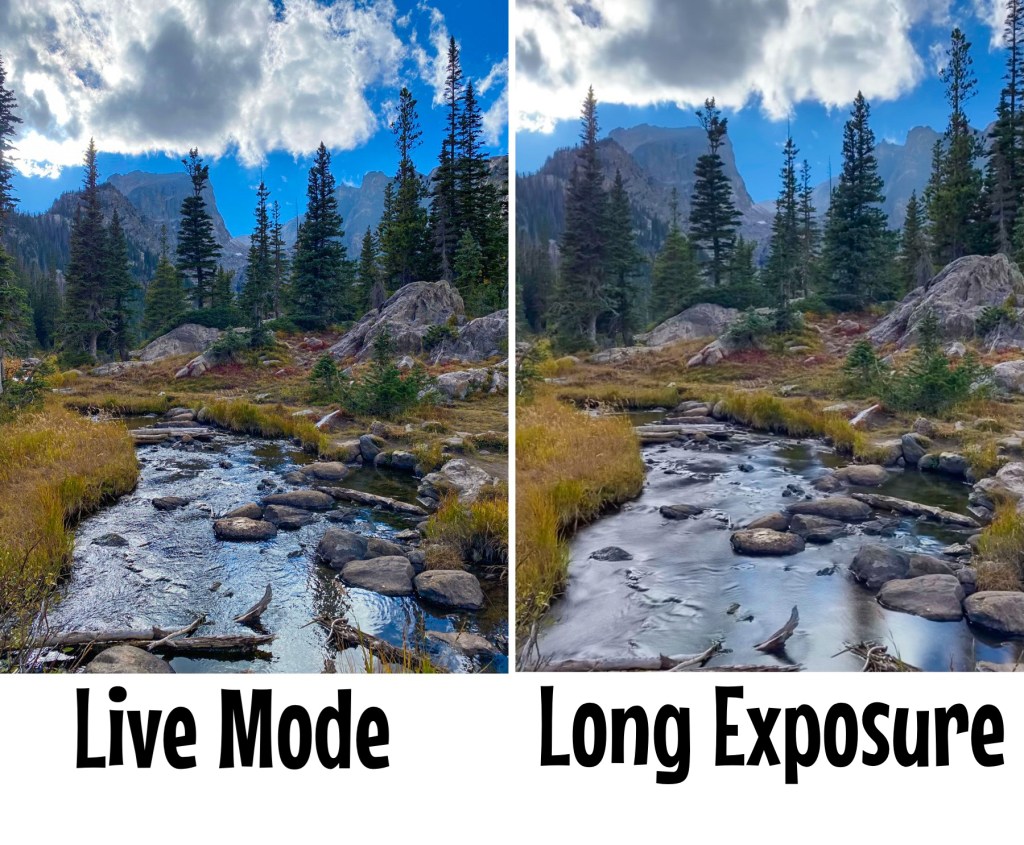
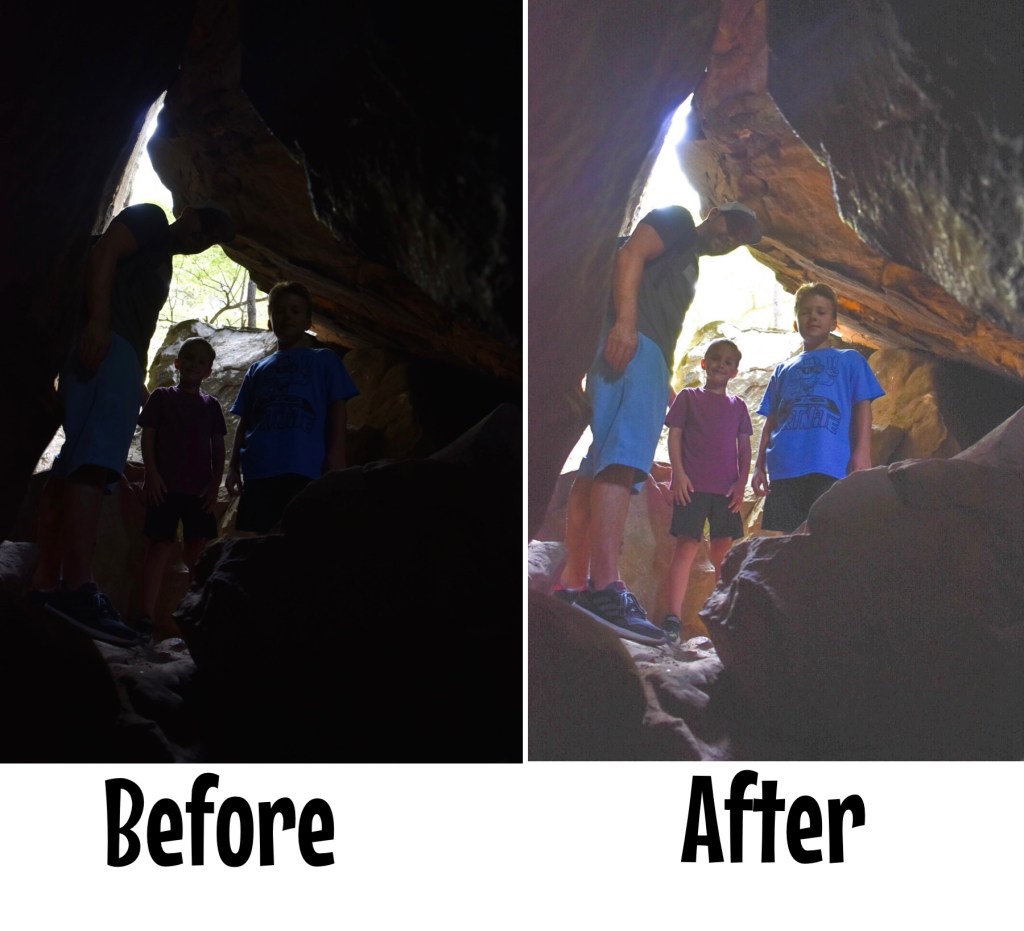
Long Exposure – Have you ever wondered how people transform a photo of a waterfall or a flowing river into those stunning photos with the blurry/foggy water effect? Well, I know the secret! And it all starts with shooting in Live Mode first, then editing the photo in the iPhone’s camera app to a Long Exposure. Another quick Long Exposure photo tip is to only add this option to landscape or scenery shots. I have not had the best luck with this feature if there are people in the photo because they become blurry as well! Check out the steps below to do this and look at some of my before and after photos in Long Exposure Mode! Both images of the waterfall are from the same photo, the first one was taken in Live Mode and the second image is the photo with Long Exposure.
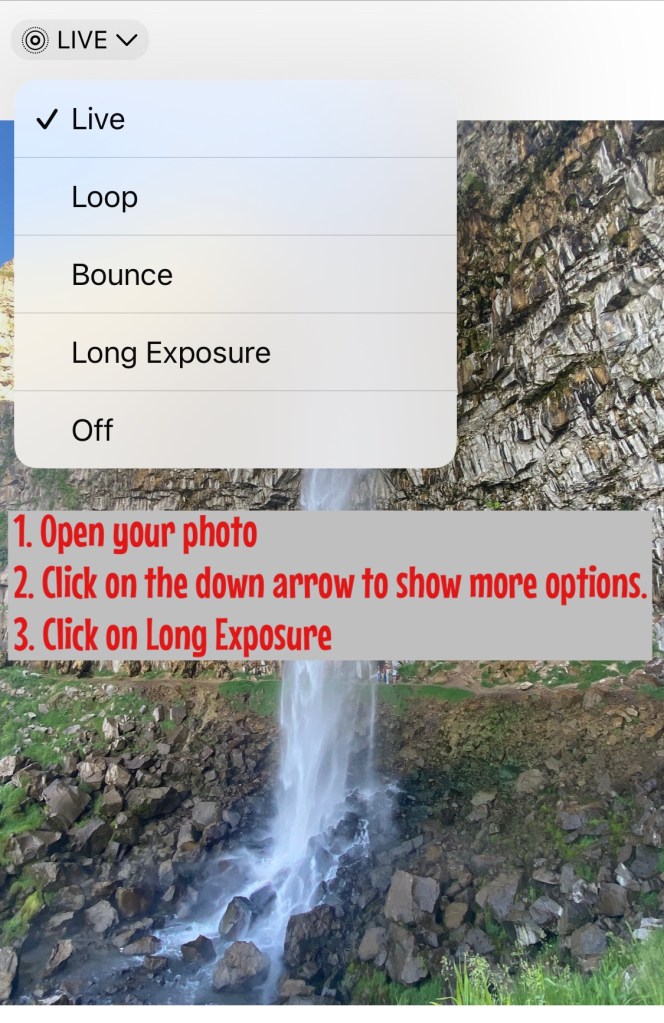
Photo Tip: To select Long Exposure, the original photo must be taken in Live Mode.
Long Exposure photo tip: Open your camera and take a picture in Live Mode of moving water. Next, open the image from your photo gallery. Click on the down arrow next to the word Live. Choose Long Exposure!
This is the end result! It doesn’t get any easier than this!
Both landscapes are stunning! Which photo do you prefer?
Portrait Mode – I really love taking pictures in Portrait Mode! City shots are my favorite when taken in this mode. I also like to use Portrait Mode when there are crowds of people or something not that visually pleasing in the background. I highly suggest trying this photo tip, I know you will be surprised at how professional your photos turn out! Follow the steps below to put your camera in Portrait Mode and enjoy some of my favorite photos shot in this mode, too!
Photo Tip: You can find the Portrait Mode button next to the Photo button when you open your camera.
I like Natural Lighting, so I usually leave this setting alone.
Same picture, one taken in Portrait Mode and the other in Live Mode.
Self-Timer – Another one of my favorite photo tips is using your camera’s self-timer. I do have a cell phone tripod, so this mode comes in handy when I want a great family shot! I also use the self-timer when I’m taking selfies of us! This mode gives us time to get situated in the frame and for me to get the angle right. Keep reading to learn how to set the self-timer on your phone.
Angles, Vantage Points, & Perspectives – The next time you’re on vacation or somewhere scenic, play around with different angles and vantage points when you’re photographing the landscape. I like to get down really low to the ground when photographing a picturesque scene. It’s also fun to play around with different natural objects, like rocks or a water line. A good photo tip is to off-center your main subject, whether that be people or an object! Check out some of my favorite landscape photos below.
I got down low to the ground and used this drift wood to get a cool beach shot!
Again, low to the ground to get this lake shot! I had never seen pine cones scattered on the shore like seashells!
The contrast in the yellow flowers, whitecapped mountains, and blue sky made a great picture!
This is one of my favorite shots that shows the true perspective of the Grand Canyon! Notice how my subjects are off-centered and more to the left of the photo.
Photo Editing
I wish I knew all the ins and outs of Photoshop, but unfortunately I do not. However, I do know how to enhance photos to make them look more visually appealing without altering the people in the image in an unrealistic way. I exclusively use two apps besides the basic editing features in the iPhone’s picture gallery, which are the Lightroom App and the Facetune App.
iPhone Camera App – This is where I start my photo editing, right in the photo app! And typically, I brighten photos and increase the vibrancy only. These are my go to edits and are so simple and easy. Keep reading to see how I increase the brightness and vibrancy in my photos.
I increased the vibrance to 100, but as you can see, the change if very subtle.
Lightroom App – This is another one of my go-to editing apps when I have a photo that just doesn’t look like the real deal. Maybe the faces in the picture are dark because of shadows. Maybe the colors just aren’t popping like they are in real life. I don’t have any presets saved here, but I do like to increase the brightness and vibrancy with this app, too.
This app makes it so easy to enhance your photos!
Photo Tip: Using Lightroom, increase the shadow and vibrancy for these results!
Facetune App – I love Facetune when I need to make something in a photo vanish. Whether that be a pimple or a random person in the background! The patching and vanishing tools in this app are amazing! I used to like smoothing out facial features, especially when I first started noticing all of my wrinkles. But now, I’ve embraced my age and really hate that plastic look. So, I truly only use this app for the vanishing/patching tool. Check out these features and some before and after pictures below.
Photo Tip: Step one, remove the blue trash can from right side of photo with Facetune. Step two, increase the brightness on the new imagewith iPhone photo editing.
Not sure why this lady walked behind our photo, but it wasn’t a problem with the Facetune app!
Poses & Action Shots
Learning how to change up our poses is something that I am still trying to figure out, it can feel so awkward at times. And I really do love those traditional pictures where everyone is smiling and looking at the camera! But, I’m also finding that I really adore those action shots, too. If you’re tired of taking the same old photos, then try changing up how you pose or getting more action shots. I’ve taken photos of us walking, jumping, running, and facing away from the camera, just to name a few. Check out some of our favorite action shots and nontraditional poses below!
Photo tip: Face away from the camera, but let your kids be themselves. I love this unintentional shot with Jake looking back at the camera!
This image is actually framed in my house. It captures my boys hiking along a gorgeous trail, no posing!
Cropping, Zooming, & Straightening
Cropping, zooming in, and straightening a photo might just be all you need to capture a great shot! The iPhone makes it so easy to crop and straighten a crooked picture. Check out the photos below to learn how to crop a photo, how to straighten a photo, and then see how some simple cropping and zooming in can completely transform your image into a stunning shot!
This is the image I shot from the beach. Wait to see the final product after some cropping & zooming! (Below)
This is the final product after some simple cropping & zooming!
Water Shots
With the right waterproof phone case, you can take amazing shots that you might have been too scared to capture before! I just recently purchased a great case and was able to take some fun shots at the lake and in the pool of my boys, without worrying about ruining my phone! Check out some of my favorite water shots below.
These underwater shots were taken in the pool!
Even in a waterproof phone case, the images from the iPhone are still so clear!
Budget Friendly Camera Gear/Accessories
This post contains affiliate links of products that I love. I may earn a small commission, at no extra charge to you, if you purchase any items using the links provided.
Camera Stand – I literally take this stand everywhere to capture our own family photos!
Waterproof Phone Case – This has allowed us to take some cool action shots on the water!
Cell Phone Arm Band – This has now become my “purse” and is great for traveling!
Cell Phone Image Quality
When people learn that I primarily only use my iPhone for photos, they ask about the image quality when printing pictures. I am happy to report that I have had no issues of poor quality when it comes to printing my iPhone photos! In fact, I have two walls in my home only dedicated to our travel adventure photos, and these two areas are the favorite places in our home! I use Mixtiles for most of these photos and we’ve been very pleased with the outcome. Check out the two photo walls in my house, and remember, every single printed image is from my iPhone!
This is the wall in our office.
This is the wall in the boys’ hallway.
Be Creative & Have Fun!
My final photo tip is to be creative and have fun trying new things with your camera! You’ll never know how great an image will turn out if you don’t at least try. Play around with editing and cropping, try out new angles and poses, and don’t give up if you aren’t successful right away. Check out some of my favorite creative shots over the past year!
This shot was a spur of the moment idea when I noticed our shadows while hiking! I wasn’t sure how it would turn out, but it’s such a cool shot of our family!
Another awesome action shot taken on July 4th!
I loved the color of these flowers and decided to get super close for a photo. The sunset in the background was a nice surprise!
This was our first time seeing sand dollars on the beach!
I truly hope that you find these simple photo tips helpful! I am not a photographer in any way, shape, or form, but I’ve been so happy with the images I’ve captured on our adventures. I’m sure I still have a lot to learn about taking amazing photos and I would love to hear any of the photo tips you may have! What photo tip of mine are you going to try next?
The year is 1997. School’s just released for the day. I head to the gas station and fill up my mustang for a grand total of five dollars. I cruise around town for a bit, I still have 45 minutes before I’m on the clock at the local tanning salon. Bored, I go ahead and head to work. I know just what I’ll do. Grabbing a Playboy bunny sticker and my favorite tanning lotion, I start the tanning bed ready for a quick nap before my shift starts. Twenty minutes later, I’m well rested and a shade darker. Life is good…
Image from Tanning Supply Shop
Fast forward to 2023 and I’ve just had my sixth, or maybe it’s now my seventh, skin cancer surgery. I’ve debated even sharing this story. But, my overall goal for this blog is to help people. I have dealt with skin cancer since I was sixteen, although I had no clue that’s what it was. I was twenty eight before I was correctly diagnosed and now at forty, I have more knowledge about skin cancer than I ever thought I would.
My first two skin cancer surgeries. 3 layers & more than 200 stitches for a spot the size of a quarter.
My first spot appeared on the middle of my back when I was sixteen. Two different doctors misdiagnosed the spot as a busted capillary. I’m sure they probably didn’t think a sixteen year old would have skin cancer at such a young age. This spot was flat, red, a little flaky, and about the size of a quarter by the time I got it removed at twenty eight. I finally saw a dermatologist when my husband would notice dots of blood on the back of my shirt where the spot was. Immediately the dermatologist knew it was basal cell carcinoma, but I still had to go through a biopsy to confirm. She was right and from there I had a full body scan and another small spot was found on my shoulder. Both of these were removed. The spot on my shoulder was pretty easy and I was able to have the procedure in the office. The spot on my back was a little tougher. I went through Mohs surgery and then reconstructive surgery afterwards.
This is my most recent surgery from about 3 weeks ago. The spot was about the size of my pinky fingernail and I ended up having 2 layers of stitches.
Since then, I have found several more spots. Lucky for me, all but one have been basal cell carcinomas and none have been on my face. I am terrified about melanoma and have only had one spot that was considered an atypical mole with signs of pre-melanoma. I wish that I would’ve photographed the before and after pictures of each spot. None of them looked like what I would have expected skin cancer to be. I’ve had skin cancer on my leg, back, both shoulders, and chest.
5 Warning Signs of Basal Cell Carcinoma
A sore that just doesn’t heal. This has been the number one indicator for me. Most of the spots I have found have looked like a small sore, sometimes even a bug bite. But it never goes away, even when using Neosporin. It might start to look better, like it is healing, and then it returns!
A reddish patch of dry, flaky skin. This is very similar to how the spot on my back was. It was often itchy, but never hurt. It was very dry and flaky and red. It finally started bleeding after twelve years.
A shiny bump or nodule. These bumps can be clear, pearly, or even white. Often, these are mistaken for normal moles.
A small pink growth. This is similar to what the bump on my shoulder looked like. It was described like a small pink eraser on the end of a pencil.
A scar-like area. This type is more serious, and can indicate an invasive basal cell carcinoma. The skin can appear shiny and the area is usually flat, white, yellow or waxy in color.
Living with Skin Cancer
If you follow along on our adventures, then you know that I don’t let skin cancer rule my life. We are a family that loves to be outside! We take beach vacations, we spend a lot of time hiking, and we even have a pool. But I have gotten REALLY serious about wearing sunscreen and ensuring that my boys do, too. Just one sunburn can double your chance of getting skin cancer. And unfortunately, even being as careful as I am, I have still gotten a few sunburns since this journey started.
Products That I Love
Rocking an at home fake tan and a cute rash guard!
Unfortunately I was raised in an era that promoted “you look best with a tan.” And even having skin cancer, I still want to have some color. However, you will never find me tanning or laying out in the sun anymore. I mean, I do lay out in the sun but it’s usually under an umbrella lathered in sunscreen! Below, are products that I love that keep my skin protected and offer a little bit of fake color.
This post contains affiliate links. I may earn a small commission, at no extra charge to you, if you purchase any items using the links provided.
When in doubt, have it checked out. If you notice something that seems abnormal, have a dermatologist check it out!
Check your skin often, from head to toe. Look for new moles or even those pesky patches of dry or flaky skin. Monitor them often for any changes.
See a dermatologist annually. Make this one of your annual dr. visits. It is always best practice to have a professional check your body. And be prepared, these full body scans are super uncomfortable, but can be lifesaving!
Be sun safe every day! Stay out of tanning beds, wear sunscreen every day, and seek out the shade if you’re outside. This is the most effective way to protect yourself from skin cancer.
Share this habit with your friends and kids! Make these safeguards everyday habits with your friends and family. I have probably terrified my kids of skin cancer, they hate seeing my scars. They also hate to stop playing outside to lather up with sunscreen, but I hope that being so firm about this will help them in the future.
Let this be your sign to get your skin checked, especially if you’ve ever wondered about a spot or a mole. If you’re tanning now, please stop! And if you’re headed outside this spring break or summer, make sure to wear that sunscreen and reapply often. I am always happy to answer questions that you may have, so don’t hesitate to reach out.
My youngest son has a strong desire to earn as many Jr. Ranger badges as he can. So, I decided to take him to the Waco Mammoth National Monument for a quick day trip when I learned that they participate in the Jr. Ranger Program there. Waco is about two hours south of Dallas, so I knew this location wouldn’t be too far for us to explore on our own together.
Fossil at the excavation site.
We ended up having a really fun time and he earned that badge! It was fascinating to learn about Colombian Mammoths and even cooler to discover that they roamed right here in TX thousands of years ago. If you are in the area or looking for a quick day trip from the Dallas, Austin, or San Antonio area, then I highly recommend checking this place out!
So excited to see the fossils and work on his Jr. Ranger booklet!
Background Information
The Colombian Mammoth behindus represents their actual size!
Did you know that Colombian Mammoths were actually larger than the Woolly Mammoths? I didn’t, until we visited the Waco Mammoth excavation site! This site is actually really amazing! Not only is it the first and only recorded nursery herd of ice age Colombian Mammoths in the country, you get the opportunity to visit the actual dig site around these fossils! Most of the time the fossils that are found are taken from the ground and then reassembled and put on display at a museum. Here, the “museum” is the actual site where these giants were found!
I really liked that this is still an excavation site with tools and equipment ready to use!
It is believed that this group of mammoths were in the creek bed when a flash flood occurred. The mud in the creek became too much for the mammoths to escape and they all perished right there. They were first discovered in 1978 by two men that were exploring the Bosque River looking for arrowheads. From 1978-1990, 16 mammoths were discovered here. These fossils are now on display at Baylor University in Waco. All of the fossils uncovered since 1990 have been left at this site. Several other ice age animals were also discovered here. In 2015, President Obama declared this site as part of the National Park Service.
We enjoyed the grounds, there is a nice walking trail to the excavation site and lucky for us, the weather was gorgeous. There is also a small sand box area near the Visitor Center that kids can dig for their own fossils. And when we visited, there was a tent outside of the Visitor Center with different fossils and animal bones to explore. I’m not sure if this is always here or something special for the weekend. Since Jake participated in the Jr. Ranger program, he had to complete 5 activities from the Jr. Ranger booklet while we were there. He really liked looking at the fossils while completing the scavenger hunt!
These are the fossils and bones outside of the Visitor Center!
On our visit, there were only self-guided tours available. Upon arriving, we received tickets to the excavation site with a barcode to scan and learn more about the site and the fossils. Overall, we only spent about an hour and half at the Waco Mammoth National Monument. We made the two hour drive and stopped for a quick lunch. Then we went to the Mammoth site and drove back home. We spent about a total of six hours on our day trip. There are other awesome activities to explore in Waco, I am linking a list here! I hope you get the chance to visit this great little town right in the heart of Texas soon!