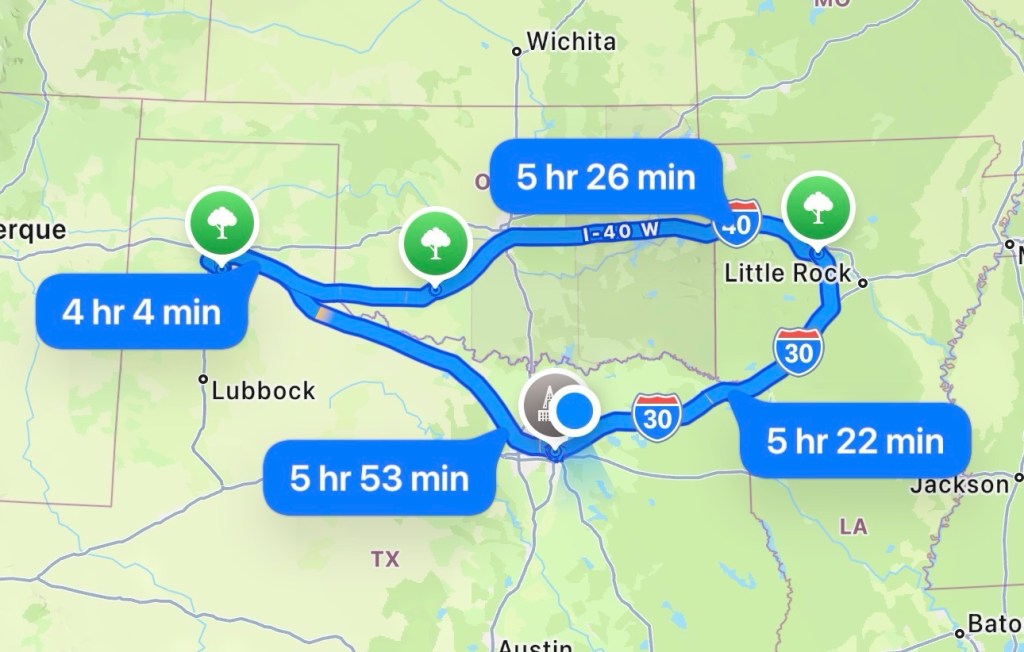
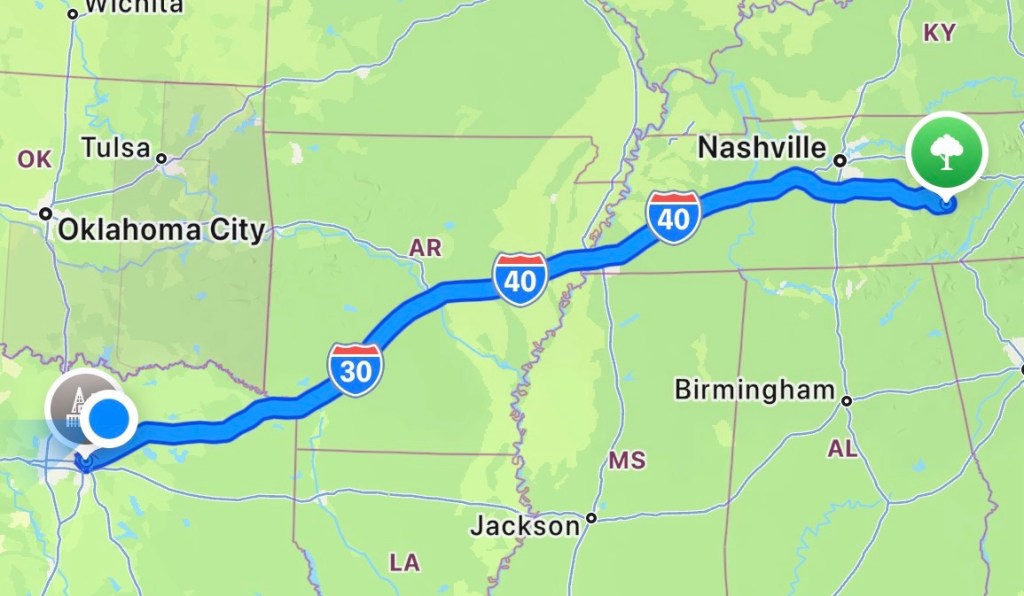
If you’re looking for an easy, high-impact road trip from Dallas, this 5-day loop through Arkansas, Oklahoma, and the Texas Panhandle is one of the best you can do. All with manageable drive times and kid-friendly stops.
Start your road trip with one of the most underrated parks in the South.
Don’t Miss:
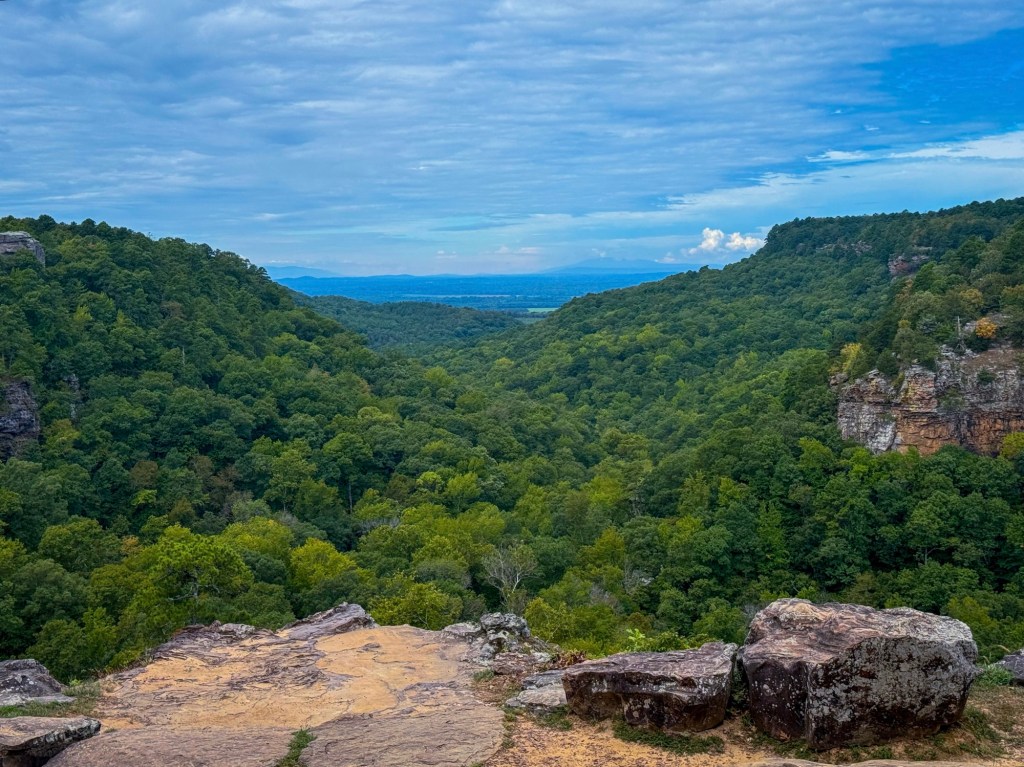
Stout’s Point Overlook (sunset views)
Mather Lodge check-in
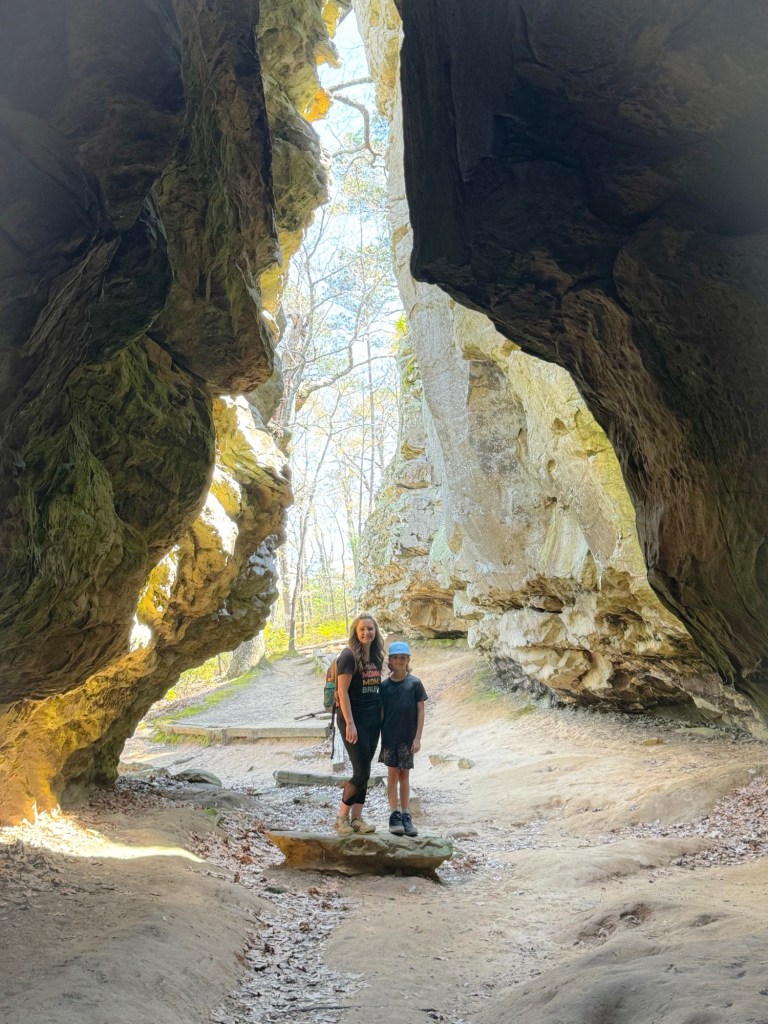
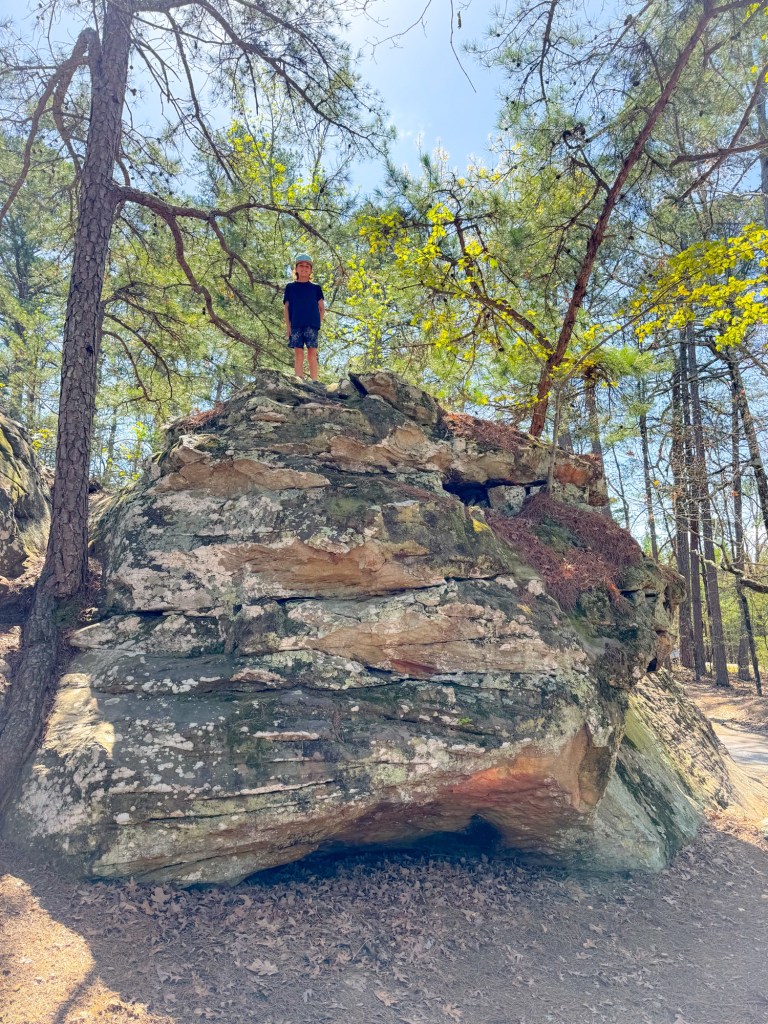
Easy exploring around Bear Cave
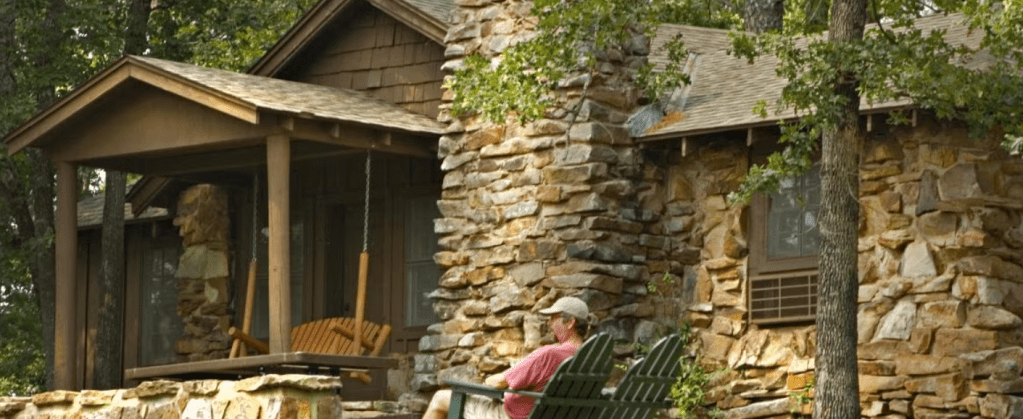
Where to Stay:
Mather Lodge (best views + convenience)
Cabins inside the park
Pro Tip: Keep this day light—save your energy for hiking tomorrow.
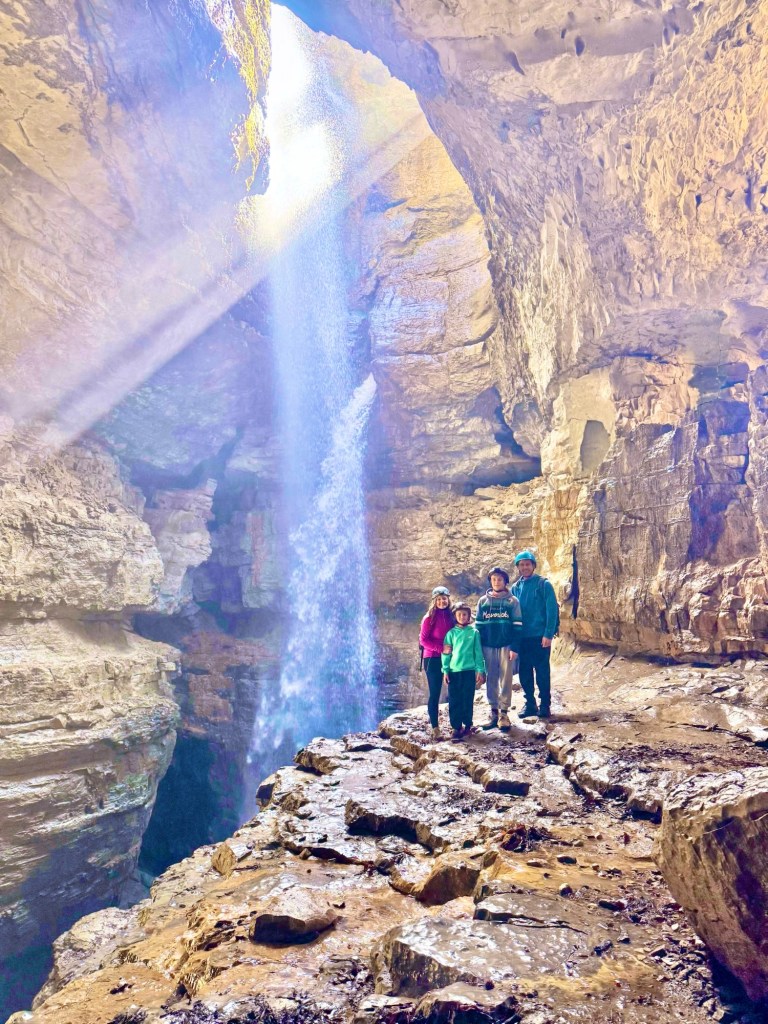
Day 2: Petit Jean State Park (Full Day)
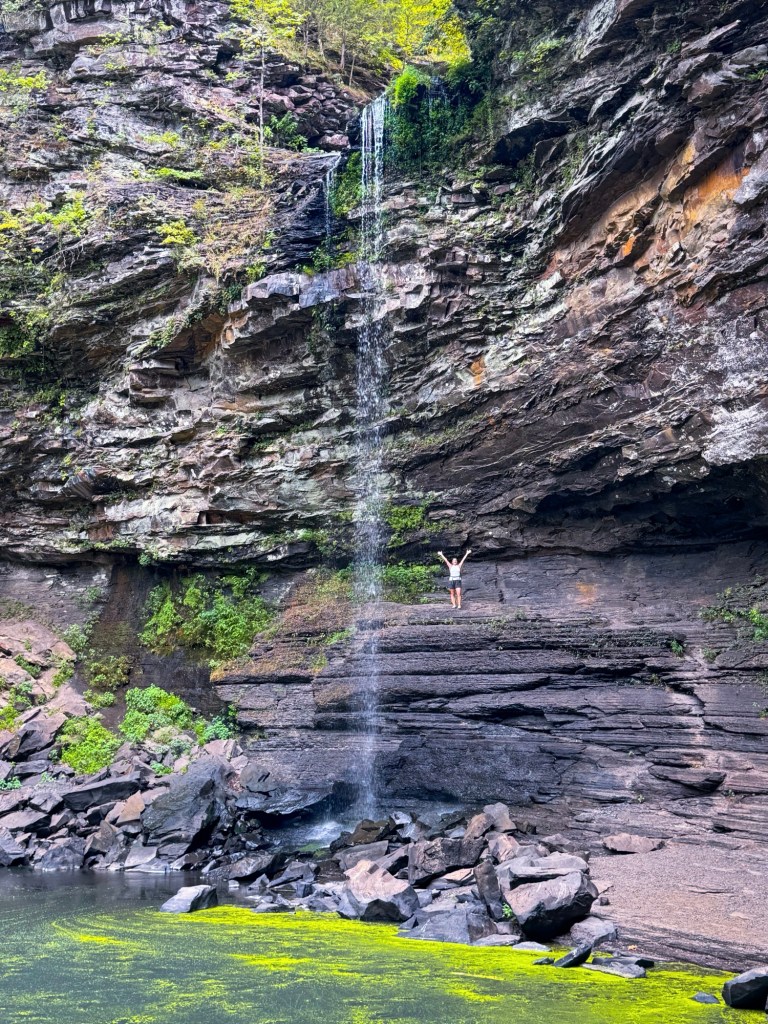
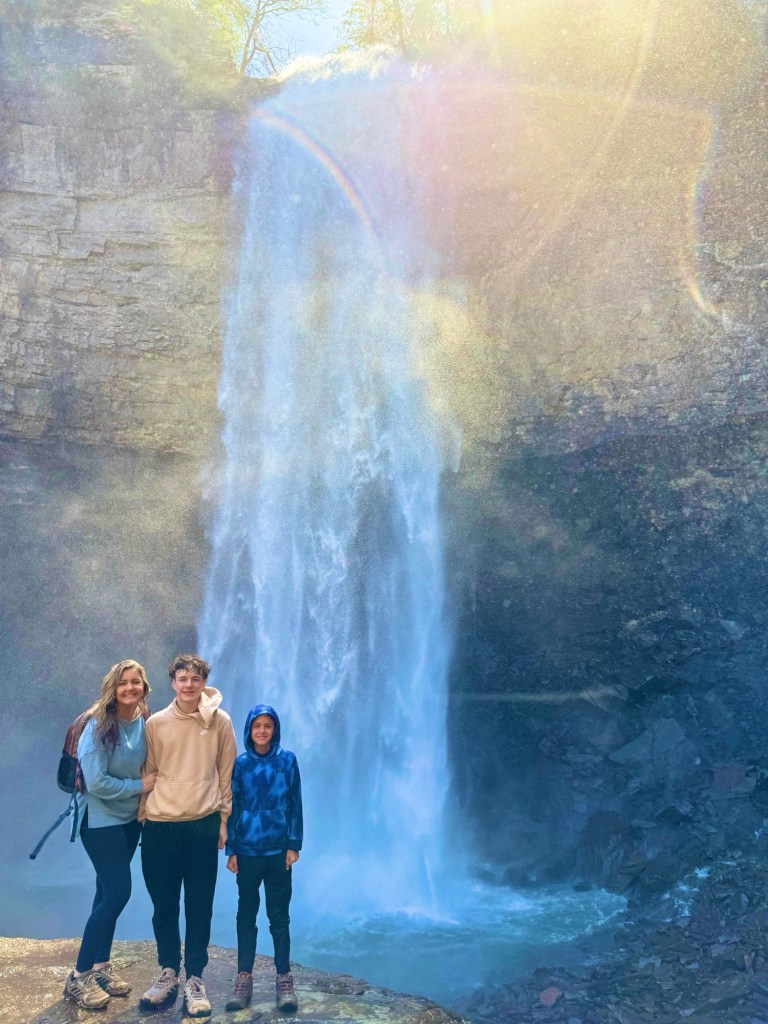
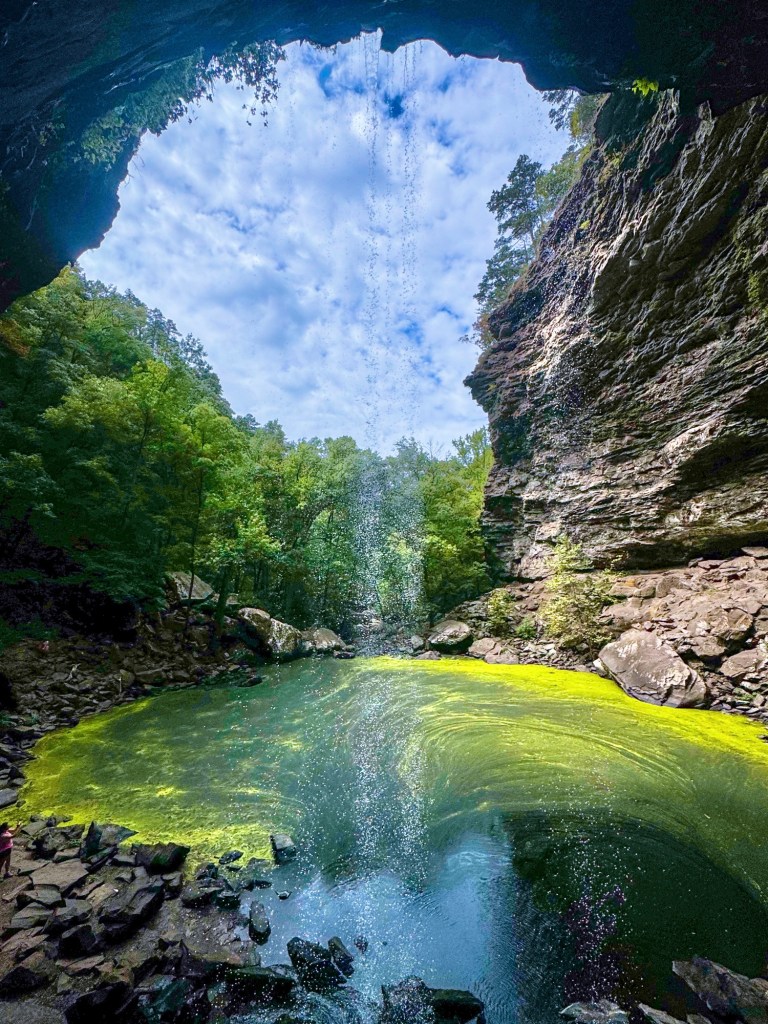
Main Highlight: Cedar Falls Trail
This is the most iconic hike in the park—and worth every step.
Don’t Miss:
Cedar Falls (95-ft waterfall)
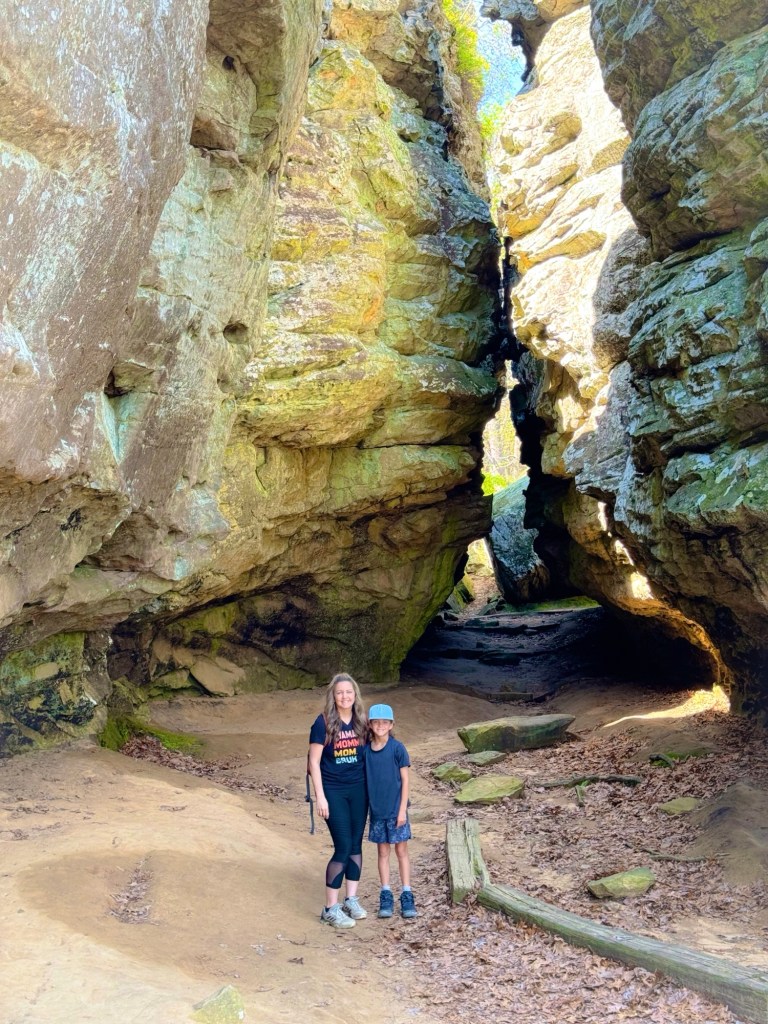
Rock House Cave (short + unique stop)
Scenic overlooks throughout the park
Tips:
Start early to beat crowds
Wear good shoes—the climb back up is no joke
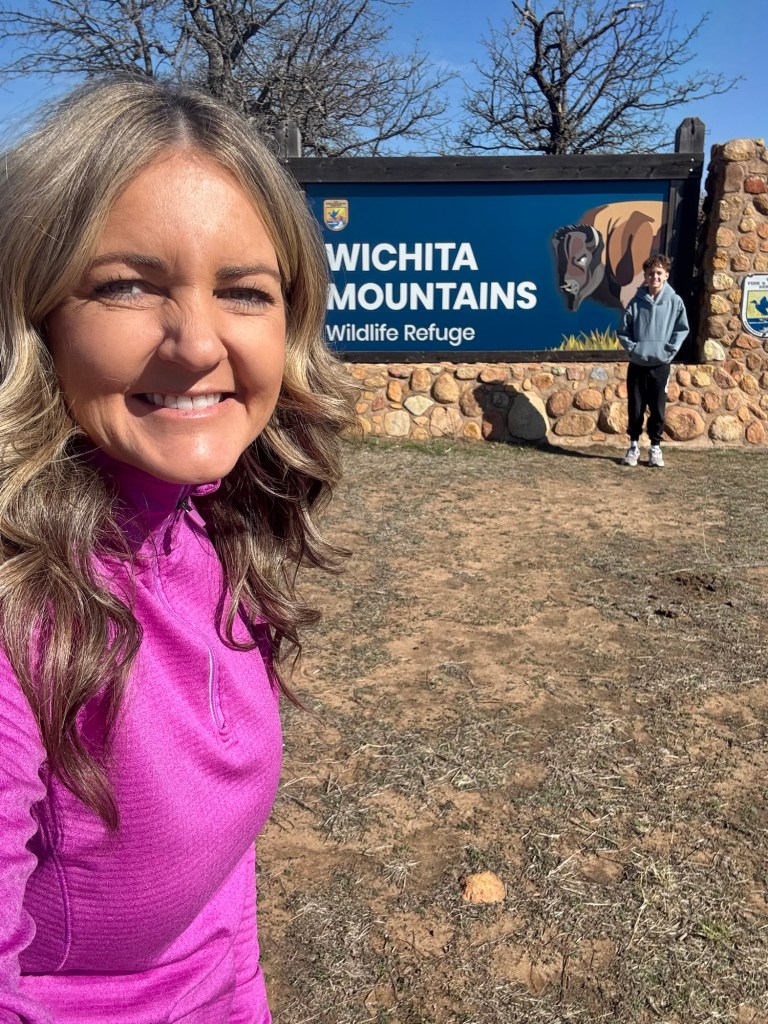
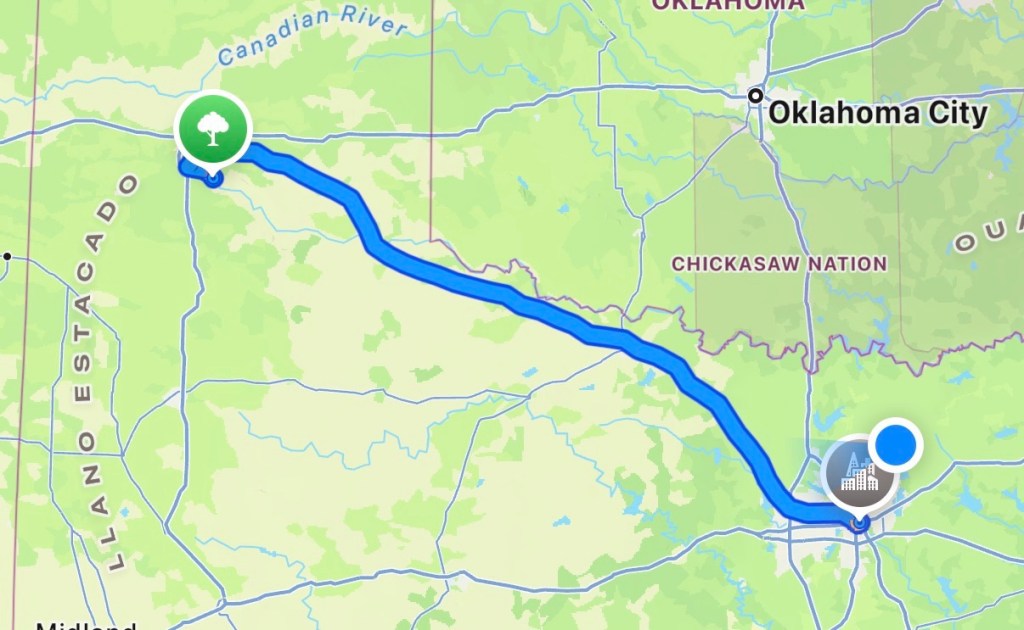
Day 3: Petit Jean → Wichita Mountains Wildlife Refuge
Drive Time: ~5.5 hours
This day mixes travel with one of the most unique landscapes in Oklahoma.
Stop in: Medicine Park (lunch + quick explore)
Don’t Miss:
Bison + longhorn sightings
Scenic refuge drive
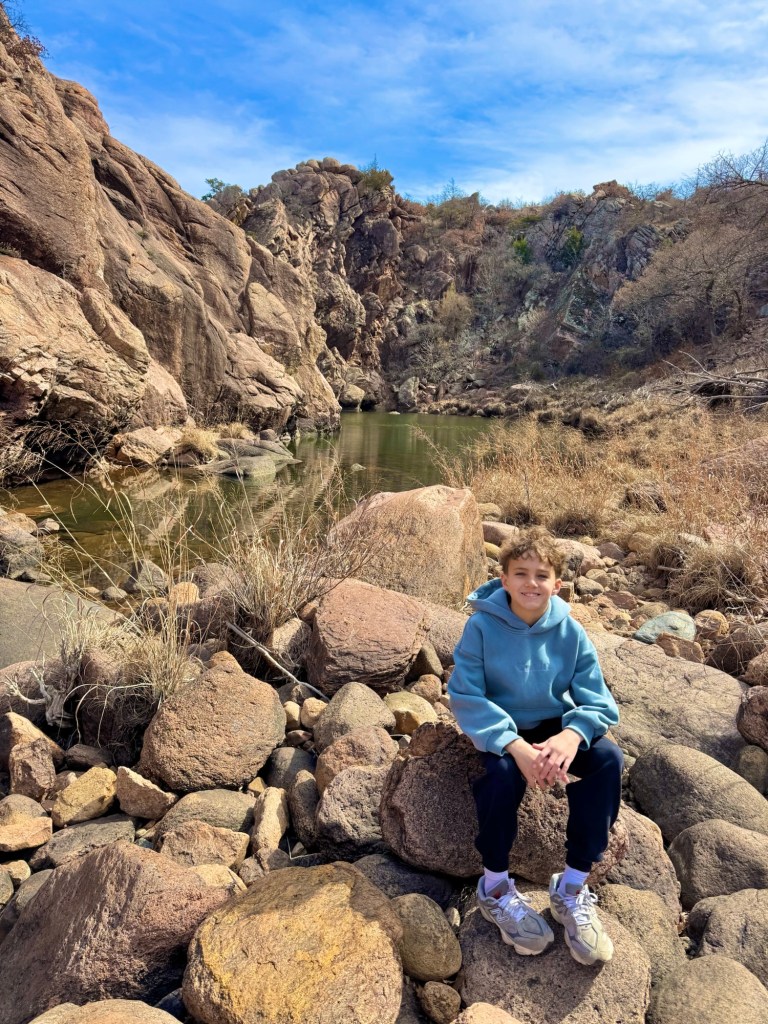
Short walk on the Narrows Trail (1.5 miles roundtrip)
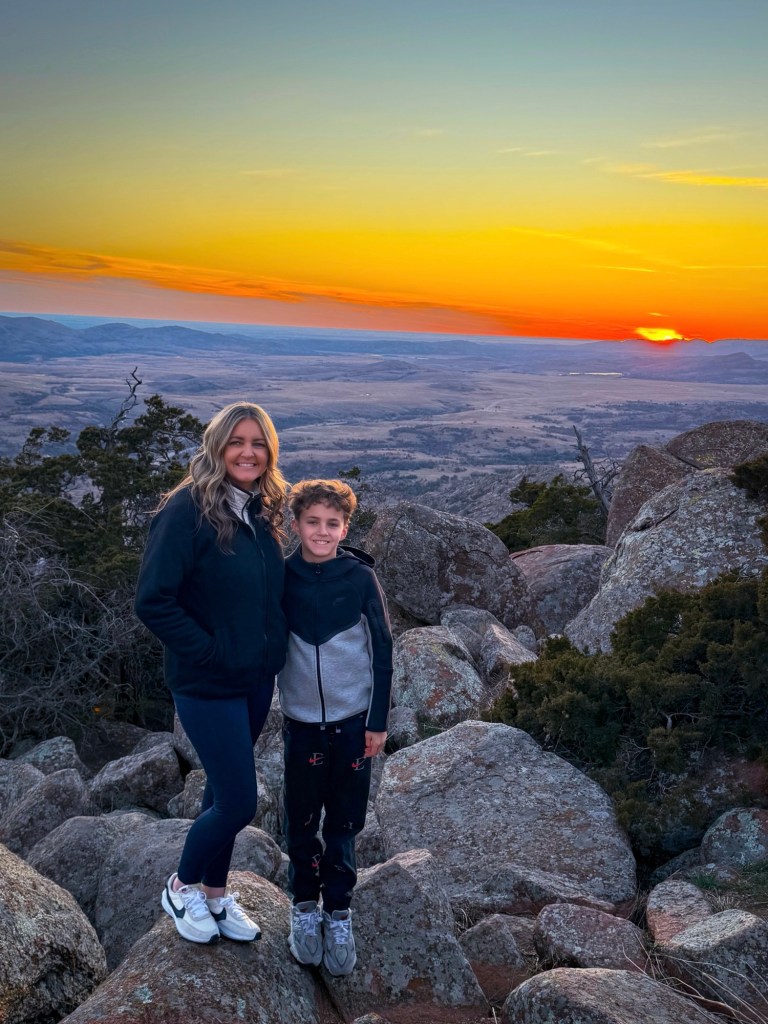
Mount Scott at sunset
Where to Stay:
Medicine Park (charming + close)
Lawton (more options)
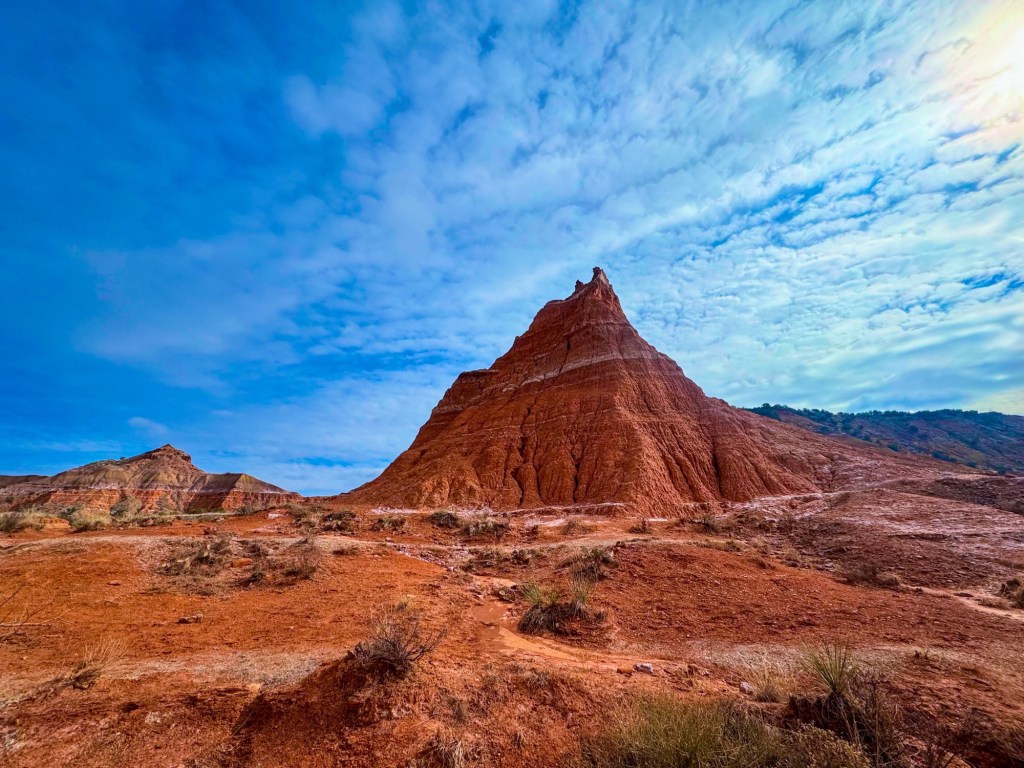
Day 4: Wichita Mountains → Palo Duro Canyon
Drive Time: ~5–5.5 hours
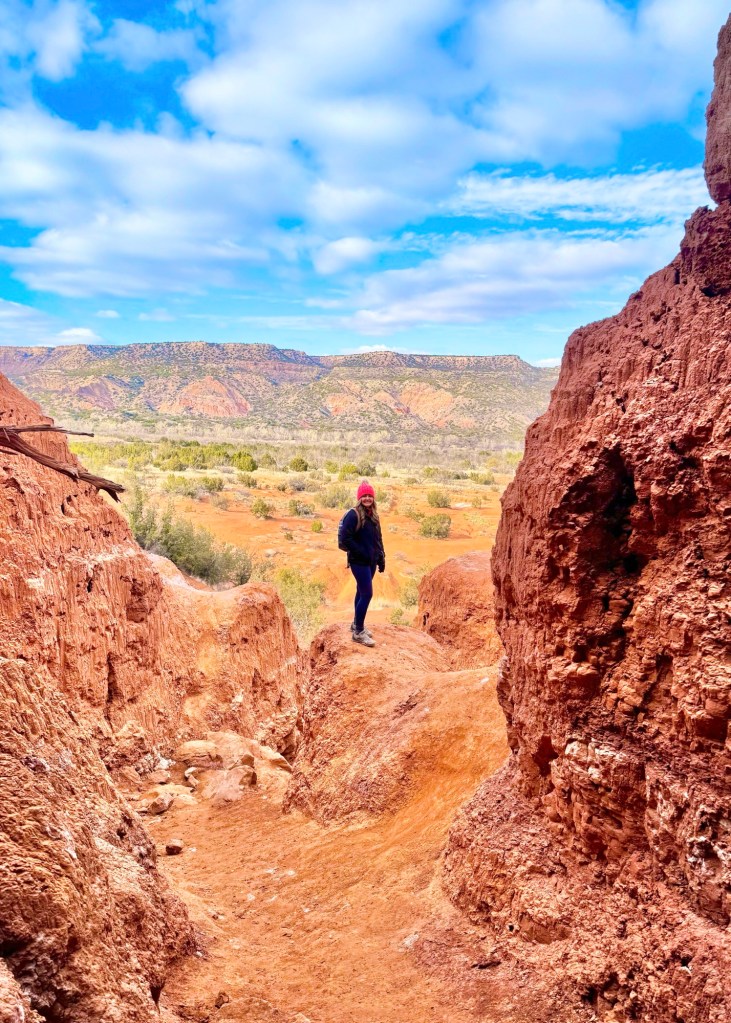
Welcome to the second largest canyon in the U.S..
Don’t Miss:
Driving down into the canyon (incredible views)
Rim overlooks
Sunset over the canyon
Where to Stay:
Palo Duro cabins/glamping
Hotels in Canyon or Amarillo
Pro Tip: Take it easy today—tomorrow is your big hike.
Day 5: Palo Duro Canyon → Dallas
Drive Time: ~6 hours
End your trip with one of the best hikes in Texas.
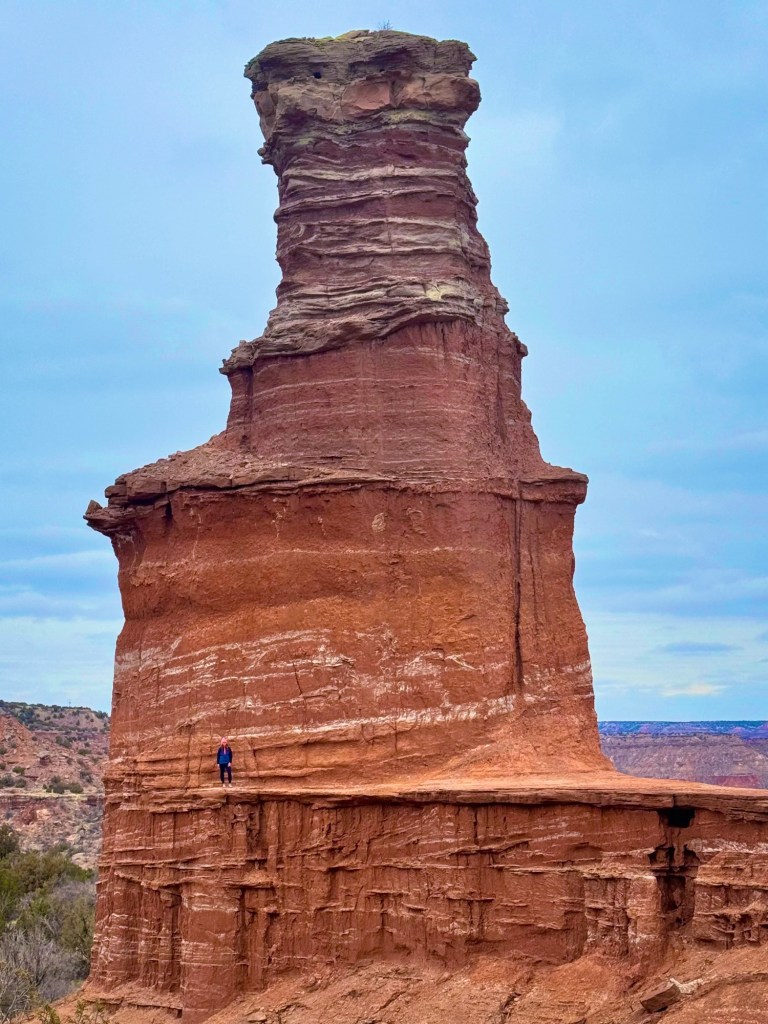
Main Highlight: Lighthouse Trail (iconic rock formation)
Tips:
Start early (heat + no shade)
Bring lots of water
Turn around early if needed—views are still amazing
Optional Stop: Cadillac Ranch (Amarillo) on the drive back to Dallas
What to Pack
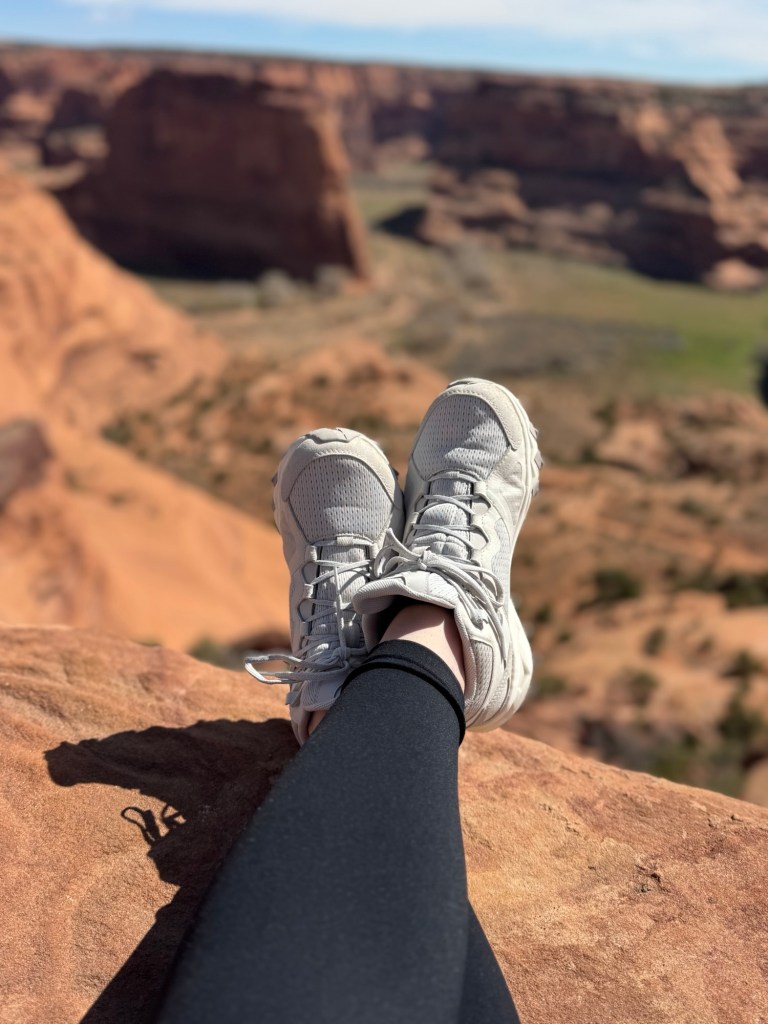
Comfortable hiking shoes
Reusable water bottles
Sunscreen + hats
Snacks + easy picnic meals
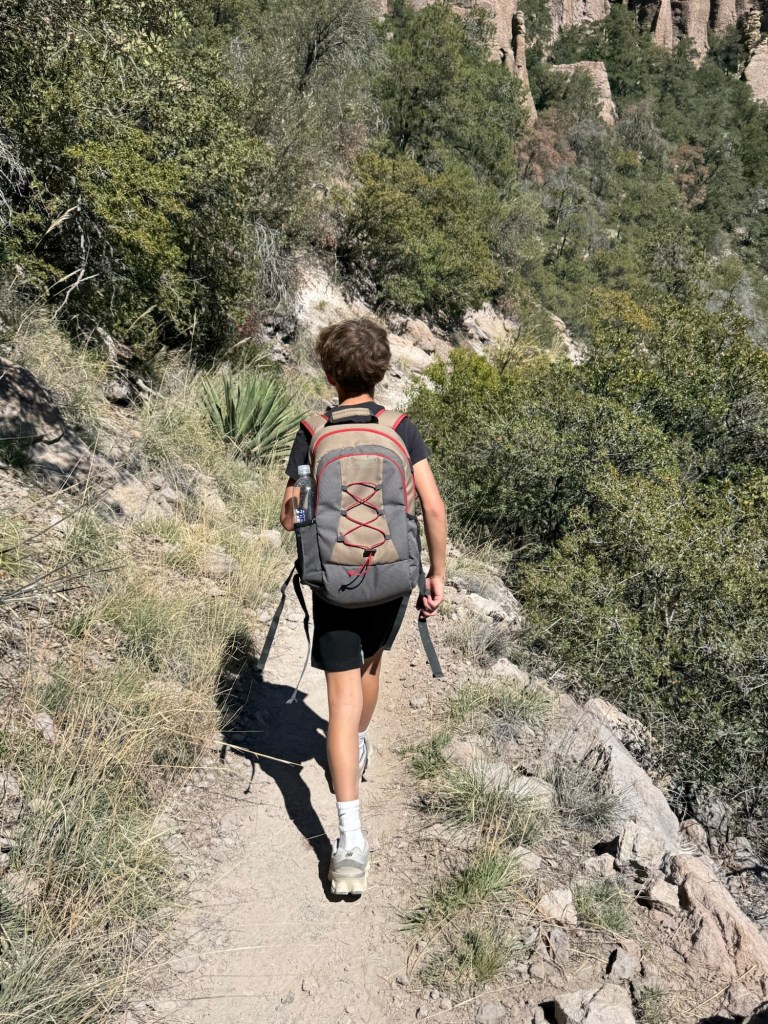
Lightweight backpack
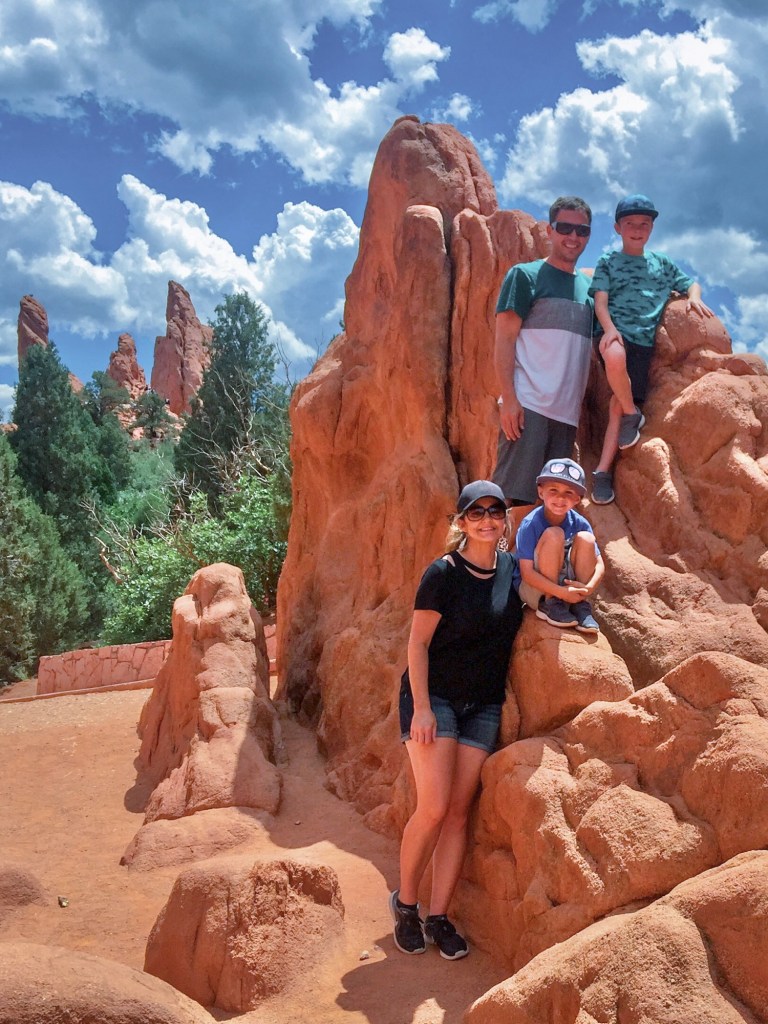
Why This Trip is Perfect for Families
No extreme drive days
Mix of easy + moderate activities
Plenty of “wow” moments without overpacking the schedule
Tips for Planning This Road Trip
Book lodging early (especially at Petit Jean + Palo Duro)
Start hikes early to avoid heat
Keep afternoons flexible for rest
This road trip is proof that you don’t have to travel far to have an incredible adventure. From waterfalls to wildlife to canyon views—this loop is one of the best road trips from Dallas!
Planning a hike with kids doesn’t have to feel overwhelming—or overpacked. After plenty of trial and error on trails from Texas to Zion, we’ve narrowed it down to the exact hiking gear we actually use every time.
This list is simple, practical, and designed to make hiking easier (and way more enjoyable) for families.
Some of these links are affiliate links, meaning I may earn a small commission at no extra cost to you—thanks for supporting my content!
The Only Hiking Gear We Bring Every Time
If you pack nothing else, start here—these are our non-negotiables:
The right shoes make all the difference. We always go with sturdy, closed-toe hiking shoes with solid traction to prevent slipping on rocks, dirt, or loose gravel.
Why it matters: Better grip = more confidence on the trail (for you and your kids).
You don’t need a ton of gear to hike successfully with your family. Focus on the essentials that make your experience easier, safer, and more enjoyable.
The goal isn’t to have the most gear—it’s to make memories without the stress.
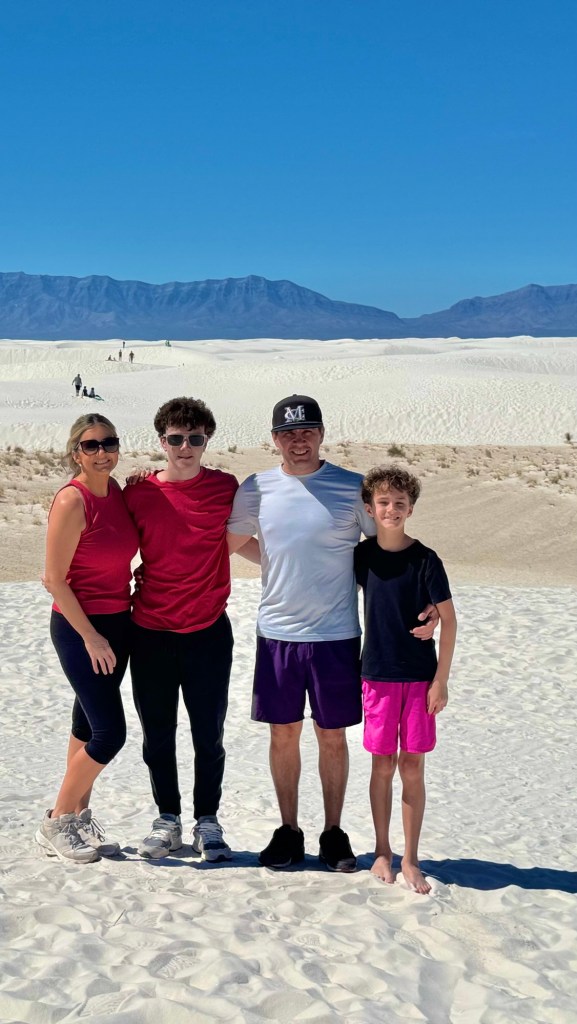
If you’ve ever spent hours planning a trip only for your kids to say their favorite part was the hotel pool… you’re not alone. So instead of guessing, we asked our kids one simple question: “What were your favorite trips?” Their answers? These four road trips from Dallas that they’re still talking about months later. From white sand beaches to mountain adventures and wildlife encounters, these are the trips that truly passed the kid test—easy to plan, packed with fun, and full of moments your family will actually remember.
These aren’t just “good” road trips — they’re the ones your kids will still be talking about months later. If you want less stress, more fun, and trips your whole family actually enjoys… start here.
If you think Texas is just flat highways… this road trip will prove you wrong.
This ultimate Texas road trip loop from Dallas takes you from sand dunes → mountains → canyons → bison-filled landscapes—all without backtracking or needing a flight.
It’s one of the most unique and doable multi-stop road trips in Texas—and I’ve mapped out the exact route, stops, and tips to make it EASY.
Dallas → Monahans Sandhills State Park → Guadalupe Mountains National Park (+ Carlsbad Caverns National Park BONUS) → Palo Duro Canyon State Park → Caprock Canyons State Park → Dallas
OVERVIEW
Length: 4–5 days
Drive Time: ~14–15 hours total
Best Time to Go: October–April (avoid peak summer heat)
Trip Style: Loop (no backtracking)
Best For: Families, first-time road trippers, bucket-list Texas adventures
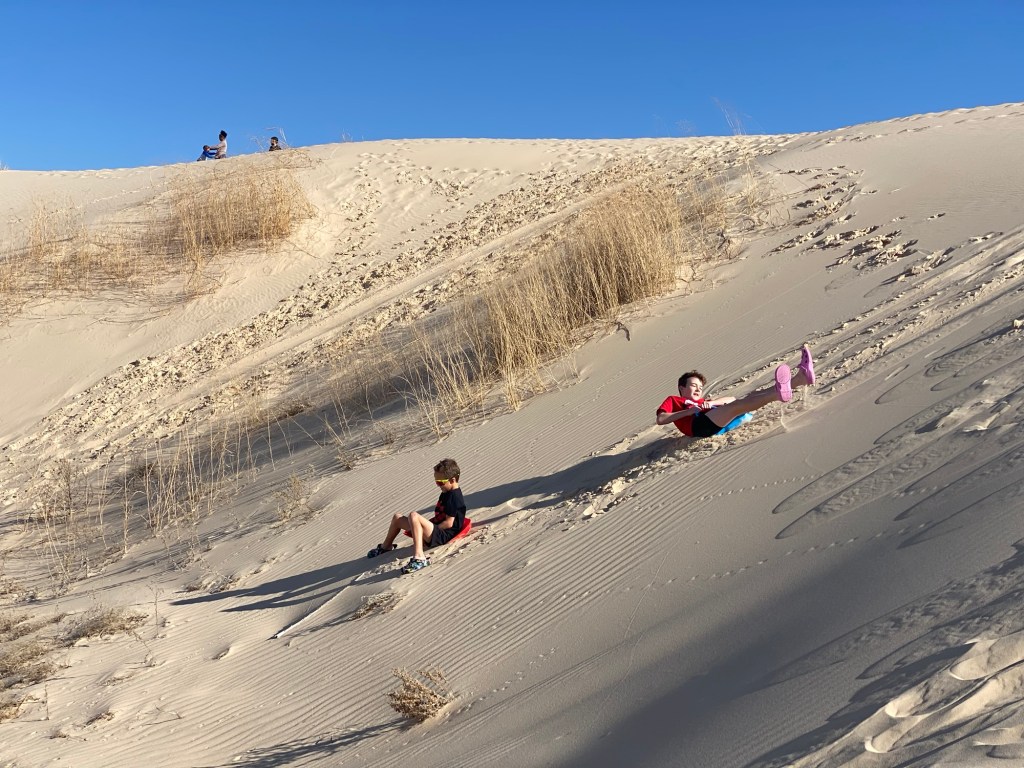
DAY 1: DALLAS → MONAHANS SANDHILLS
Kick off your trip heading west toward one of the most unexpected landscapes in Texas.
Drive time: ~5 hours
Route: Dallas → I-20 W → Midland/Odessa → Monahans
Stop: Monahans Sandhills State Park
Time here: 1.5–3 hours
Don’t Miss:
Sandboarding or sledding down the dunes
Climbing to the highest points for sweeping views
Letting kids run wild (no trails = total freedom)
Exploring during golden hour for the best experience
Pro Tips:
Go late afternoon for cooler temps
Bring water + sunglasses (windy + sandy!)
Stay:
Midland/Odessa (most options)
OR continue 2 hrs to Carlsbad, NM (sets up Day 2 perfectly)
These are the weekend trips I’d recommend first if you want big scenery, memorable hikes, wildlife, and that “how is this only a few hours from Dallas?” feeling. I picked a mix of Texas, Oklahoma, and Arkansas destinations that are all realistic for a 2–3 day getaway, with park basics, where to stay, top highlights, a hidden gem, and an easy weekend plan for each one. Park fees, hours, and lodging details can change, so I’d still book/check the official park pages before you go.
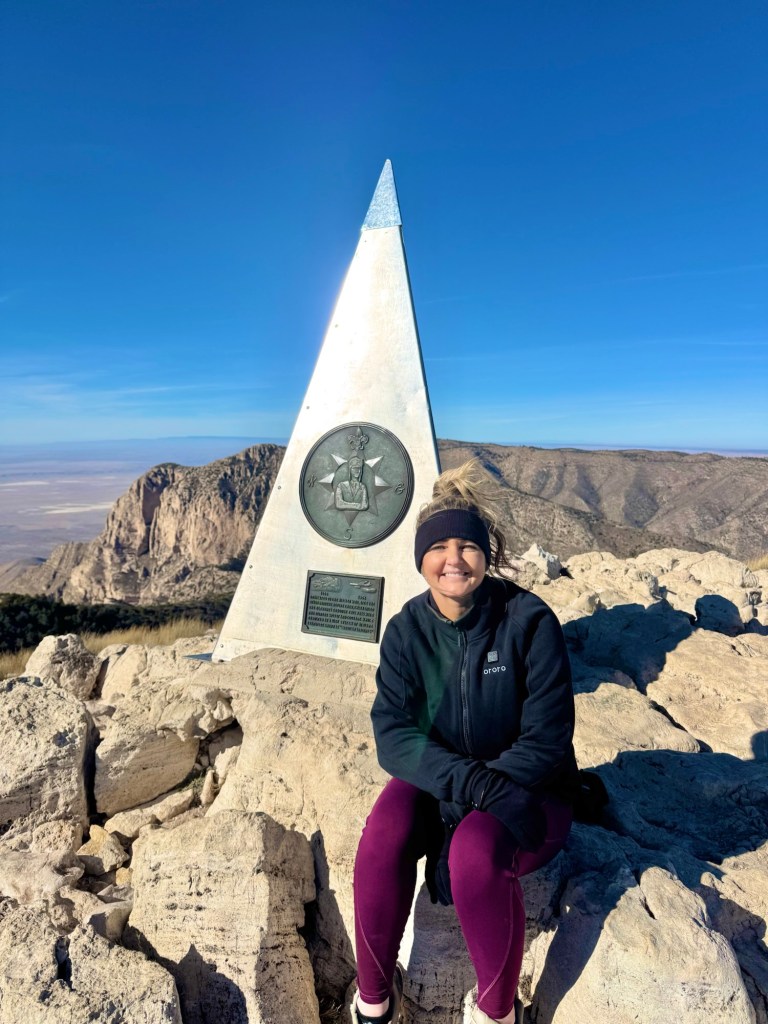
1.) Guadalupe Mountains National Park + Carlsbad Caverns National Park — Carlsbad, NM
Drive from Dallas: about 7–7.5 hours Best for: a bucket-list combo trip (mountains + caves in one weekend)
This is one of the BEST ways to experience Guadalupe Mountains — pair it with Carlsbad Caverns and base yourself in Carlsbad, New Mexico for an unforgettable weekend.
Best route from Dallas: Head west toward Carlsbad, NM (easy, straightforward drive). On your full day, you’ll drive about 45 minutes to Guadalupe Mountains (Pine Springs area).
Where to stay:
Carlsbad, NM (best option — more hotels, restaurants, and easier logistics)
Options range from budget hotels to family-friendly stays
Much more convenient than staying in Van Horn
Top highlights:
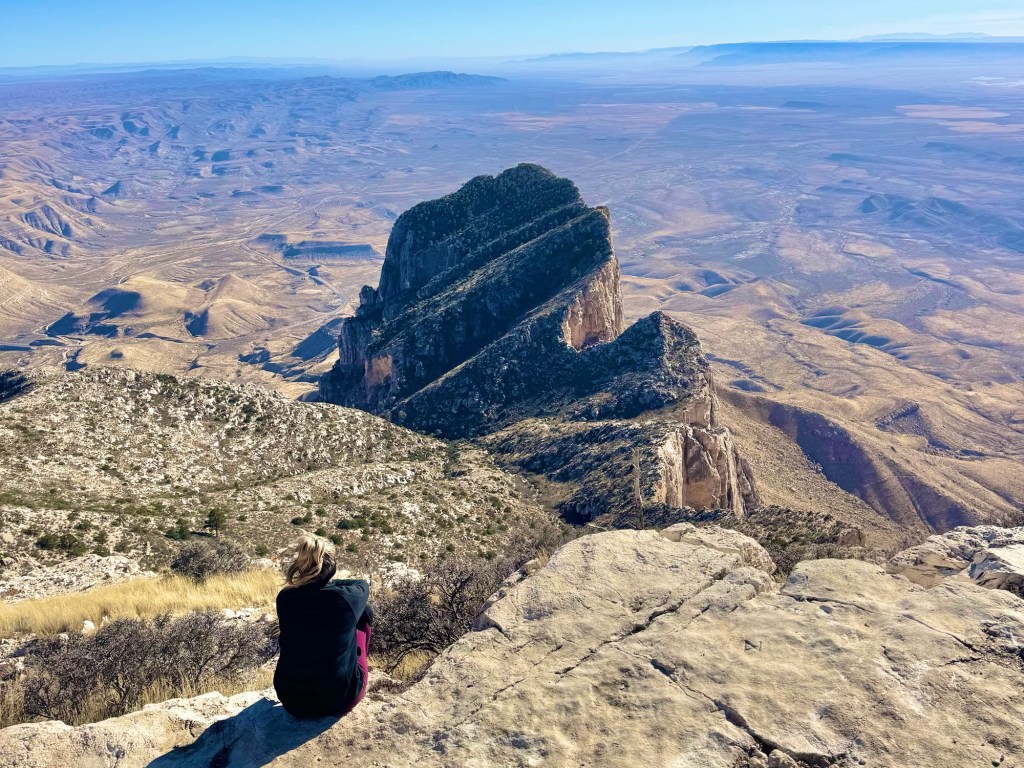
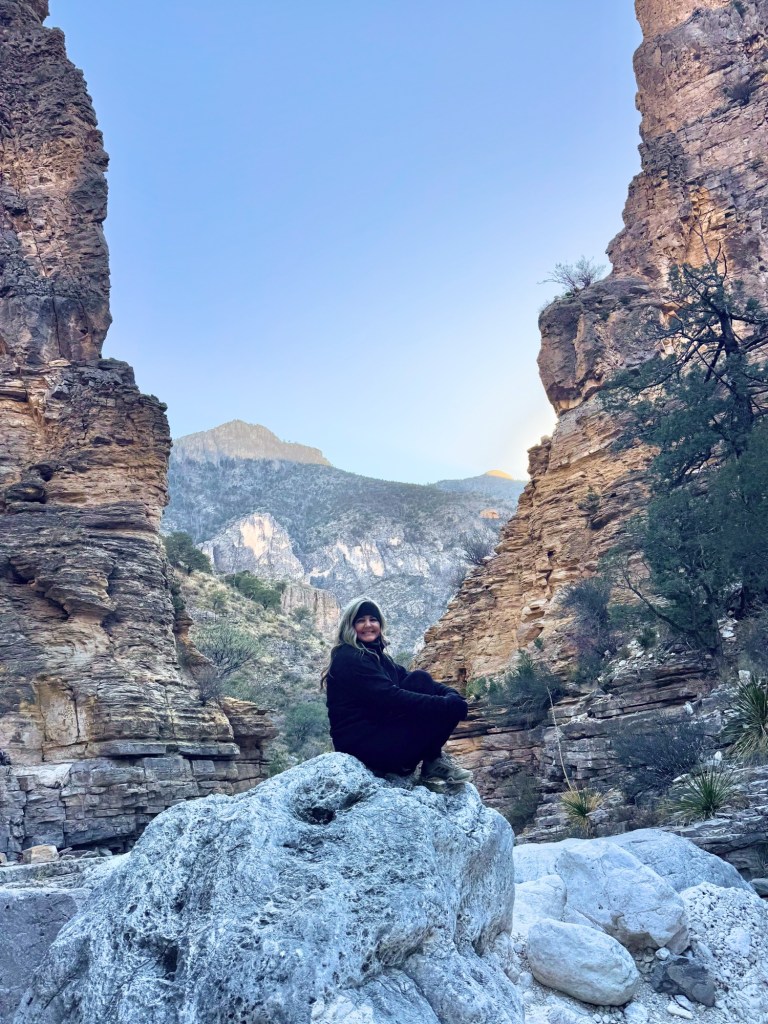
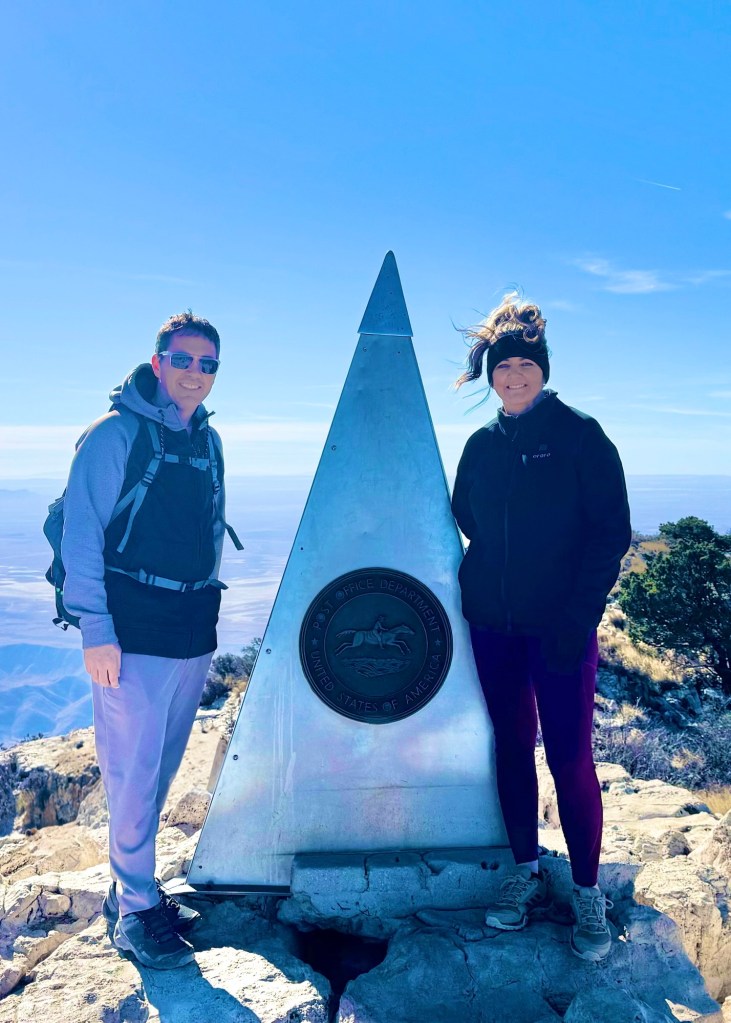
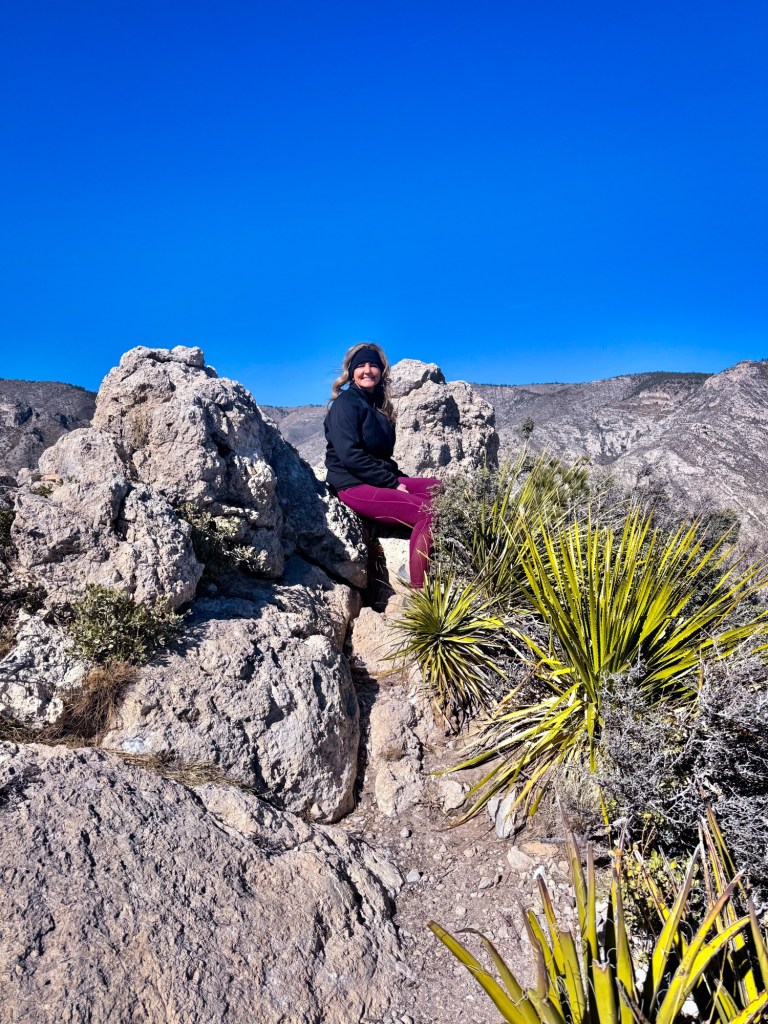
Guadalupe Peak (highest point in Texas)
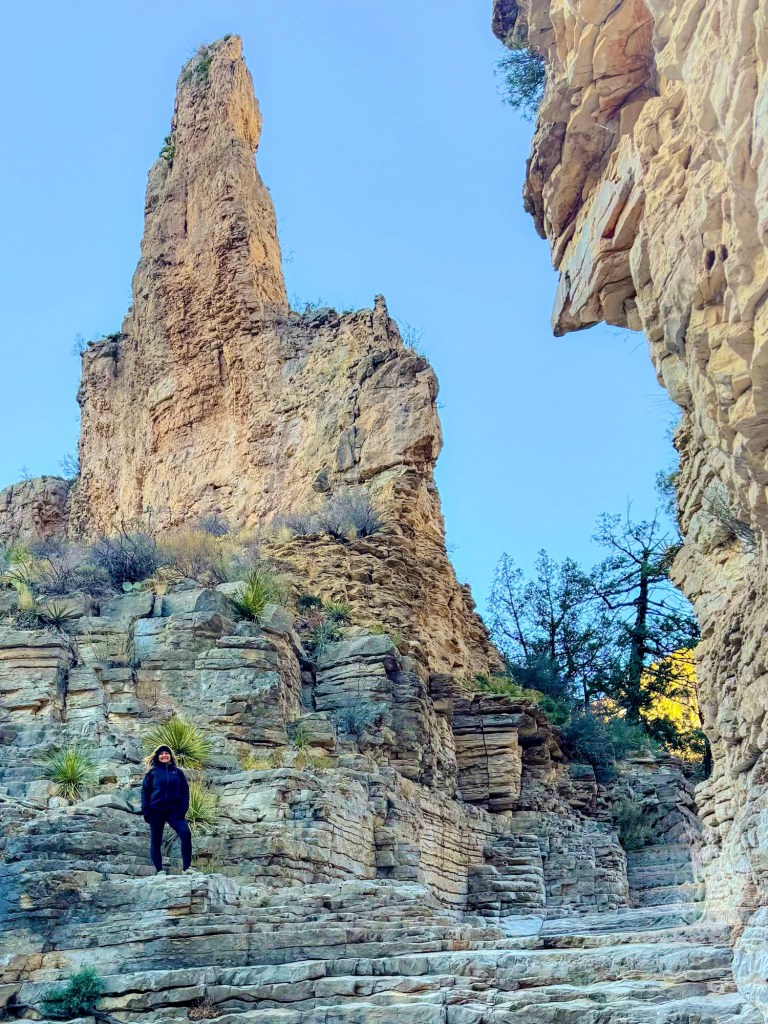
Devil’s Hall (fun rock scrambling)
El Capitan views on the drive in
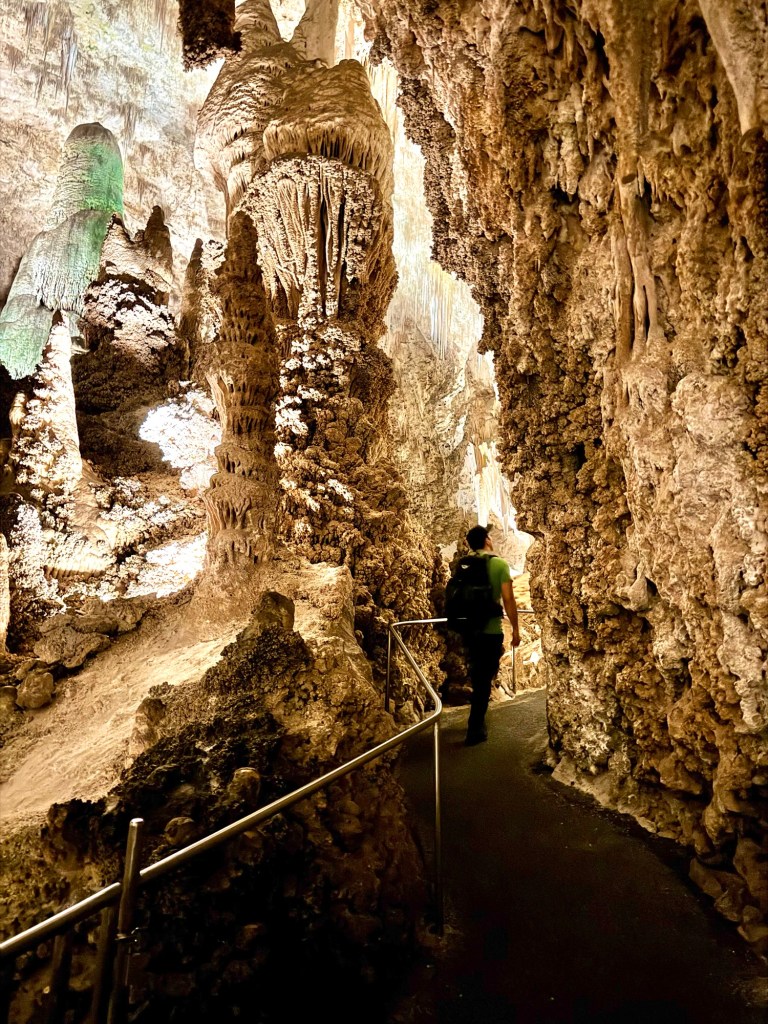
Carlsbad Caverns (massive underground cave system — unreal experience)
Guadalupe MountainsWeekend Itinerary:
Day 1: Drive Dallas → Carlsbad Check in, dinner in town, rest up
Day 2: Morning hike in Guadalupe Mountains (Devil’s Hall or Guadalupe Peak) Afternoon rest Evening: Carlsbad Caverns bat flight program (seasonal but AMAZING)
Day 3: Morning: Explore Carlsbad Caverns (Natural Entrance + Big Room) Lunch in Carlsbad Drive back to Dallas
2.) Wichita Mountains Wildlife Refuge — Medicine Park / Lawton, OK
Drive from Dallas: about 3 hours Best for: a quick, high-reward weekend with wildlife, views, and minimal planning
This is one of the easiest weekend trips from Dallas that still feels like a true escape — think mountains, open prairie, and bison roaming freely.
Best route from Dallas: Head north toward Lawton, OK. Super straightforward drive and perfect for leaving after work on a Friday.
Where to stay:
Medicine Park (best option — charming cabins + walkable town)
Hotels in Lawton (more budget-friendly + chain options)
Top highlights:
Mount Scott drive (panoramic views with almost no effort)
Bison + longhorn sightings throughout the refuge
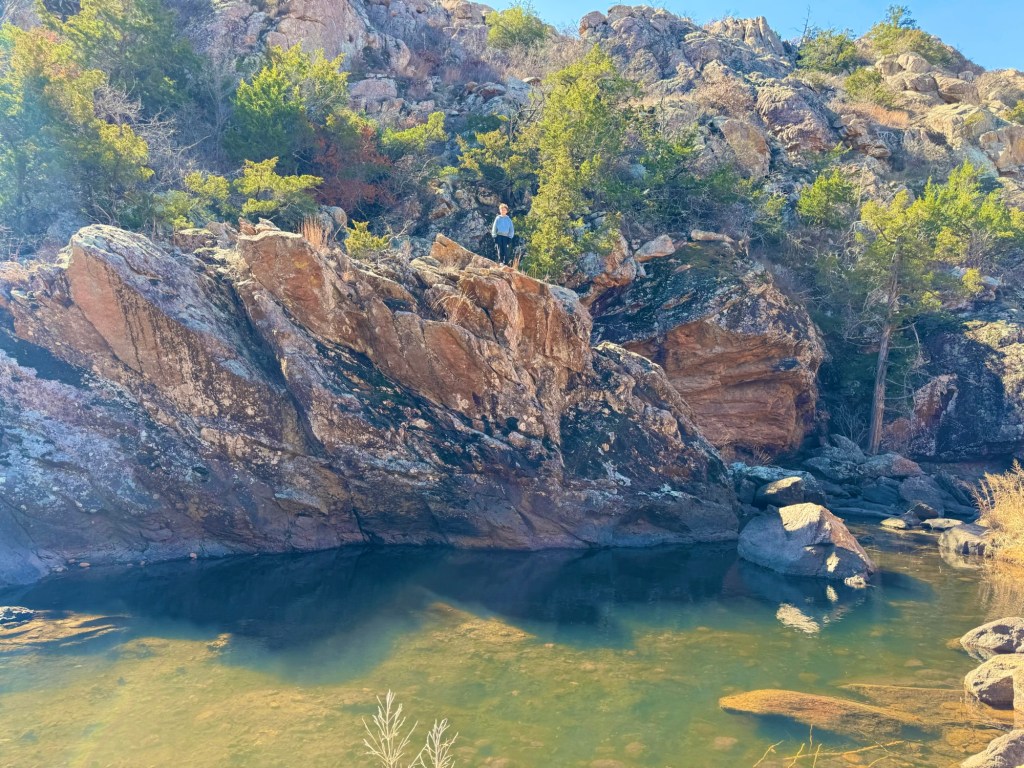
Elk Mountain hike (short, scenic summit)
Lake Lawtonka (great for relaxing views)
Wichita MountainsWeekend Itinerary:
Day 1: Drive Dallas → Medicine Park Explore town, dinner, sunset drive up Mount Scott
Day 2: Morning wildlife spotting (bison!) Hike Elk Mountain Relax at Lake Lawtonka or explore more scenic pull-offs
Day 3: Slow morning in Medicine Park Coffee + quick walk Drive back to Dallas
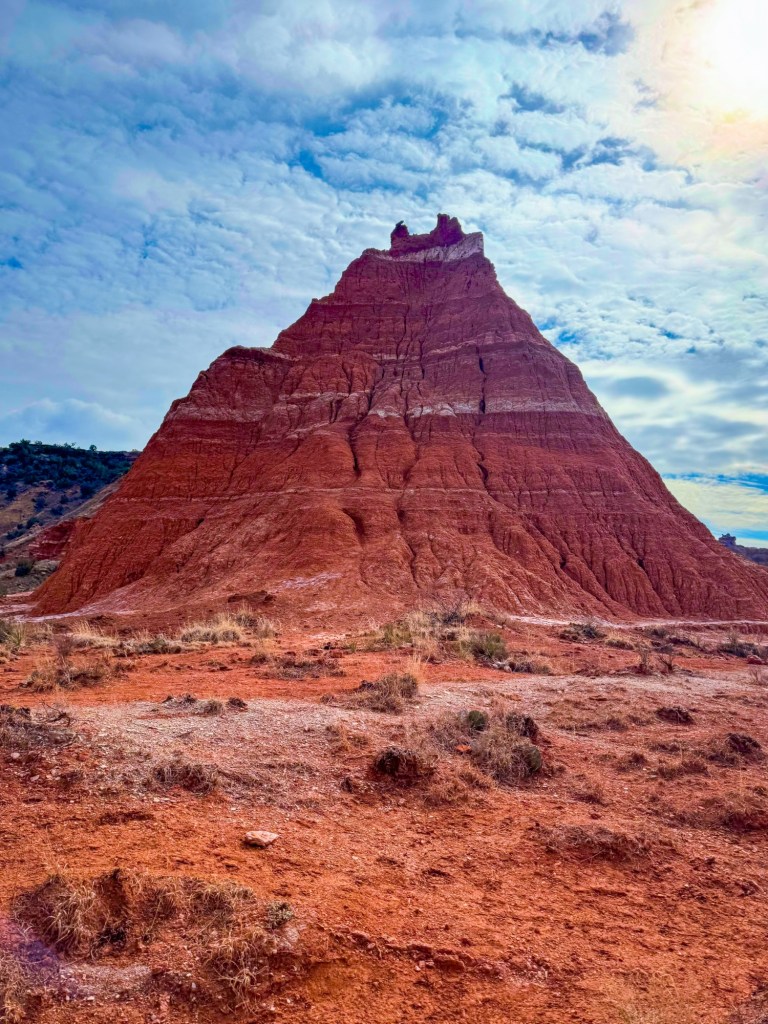
3.) Palo Duro Canyon State Park — Amarillo, TX
Drive from Dallas: about 6 hours Best for: iconic Texas scenery + one of the most photogenic hikes in the state
Palo Duro is the kind of place that makes you stop and say… this is Texas?! It’s massive, colorful, and surprisingly easy to explore.
Best route from Dallas: Head northwest toward Amarillo. Easy highway driving the entire way.
Day 1: Drive Dallas → Morrilton Check in, sunset at an overlook
Day 2: Morning hike to Cedar Falls Explore Bear Cave or Seven Hollows Relax at lodge or viewpoints
Day 3: Stop at Rock House Cave Drive back to Dallas
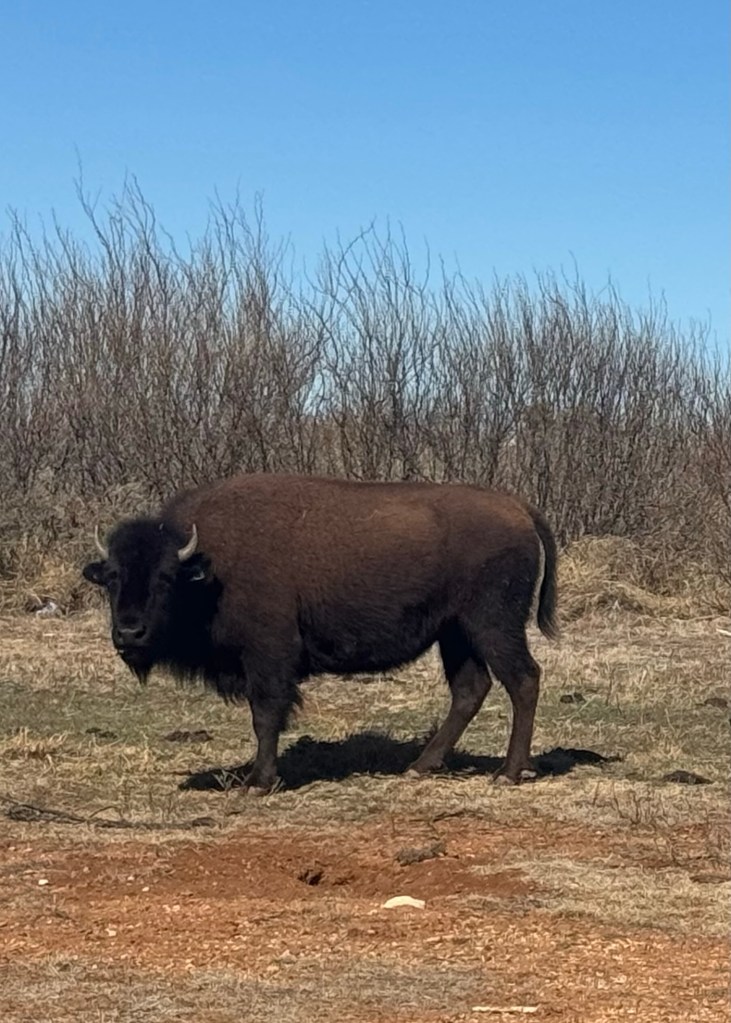
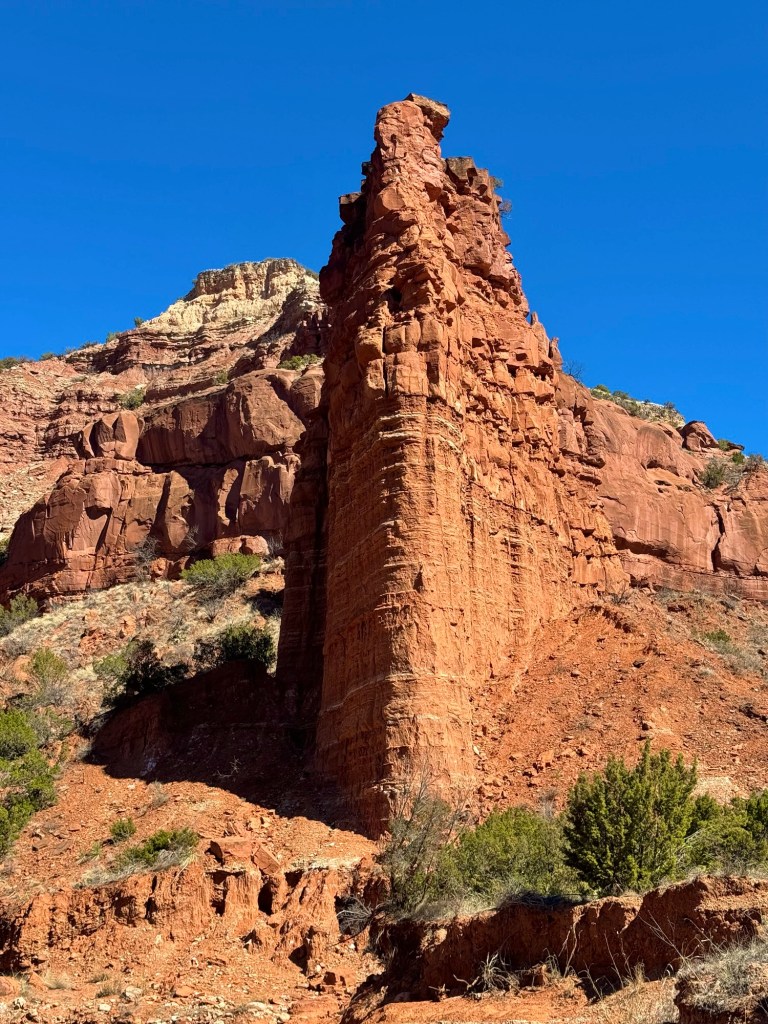
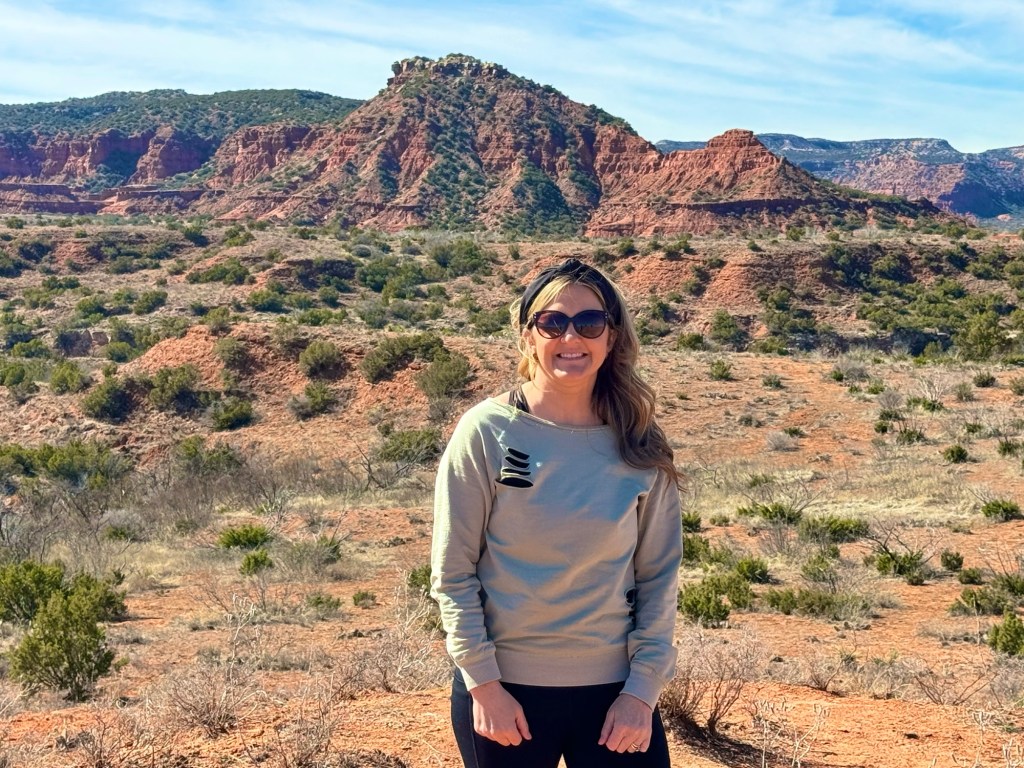
5.) Caprock Canyons State Park — Quitaque, TX
Drive from Dallas: about 4–5 hours Best for: red rock canyon views without the crowds
Caprock feels like Palo Duro’s quieter, wilder sister — same dramatic scenery, but way fewer people.
Best route from Dallas: Head northwest toward Quitaque, TX — similar direction as Amarillo, just less traffic and fewer stops.
Where to stay:
Campgrounds inside the park (best experience)
Limited stays in Quitaque
Nearby small towns like Turkey, TX
Top highlights:
Texas State Bison Herd (often very close to the road)
Clarity Tunnel (walk-through bat tunnel)
Upper Canyon Trail (best views in the park)
Lake Theo (great for relaxing or picnics)
Caprock CanyonWeekend Itinerary:
Day 1: Drive Dallas → Quitaque Check in or set up camp Sunset at canyon rim
Day 2: Morning hike (Upper Canyon Trail) Explore Clarity Tunnel Wildlife spotting (bison) Relax at Lake Theo
Day 3: Slow morning Quick scenic stop Drive back to Dallas
Final Thoughts
These are the kind of weekend trips that remind you how much there is to explore just a few hours from Dallas. Whether you want mountains, waterfalls, wildlife, or wide-open canyon views — you don’t need a flight to make it happen.
I’ve mapped out routes, stops, and family-friendly plans for all 5 to make planning simple — so all you have to do is pick a weekend and go.
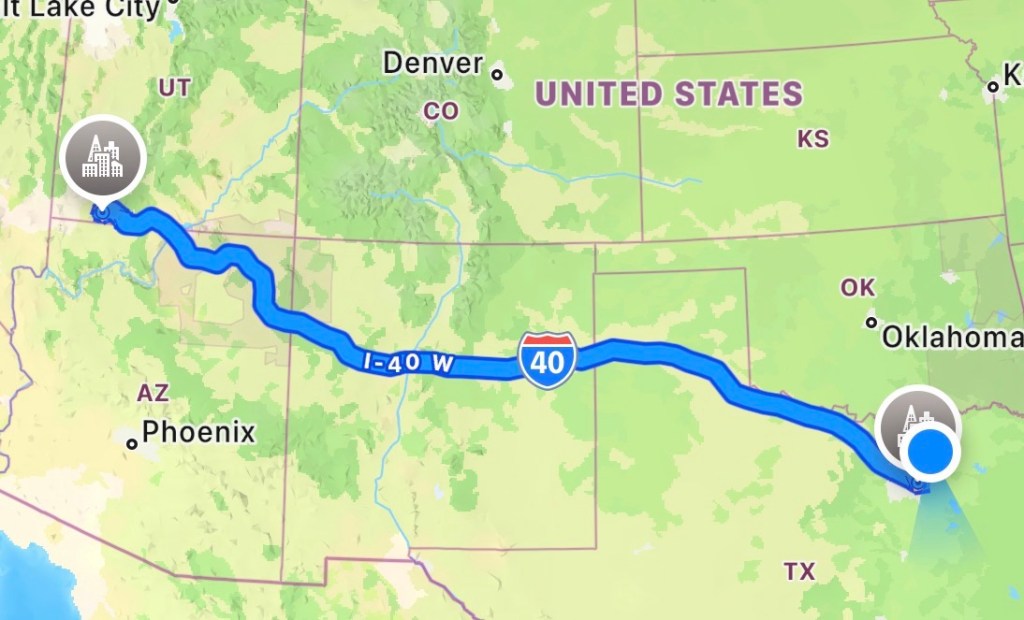
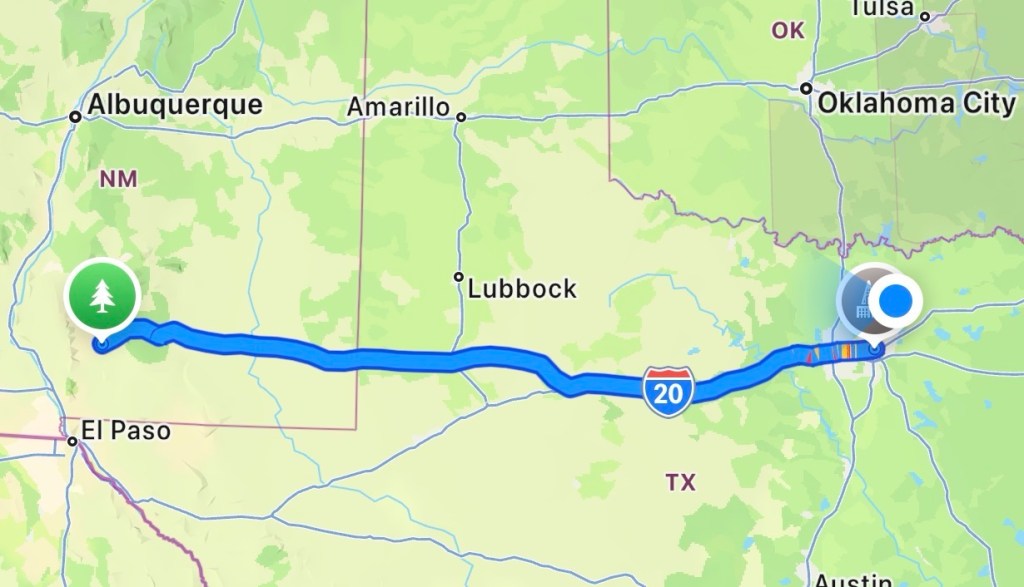
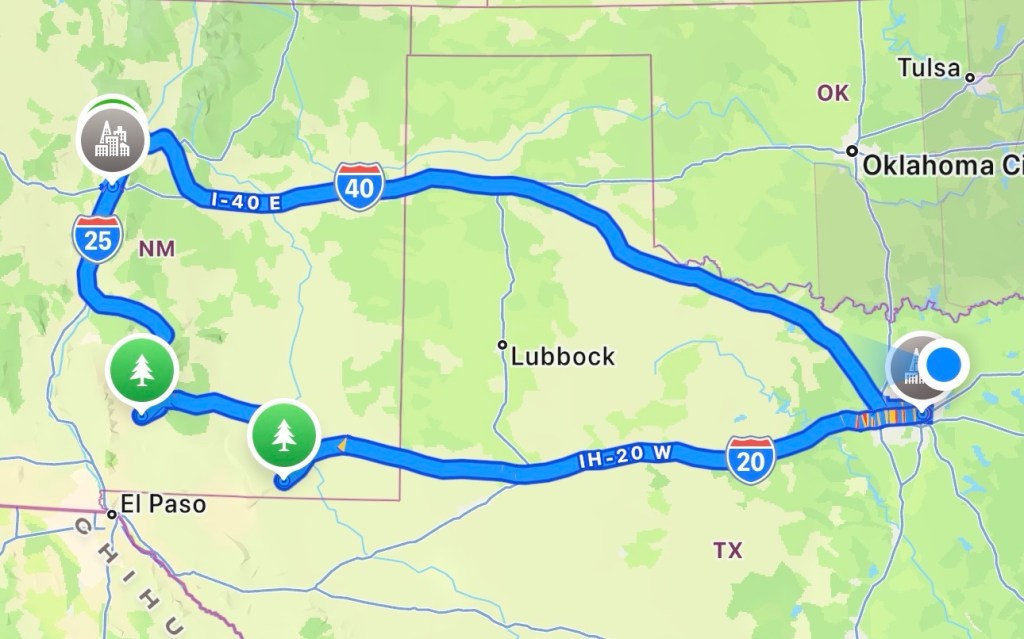
If you’re driving from Texas to Arizona, this is the route that turns the drive into the trip. Every stop feels completely different—white dunes, cactus forests, hidden rock formations, and underground caves.
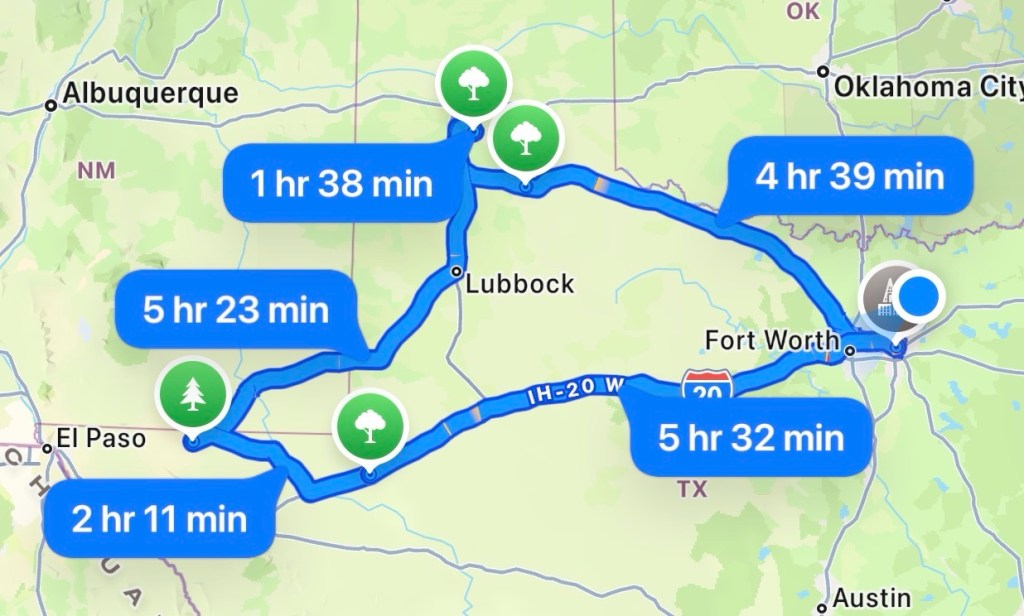
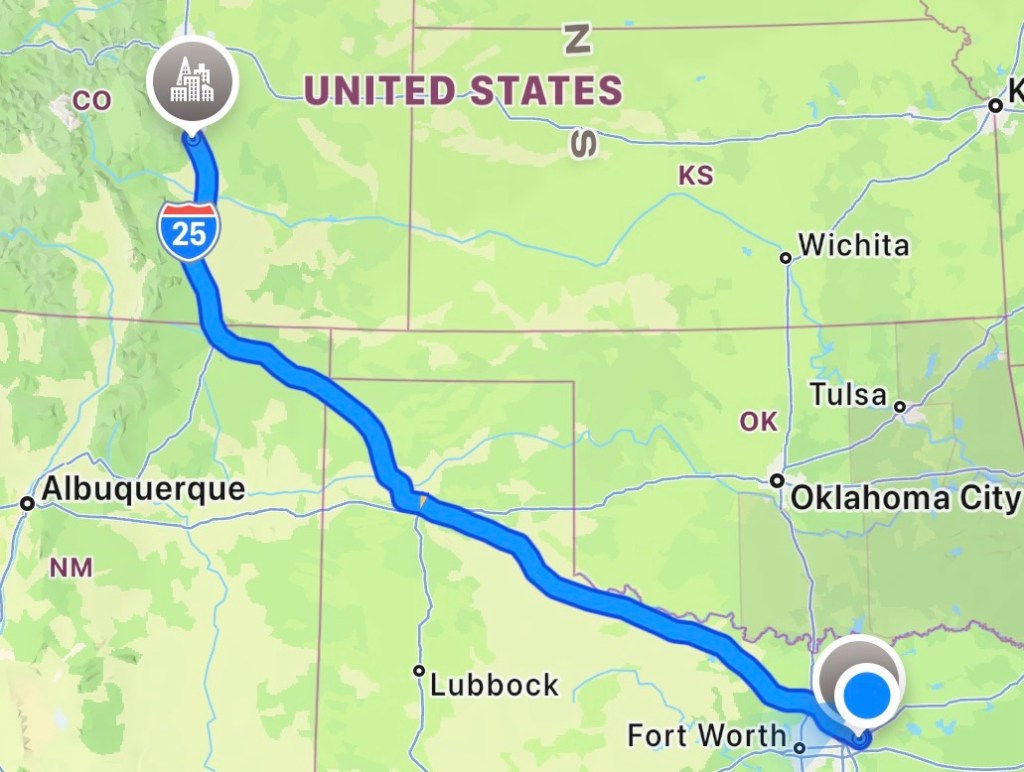
Route Overview (Drive Breakdown)
Dallas → White Sands: ~9.5 hrs
White Sands → Tucson (Saguaro): ~4.5 hrs
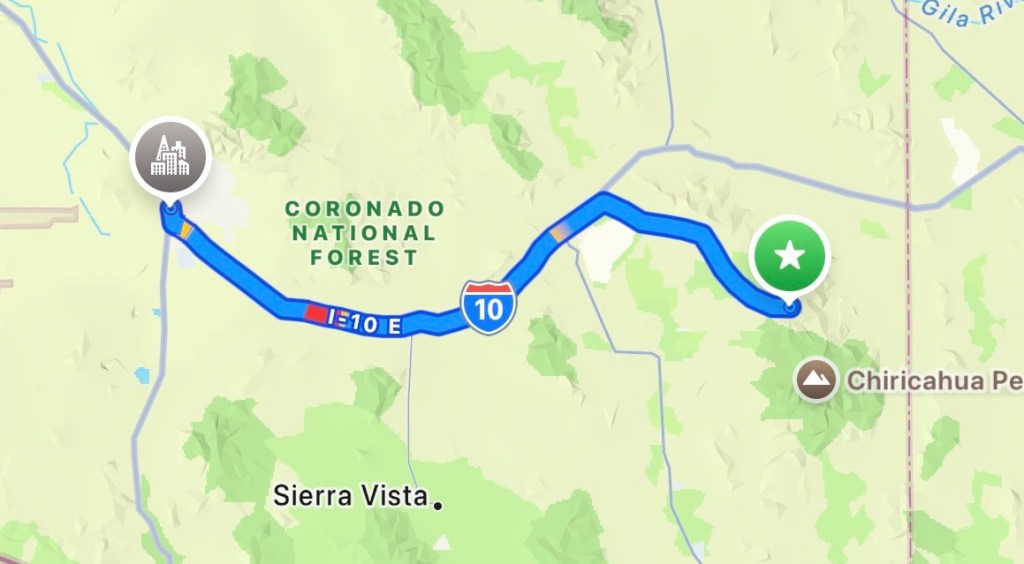
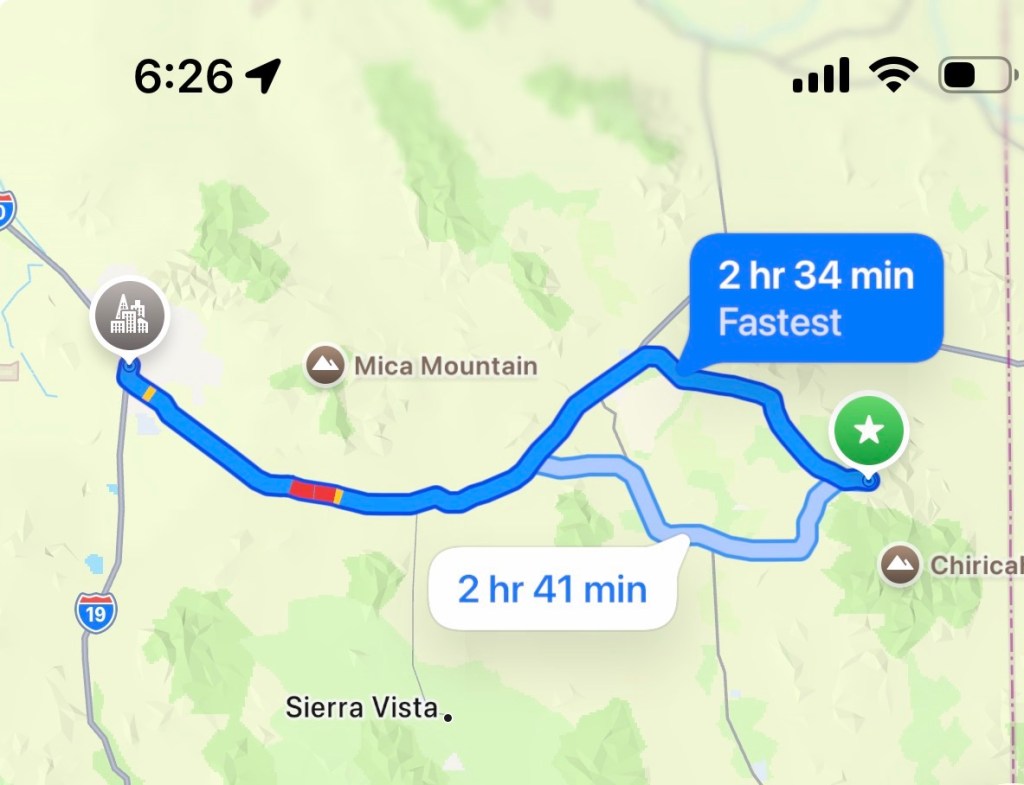
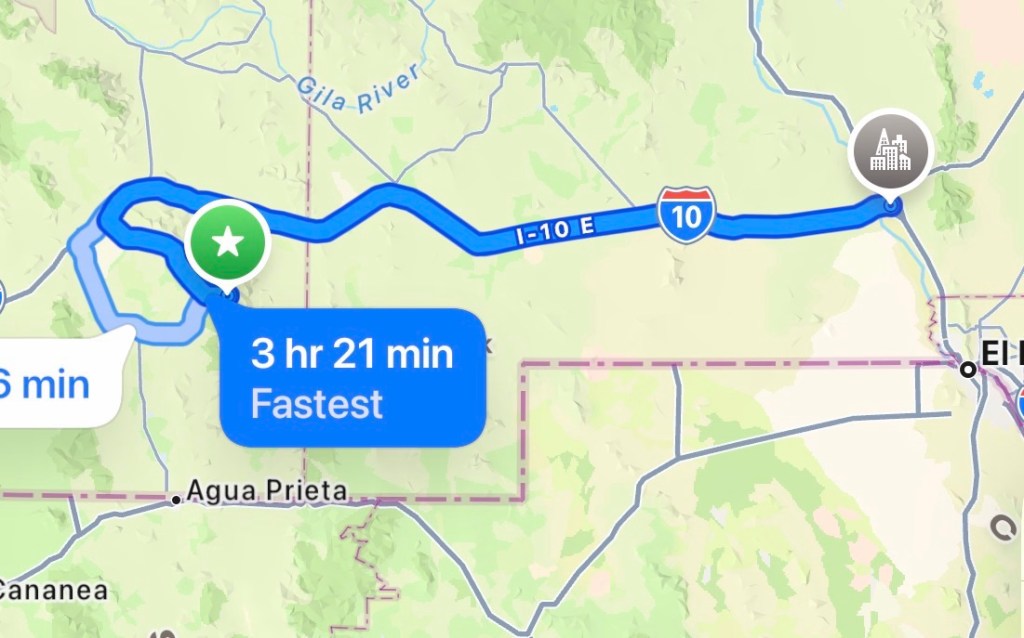
Tucson → Chiricahua: ~2.5 hrs
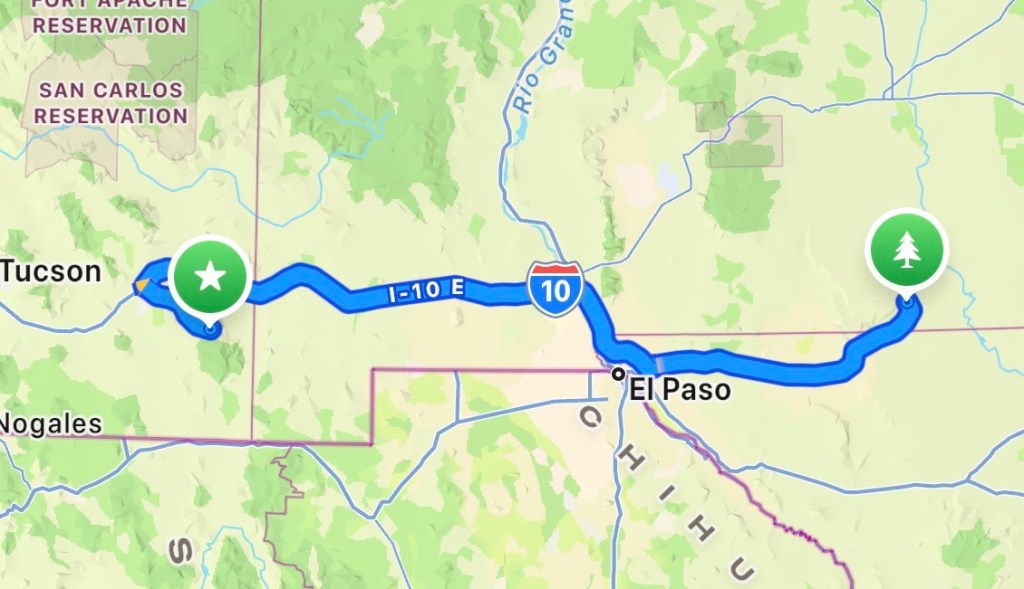
Chiricahua → Carlsbad: ~6.5 hrs
Carlsbad → Dallas: ~7 hrs
Best done as a 4–6 day trip depending on pace
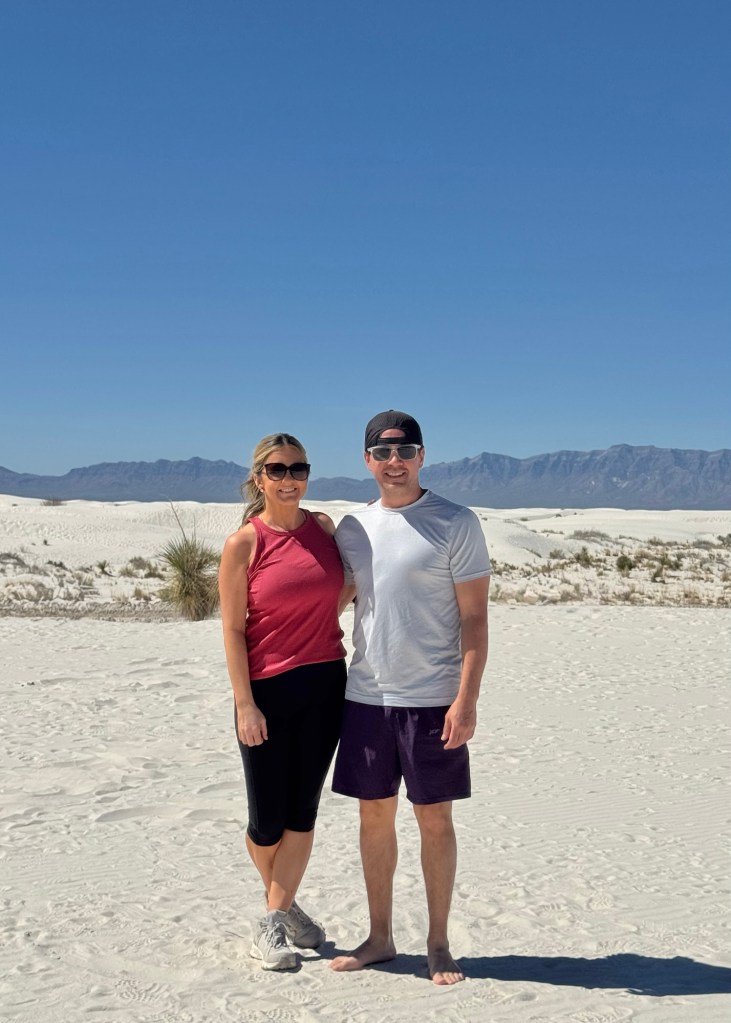
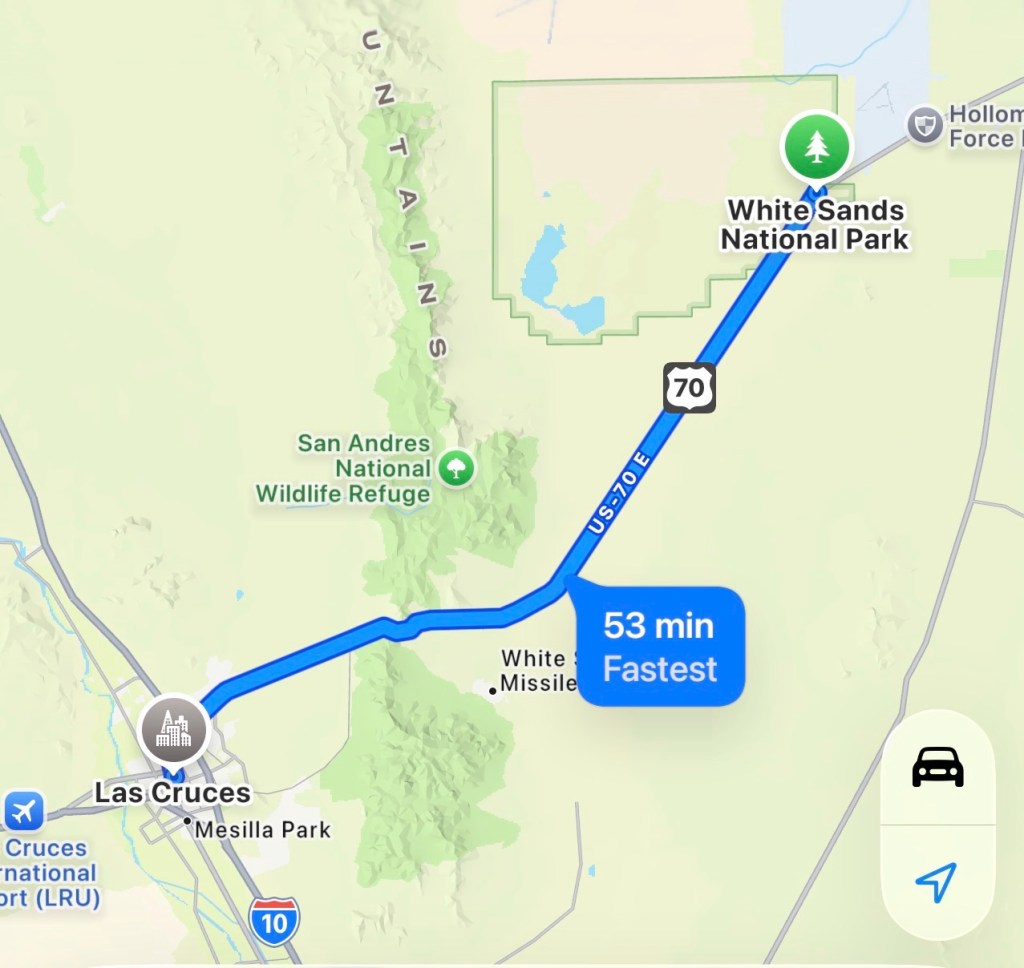
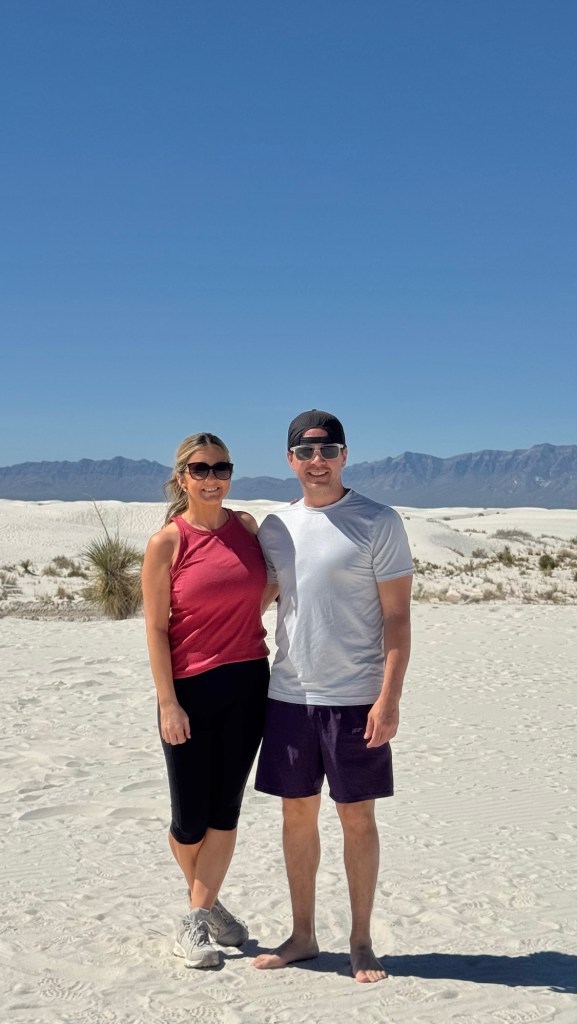
Stop 1: White Sands National Park
Why It’s Worth It
Massive white gypsum dunes that feel like another planet—this is one of the most unique landscapes in the U.S. and 100% worth the drive.
Best Things To Do
Sled down the dunes (kids LOVE this)
Walk barefoot across the sand
Drive the scenic loop
Stay for sunset (don’t skip this)
Best Time to Visit
Late afternoon → sunset (cooler temps + best lighting)
Tips You NEED to Know
It is extremely bright → sunglasses required
Bring lots of water (no shade anywhere)
Sand gets HOT midday
Purchase sleds at the visitor center or bring your own
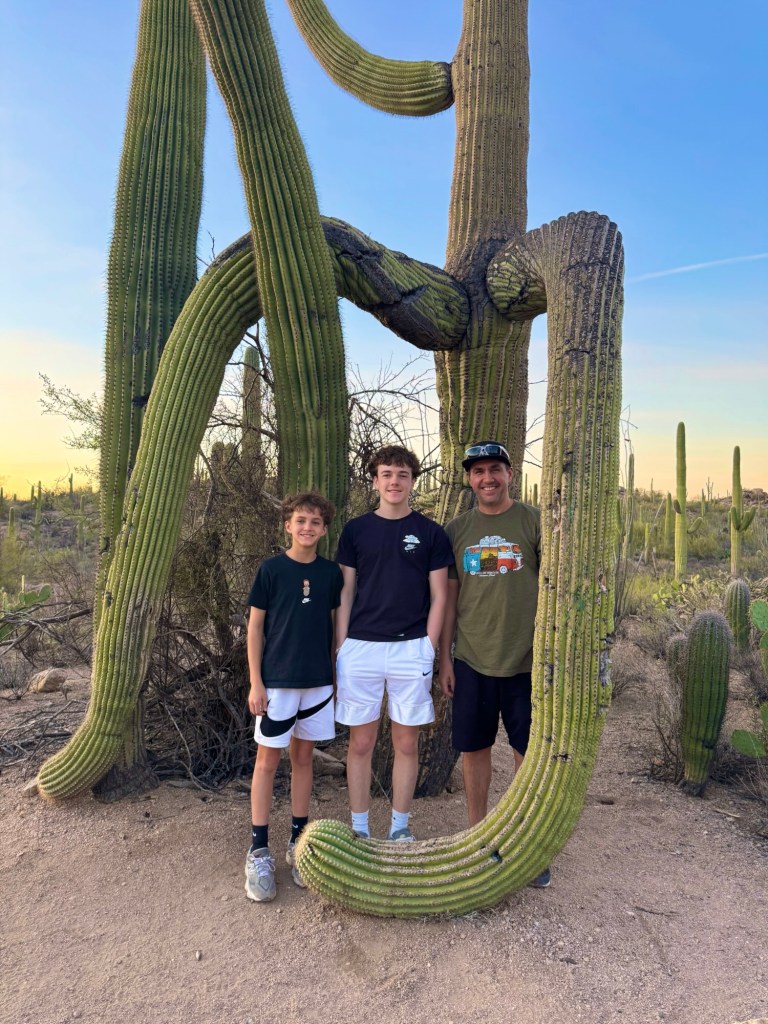
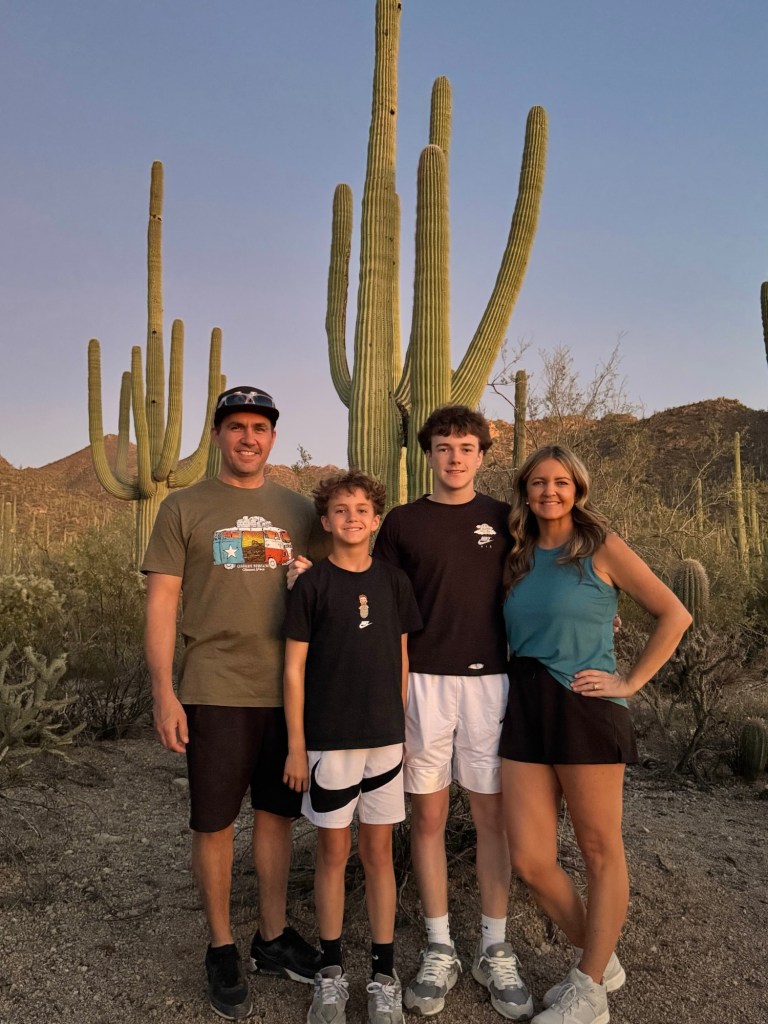
West (Tucson Mountain District): better sunsets + denser cacti
East (Rincon District): more mountain views + fewer crowds
If you only have time for one: choose WEST
Best Things To Do
Scenic drive (perfect with kids)
Short desert hikes
Sunset photography
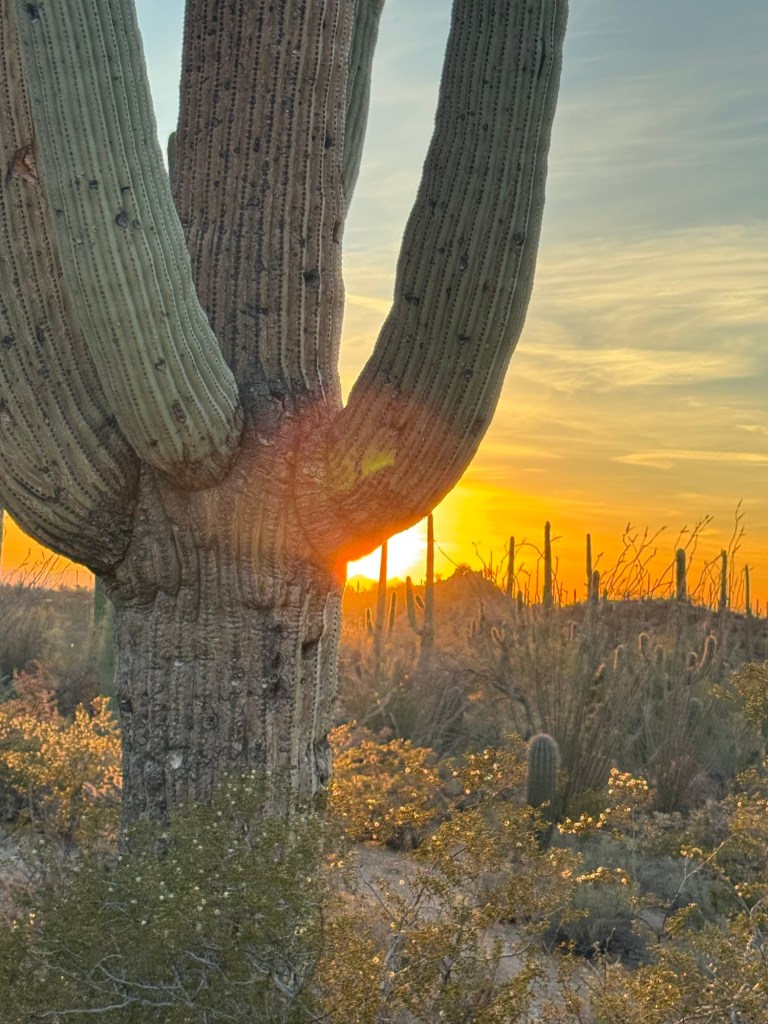
Best Time to Visit
Sunrise or sunset (midday heat is intense)
Fall, winter, and spring is ideal for cool temps!
Tips You NEED to Know
Temps can exceed 100° depending on season
Bring more water than you think
Watch for cacti + desert wildlife
Plan for at least 2-3 hours
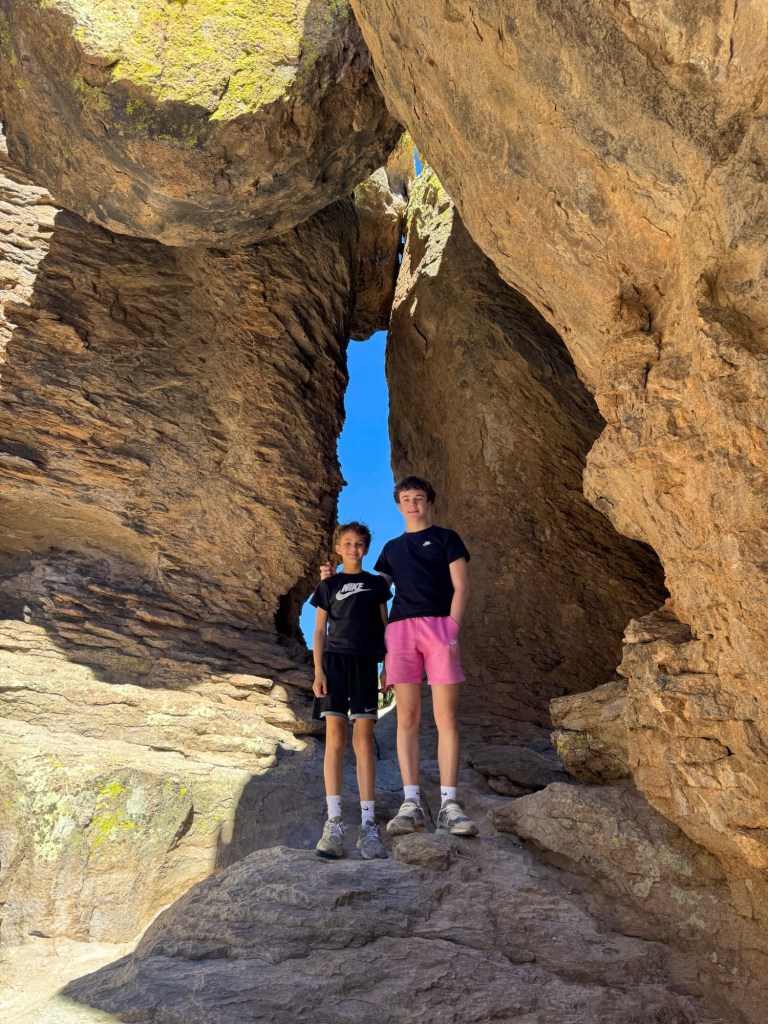
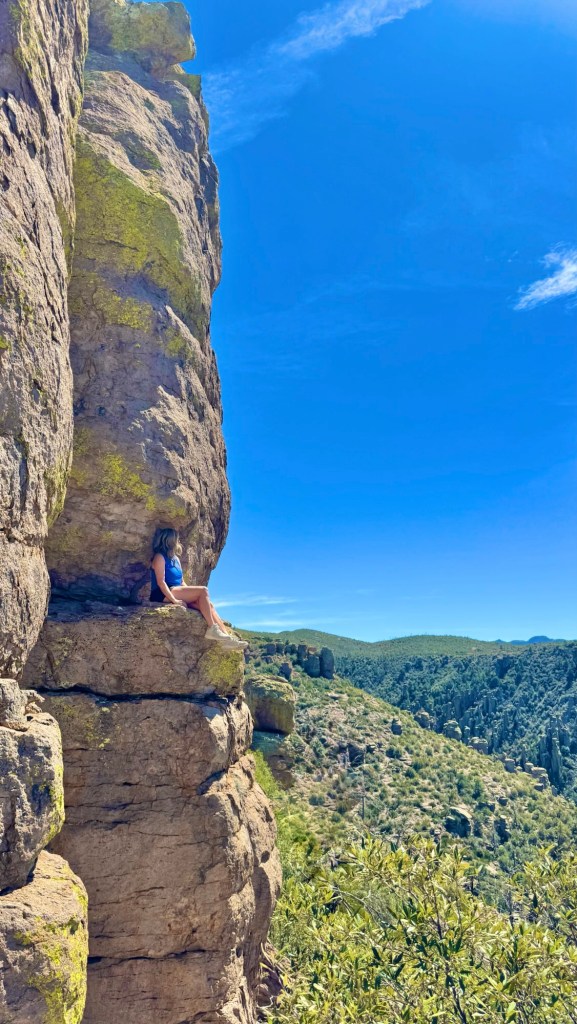
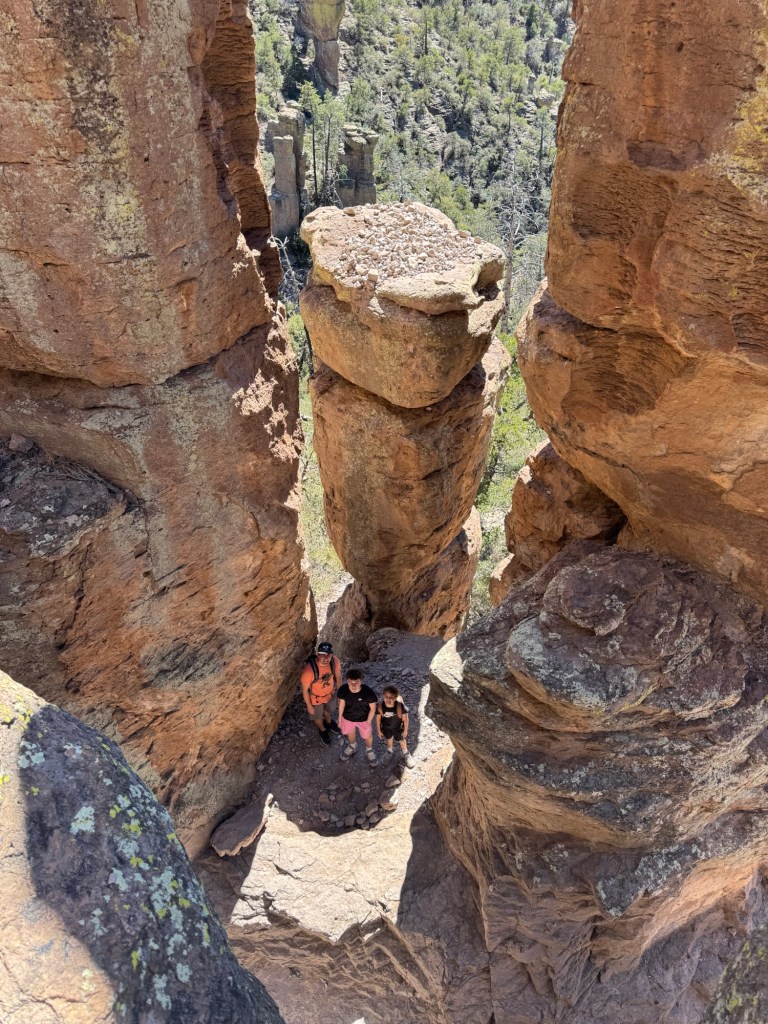
Stop 3: Chiricahua National Monument
Why It’s Worth It
One of the most underrated stops in the Southwest—massive rock formations (hoodoos) with way fewer crowds than national parks.
Best Things To Do
Echo Canyon Loop (most popular hike)
Scenic drive + overlooks
Short trails if traveling with kids
Best Time to Visit
Morning or late afternoon for cooler temps + lighting
Tips You NEED to Know
No cell service → download maps ahead
Roads are winding—take your time
Bring snacks/water (limited services)
Plan for at least 2-4 hours
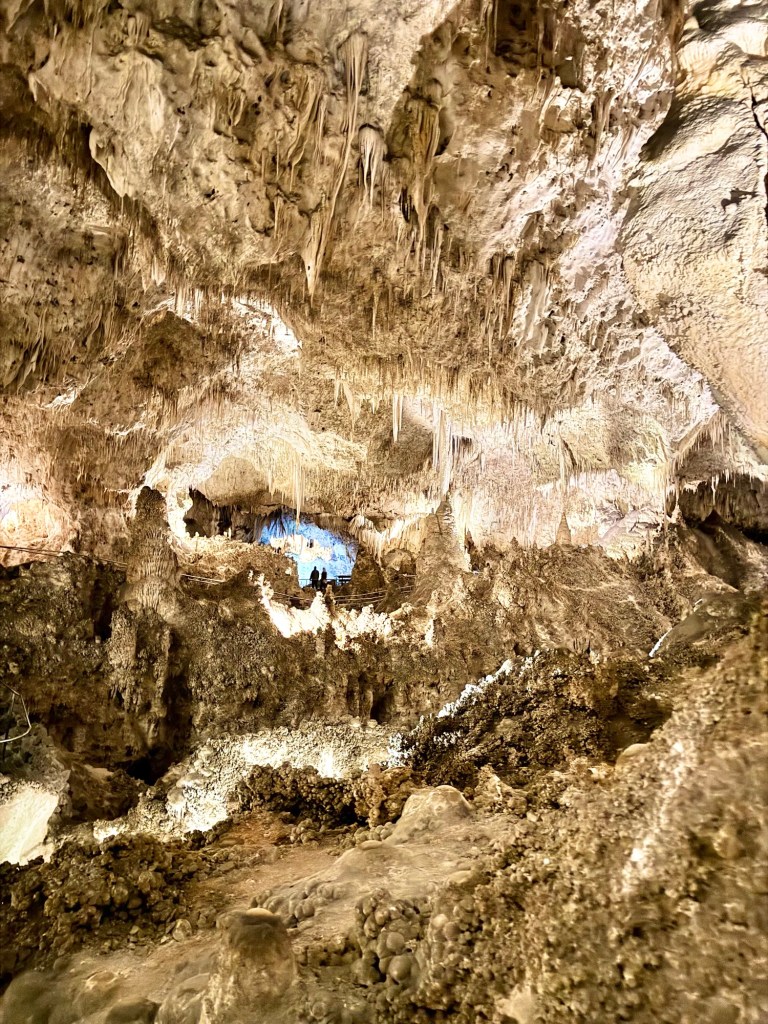
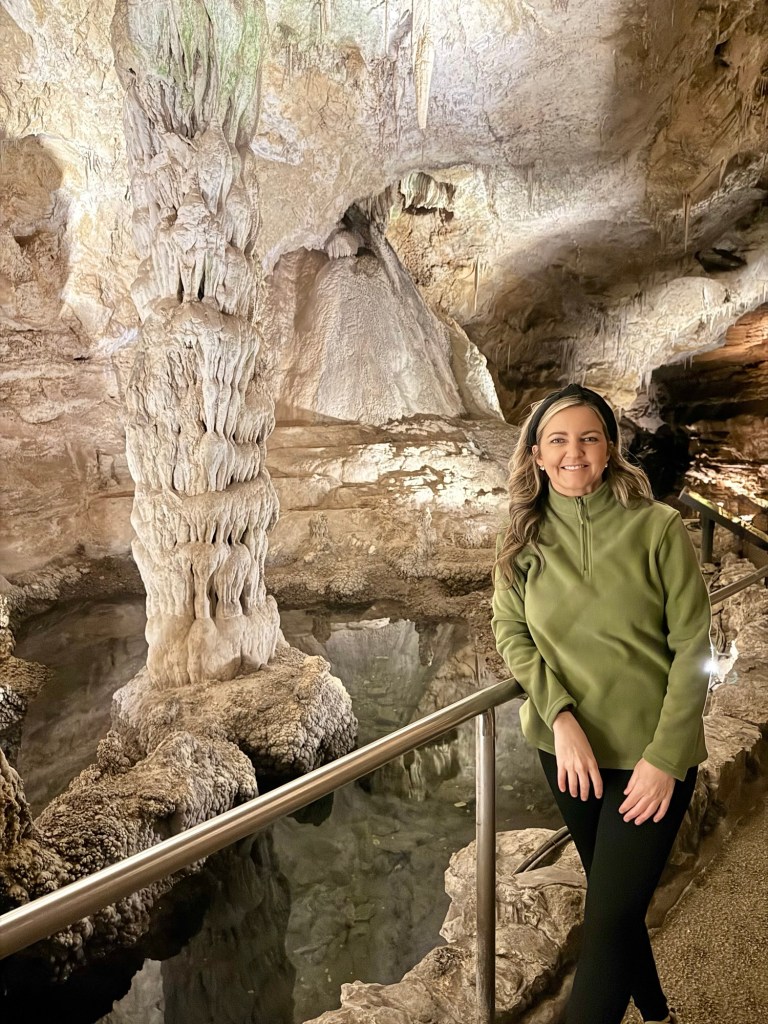
Stop 4: Carlsbad Caverns National Park (Perfect Return Stop)
Why It’s Worth It
A completely different experience—massive underground cave system with incredible formations.
Best Things To Do
Walk the Natural Entrance (if able)
Explore the Big Room
Take the elevator down/up (easy option with kids)
Best Time to Visit
Anytime (great midday stop to escape heat)
Tips You NEED to Know
Reservations required for entry times
Bring a light jacket (it’s cool inside)
Strollers are limited—check accessibility ahead
Plan for at least 2-3 hours
Where to Stay (Easy + Family-Friendly Options)
White Sands Area (Alamogordo)
TownePlace Suites Alamogordo
Hampton Inn Alamogordo
Tucson
TownePlace Suites Tucson (great for space + kitchen)
Embassy Suites Tucson
Carlsbad
TownePlace Suites Carlsbad
Home2 Suites Carlsbad
These are great for families: more space, kitchens, and free breakfast
Sample 5-Day Itinerary
Day 1: Drive Dallas → White Sands (sunset) Day 2: White Sands → Tucson (evening in Saguaro) Day 3: Saguaro + explore Tucson Day 4: Chiricahua (day trip or overnight nearby) Day 5: Carlsbad → drive back to Dallas
Important Travel Tips
Download offline maps (especially for Chiricahua)
Fill up gas before remote areas
Pack snacks + water at all times
Plan around sunrise/sunset for best experiences
Book Carlsbad entry in advance
Final Thoughts
This is one of those rare road trips where the drive never feels boring—every stop brings a completely new landscape and experience.
If you’re looking for a Southwest road trip from Texas that’s actually worth the miles… this is it.
Carlsbad Caverns • White Sands • Albuquerque • Tent Rocks
If you’re looking for a road trip from Texas that feels completely different from anything you’re used to—this New Mexico loop delivers.
In just a few days, you’ll experience massive underground caverns, bright white sand dunes, mountain-top sunsets, and one of the most unique hikes in the Southwest.
This guide covers everything you need to plan the trip: route, stops, hotels, tips, and exactly what to expect at each destination.
This route is very family-friendly with a mix of easy + moderate activities
Best time to go: spring and fall (cooler temps, better hiking conditions)
Final Thoughts
This New Mexico road trip is one of the most diverse routes you can take from Texas. In just a few days, you’ll go from underground caves to white desert dunes to mountain sunsets and slot canyon hikes.
It’s one of those trips that feels much bigger than the distance—and one you’ll want to do again.
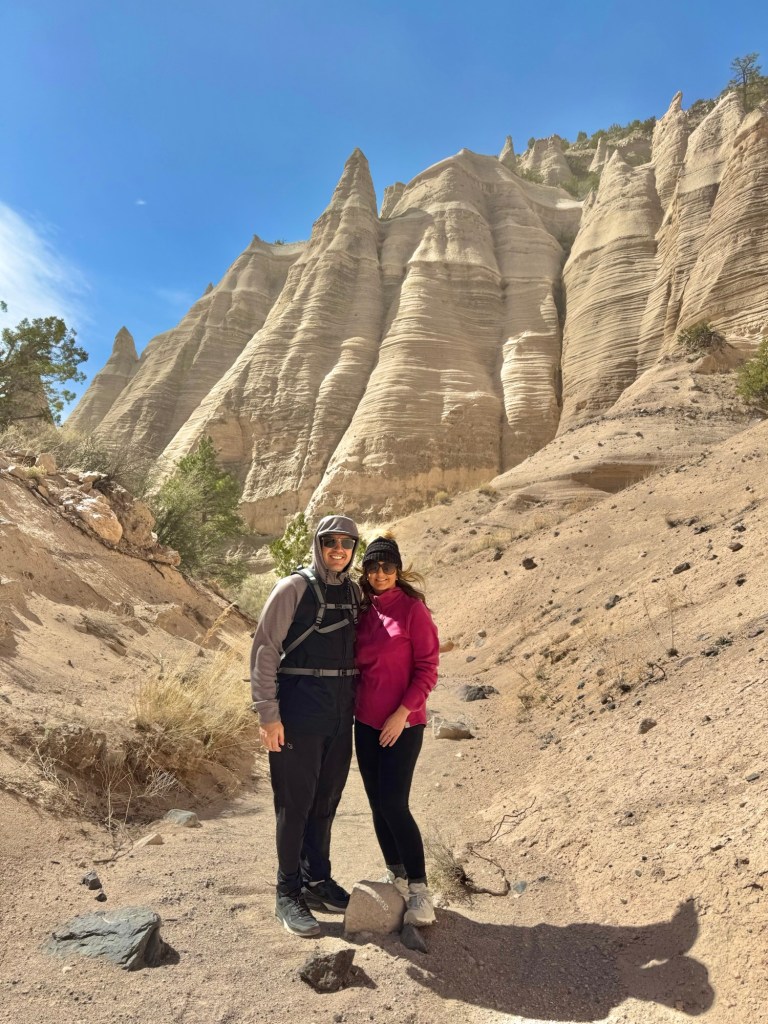
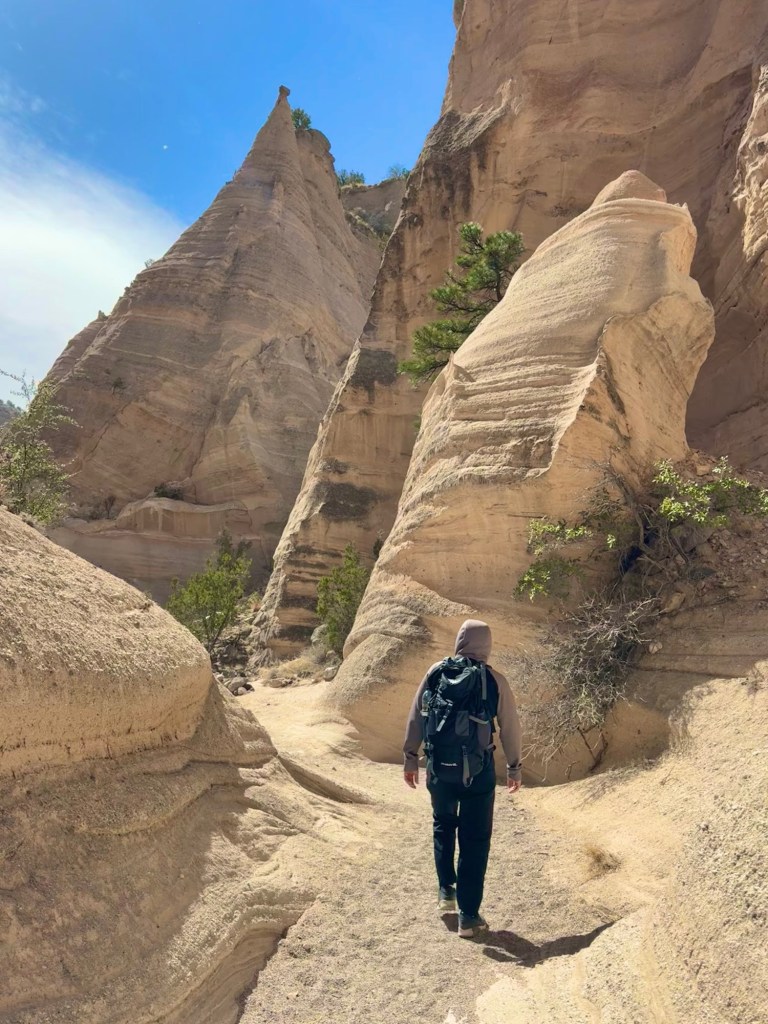
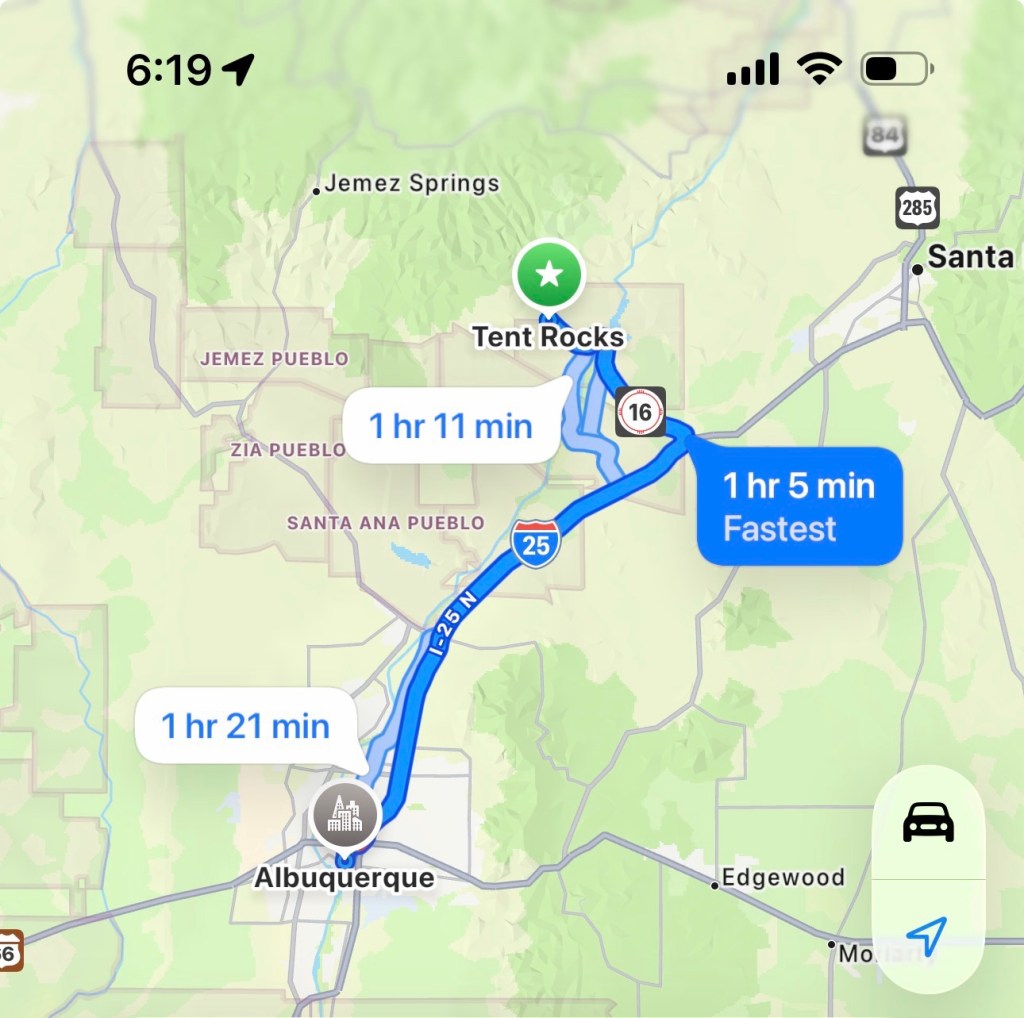
Tent Rocks is one of those places that feels completely unexpected — like you’ve stumbled onto another planet right in the middle of New Mexico. If you’re planning a Southwest road trip, this is a stop that’s absolutely worth the extra planning. Save this guide for later!
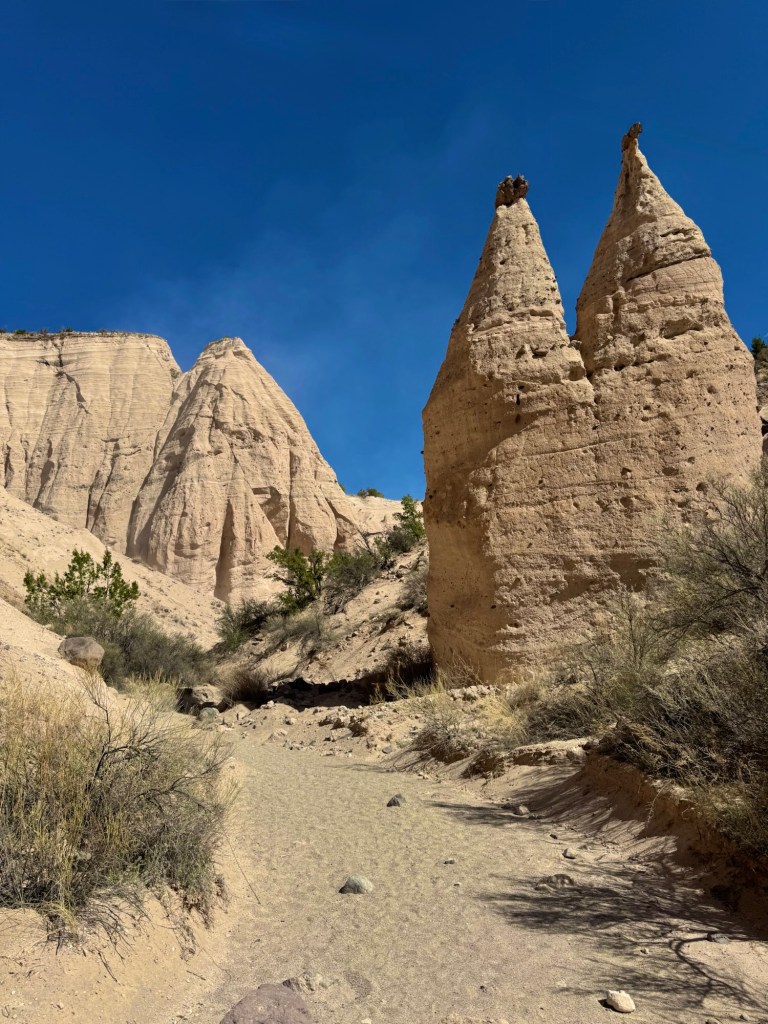
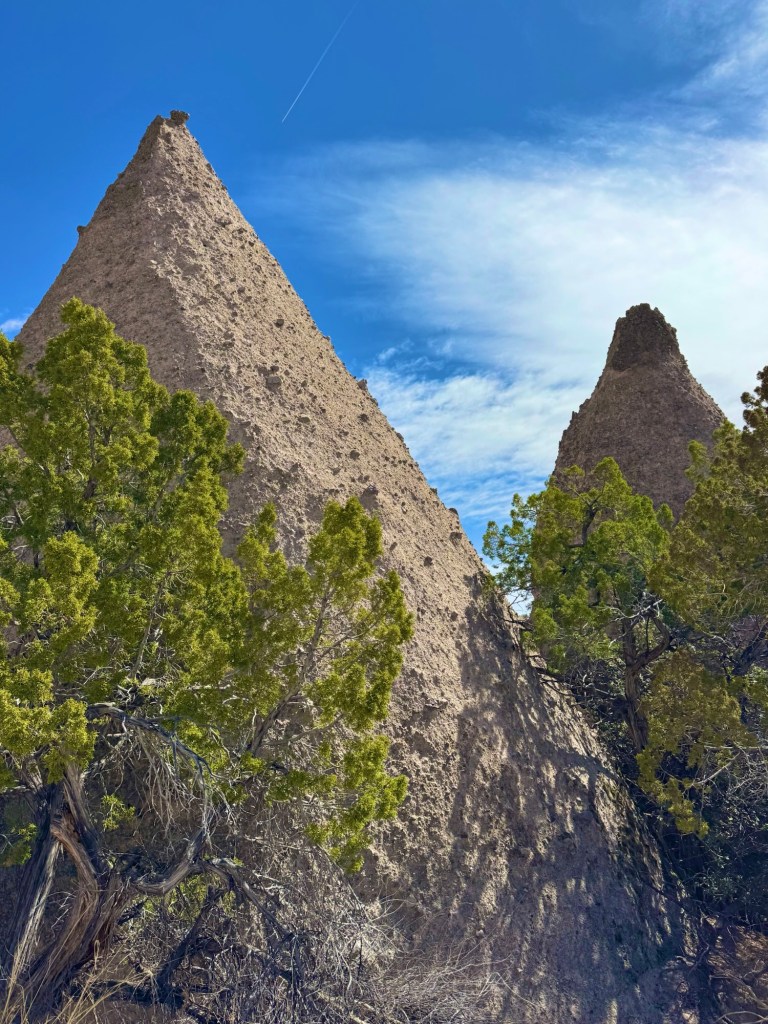
What Are Tent Rocks?
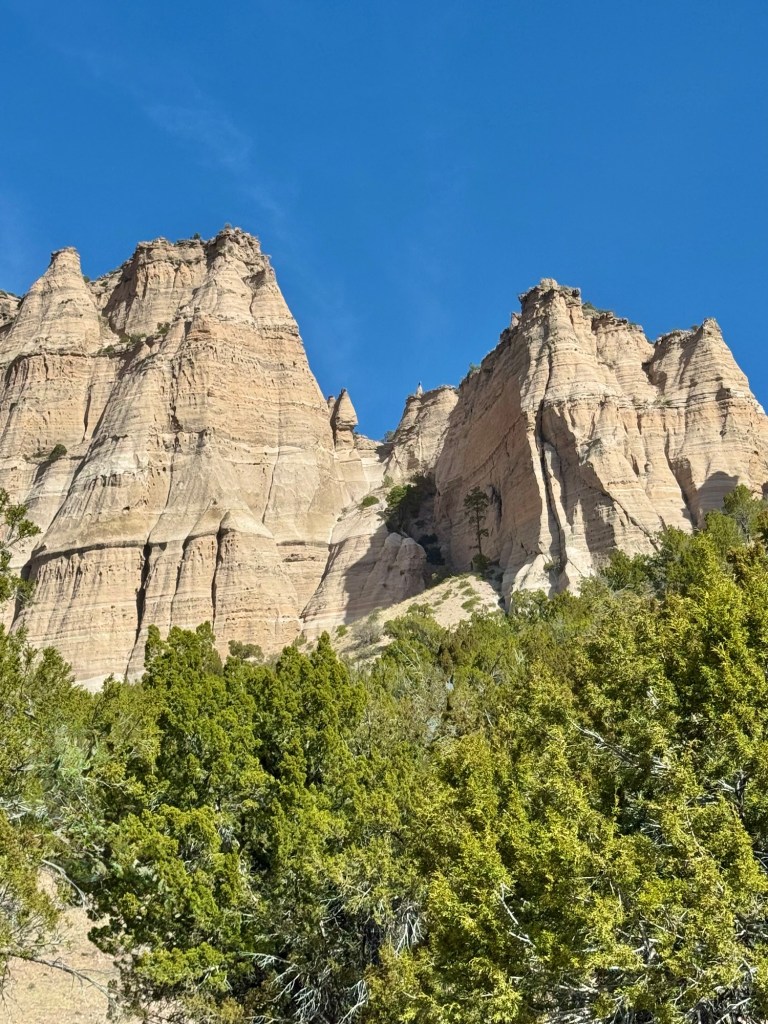
Kasha-Katuwe Tent Rocks National Monument is one of the most unique landscapes in New Mexico, known for its cone-shaped rock formations (called hoodoos) created by volcanic eruptions millions of years ago.
It honestly feels like walking through another planet — especially once you hit the slot canyon.
You’ll check-in at the Visitor Center and then follow a pilot truck to the actual site
Hours & Access
Typically open Thursday–Monday
Closed Tuesday & Wednesday
Day-use only (no sunset access)
Tent Rocks opens at 8:00 am and the last pilot truck leaves the Visitor Center at 1:00 pm
⚠️ Hours can change — always double check before going
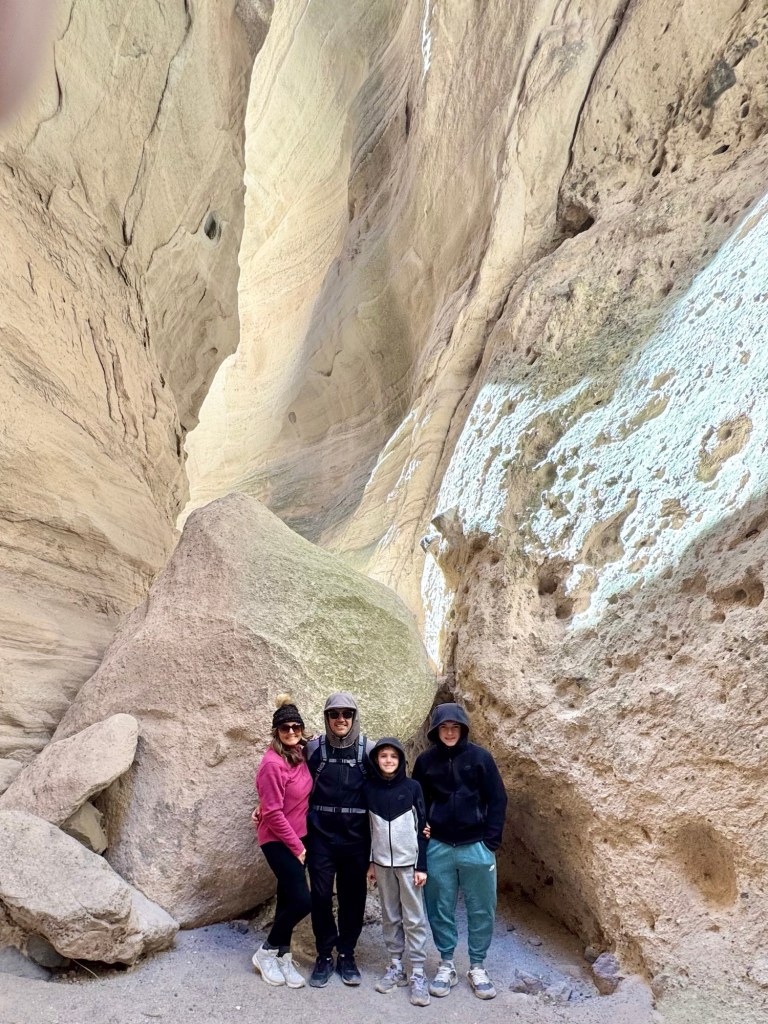
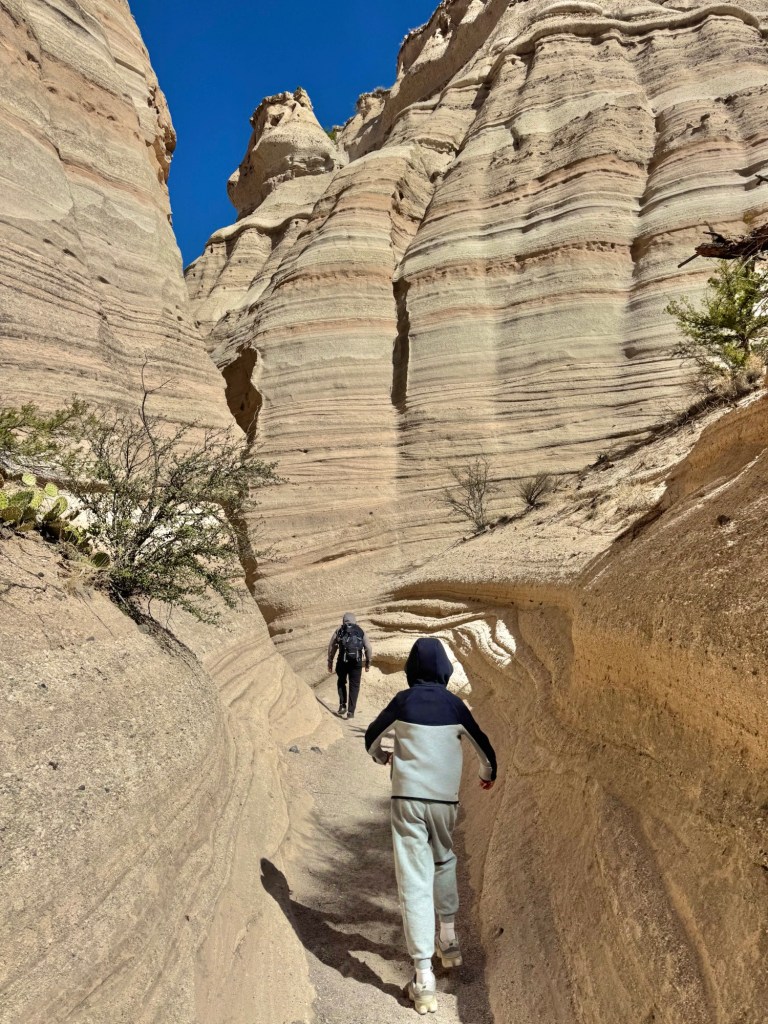
Best Hike to Do
Slot Canyon Trail (DO THIS ONE)
~3 miles round trip
Moderate
Includes:
Slot canyon section (super narrow + fun)
Short ladder climb
Panoramic overlook at the top
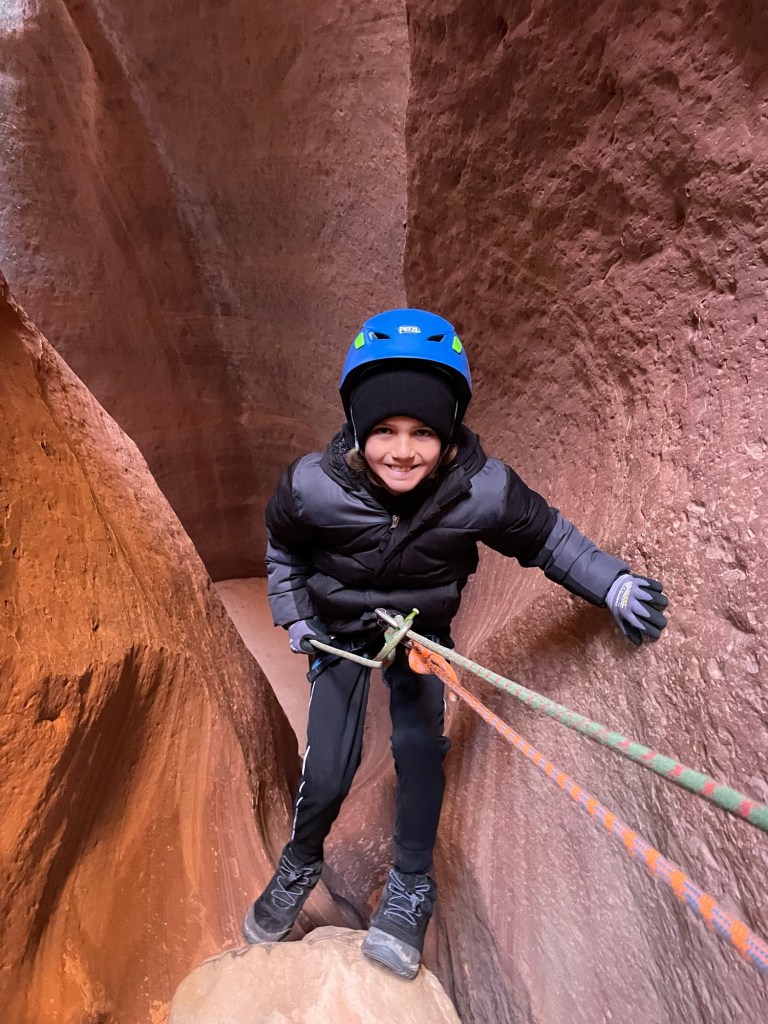
Is It Kid-Friendly?
Yes, but:
The slot canyon gets tight
The ladder may be tricky for little ones
Great for adventurous kids
Best Time to Go
Morning = best lighting + fewer crowds
Avoid midday heat (very exposed)
No shade for most of the hike
What to Bring
Water (no services inside)
Good hiking shoes
Sun protection
Sun glasses – it was extremely windy and sandy on our visit
Snacks if doing the full hike
Photo Tips
The slot canyon = best reel footage
Shoot upward angles to capture the scale
Overlook at the top = wide landscape shots
Things to Know Before You Go
No pets allowed
No drones
Limited facilities
Can close due to weather
Is It Worth It?
100% yes — one of the most unique hikes in New Mexico.
This ended up being one of our favorite stops on the entire trip — and honestly, I didn’t expect it to be. It’s fun, unique, and just adventurous enough to feel like a hidden gem. If you’re building out a Southwest road trip, definitely add this one to your list.
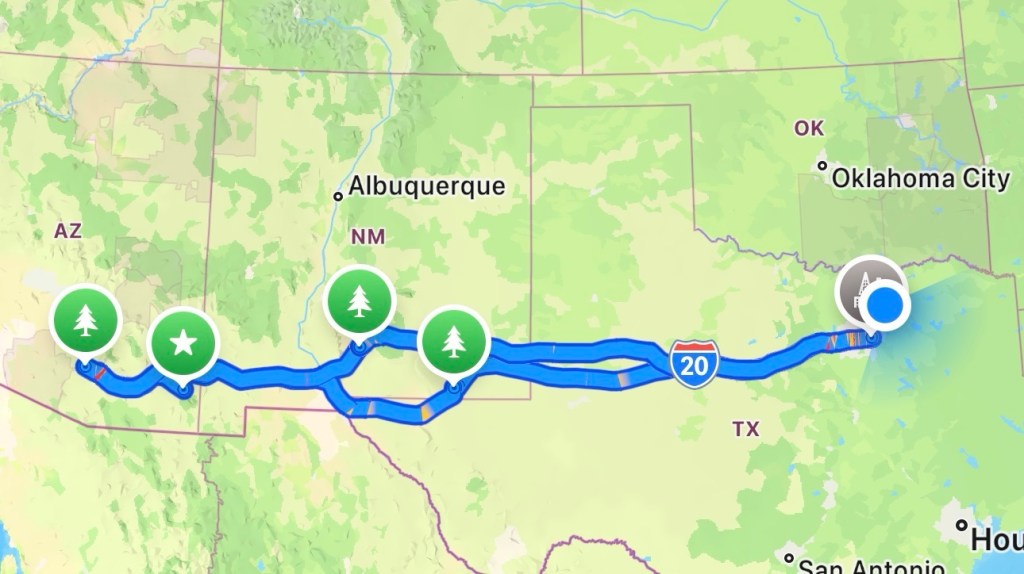
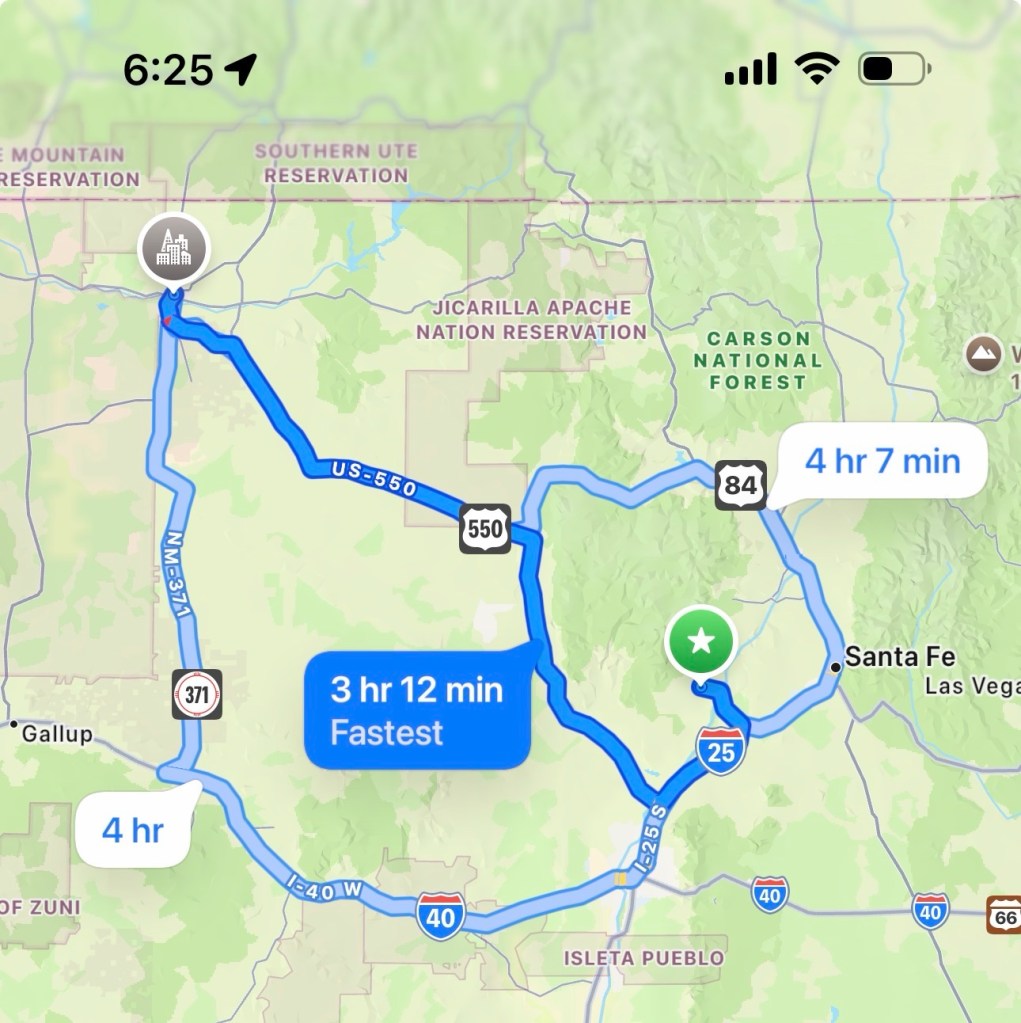
If you’re looking for a real-life, doable Southwest road trip from Texas, this is the exact route we just did for spring break—and it might be one of my favorite routes yet.
Think: desert sunsets, slot canyons, giant cacti, and lots of memories made!
Overview of the Route
Start: Dallas, TX
States: Texas → New Mexico → Arizona → back to Texas
Total Time: 6 days
Stops: Albuquerque, Tent Rocks, Canyon de Chelly, Saguaro, Chiricahua, White Sands
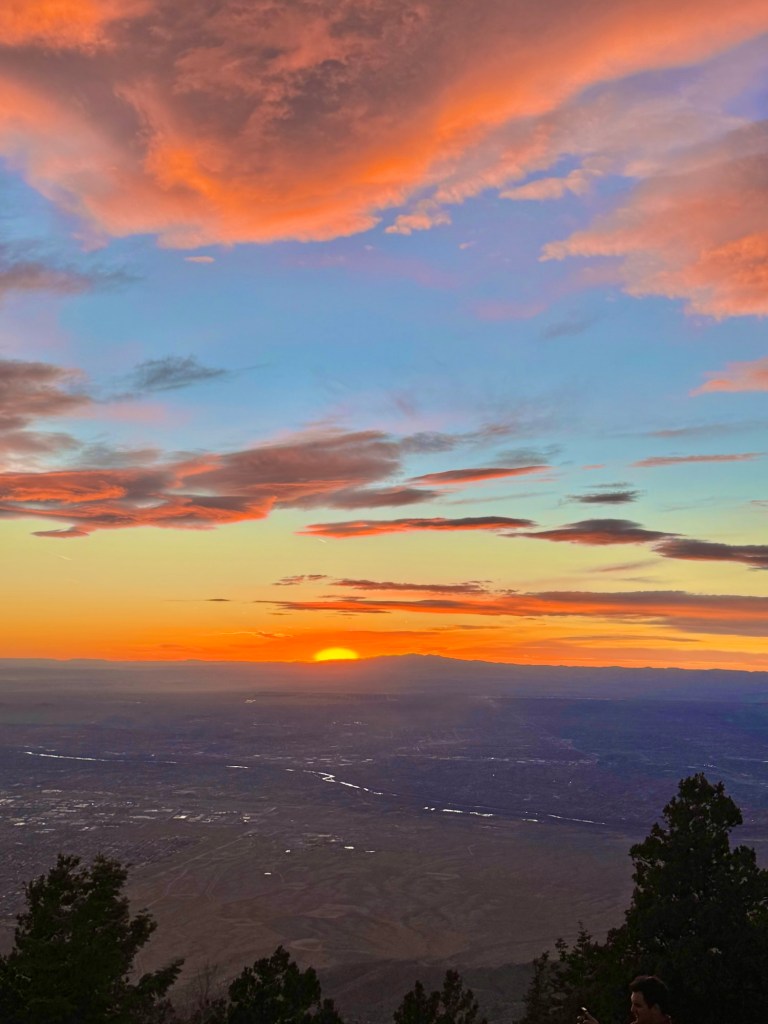
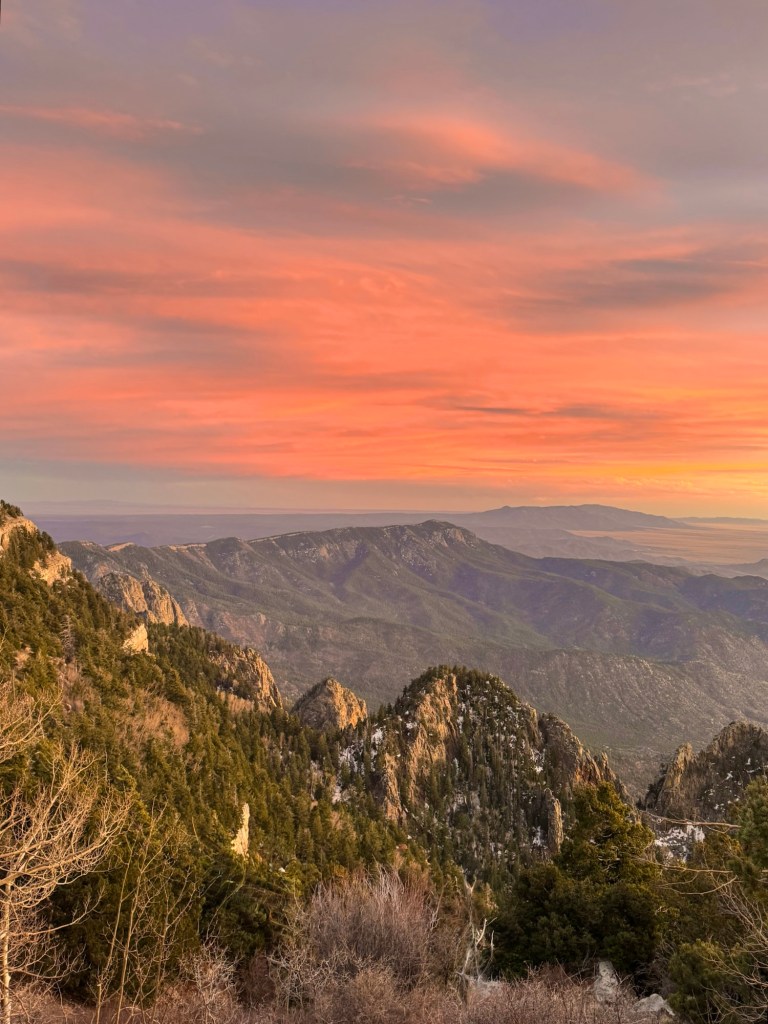
Day 1: Drive to Albuquerque + Sunset Views
After a long travel day from Texas, we made it to Albuquerque, NM just in time for sunset—and WOW, this is such an underrated stop.
What to do:
Head up to Sandia Crest (or nearby overlooks) for sunset
Take Dramamine if you get carsick – that road up to the peak is no joke!
Watch the mountains turn pink + gold
Why it’s worth it – This is the perfect way to kick off the trip without overpacking your first day.
Where to stay – Anywhere in Albuquerque for easy access to the next day’s drive. We stayed at Home2Suites by Hilton and had a lovely stay in a spacious room!
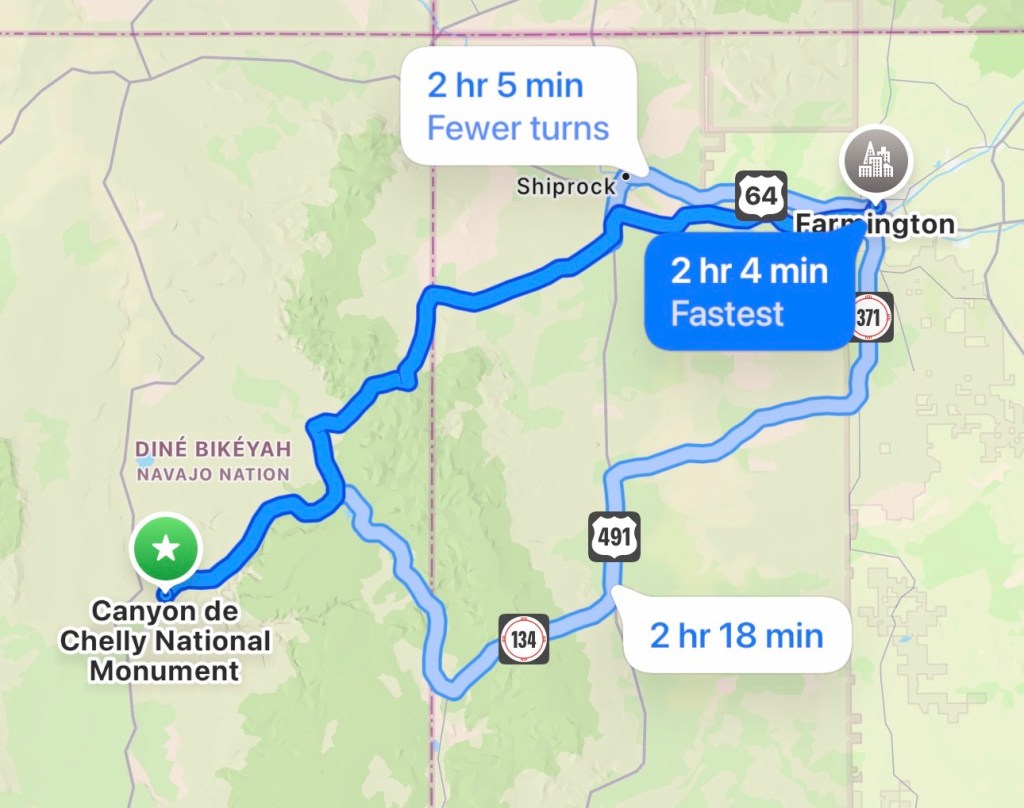
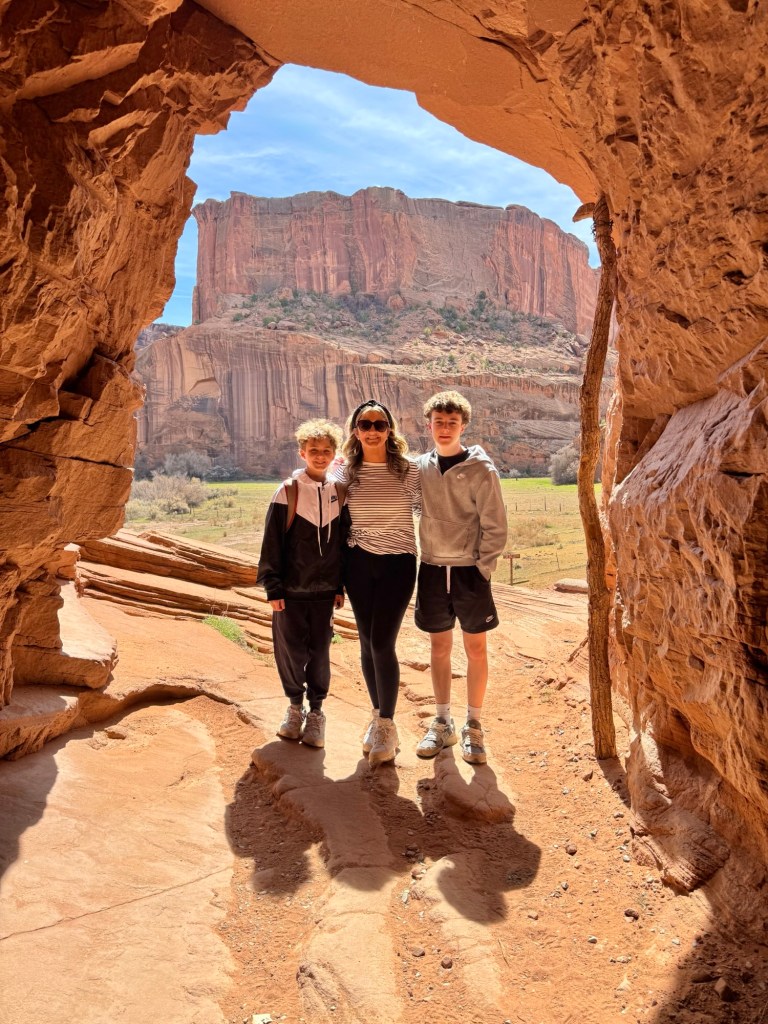
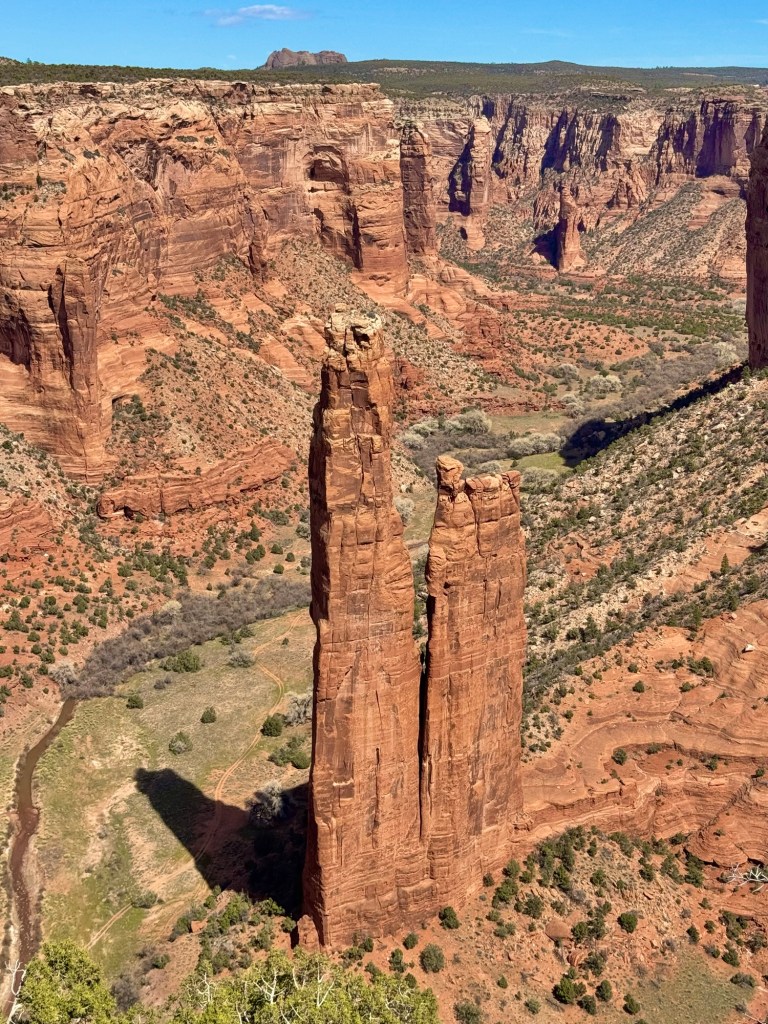
One of the most underrated places in the Southwest—and honestly, it surprised us.
What to do:
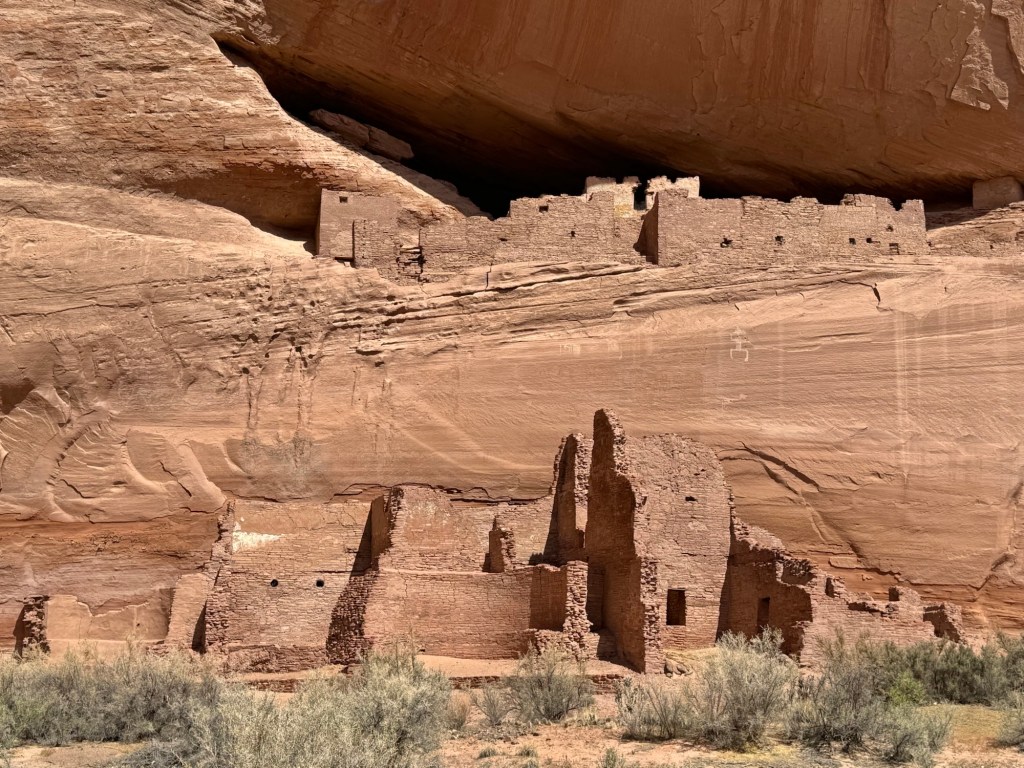
Hike the White House Trail (only trail you can do without a guide)
Stop at scenic overlooks along the rim
Why it’s special – You’re looking at ancient cliff dwellings AND massive canyon views—without the crowds of bigger parks.
Time needed: Half day
We drove straight to Tucson, AZ after visiting this site. We stayed two nights at Townplace Suites by Marriott in Tucson, and really enjoyed the spacious room and the breakfast was delicious! The pool was great, too!
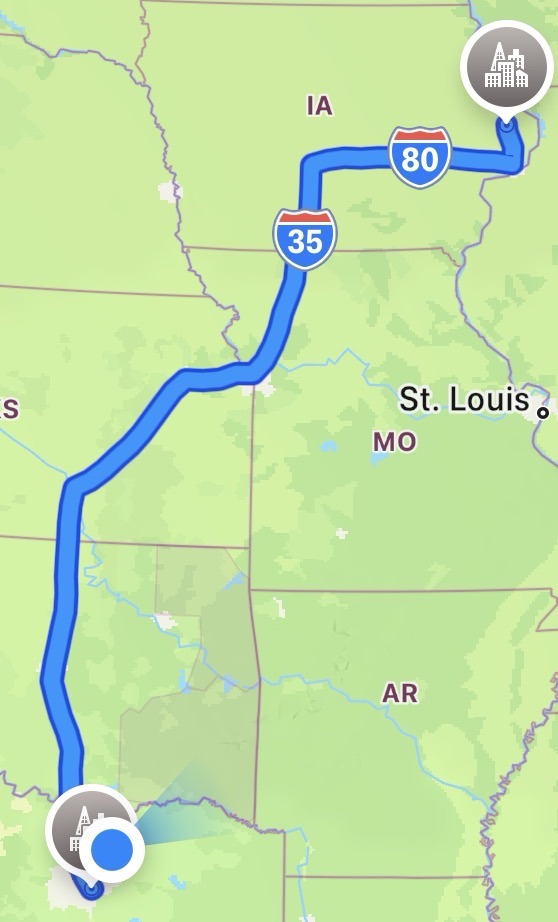
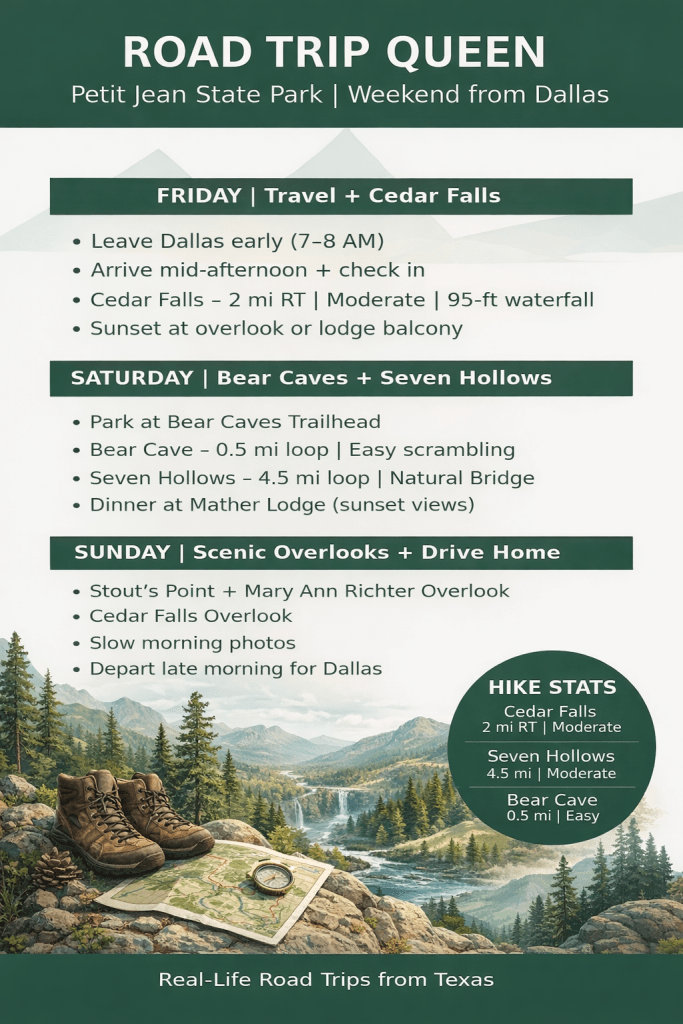
If you’re looking for an easy, adventure-packed getaway from Dallas, Petit Jean State Park is one of the best bang-for-your-buck road trips within 6 hours. Think: waterfalls, slot-like rock formations, canyon views, and sunset overlooks — all in one weekend.
Here’s your Friday–Sunday itinerary freebie, plus more details about where to stay, what to do, & what to pack!
The Drive from Dallas
Distance: ~5.5 hours Best plan: Leave early Friday morning (7–8 AM) You’ll roll into Arkansas mid-afternoon with time to check in and hit the trails before sunset.
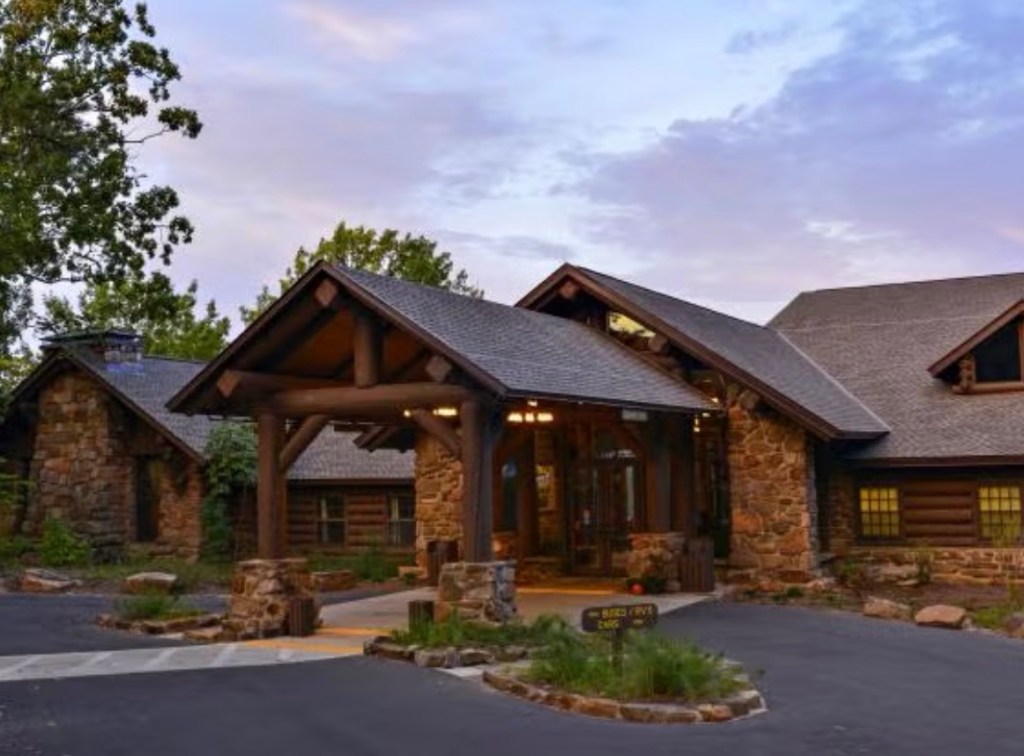
Where to Stay
Inside the Park (Highly Recommend for First Visit)
Park at the Bear Caves Trailhead Lot and knock out both hikes from there.
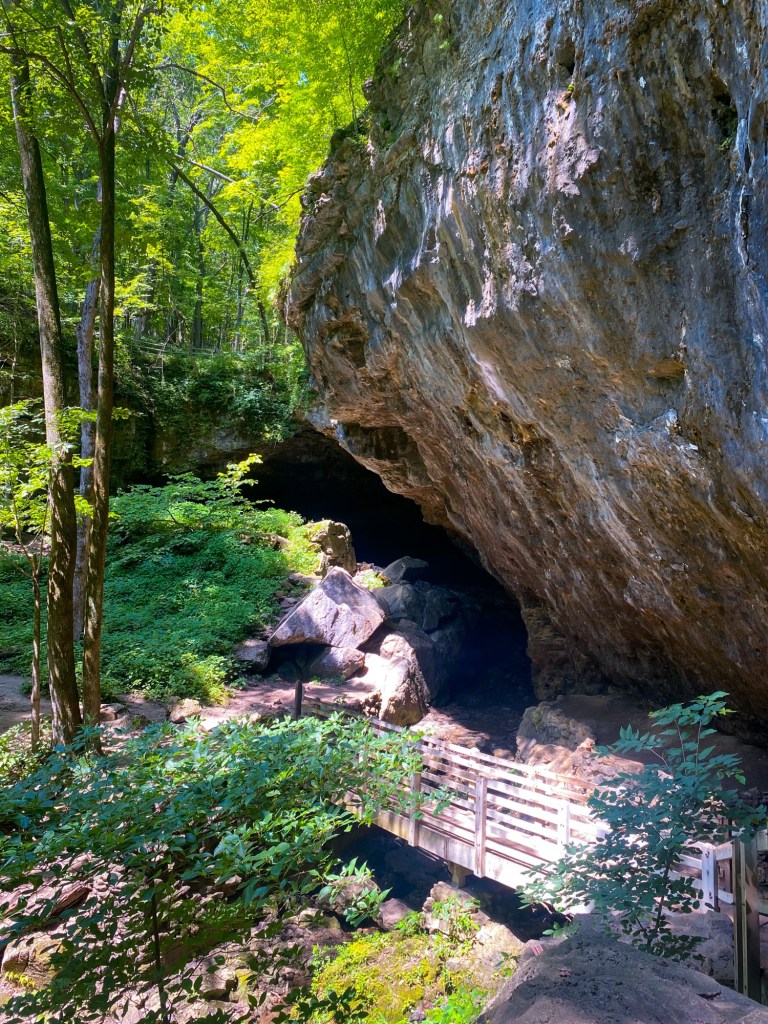
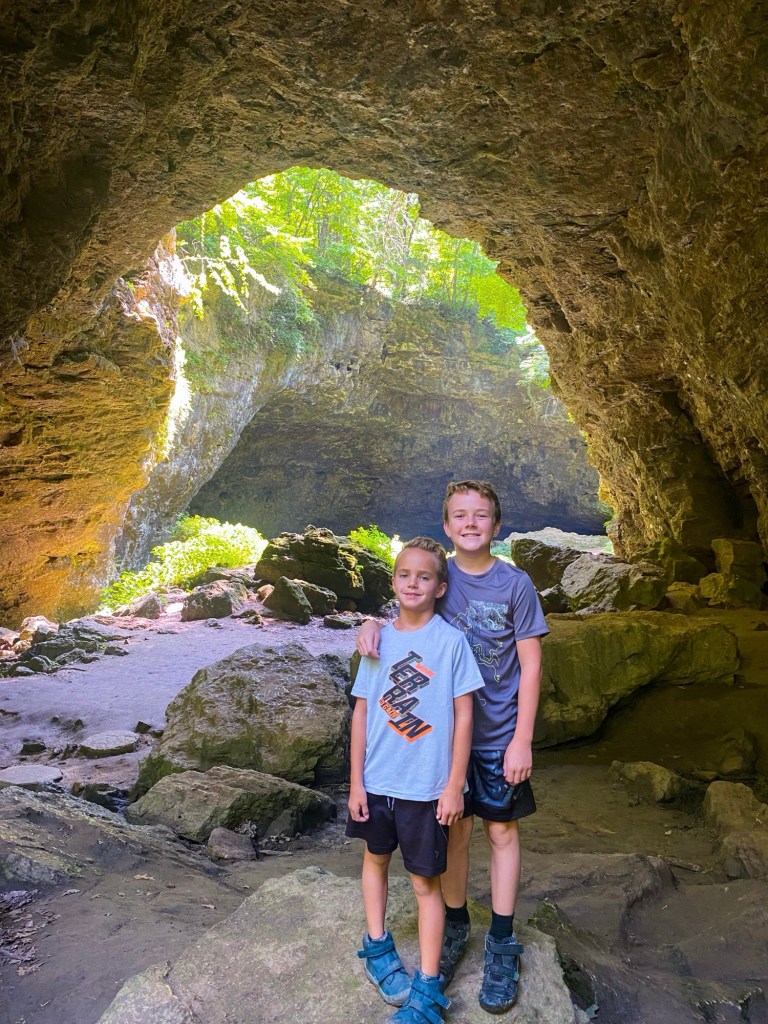
Bear Cave Trail
Distance: ~0.5 mile loop
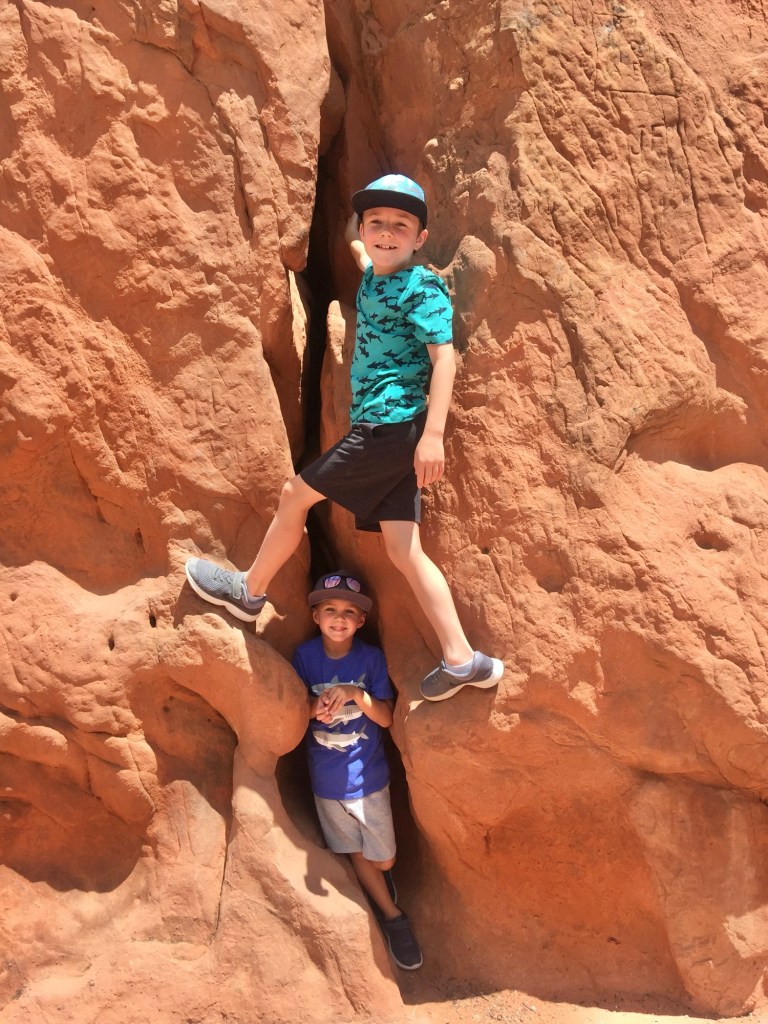
Difficulty: Easy but adventurous
What to expect: Huge rock formations, narrow passages, fun scrambling
Perfect for kids and anyone who loves exploring rock “caves.”
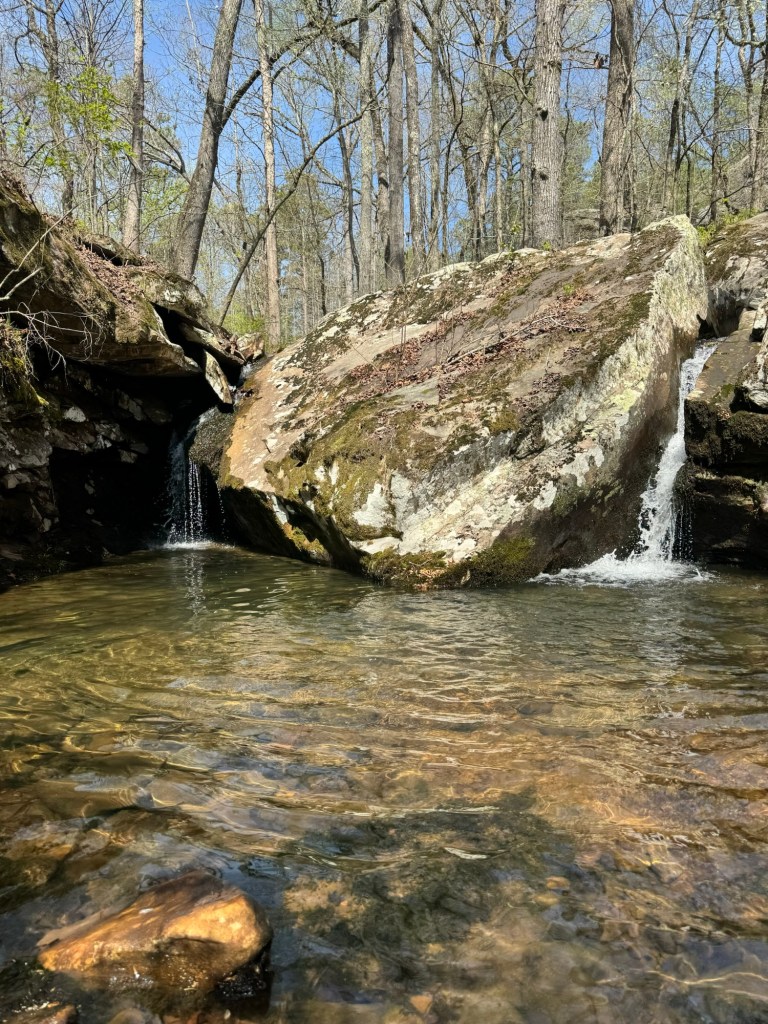
Seven Hollows Trail
Distance: 4.5 miles loop
Difficulty: Moderate
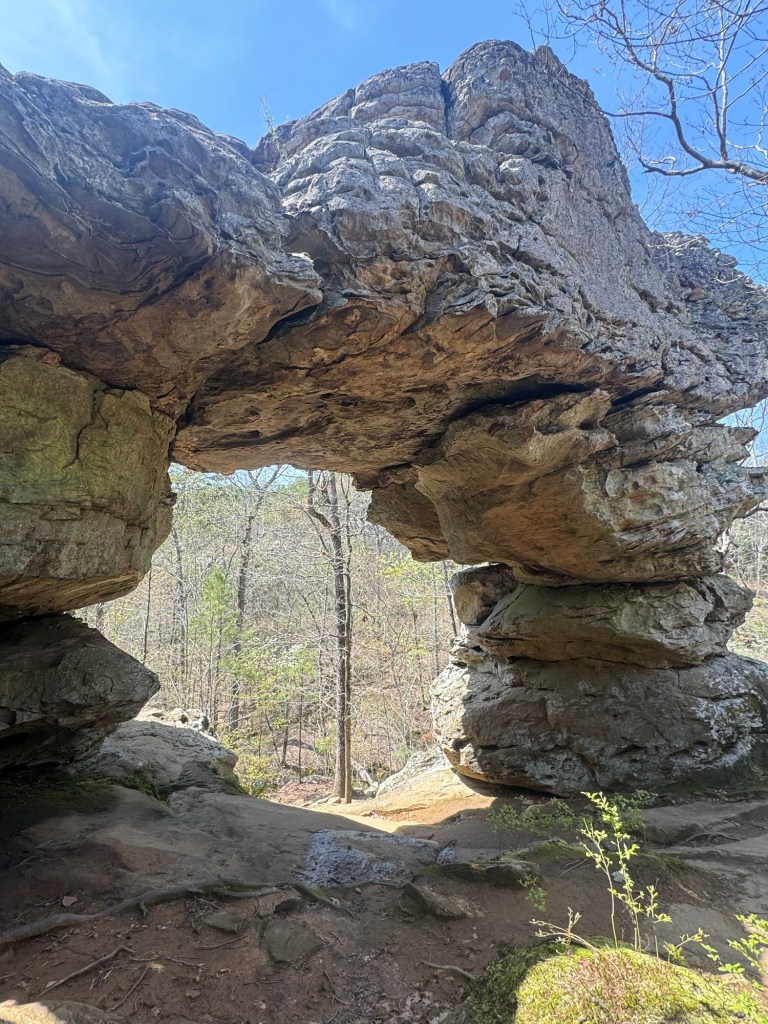
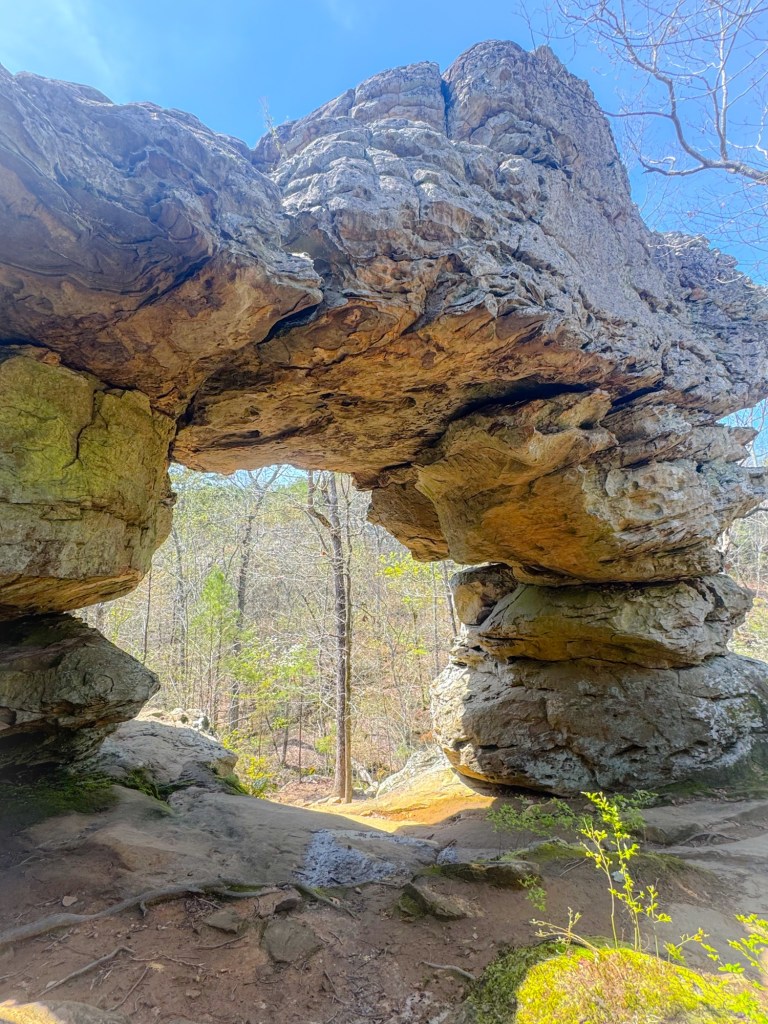
Highlights:
Natural Bridge
Small waterfalls (seasonal)
Bluffs + forest scenery
Bring plenty of water — this one takes a few hours.
Dinner at the Lodge
Have dinner at the restaurant inside Mather Lodge.
Canyon views at sunset
Southern comfort-style menu
Zero need to drive after a long hiking day
If you’re staying in Morrilton, it’s still worth the 20-minute drive back into the park for dinner.
Sunday: Overlooks + Drive Home
Keep it slow and scenic before heading back to Texas.
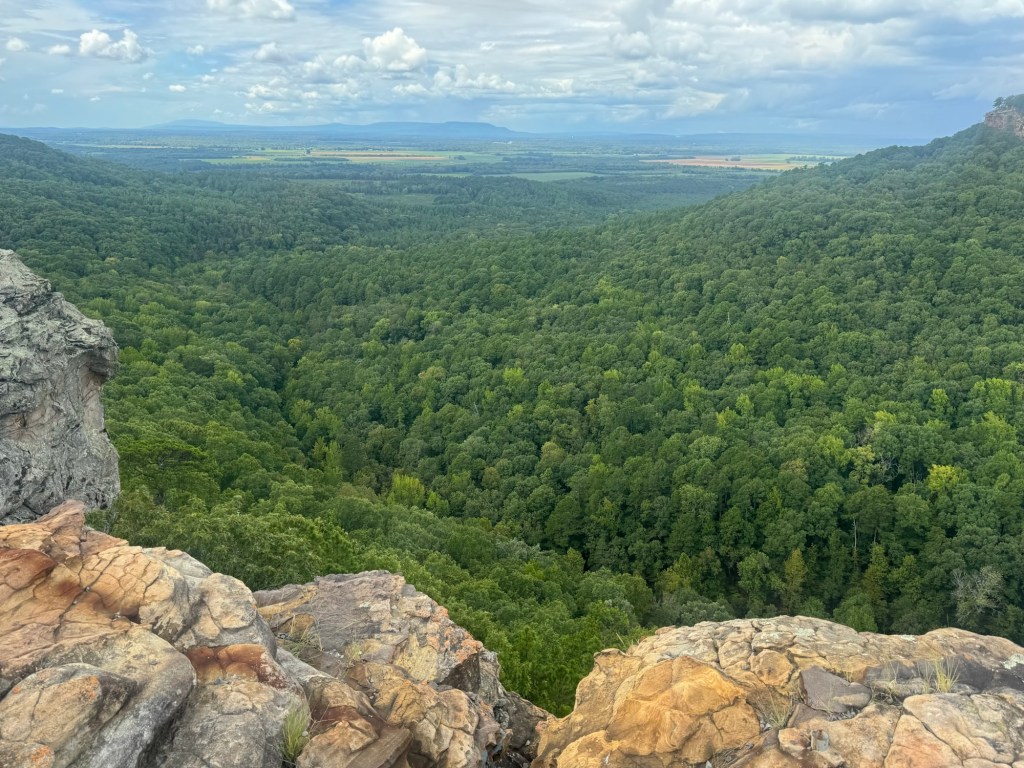
Must-see overlooks:
Cedar Falls Overlook
Stout’s Point
Mary Ann Richter Overlook
Most are short walks from parking areas — perfect for stretching your legs before the 5.5-hour drive home.
Plan to leave by late morning or noon to get back to Dallas before evening traffic.
Why This Makes the Perfect Texas-to-Arkansas Road Trip
Easy 3-day loop
Mix of big payoff waterfall + adventurous rock scrambling
Great for families
Affordable lodging options
Feels like you went way farther than 5.5 hours
What to Pack for Hiking at Petit Jean State Park
Petit Jean’s trails range from easy rock scrambles (Bear Cave) to longer moderate loops like Seven Hollows. Here’s exactly what I personally use and recommend for this trip:
(This post contains affiliate links. I may earn a small commission at no extra cost to you.)
Hiking Boots
For rocky trails like Cedar Falls and Seven Hollows, ankle support matters.
Petit Jean State Park is proof that you don’t have to fly across the country to find adventure. Just a tank of gas, a good playlist, and a willingness to hit the trail.
From scrambling through Bear Caves to standing in awe at Cedar Falls, this weekend feels bigger than 5.5 hours from Dallas.
If you take this trip, I’d love to see it — tag me so I can cheer you on.
More real-life road trips from Texas coming your way.
Vegas → Valley of Fire → Zion → Cathedral Gorge → Vegas
Las Vegas wasn’t the best part of this trip — and that surprised us.
When we planned this weekend road trip, we expected the Strip to be the highlight. Instead, the real magic happened once we left the city behind. In just a few days, this loop took us from glowing red rock desert to towering canyon walls and one of the most underrated state parks in the Southwest.
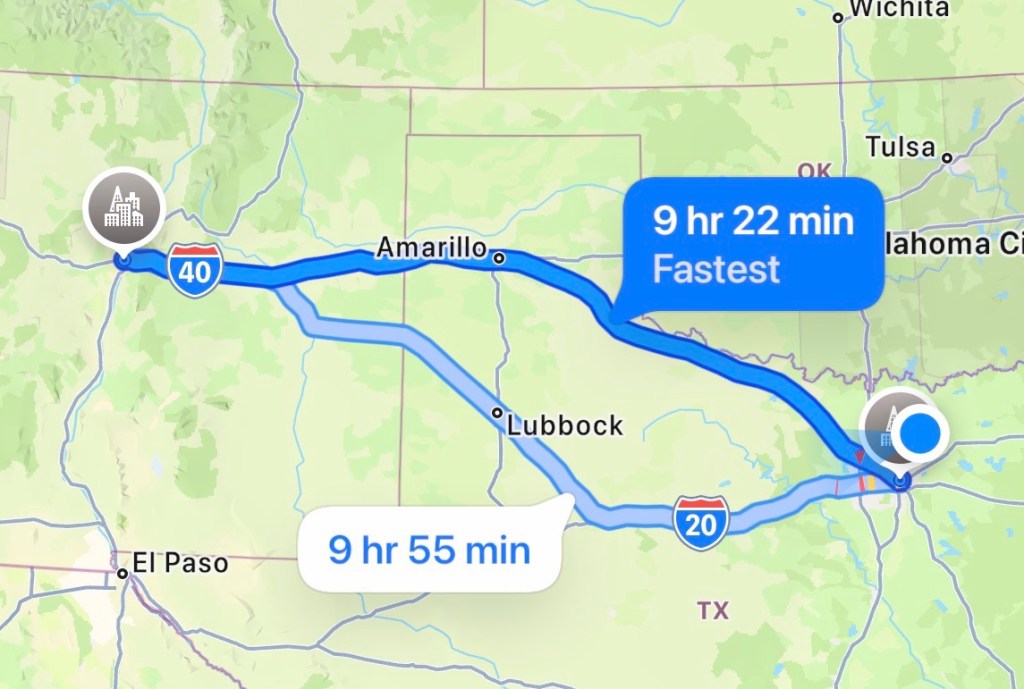
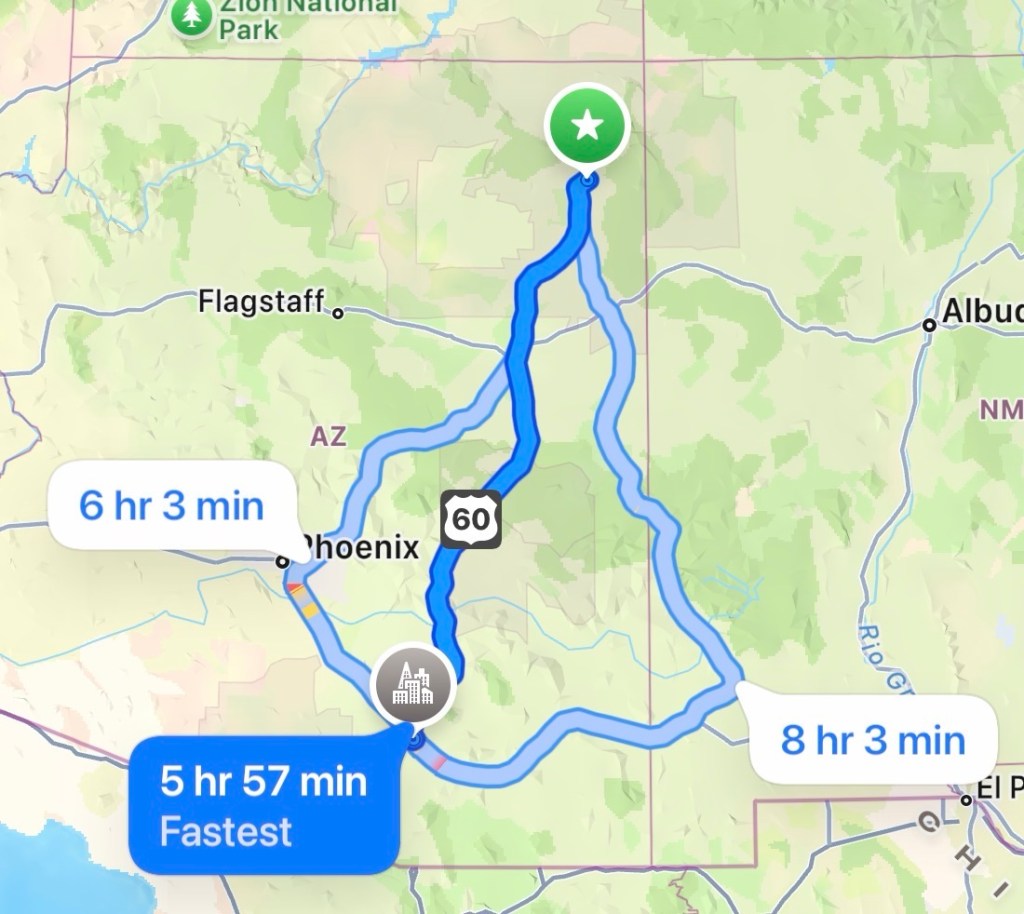
Here’s a quick visual overview of the route + drive times if you’re short on time:
If you’re looking for a road trip that feels big without requiring a full week off, this Las Vegas weekend loop is hard to beat.
The Ultimate Las Vegas Weekend Road Trip Loop
Start & End: Las Vegas Trip Length: 2–3 days Best For: Long weekends, first-time Southwest trips, scenic drives
This route works especially well if you want variety without backtracking.
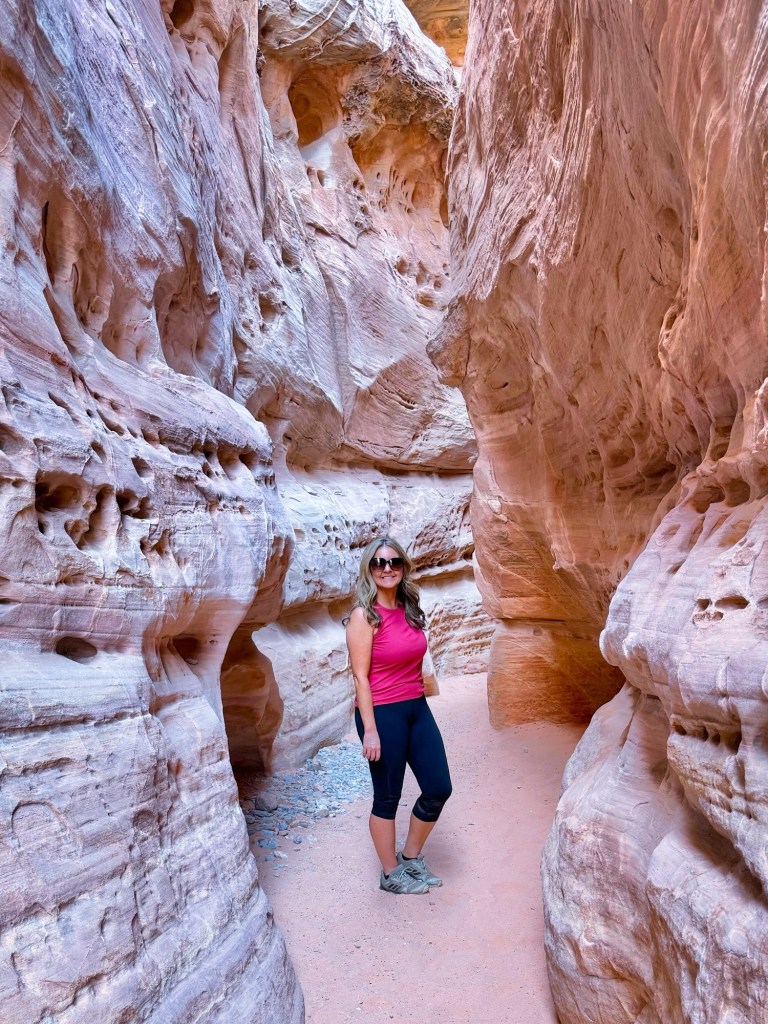
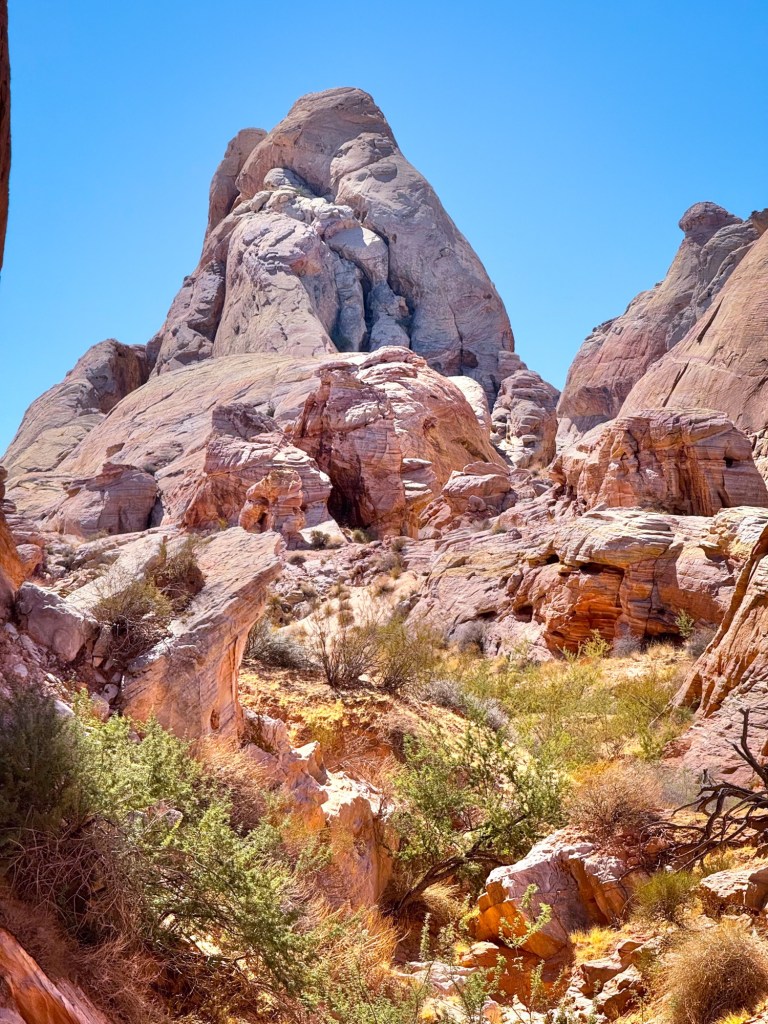
Valley of Fire is the perfect first stop. The drive is short, but the scenery immediately makes it feel like you’re far from the city. Bright red sandstone formations, easy scenic pullouts, and short hikes make this a great place to stretch your legs and settle into road trip mode.
Don’t miss:
Fire Wave Trail
Scenic drive through the park
Early morning or golden hour for the best light
This stop alone is enough to make the drive from Las Vegas worth it.
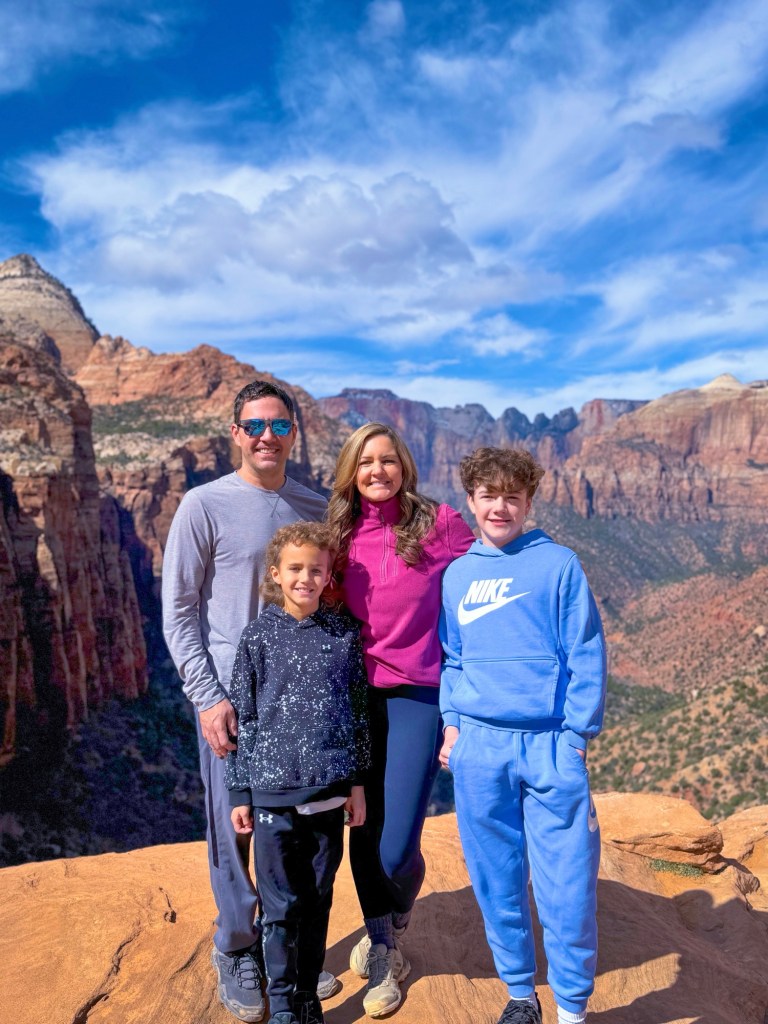
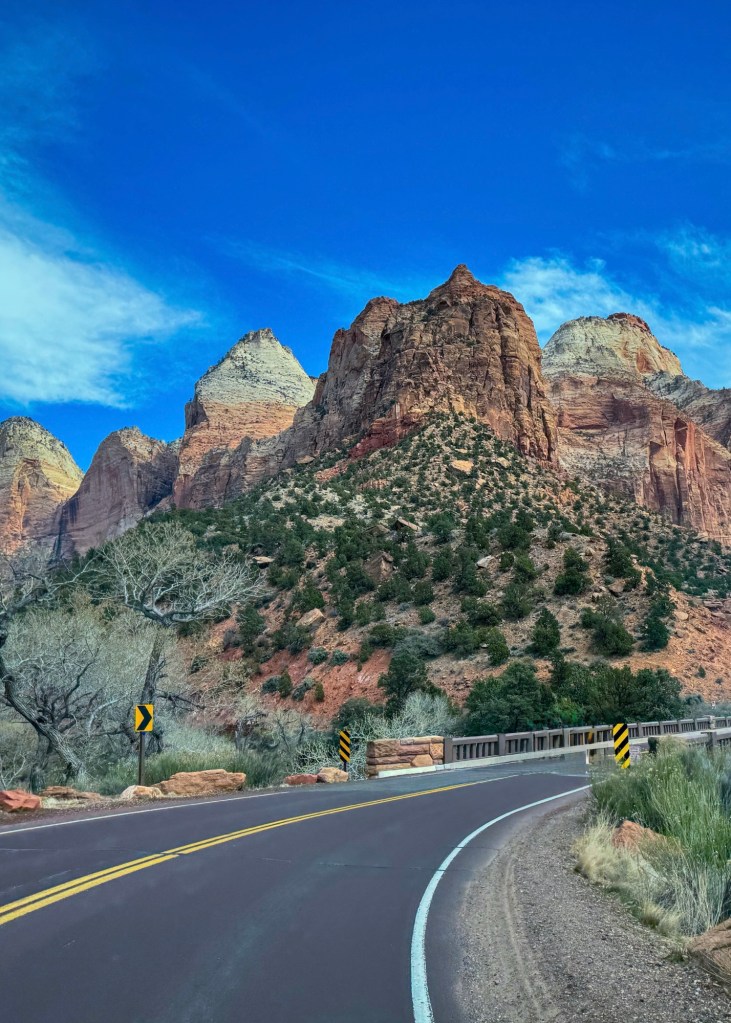
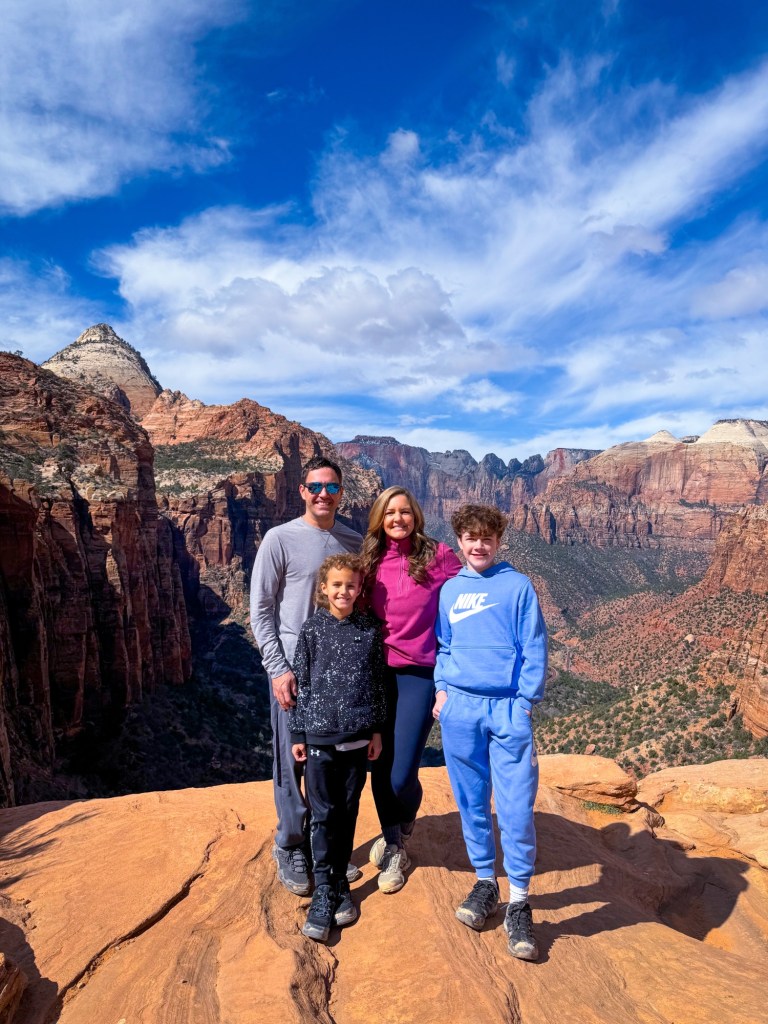
Zion is the heart of this loop — and the place we underestimated the least. Even if you only have one full day here, the scale of the canyon walls and the variety of trails make a huge impression.
Depending on the season, you may need to use the park’s shuttle system, so planning ahead helps if your time is limited.
Top experiences for a short visit:
Zion Canyon Scenic Drive
Emerald Pools
The Narrows
Riverside Walk (easy and family-friendly)
Where We Stayed Near Zion National Park
We stayed in Springdale, Utah, just outside the entrance to Zion National Park, and it was the perfect home base for this trip. Being so close to the park made early starts easy and eliminated extra driving at the end of long days.
If you’re planning this loop for a weekend, staying in Springdale keeps everything simple and central.
👉 Check current hotel prices and availability in SpringdaleonExpedia
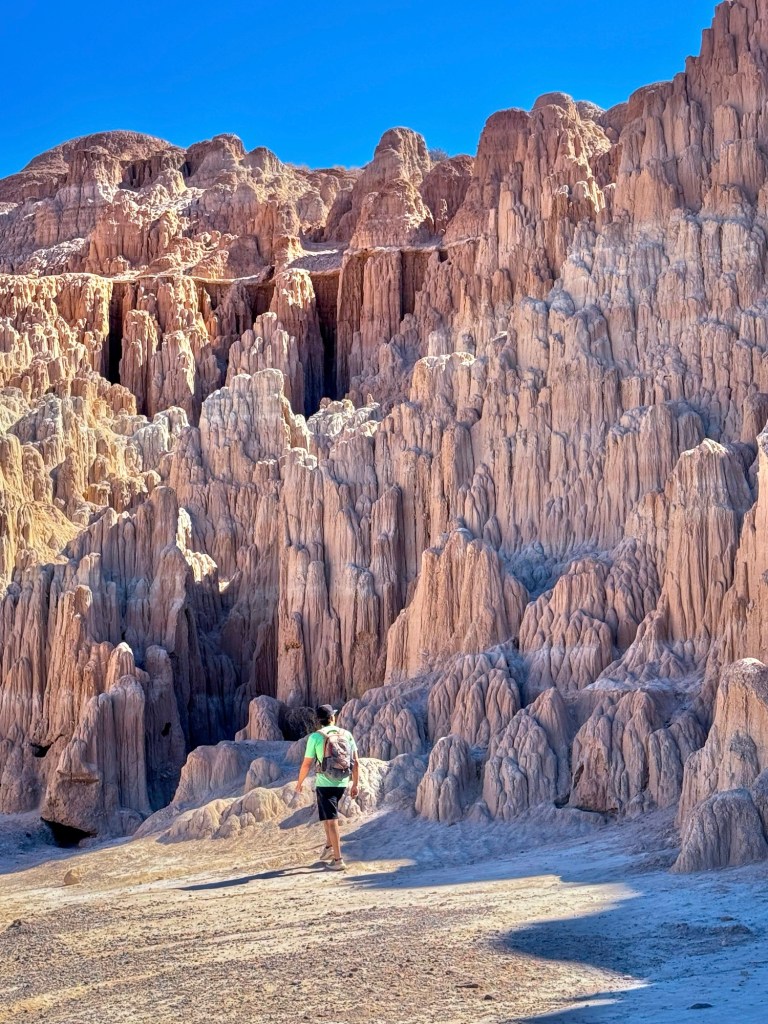
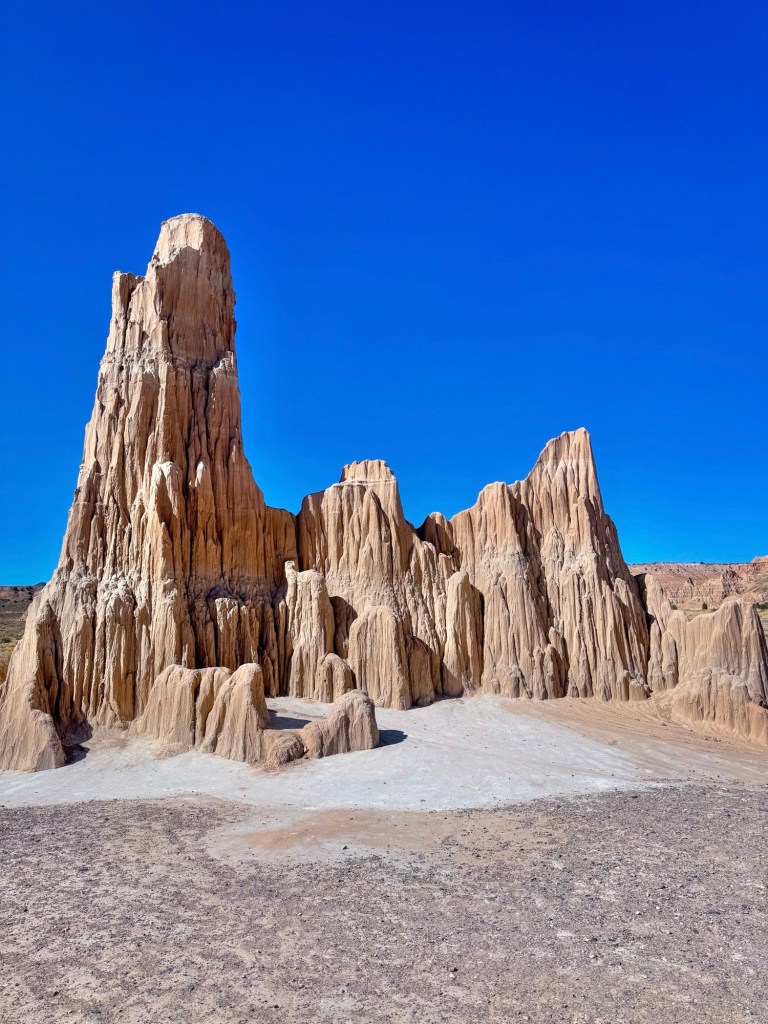
Cathedral Gorge was the biggest surprise of the trip.
This small Nevada state park feels completely different from the other stops on the loop. Narrow clay canyons, cathedral-like formations, and quiet trails make it an incredible contrast to Zion — and far less crowded.
Don’t miss:
Moon Caves
Miller Point Overlook
Juniper Draw Loop
It’s the kind of place you might skip if you’re rushing, but it ended up being one of our favorite stops.
Return to Las Vegas
2.5 hours from Cathedral Gorge
From Cathedral Gorge, it’s an easy drive back to Las Vegas, completing a loop that feels much more expansive than a typical weekend trip.
Why This Road Trip Works So Well
No backtracking
Short driving days
Mix of national and state parks
Big scenery without needing extra PTO
This loop is ideal if you want a road trip that feels adventurous but still manageable.
Final Thoughts
We didn’t expect this road trip from Las Vegas to surprise us — but it did. The combination of desert landscapes, canyon walls, and quieter parks made this one of those trips that sticks with you long after you’re home.
If you’re planning a Southwest getaway and want something beyond the Strip, this loop is absolutely worth considering.
If you’re craving a weekend trip that delivers jaw-dropping scenery, epic hikes, and minimal crowds, this Carlsbad Caverns & Guadalupe Mountains National Park itinerary belongs at the top of your list.
In just one weekend, we explored the deepest cave in the U.S., hiked desert trails with dramatic canyon views, and stood on the highest point in Texas — all without needing a full week off work.
Here’s exactly how to plan the perfect weekend road trip to Carlsbad Caverns and Guadalupe Mountains National Parks.
Why Pair These Two National Parks?
Carlsbad Caverns and Guadalupe Mountains are only 35 miles apart, making them one of the best national park pairings in the Southwest.
Kids who can walk independently usually do great here.
After finishing the caverns, grab lunch in Carlsbad before heading west. We ate at the Visitor Center and had the green chili pork stew and it was delicious!
Why It’s Worth It: Endless desert views and serious bragging rights
Start early to avoid heat and wind near the summit. The trail is steady uphill the entire way, and the descent can be just as challenging as the climb.
Helpful Tips
Wind at the top can be intense — pack layers even in warm months.
Bring more water than you think you’ll need
Electrolytes and peanut butter saved the day for us
Plan for 6–8 hours total, including breaks and time at the summit. It took us about 6 hours total, 3.5 to hike up to the peak, and then 2.5 hours to hike back down to the trailhead.
Why This Order Works So Well
✔️ Caverns when energy is high ✔️ Devil’s Hall as a “warm-up” hike ✔️ Peak hike gets its own day ✔️ No rushed mornings or dangerous fatigue
This pacing makes the weekend challenging but totally doable — even if you’re not a hardcore hiker.
Where to Eat in Carlsbad
After long hike days, these spots hit the spot:
YellowBrix Restaurant – Great for dinner and cocktails
El Diamante Restaurant– Delicious Mexican food
Blue House Bakery – Perfect for breakfast before heading out
What I’d Do Differently Next Time
Start Guadalupe Peak earlier (sunrise if possible)
Bring trekking poles for the descent
Is This Weekend Trip Worth It?
Absolutely — if you: ✔️ Want fewer crowds ✔️ Love unique landscapes ✔️ Don’t mind earning your views ✔️ Want a national park trip that feels different
This is one of those weekends that sticks with you long after the sore legs fade.
Planning This Trip?
I’m putting together easy, realistic road trip itineraries (with honest hiking info, kid-friendly notes, and where-to-stay tips) — no fluff, just practical planning.
👉 Subscribe to my blog so you don’t miss future trips like this one.
Waterfall hikes are by far my favorite. When we planned our drive to Crested Butte, I was thrilled to discover Zapata Falls! I knew right away that this was the perfect hike to cap off the year. Keep reading to discover more about this incredible winter hike to a stunning frozen waterfall!
This post contains affiliate links of products that we use and love! I may earn a small commission, at no charge to you, if you purchase any items using the links provided. Thank you!
Zapata Falls in winter is a breathtaking sight, where the cascading water freezes into intricate ice formations that glisten in the cold, mountain air. Surrounded by rugged cliffs and a serene landscape, the falls create a tranquil, almost otherworldly scene.
Getting There
Address: Zapata Falls is located off Highway 150, just a few miles from the Great Sand Dunes National Park entrance. It’s within the San Isabel National Forest.
Trailhead: The trailhead is marked, and you can drive to the Zapata Falls parking area. From there, the hike to the falls is about 1/4 mile (0.4 km) and is relatively short, but it involves some scrambling through rocky terrain and can be slippery in winter due to ice and snow.
The Hike – Distance: 0.8 miles | Time: 30 minutes | Level: Moderate
This hidden gem of a hike provides a stunning view of a 25-foot frozen waterfall nestled inside a cave. The hike to the falls is an easy, gravel trail that meanders through the trees. To reach the cave itself, you’ll need to trek on top of a chilly, frozen creek, and to see the waterfall, you will need to enter the cave.
Winter Hiking Conditions
Trail Difficulty: The short trail can be steep and potentially icy during winter, especially as you get closer to the waterfall. It’s important to wear sturdy, waterproof boots with good tread and consider investing in microspikes or crampons to improve traction on icy surfaces.
Ice and Snow: The falls themselves are often frozen in winter, creating a beautiful scene of cascading ice formations. However, the surrounding rocks, water, and trail can be slick, so proceed cautiously.
Cold Temperatures: Winter temperatures in the area can drop significantly, especially at higher elevations. Be sure to wear warm, layered clothing, and bring hats, gloves, and scarves.
Clothing and Gear
Dress in layers to regulate your body temperature and wear moisture-wicking fabrics. Be sure to pack warm gloves, hats, and a scarf or neck gaiter to protect against cold winds. Consider bringing trekking poles for added stability on slippery terrain. My heated jacket was the perfect outer layer for this hike!
If you plan to spend time near the falls, the mist and cold air can cause the surroundings to freeze, making it a beautiful, icy spectacle. Waterproof outer layers can keep you dry in these conditions.
The trail to Zapata Falls is typically accessible year-round, but in winter, there may be snow and ice, making the path slippery. Wear sturdy, waterproof boots with good traction and consider bringing traction devices like microspikes or crampons.
Safety Tips
Stay Safe Around Ice: Be cautious when walking near the frozen waterfall, as ice can be slippery. Keep a safe distance from the edge of any ice-covered areas.
Cell Service: There may be limited or no cell service in the area, so it’s a good idea to tell someone your plans and estimated return time.
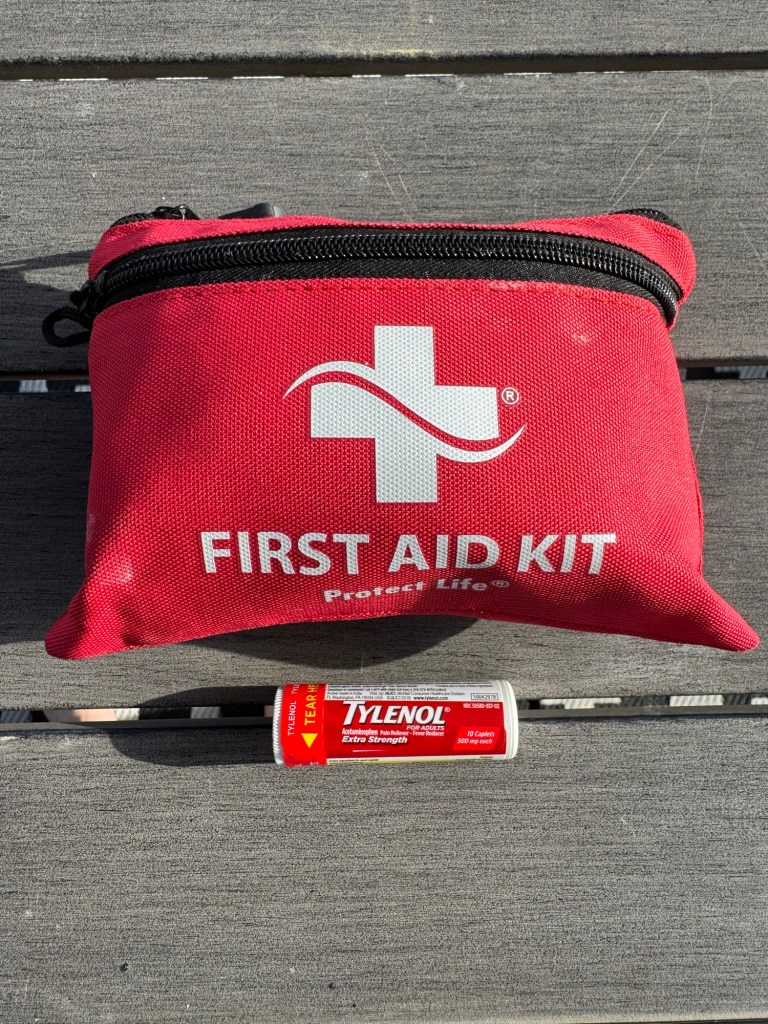
First Aid Kit: Always carry a basic first aid kit, as the trail can be tricky, especially when icy.
Other Winter Activities Nearby
If you’re in the area for hiking, you might also want to explore other winter activities near Great Sand Dunes National Park, such as snowshoeing or sledding on the sand dunes, which create a surreal experience in winter.
Image credit: Great Sand Dunes National Park website
Overall, Zapata Falls in winter is a stunning and serene destination, with fewer crowds and a peaceful atmosphere. If you’re well-prepared and take necessary precautions, it can be a memorable winter hike!