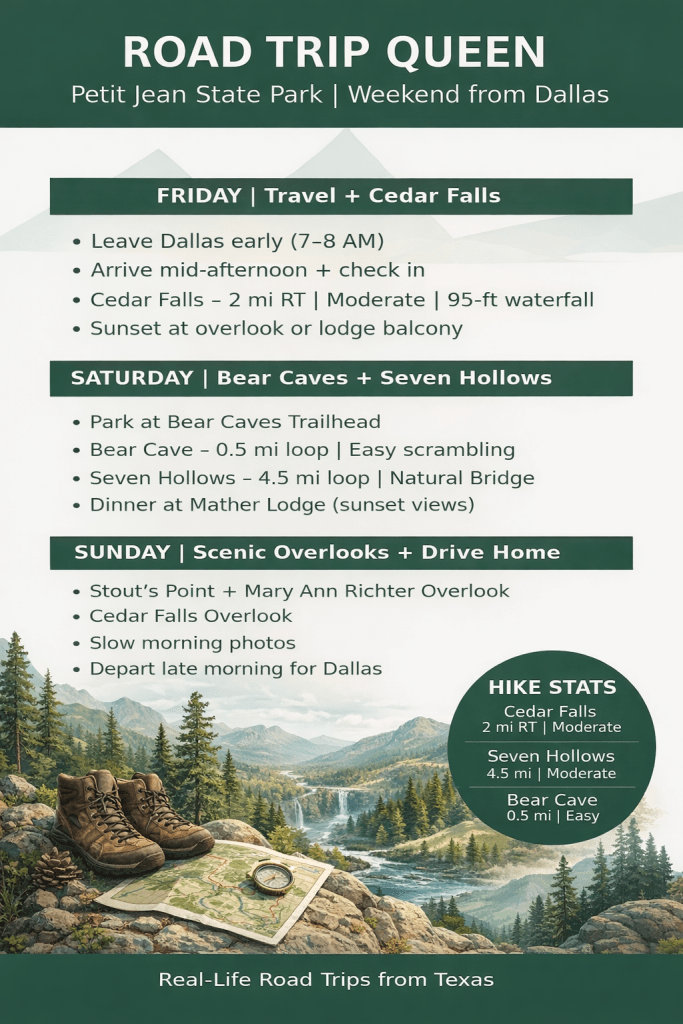
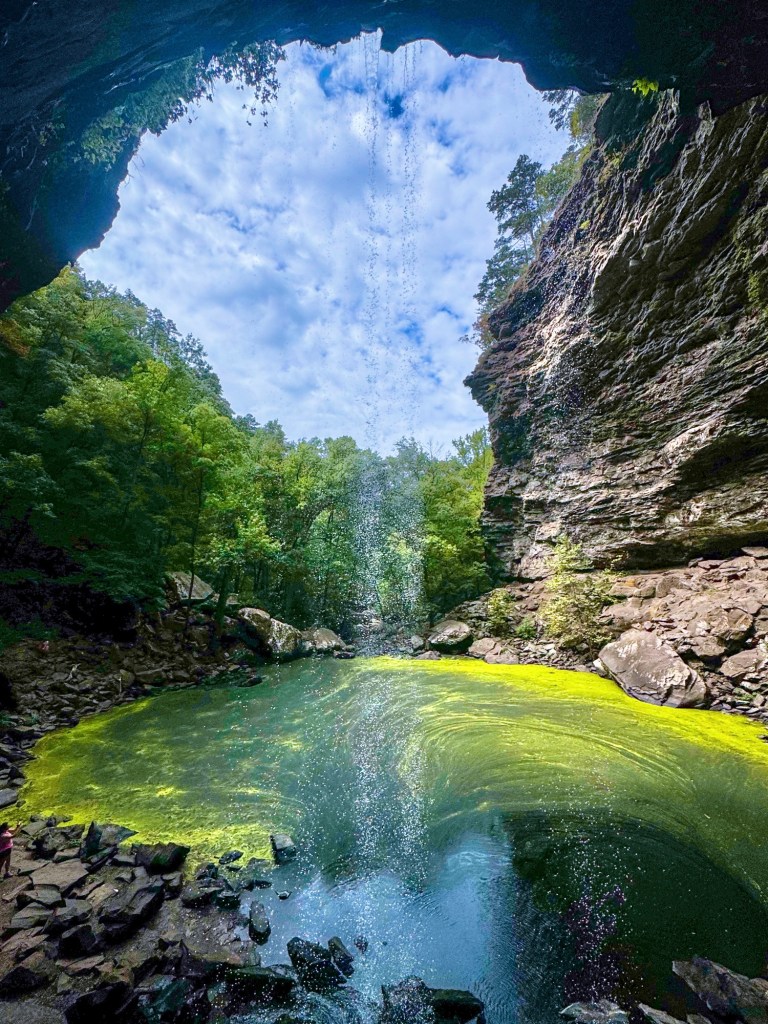
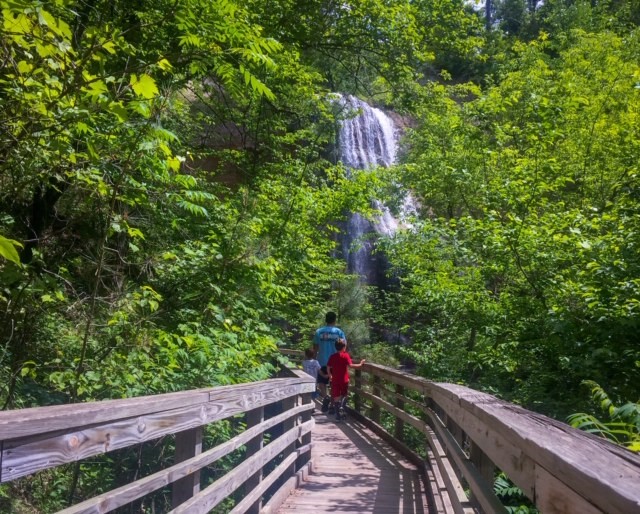
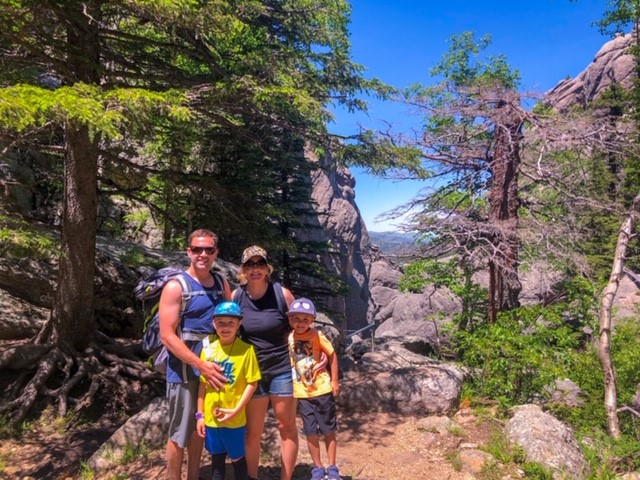
If you’re looking for an easy, adventure-packed getaway from Dallas, Petit Jean State Park is one of the best bang-for-your-buck road trips within 6 hours. Think: waterfalls, slot-like rock formations, canyon views, and sunset overlooks — all in one weekend.
Here’s your Friday–Sunday itinerary freebie, plus more details about where to stay, what to do, & what to pack!
The Drive from Dallas
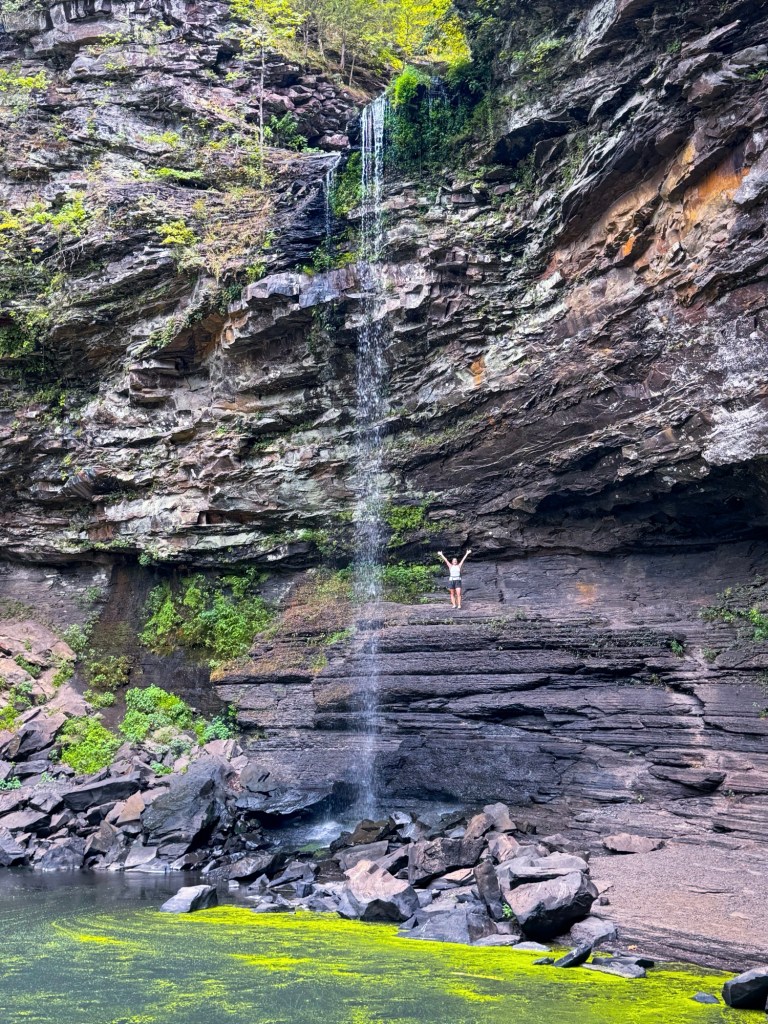
Distance: ~5.5 hours Best plan: Leave early Friday morning (7–8 AM) You’ll roll into Arkansas mid-afternoon with time to check in and hit the trails before sunset.
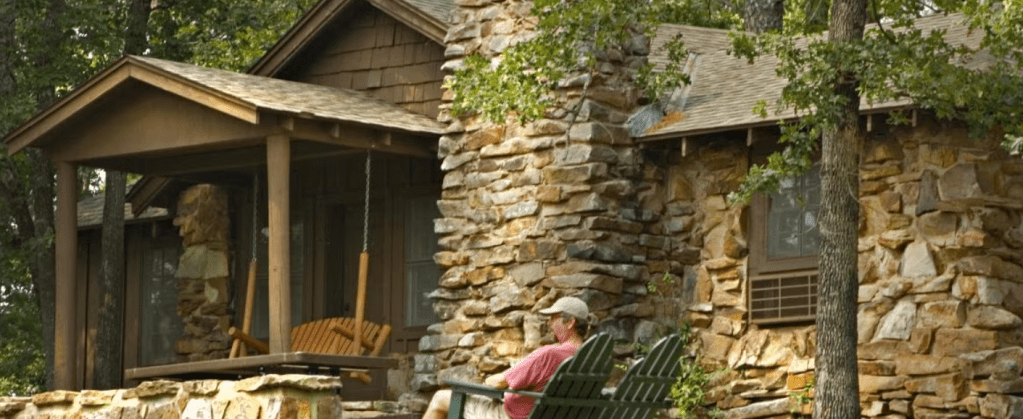
Where to Stay
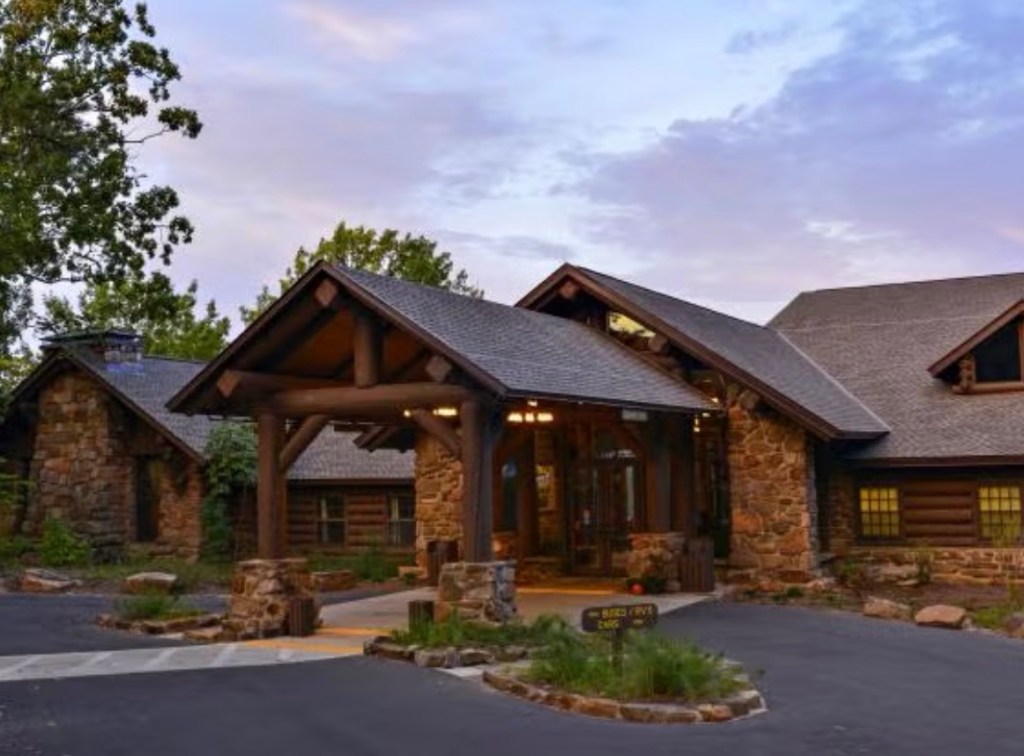
Inside the Park (Highly Recommend for First Visit)
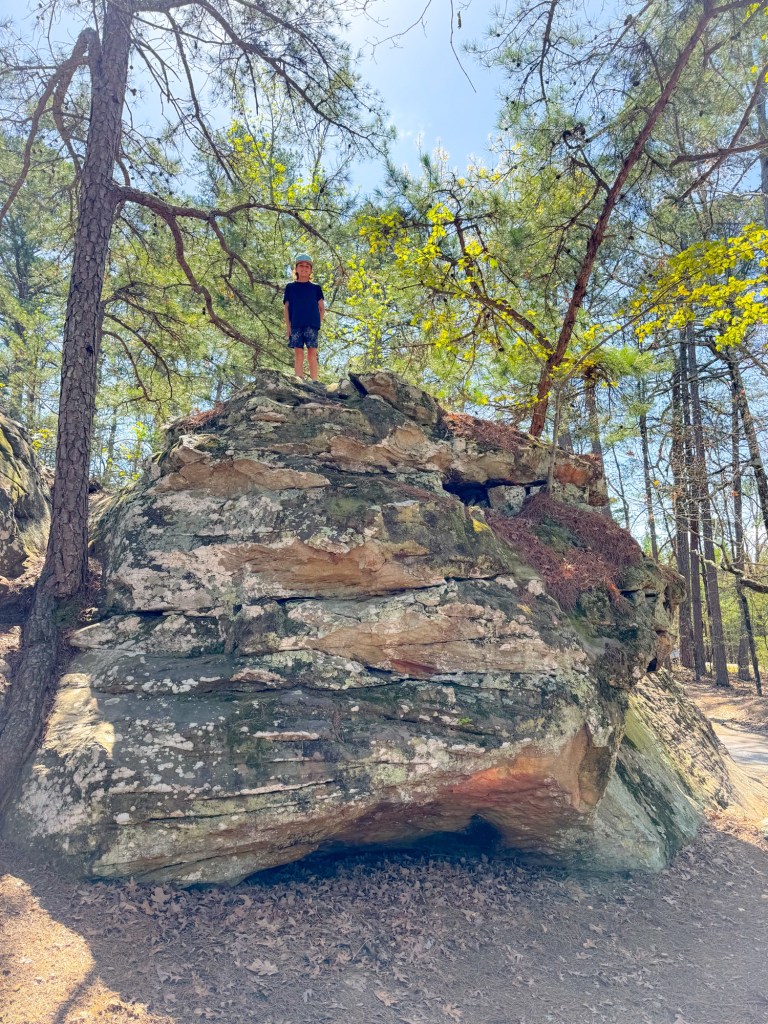
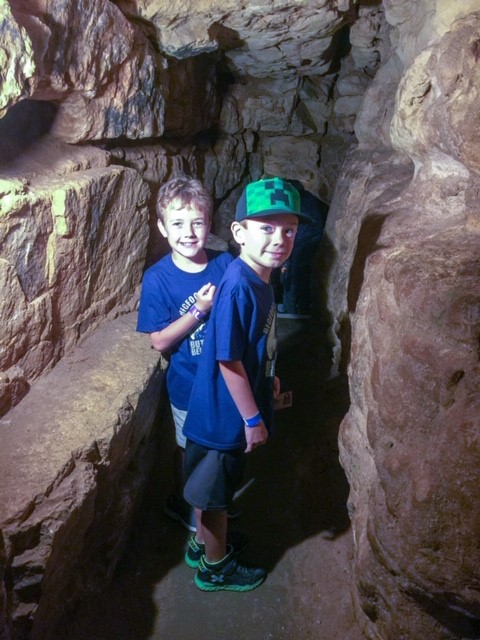
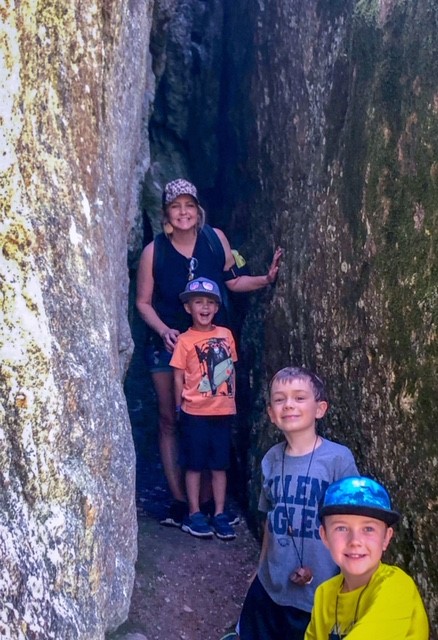
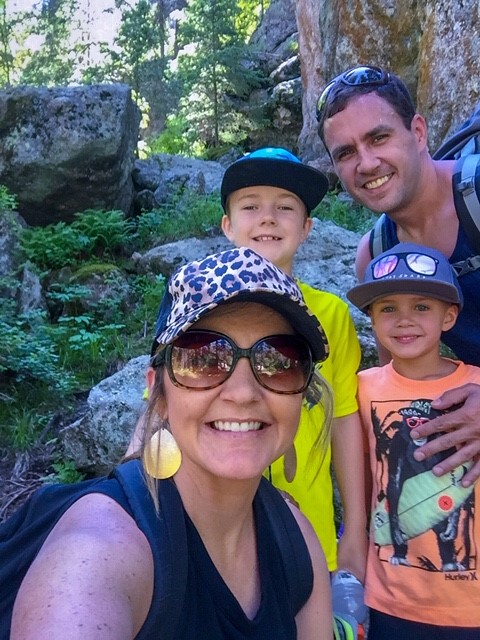
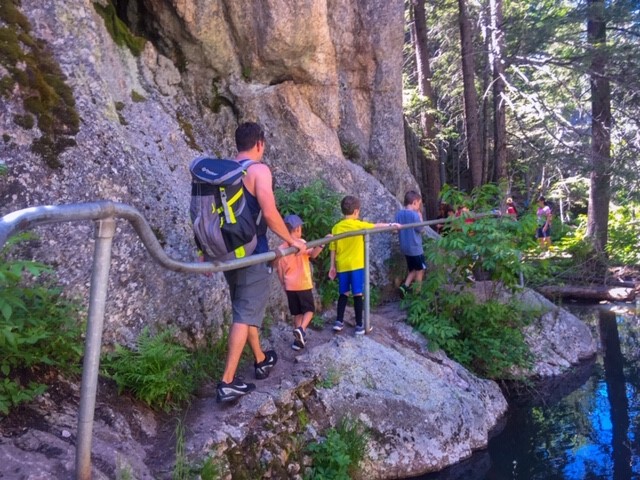
Park at the Bear Caves Trailhead Lot and knock out both hikes from there.
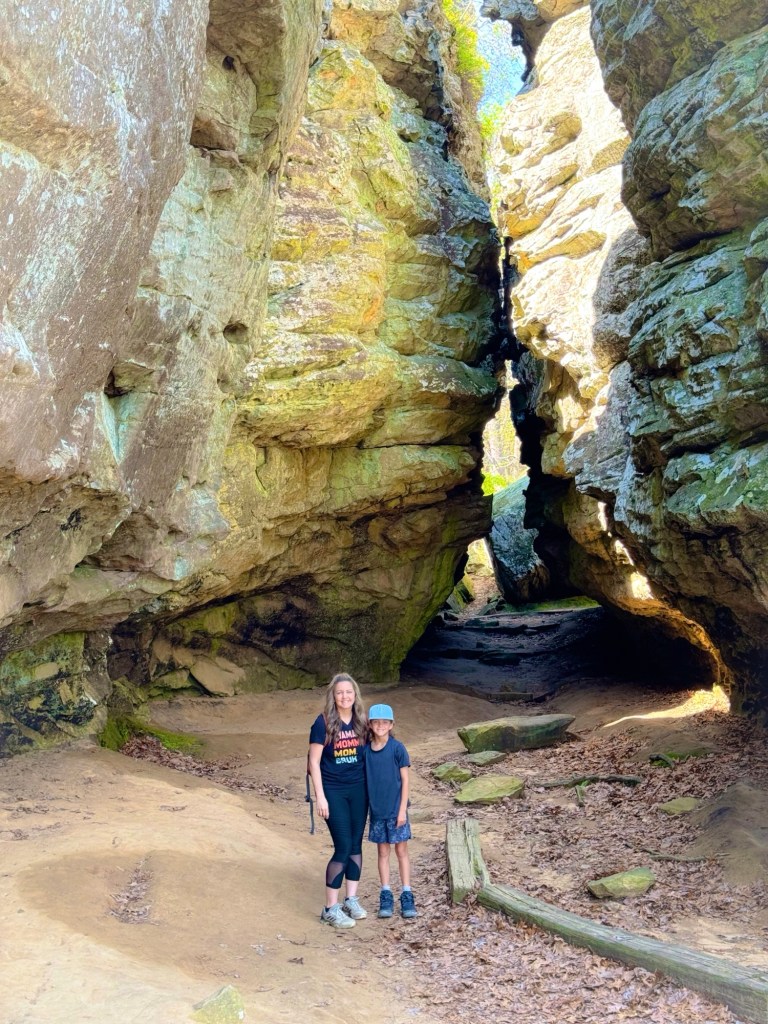
Bear Cave Trail
Distance: ~0.5 mile loop
Difficulty: Easy but adventurous
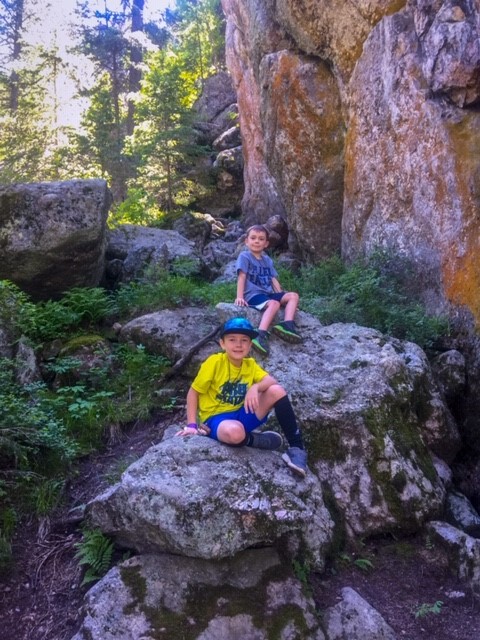
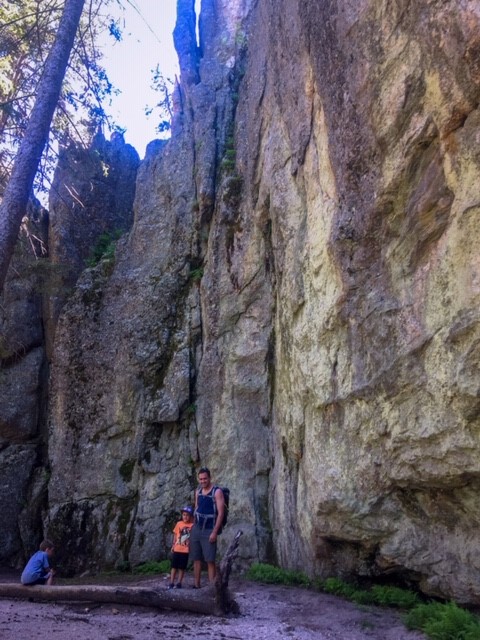
What to expect: Huge rock formations, narrow passages, fun scrambling
Perfect for kids and anyone who loves exploring rock “caves.”
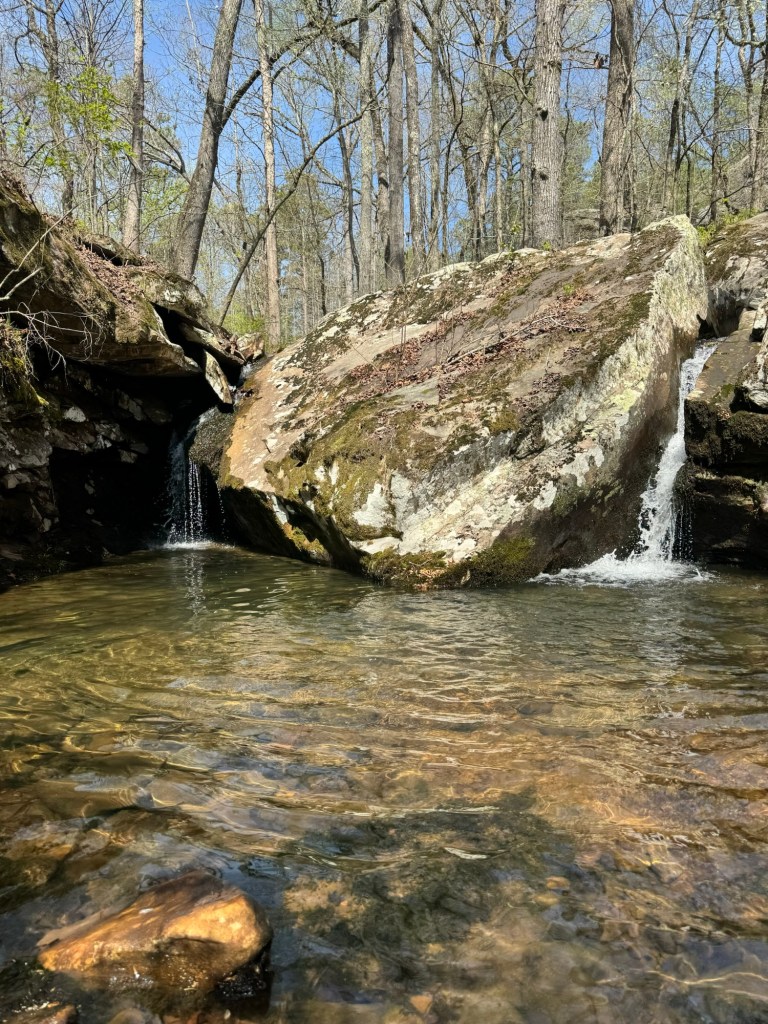
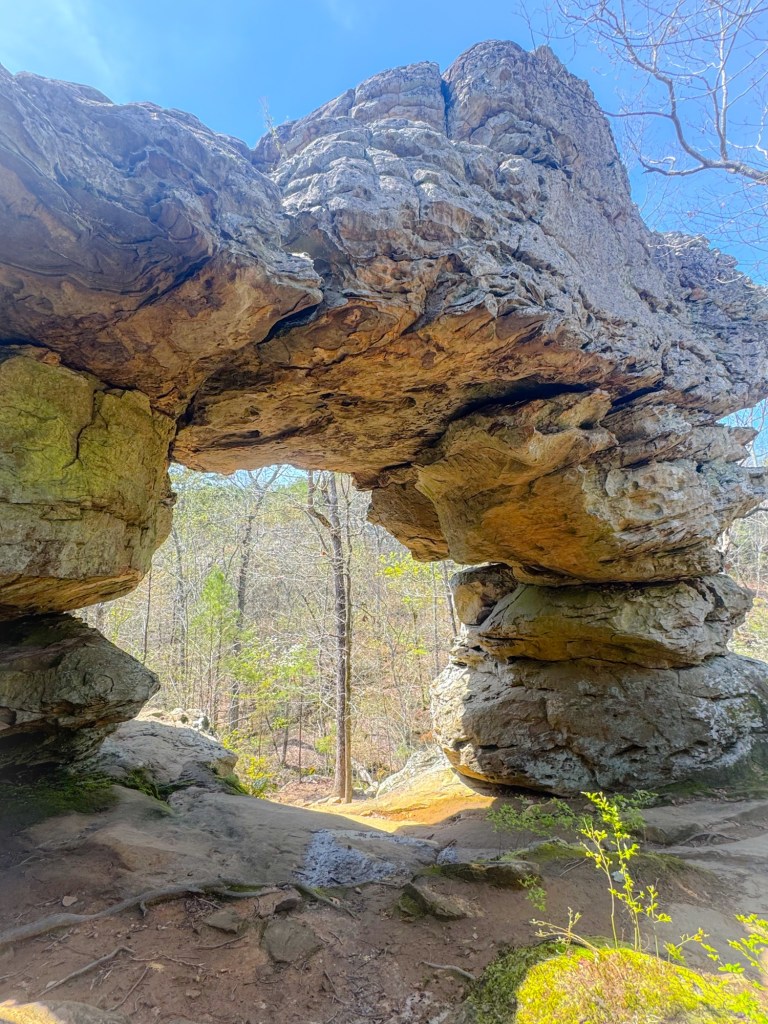
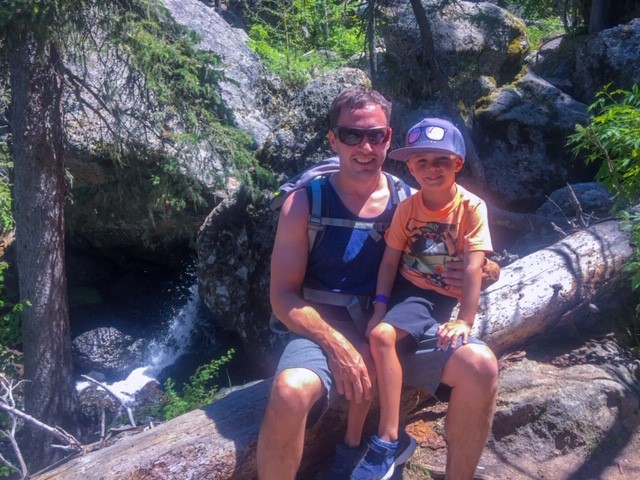
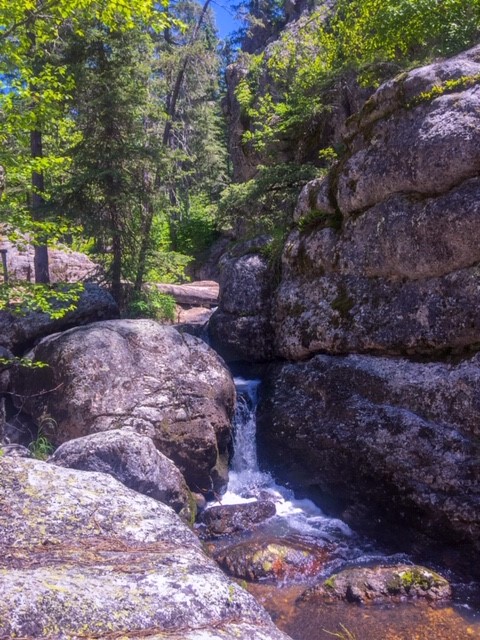
Seven Hollows Trail
Distance: 4.5 miles loop
Difficulty: Moderate
Highlights:
Natural Bridge
Small waterfalls (seasonal)
Bluffs + forest scenery
Bring plenty of water — this one takes a few hours.
Dinner at the Lodge
Have dinner at the restaurant inside Mather Lodge.
Canyon views at sunset
Southern comfort-style menu
Zero need to drive after a long hiking day
If you’re staying in Morrilton, it’s still worth the 20-minute drive back into the park for dinner.
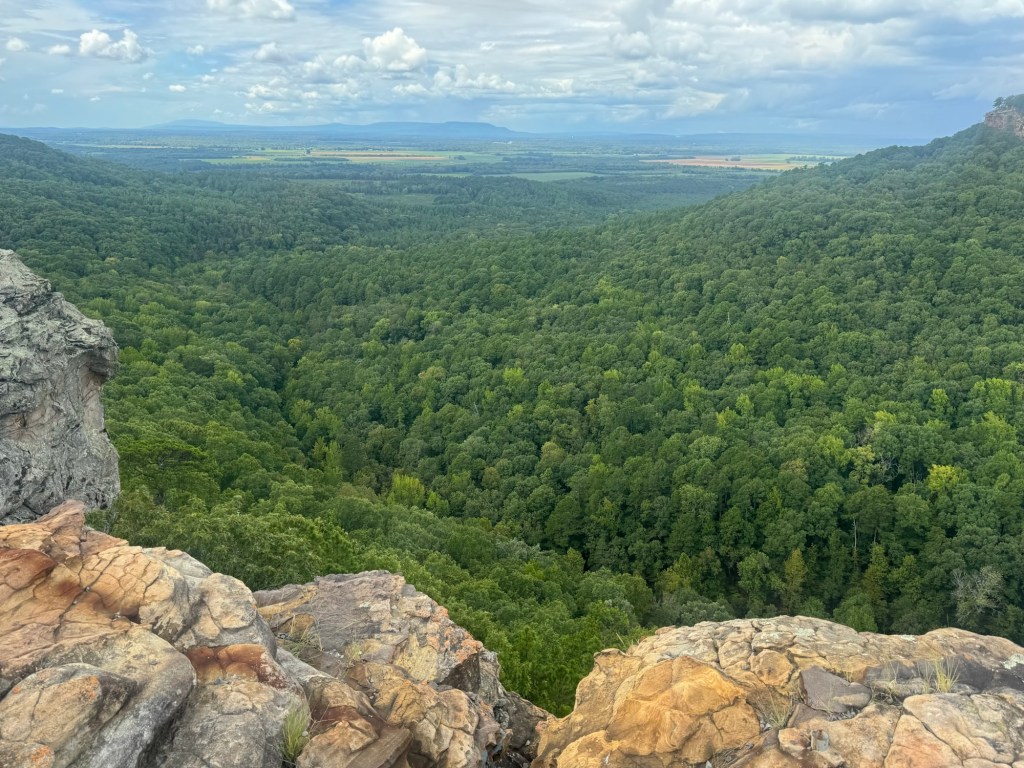
Sunday: Overlooks + Drive Home
Keep it slow and scenic before heading back to Texas.
Must-see overlooks:
Cedar Falls Overlook
Stout’s Point
Mary Ann Richter Overlook
Most are short walks from parking areas — perfect for stretching your legs before the 5.5-hour drive home.
Plan to leave by late morning or noon to get back to Dallas before evening traffic.
Why This Makes the Perfect Texas-to-Arkansas Road Trip
Easy 3-day loop
Mix of big payoff waterfall + adventurous rock scrambling
Great for families
Affordable lodging options
Feels like you went way farther than 5.5 hours
What to Pack for Hiking at Petit Jean State Park
Petit Jean’s trails range from easy rock scrambles (Bear Cave) to longer moderate loops like Seven Hollows. Here’s exactly what I personally use and recommend for this trip:
(This post contains affiliate links. I may earn a small commission at no extra cost to you.)
Hiking Boots
For rocky trails like Cedar Falls and Seven Hollows, ankle support matters.
Petit Jean State Park is proof that you don’t have to fly across the country to find adventure. Just a tank of gas, a good playlist, and a willingness to hit the trail.
From scrambling through Bear Caves to standing in awe at Cedar Falls, this weekend feels bigger than 5.5 hours from Dallas.
If you take this trip, I’d love to see it — tag me so I can cheer you on.
More real-life road trips from Texas coming your way.
Some places don’t just live in your camera roll — they stay with you. These are the kinds of destinations that make the long drive worth it, the early alarms tolerable, and the sore legs a badge of honor.
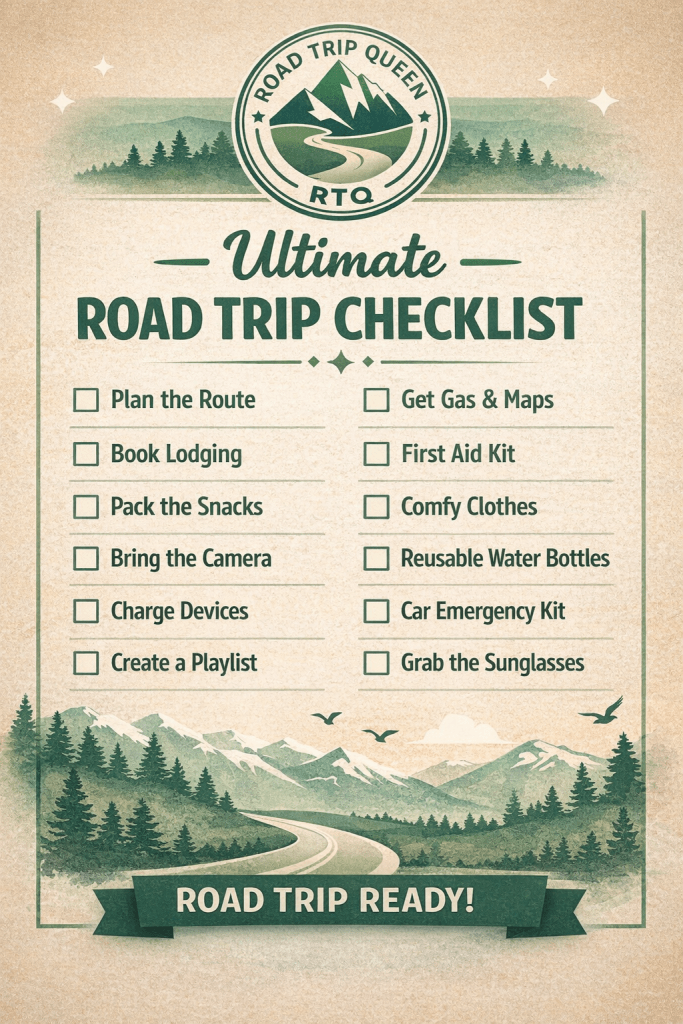
Free Road Trip Checklist
Planning a road trip? Don’t forget the essentials. I put together my go-to Road Trip Checklist so you can hit the road stress-free — whether it’s a weekend getaway or a multi-state adventure.
Save this checklist or bookmark this page before your trip!
If you’re building your next bucket-list road trip, start here.
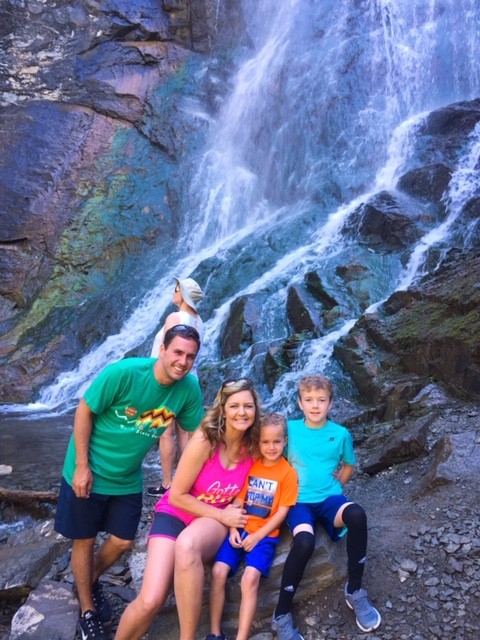
Why it’s unforgettable: Electric-blue alpine lakes + wildflowers. What to know:
Strenuous hike (worth every step)
Best mid-summer to early fall
Highlights:
One of Colorado’s most scenic hikes
Multiple lakes + epic mountain views
Final Road Trip Tip
These places aren’t just destinations — they’re memories in the making. Mix a few of these into one trip, or build an entire road trip around just one.
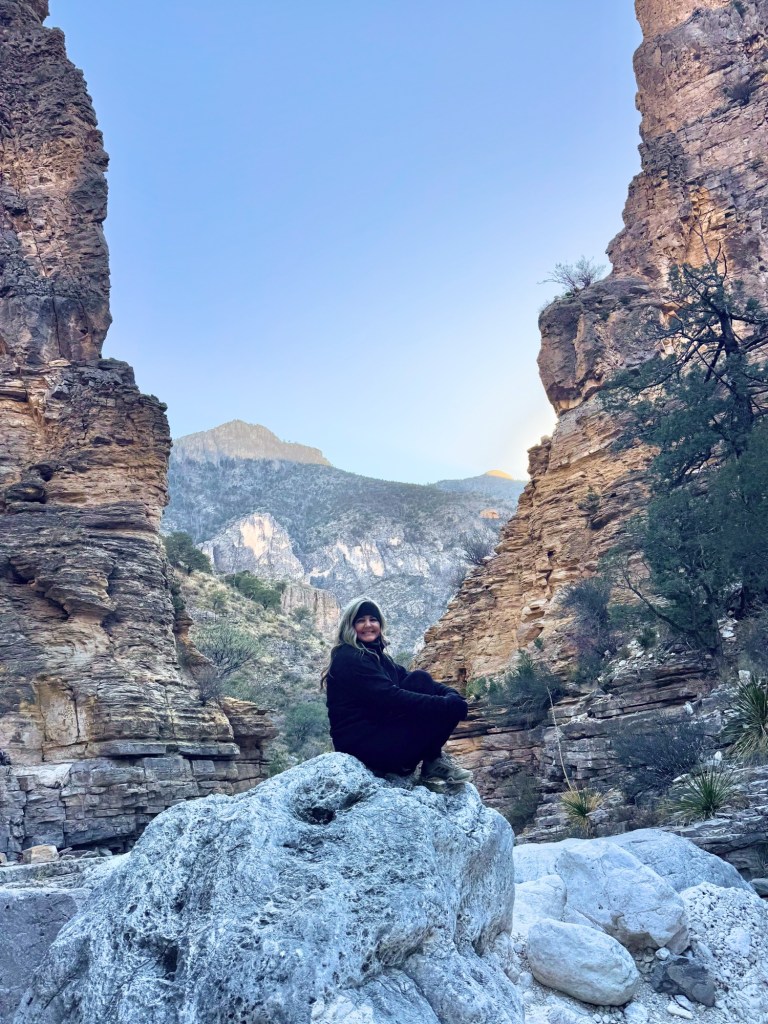
If you’re craving a weekend trip that delivers jaw-dropping scenery, epic hikes, and minimal crowds, this Carlsbad Caverns & Guadalupe Mountains National Park itinerary belongs at the top of your list.
In just one weekend, we explored the deepest cave in the U.S., hiked desert trails with dramatic canyon views, and stood on the highest point in Texas — all without needing a full week off work.
Here’s exactly how to plan the perfect weekend road trip to Carlsbad Caverns and Guadalupe Mountains National Parks.
Why Pair These Two National Parks?
Carlsbad Caverns and Guadalupe Mountains are only 35 miles apart, making them one of the best national park pairings in the Southwest.
Kids who can walk independently usually do great here.
After finishing the caverns, grab lunch in Carlsbad before heading west. We ate at the Visitor Center and had the green chili pork stew and it was delicious!
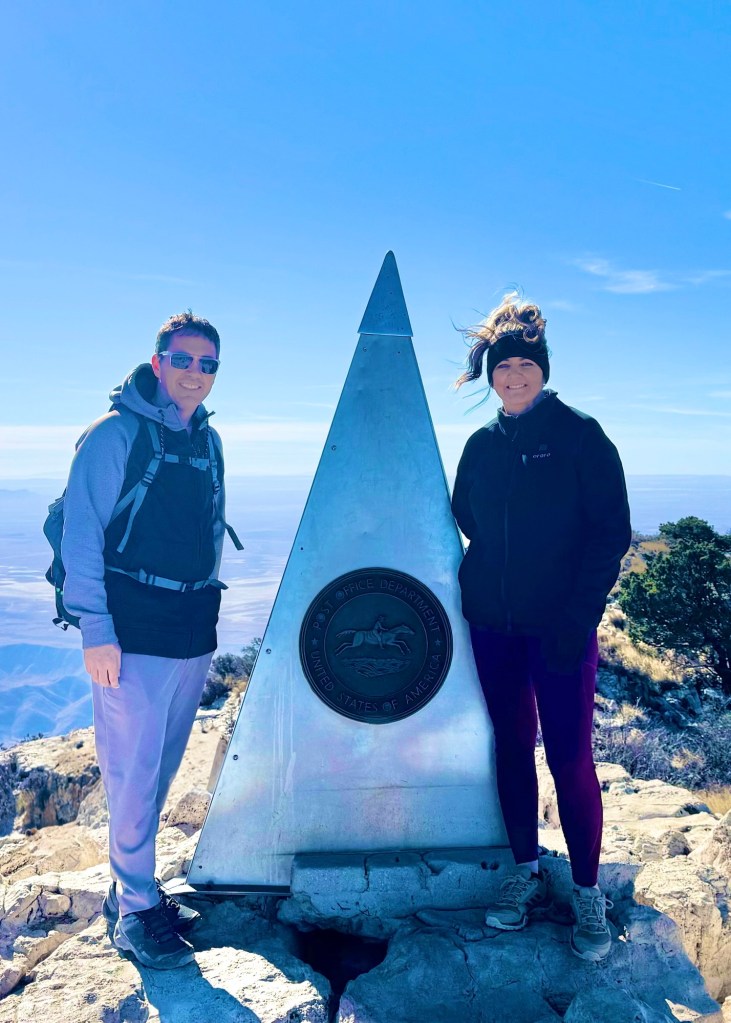
Why It’s Worth It: Endless desert views and serious bragging rights
Start early to avoid heat and wind near the summit. The trail is steady uphill the entire way, and the descent can be just as challenging as the climb.
Helpful Tips
Wind at the top can be intense — pack layers even in warm months.
Bring more water than you think you’ll need
Electrolytes and peanut butter saved the day for us
Plan for 6–8 hours total, including breaks and time at the summit. It took us about 6 hours total, 3.5 to hike up to the peak, and then 2.5 hours to hike back down to the trailhead.
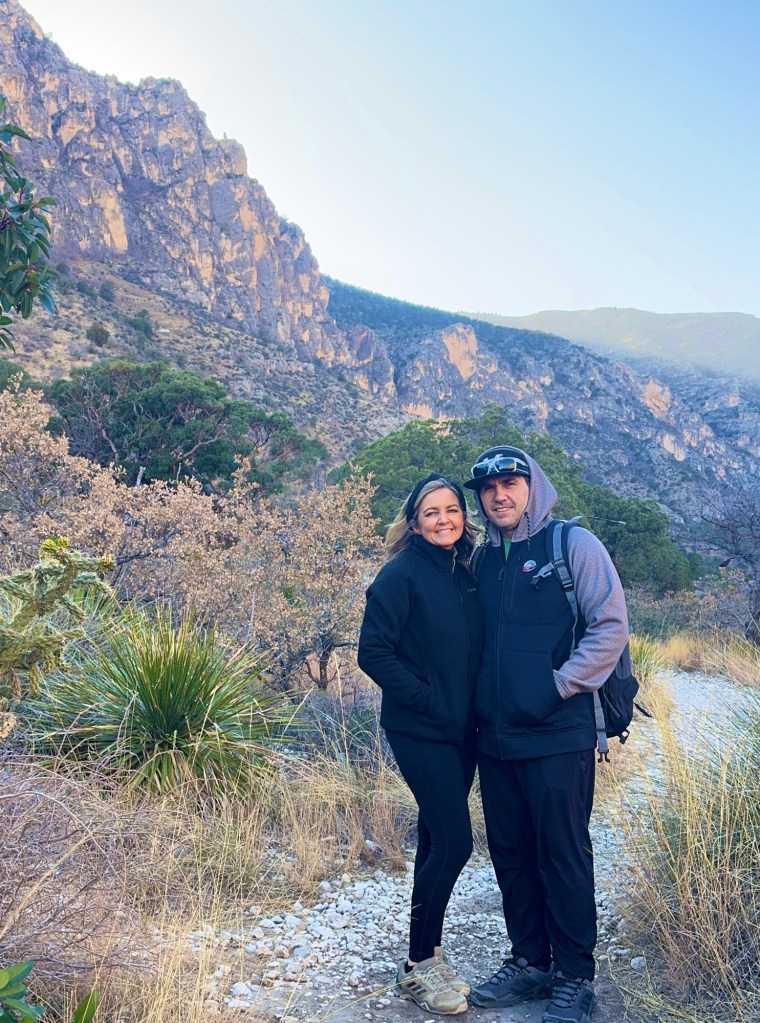
Why This Order Works So Well
✔️ Caverns when energy is high ✔️ Devil’s Hall as a “warm-up” hike ✔️ Peak hike gets its own day ✔️ No rushed mornings or dangerous fatigue
This pacing makes the weekend challenging but totally doable — even if you’re not a hardcore hiker.
Where to Eat in Carlsbad
After long hike days, these spots hit the spot:
YellowBrix Restaurant – Great for dinner and cocktails
El Diamante Restaurant– Delicious Mexican food
Blue House Bakery – Perfect for breakfast before heading out
What I’d Do Differently Next Time
Start Guadalupe Peak earlier (sunrise if possible)
Bring trekking poles for the descent
Is This Weekend Trip Worth It?
Absolutely — if you: ✔️ Want fewer crowds ✔️ Love unique landscapes ✔️ Don’t mind earning your views ✔️ Want a national park trip that feels different
This is one of those weekends that sticks with you long after the sore legs fade.
Planning This Trip?
I’m putting together easy, realistic road trip itineraries (with honest hiking info, kid-friendly notes, and where-to-stay tips) — no fluff, just practical planning.
👉 Subscribe to my blog so you don’t miss future trips like this one.
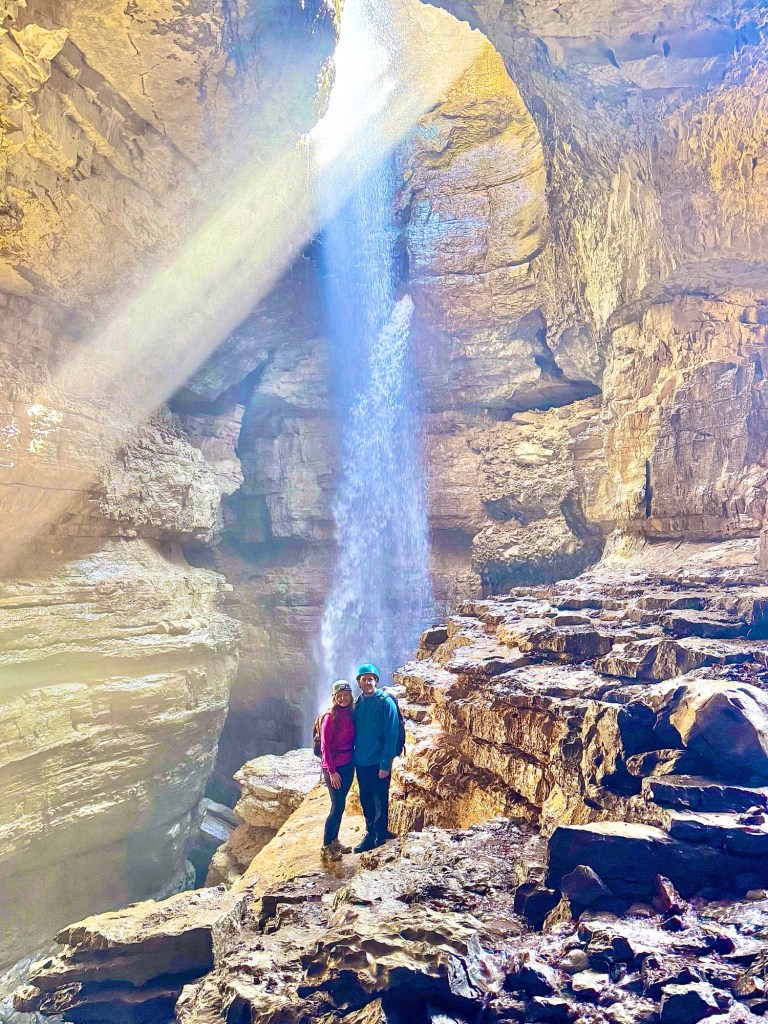
Waterfall hikes are by far my favorite. When we planned our drive to Crested Butte, I was thrilled to discover Zapata Falls! I knew right away that this was the perfect hike to cap off the year. Keep reading to discover more about this incredible winter hike to a stunning frozen waterfall!
This post contains affiliate links of products that we use and love! I may earn a small commission, at no charge to you, if you purchase any items using the links provided. Thank you!
Zapata Falls in winter is a breathtaking sight, where the cascading water freezes into intricate ice formations that glisten in the cold, mountain air. Surrounded by rugged cliffs and a serene landscape, the falls create a tranquil, almost otherworldly scene.
Getting There
Address: Zapata Falls is located off Highway 150, just a few miles from the Great Sand Dunes National Park entrance. It’s within the San Isabel National Forest.
Trailhead: The trailhead is marked, and you can drive to the Zapata Falls parking area. From there, the hike to the falls is about 1/4 mile (0.4 km) and is relatively short, but it involves some scrambling through rocky terrain and can be slippery in winter due to ice and snow.
The Hike – Distance: 0.8 miles | Time: 30 minutes | Level: Moderate
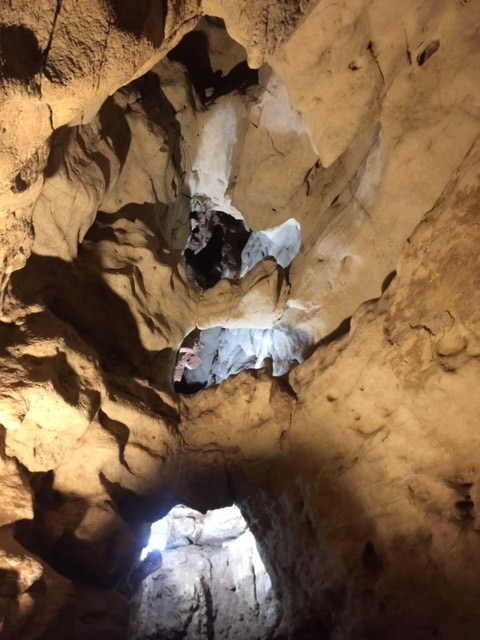
This hidden gem of a hike provides a stunning view of a 25-foot frozen waterfall nestled inside a cave. The hike to the falls is an easy, gravel trail that meanders through the trees. To reach the cave itself, you’ll need to trek on top of a chilly, frozen creek, and to see the waterfall, you will need to enter the cave.
Winter Hiking Conditions
Trail Difficulty: The short trail can be steep and potentially icy during winter, especially as you get closer to the waterfall. It’s important to wear sturdy, waterproof boots with good tread and consider investing in microspikes or crampons to improve traction on icy surfaces.
Ice and Snow: The falls themselves are often frozen in winter, creating a beautiful scene of cascading ice formations. However, the surrounding rocks, water, and trail can be slick, so proceed cautiously.
Cold Temperatures: Winter temperatures in the area can drop significantly, especially at higher elevations. Be sure to wear warm, layered clothing, and bring hats, gloves, and scarves.
Clothing and Gear
Dress in layers to regulate your body temperature and wear moisture-wicking fabrics. Be sure to pack warm gloves, hats, and a scarf or neck gaiter to protect against cold winds. Consider bringing trekking poles for added stability on slippery terrain. My heated jacket was the perfect outer layer for this hike!
If you plan to spend time near the falls, the mist and cold air can cause the surroundings to freeze, making it a beautiful, icy spectacle. Waterproof outer layers can keep you dry in these conditions.
The trail to Zapata Falls is typically accessible year-round, but in winter, there may be snow and ice, making the path slippery. Wear sturdy, waterproof boots with good traction and consider bringing traction devices like microspikes or crampons.
Safety Tips
Stay Safe Around Ice: Be cautious when walking near the frozen waterfall, as ice can be slippery. Keep a safe distance from the edge of any ice-covered areas.
Cell Service: There may be limited or no cell service in the area, so it’s a good idea to tell someone your plans and estimated return time.
First Aid Kit: Always carry a basic first aid kit, as the trail can be tricky, especially when icy.
Other Winter Activities Nearby
If you’re in the area for hiking, you might also want to explore other winter activities near Great Sand Dunes National Park, such as snowshoeing or sledding on the sand dunes, which create a surreal experience in winter.
Image credit: Great Sand Dunes National Park website
Overall, Zapata Falls in winter is a stunning and serene destination, with fewer crowds and a peaceful atmosphere. If you’re well-prepared and take necessary precautions, it can be a memorable winter hike!
As someone that’s always looking for the next trail to hike, I cannot believe that I didn’t make the trip to Palo Duro Canyon sooner! I was absolutely blown away that this State Park exists… in Texas! Here are 3 hikes you can’t miss in Palo Duro Canyon State Park.
Photo taken from inside the Big Cave
This post contains affiliate links of products that we use and love! I may earn a small commission, at no charge to you, if you purchase any of the items using the links provided. Thank you!
Park Information
Palo Duro Canyon is located in the Texas Panhandle.
Park Address: 11450 Park Road 5, Canyon, TX 79015.
Daily Fees: $8 per adult, children under 12 are free
Hours: 7 am – 9 pm
Park Map
Things to Know
Palo Duro Canyon is known as the “Grand Canyon of Texas!”
This canyon is the 2nd largest canyon in the US!
Palo Duro Canyon spans 120 miles and is 800 feet deep.
The best time to visit is spring and fall.
Summer visits can be dangerous because of the heat and high temps.
Make sure to bring more water than you think you’ll need during your hikes!
Palo Duro Canyon is a great place for a weekend getaway!
It only takes about 45 minutes to drive the loop through the Park.
You can stay nearby in the town of Canyon, TX.
My best friend and I visited Palo Duro Canyon in mid-February. We were pleasantly surprised with the weather and really enjoyed the hikes we were able to squeeze in during our weekend visit! Keep reading to learn more about the three hikes you can’t miss in Palo Duro Canyon!
Photo taken at the beginning of the Lighthouse Trail hike
The Hikes
The Lighthouse Trail – Distance: 5.9 miles | Time: 2.5 hours | Level: Moderate
This is the Lighthouse!
Our favorite hike was the Lighthouse Trail. This 6 mile hike is fairly easy until you get closer to the “Lighthouse” rock formation. At this point the hike gains slightly in elevation and you have to make a climb to get close to the Lighthouse.
Gorgeous landscape along the Lighthouse Trail
The Lighthouse Trail took us about two and a half hours to complete. I was very impressed with how well the entire trail was marked. And, my friend and I felt very safe the entire time we were hiking!
The stunning desert landscape and dramatic colors make for an excellent hike. These unique colors of Palo Duro Canyon represent different geologic time periods spanning 240 million years!
The Big Cave – Distance: short walk from parking spot | Time: 30 min. | Level: Easy
The Big Cave
Our second hike of the day was more of a short walk. We drove under two miles from the Lighthouse Trail parking lot to reach the Big Cave. You will see a sign for The Big Cave on the side of the road past the Juniper Campground.
I have a new love of exploring caves… especially on my own without a guide or a group! This cave is BIG and was so fun to explore at our own pace. Even better, it’s only a short walk from the parking spots near the trailhead.
I had so much fun exploring this short trail and the cave. If you have children with you, this hike is a must! They’ll love the cave and all the climbing around it!
The Caves Trail – Distance: 0.9 | Time: 30 min | Level: Easy
This is another really cool hike with several caves to explore at your own pace! I wish we would’ve spent more time here, but we were pretty tired after the other two hikes of the day.
The beginning of the Caves Trail
If I had it to do all over again, or if I had my boys with me, I would like to start the day on this trail. There is a small parking lot right at the trailhead, but unlike the hike on the Lighthouse Trail, this one is not very well marked.
I recommend bringing headlamps or a flashlight to go deeper into some of the caves. It was cloudy off and on during our visit and kind of dark at times. You may not need them, but I wished that I would’ve had mine on this hike!
Palo Duro CanyonHighlights
Well marked trails
I had excellent cell service in most areas of the Park
Stunning views and colors
The Park was easy to navigate
No crowds
The trails were scenic and not too hard
Hiking Essentials
These are some of my tried and true hiking essentials that I cannot trek without! I really do consider myself a minimalist when I hike, but I do feel like you need to be prepared for anything when you’re out in the wilderness. Here are the things I never hike without.
Hiking shoes – I’ve been wearing these instead of my tall hiking boots and love the comfort of them!
Hiking backpack – This backpack is the perfect size for me. My husband carries a larger one, but this one is great for a smaller amount of stuff.
Cell phone arm band – I like the ease of this phone case. I can easily grab my phone and put it up throughout the hike as needed.
Camera stand– I love capturing family photos, but I don’t like having to ask other people to take them. This is great for all kinds of traveling, not just hiking!
Headlamps– these are the ones I own and won’t hike these trails again without!
Where to Stay
If you’re planning a trip to Palo Duro Canyon, I recommend lodging in Canyon, TX which is only about 19 miles/33 minutes from the entrance of Palo Duro Canyon State Park. We stayed at the Holiday Inn Express & Suites. The room was clean and cozy and we enjoyed the free breakfast buffet in the morning!
The Hiker’s 365 Adventure!
On a final note, my best friend and I signed up for the Hiker’s 365 Adventure Challenge! We’ve set a goal to hike 365 miles in 365 days. Whether you’re a seasoned hiker or a beginner, this challenge offers the perfect opportunity to connect with nature one mile at a time! We’d love for you to join this community of hikers, too! If you’re interested, register today using my Hiker’s 365 Adventure referral link!
We finally got to explore Zion National Park and man, we were blown away! The views just driving through were like nothing we’d ever seen before. Keep reading to learn all about how to spend a day in Zion National Park with Kids!
Zion National Park Information
Address: 1 Zion Park Blvd., Springdale, UT 84767
Phone: 435-772-3256
Fees: $35 per vehicle
Hours: Open year round, 24 hours a day
Shuttle Service: Website (shuttle service is mandatory for certain areas of the Park)
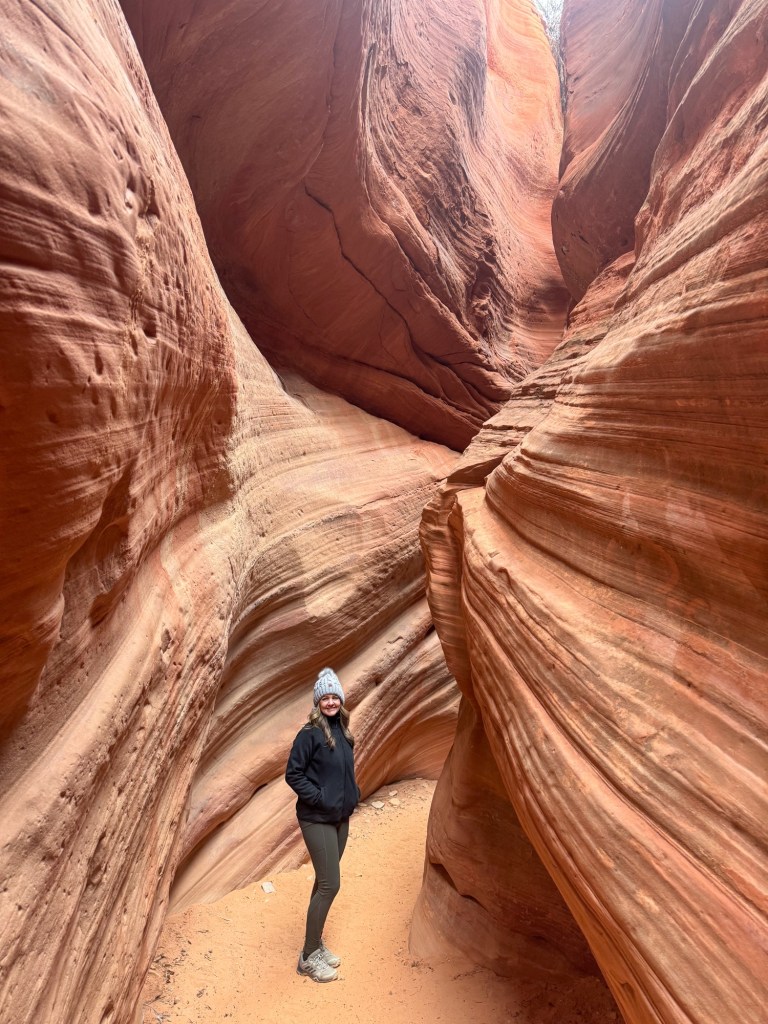
This was our first trip to the area, so we wanted to pack in as much as we could during our spring break in Utah. We stayed in Kanab and visited Bryce Canyon National Park, Zion National Park, explored slot canyons, hiked the Toadstool Hoodoos, and more! We only dedicated one day to Zion National Park, and while we had a great visit, we could’ve spent the entire week just at this Park!
Hiking
Full disclosure, it was pretty crowded during our visit over spring break. Because of the crowds, it was hard to find parking and the shuttle lines were insane. We opted to hike two trails in East Zion that did not require the shuttle, and we highly recommend both!
Zion Canyon Overlook Trail – Distance: 0.9 miles | Time: 30-45 minutes | Level: Easy
If you only have a day in the Park, you don’t want to miss this easy hike. The overlook is truly impressive and the entire trail has views for day, just check out the photos below!
Lower Pine Creek Waterfall Trail – Distance: 0.7 miles | Time: 1 hour | Level: Moderate
The second trail we hiked was by happenstance when a spot opened up in the parking lot as we were driving by. I’m so glad we decided to stop here, we ended up having the entire trail to ourselves! And the best part, this hike ended at a gorgeous waterfall!
We really enjoyed the rock scramble to get to the falls! If you have kiddos, they will really love the adventure that this trail provides!
Driving
If you’re unable to hike, you can still see many impressive views just driving through! Just be mindful that from March through November, it is mandatory to take the free shuttle on the Zion Canyon Scenic Drive!
When to Visit
April through November is considered the best time to visit Zion National Park. The fall months provide the best weather for hiking and the crowds begin to thin. Summer is usually the most popular time to visit, so expect crowds and longer wait times for parking and shuttle lines. We visited in March and the weather was very pleasant, but it was already very crowded!
Things to Know
Arrive early to ensure you find parking and have enough time for your adventures!
Be aware of the permits and mandatory shuttle services for certain areas of the Park.
Bring plenty of food, snacks, and water if you’re hiking.
Be cautious of the ledges and steep drop offs on some of the trails.
Overall, we had a wonderful day in Zion National Park! In fact, this was my husband’s favorite experience of our entire Utah trip. My only regret is not planning more time in this Park! Whether you go the day or for a week, I’m sure you’ll have a memorable visit!
Every Kid Outdoors Pass
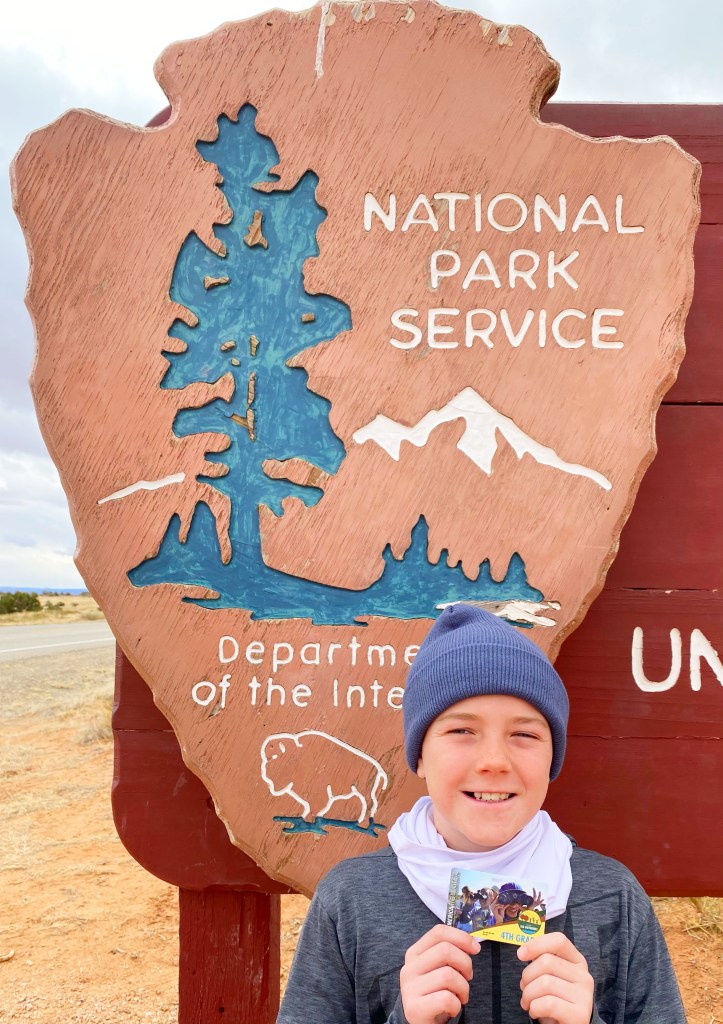
The teacher in me is so excited to share about this amazing opportunity for elementary students in fourth grade! Did you know that with an Every Kid Outdoors Pass, fourth grade students can get into any National Park in the United State for FREE? And really, every person in the whole entire passenger vehicle gets in free, too!
My fourth grader was so eager to get his pass! We completed the information online and printed the confirmation page. Once we visited our first National Park with the printout, my fourth grader was given his very own National Park Pass! These passes are good from September 1st – August 31st! So, be sure to share this information with anyone that has an elementary student! Using my son’s pass we were able to visit Bryce Canyon National Park and Zion National Park for free during our spring break trip!
One of my new favorite National Parks is Bryce Canyon National Park! I cannot wait to tell you about the hikes we chose and share photos of the stunning hoodoos and landscape. Keep reading to learn how to spend a day in Bryce Canyon with kids!
This was our first trip to the area, so we wanted to pack in as much as we could during our week long trip to Southern Utah. We stayed in Kanab and visited Bryce Canyon National Park, Zion National Park, explored slot canyons, hiked the Toadstool Hoodoos, and more! It’s a great place to base from. Even though we only had a day at Bryce Canyon National Park, we feel like it was the perfect amount of time for our family!
One Day Itinerary
Visitor Center / Jr. Ranger Program
Drive to Bryce Canyon from Kanab, UT (1.5 hours)
Sunset Point Overlook
Hike Navajo Loop Trail
Visitor Center / receive Jr. Ranger badge
Hike Mossy Cave Trail
Drive Back to Kanab, UT (1.5 hours)
Visitor Center / Jr. Ranger Program
We always like to stop by the Visitor Center when visiting National or State Parks! Most are similar to a small museum with artifacts and Park information. Plus, my youngest son really likes to participate in the Jr. Ranger Program. We grab the booklet to work on throughout our visit and then stop back by to turn it in when it’s complete so that he can swear in and get his Jr. Ranger badge!
Sunset Point Overlook
Our first glimpse of the magic of Bryce Canyon, was at the Sunset Point Overlook. You can’t miss this one, especially if hiking isn’t your thing! If you do plan to hike, many of the trailheads can be found near Sunset Point, so it’s a great place to park your vehicle!
The Hikes
Now, on to the good stuff…hiking! Based on the trails that were open and hiking with kids ages 13 and 9, we decided to hike the Navajo Loop Trail and Mossy Cave (which is outside of the Park).
The Navajo Loop Trail is the most popular trail in Bryce Canyon National Park! It truly is amazing walking in between huge hoodoos! To find this trail, head to the parking lot area at Sunset Point. You’ll see the trailhead near the overlook area.
This trail can be moderately challenging when hiking back up to Sunset Point. For us, the entire trail was a little tough because of the wet conditions. It was very muddy, which made the hike down a little tricky in spots! The views are amazing, so don’t let a little mud discourage you from making the trek.
Be sure to check the weather before you go. If it has rained or snowed in the days before your trip, I suggest wearing hiking boots and bringing along spikes for mud or ice!!
After finishing the Navajo Loop Trail, we drove about ten minutes to the Mossy Cave Trail. This is a short hike with a small waterfall, rock formations with “windows,” and a cave at the end. The waterfall was more of a trickle when we visited, but we still enjoyed the trail!
Even though this trail is part of Bryce Canyon, it was not as muddy or as crowded as the Navajo Loop Trail within the park. I’ve heard it’s fun to see this waterfall in the winter, because it freezes and you can walk behind it! We really like hiking to caves, but I was a little disappointed that the cave is blocked off by a fence, so you can’t actually explore inside it. But, it was still a fun hike and the views were awesome!
We packed in a lot of time hiking during our one day visit to Bryce Canyon National Park! I know that we didn’t see everything that this amazing Park has to offer, but we really enjoyed our day and the trails that we chose to hike!
Highlights
Bryce Canyon has the largest concentration of hoodoos found anywhere on Earth! What exactly are hoodoos? Well, they are unique, thin spires of rock formed by weathering and erosion that can be caused by wind, ice and rain.
This Park is open and amazing year-round!
The crowds were much smaller than the crowds at Zion National Park!
There are no mandatory reservations, permits, or shuttle rides required.
There are scenic overlooks and viewpoints if you do not enjoy hiking.
It’s a great place for a day trip!
When to Visit
October through May is an ideal time to visit! The crowds are smaller and the temperatures are cooler. Summer is the most popular time to visit, with more crowds and higher temps. Winter is gorgeous with deep blankets of snow! We visited in March and there was still a lot of snow. It was an unexpected surprise, especially since we came from Texas and don’t usually get to see that!
Things to Know
Arrive early to ensure you find a parking spot at the trailhead or overlook area!
Bring plenty of food, snacks, and water if you’re hiking.
Be cautious of the ledges and steep drop offs on some of the trails.
The teacher in me is so excited to share about this amazing opportunity for elementary students in fourth grade! Did you know that with an Every Kid Outdoors Pass, fourth grade students can get into any National Park in the United State for FREE? And really, every person in the whole entire passenger vehicle gets in free, too!
My fourth grader was so eager to get his pass! We completed the information online and printed the confirmation page. Once we visited our first National Park with the printout, my fourth grader was given his very own National Park Pass! These passes are good from September 1st – August 31st! So, be sure to share this information with anyone that has an elementary student! Using my son’s pass we were able to visit Bryce Canyon National Park and Zion National Park for free during our spring break trip!
If you have kids that enjoy short hikes with unique rock formations and lots to explore, then you should check out the Toadstool Hoodoos located near Kanab, Utah!
Hi, we’re the Fosters! Thank you for visiting my blog!
Our first stop on our recent road trip to Utah was to the Toadstool Hoodoos! My boys loved this trail and we all had such a fun time exploring the area. Plus, it was not crowded at all. Several different times during our visit we were the only people there!
What are Hoodoos?
Hoodoos are unique, thin spires of rock formed by weathering and erosion that can be caused by wind, ice and rain. There are several different sized hoodoos on this trail and it truly felt like we were on another planet! The entire landscape was nothing like we’d ever explored before.
The Hike
The Toadstool Hoodoos – Distance: 1.8 miles | Time: 45 min. | Level: Easy
Photo from AllTrails app
The out and back hike to the toadstools is mostly flat and extremely easy. At the beginning of the trail you will find lots of rocks to climb and small caves to explore. My boys loved this part! The trail was easy to follow and the views were great.
To reach the toadstools, you’ll continue north on the trail. I don’t remember seeing any trail signs, but the sandy path was clear.
Once at the toadstools, you’ll find a couple of unique clusters of hoodoos! The area is beautiful with unique rock formations surrounded by white and orange hills.
Highlights
Kid-friendly trail – This is a fun family hike that has cool features to explore and is easy enough that our boys weren’t tired or complaining! If you are just getting into hiking with your kiddos, this is a great trail!
Caves – we really enjoy exploring caves, so when we happen to stumble across a few on our hikes, we’re pumped! This was an unexpected surprise!
Landscape – the toadstools, the desert plants, the sand, and the hills surrounding the trails really made for a gorgeous adventure!
Lack of Crowds – the best part was the lack of crowds we encountered during our hike. It’s always nice to have an entire place mostly to yourself, to spend as much time as you want taking in the sights!
When to Visit
Considering that this is a desert landscape, spring and fall is the ideal time to visit. We went during the middle of the day over our spring break and the temperatures were very pleasant. If you plan to go in the summer, I’d recommend going early in the morning or later in the evening so that you aren’t too hot.
Things to Know
This trail is located off Highway 89, 45 miles east of Kanab, Utah.
There are no fees or permits required for this hike.
This dog-friendly trail is open year round.
The parking lot is small, but we didn’t encounter any crowds.
There are two small portable bathrooms in the parking lot.
We had a fantastic hike and our first taste of Southern Utah at the Toadstool Hoodoos! Utah is such an amazing state and we cannot wait to venture back that way!
We just returned from a fantastic week in Utah! I’m so excited to share our Kanab, Bryce Canyon, and Zion National Park itinerary and photos with y’all! This itinerary is great for families, couples, or solo travelers.
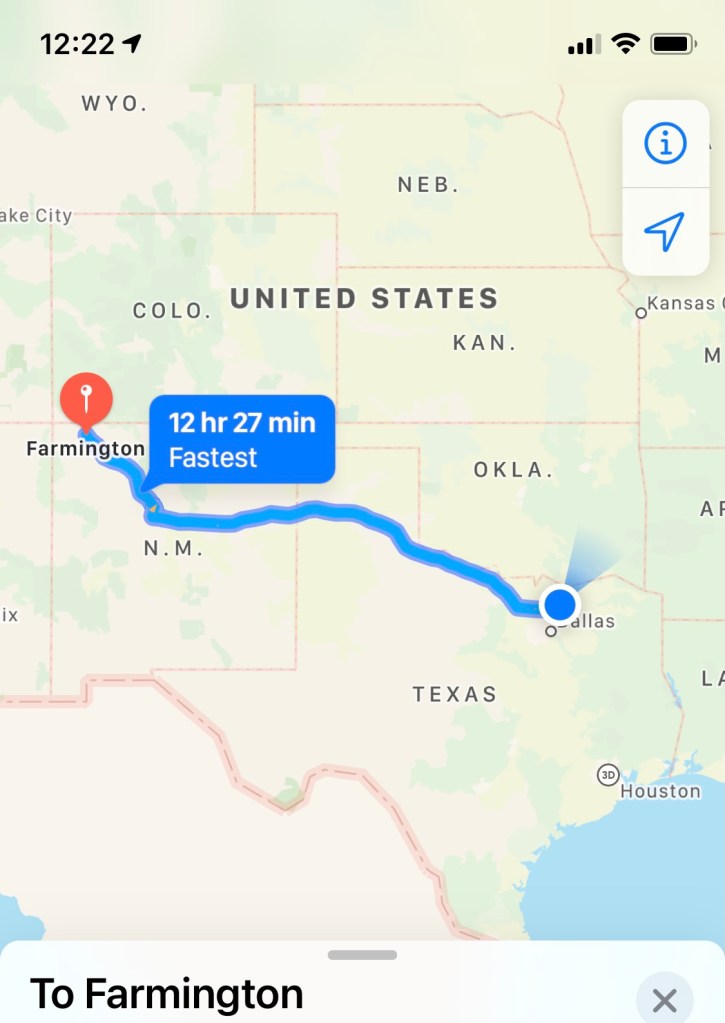
Day 1:Texas to New Mexico
We began our road trip to Utah from North Texas. For us, it’s about a sixteen hour drive, so we had to break the drive up into two days. We decided to stop in Farmington, New Mexico on our first day of driving. It’s twelve hours from us, so we knocked out the majority of the drive on day one and only had four hours to go the following day.
Farmington is in the Four Corners region and has several great options of places to see if you want to explore more of this area. We’ve stopped at the Aztec Ruins National Monument and to see Shiprockon previous road trips!
Day 2:Kanab/Toadstool Hoodoos
On day two, we continued driving and stopped first in Page, AZ. We only stopped here because we happened to drive right by the Big Lake Trading Postand I wanted to do the short hike from the parking lot to see the sand cave! It was really cool, quick stop!
After that stop, we continued on our drive towards Kanab, UT which is where we were basing out of the entire week. We decided to stop by the Toadstool Hoodoos on the drive into Kanab and I am so glad that we did! My boys loved this stop and we had such a fun time exploring this area. Plus, it wasn’t crowded at all. Several different times during this stop, we were the only people there!
Hoodoos are unique, thin spires of rock formed by weathering and erosion. There are several different sized hoodoos on this trail and it truly felt like we were on another planet! The entire landscape was nothing like we’d ever explored before.
The Toadstool Hoodoos Trail – Distance: 1.8 miles | Time: 45 min. | Level: Easy | Cost: FREE
Once we left the Toadstools, we continued driving to Kanab. We stayed at the Comfort Suites and enjoyed this hotel. We had so much space in our room and it was in a great location! We also enjoyed the free breakfast buffet each morning, but the rates were the best part! We paid less than $450 for six nights here!
For dinner, we ate right down the road from our hotel at Vermillion 45 and it was delicious! It was a little fancier than our usual dinners on the road, but so good! I had shrimp risotto, the boys had pizza and rigatoni, and Jereme had chicken fricassee.
Day 3: Bryce Canyon National Park
After looking ahead at the predicted weather for the week, we decided to explore Bryce Canyon National Park on day three. The weather forecast was great for this day, but snow was predicted for later on in the week. It is right under 1.5 hours to get from Kanab to Bryce Canyon!
Based on the trails that were open and hiking with kids ages 13 and 9, we decided to hike the Navajo Loop Trail and Mossy Cave (which is outside of the Park). Be sure to check the weather before you go. If it has rained or snowed in the days before your trip, I suggest wearing hiking boots and bringing along spikes for mud or ice!
Navajo Loop Trail – Distance: 1.5 miles | Time: 1.5 hours | Level: Moderate| Cost: $35 per vehicle
We enjoyed this trail so much because of the up-close view of the hoodoos it provides! But, it was a little tough because of the wet conditions. It was very muddy, which made the hike down a little tricky in spots! The views are amazing, so don’t let a little mud discourage you from making the trek.
After finishing the Navajo Loop Trail, we drove about nine minutes to the Mossy Cave Trail. This is a short hike with a small waterfall, rock formations with “windows,” and a cave at the end. The waterfall was more of a trickle when we visited, but we still enjoyed the trail!
Mossy Cave Trail – Distance: 0.9 miles | Time: 45 minutes | Level: Easy |Cost:FREE (trail is outside main area of Park)
When we returned to Kanab, we had an amazing dinner at Escobar’s Mexican Restaurant. Hands down, this was the BEST food we had on our entire trip! If you’re in the area, definitely make sure to eat here.
Day 4: Kanab
On day four we decided to have a little bit of down time. My boys always seem to need a day to recover after a long drive and a lot of activities. It was so nice to sleep in, walk around the quaint downtown area, and check out some of the places right outside of Kanab.
The boys were tired of hiking and wanted a day to relax, watch tv, and play video games. So, Jereme and I had our own adventure date to the Kanab Sand Caves, also known as Moqui Caves. This place is fascinating! I highly recommend checking it out if you’re ever near Kanab. You don’t need a lot of time here and the hike is pretty easy!
This is such a unique place, right off the main highway that leads to Bryce or Zion from Kanab! We parked right off Highway 89 in a large, marked parking lot for the Sand Caves. You can’t miss it!
For dinner, we decided to have steaks at Iron Horse Restaurant. It was great, the boys loved this place! I didn’t take any food pics, but we all had steak, mashed potatoes, and salad.
Day 5 – Zion National Park
We dedicated day five to exploring Zion National Park and man, we were blown away! The views just driving through were like nothing we’d ever seen before. Full disclosure, it was pretty crowded during our visit over spring break. Because of the crowds, it was hard to find parking and the shuttle lines were insane. We opted to hike two trails in East Zion that did not require the shuttle and we highly recommend both!
If you only have a day in the Park, you don’t want to miss this easy hike. The overlook is truly impressive and the entire trail has views for day, just check out the photos below!
Zion Canyon Overlook Trail – Distance: 0.9 miles | Time: 30-45 minutes | Level: Easy|Cost: $35 per vehicle
The second trail we hiked was by happenstance when a spot opened up in the parking lot as we were driving by. I’m so glad we decided to stop here, we ended up having the entire trail to ourselves! And the best part, this hike ended at a gorgeous waterfall!
Lower Pine Creek Waterfall Trail – Distance: 0.7 miles | Time: 1 hour | Level: Moderate| Cost: $35 per vehicle
We really enjoyed the rock scramble to get to the waterfall! If you have kiddos, they will really love the adventure that this trail provides!
Day 6 – Ride and Rappel Slot Canyon Tour
This day was the best day! We booked the 2.5 hour ride, hike, and rappel adventure with Roam Outdoor. This was great for our boys ages 9 and 13. I recommend this option for families with younger kiddos or for anyone that has never rappelled before. We did four rappels that ranged from 10 feet to 45 feet, all while hiking through the stunning Ladder Canyon near Orderville, Utah.
We met up at the Roam Outdoor business at 10:00 am and were fitted with all of our rappelling gear. Then, we were driven on an ATV by our fantastic guide, Bryson, to Ladder Canyon. It was a short climb around to enter the slot canyon, which started with a rappel down into it! We all felt well prepared to make the first rappel and it started off small at only 10 feet. We gradually increased the distance of each rappel as we went, and finished with a 45 foot decent.
I also truly loved and appreciated how amazing Bryson was when it came to taking photos of our family to remember this special occasion! This was a family favorite and an unforgettable experience!
We followed up our time rappelling with a wonderful late lunch at Wild Thyme Café back in Kanab! The corn chowder soup and chicken pasta alfredo was to die for!
Day 7 – Peek-A-Boo Slot Canyon
Our final day of the trip was a fun one! We really enjoyed the tour the day before and wanted to find another slot canyon to hike. I had noticed signs for Peek-A-Boo Slot Canyon so I began looking up information on that trail. A high clearance four wheel drive vehicle is extremely necessary. I drive a 4WD Expedition and it would not have made the drive to the canyon. Luckily we had borrowed my mom’s Jeep for this trip and had no trouble off-roading the 3+ miles to the slot canyon. The trail is easy and fun, the sand is just very deep!
To find Peek-A-Boo Slot Canyon from Kanab, follow Highway 89 North out of Kanab for about nine miles. You will see a sign for Peek-A-Boo and a parking lot area on the right hand side of the road. Turn into the parking lot and then immediately turn left. This will take you onto BLM Route 102. Follow this until you reach the wash (almost like a dry riverbed). Here, turn left and follow the wash, this will be on BLM Route 106H and it will lead you straight to the slot canyon.
If you’re planning a trip to Utah, I hope you find this Kanab, Bryce Canyon, and Zion National Park itinerary helpful! Don’t hesitate to reach out if you have any questions. Be sure to follow all Leave No Trace Principals so we can continue to enjoy this beautiful country of ours!
The Leave No Trace principles are a set of guidelines designed to minimize the environmental impact of outdoor activities. These principles promote responsible outdoor recreation and stewardship of natural areas. Here are the seven Leave No Trace principles:
Plan ahead and prepare: Proper planning helps minimize potential impacts on the environment. This includes researching the area you’ll be visiting, understanding regulations and special concerns, and being adequately prepared with the right gear and skills.
Travel and camp on durable surfaces: Stick to established trails, campsites, and designated recreation areas to minimize damage to vegetation and soil. Avoid trampling fragile ecosystems by walking on durable surfaces like rocks, gravel, or dry grass.
Dispose of waste properly: Pack out all trash, garbage, and leftover food. Leave natural areas cleaner than you found them by properly disposing of waste and packing out all items, including biodegradable materials like fruit peels and food scraps.
Leave what you find: Minimize your impact on natural landscapes by leaving rocks, plants, and other natural objects as you found them. Avoid disturbing wildlife or removing cultural or historical artifacts.
Minimize campfire impacts: If fires are permitted and necessary for warmth or cooking, use existing fire rings or designated fire pits whenever possible. Keep fires small, use only local firewood, and fully extinguish fires before leaving. In sensitive areas, consider using a portable stove instead of building a fire.
Respect wildlife: Observe wildlife from a distance and avoid approaching or feeding them. Keep pets under control and prevent them from harassing wildlife or damaging vegetation. Store food securely to prevent wildlife from accessing it.
Be considerate of other visitors: Respect other visitors’ experiences by minimizing noise, yielding to others on the trail, and respecting privacy in campsites. Follow rules and regulations, and be courteous to others to ensure everyone can enjoy the outdoors responsibly.
By following these principles, outdoor enthusiasts can help protect natural environments and ensure that future generations can continue to enjoy outdoor recreation opportunities.
Embarking on a hiking adventure with kids is not just a stroll in the woods – it’s an opportunity for unforgettable experiences and quality family time. Most of our road tripping adventures have led to us to amazing outdoor destinations and hiking has become one of our family favorites! Check out my top 12 kid-friendly hikes for 2024!
This is a preview of all the hikes I’ll be sharing!
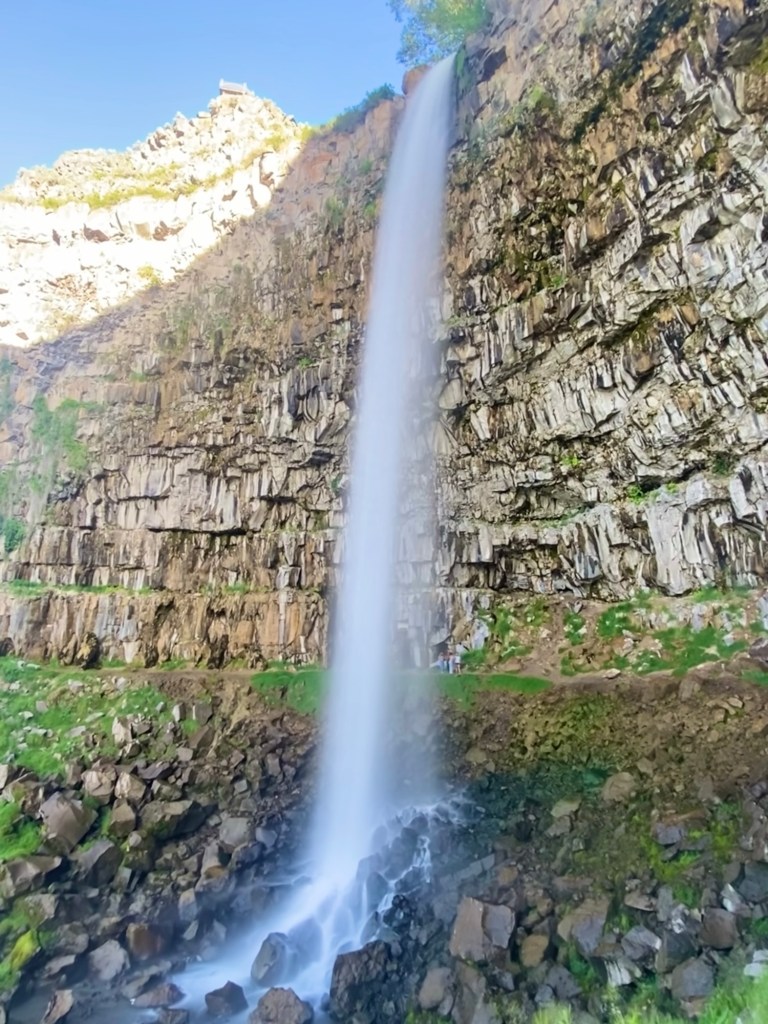
Perrine Coulee Falls Trail – Walk behind a waterfall in Twin Falls, Idaho!
This trail is rated as easy/moderate and is only about a half mile, out and back. You can find this 200 foot waterfall as you drive towards Centennial Waterfront Park. There will be several parking spots right along the roadway at the trailhead!
Hidden Falls Trail – Find a hidden waterfall in The Grand Tetons, Wyoming!
You can either take a scenic, 4 mile out and back hike to see this spectacular 100 foot waterfall. Or you can take a boat ride across Jenny Lake and hike only a mile to find this hidden gem! We chose to take the hike, so we started at Jenny Lake and followed the trail signs.
Maquoketa Caves Loop – Explore 13 different caves in Maquoketa, Iowa
This 1.7 mile loop allows you to explore 13 caves completely on your own, without a guided tour! You can find this amazing trail at Maquoketa Caves State Park in Iowa. Be aware, the caves close for bat hibernation October through April.
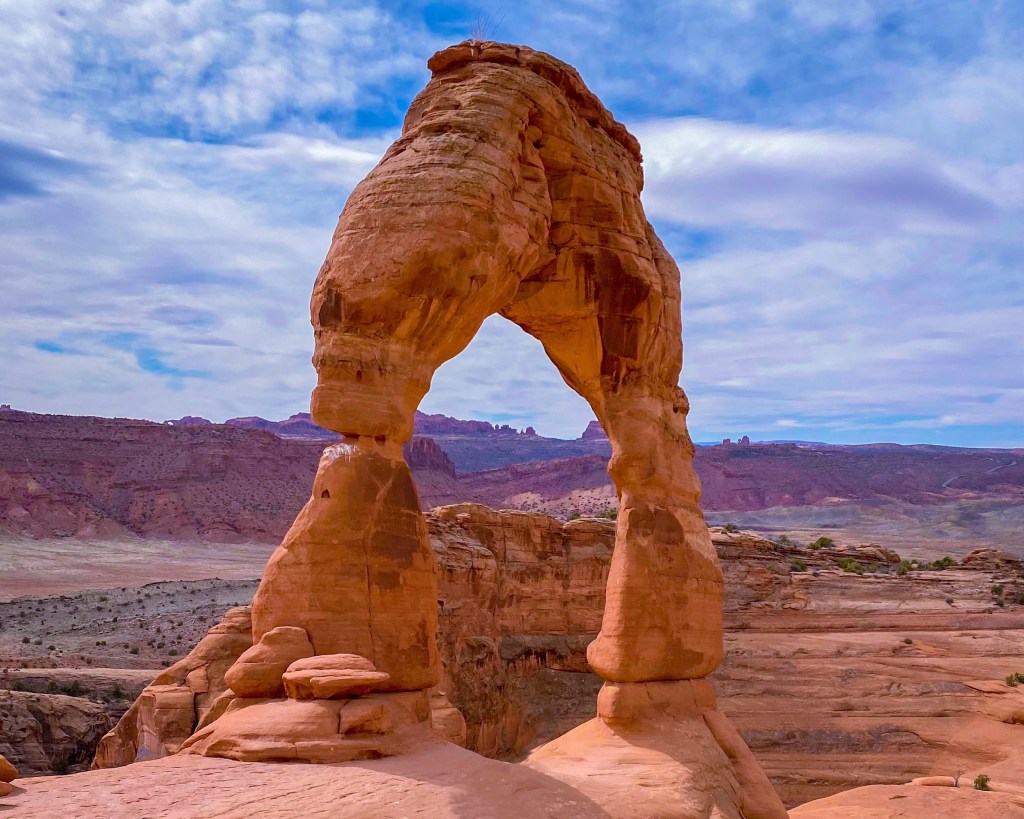
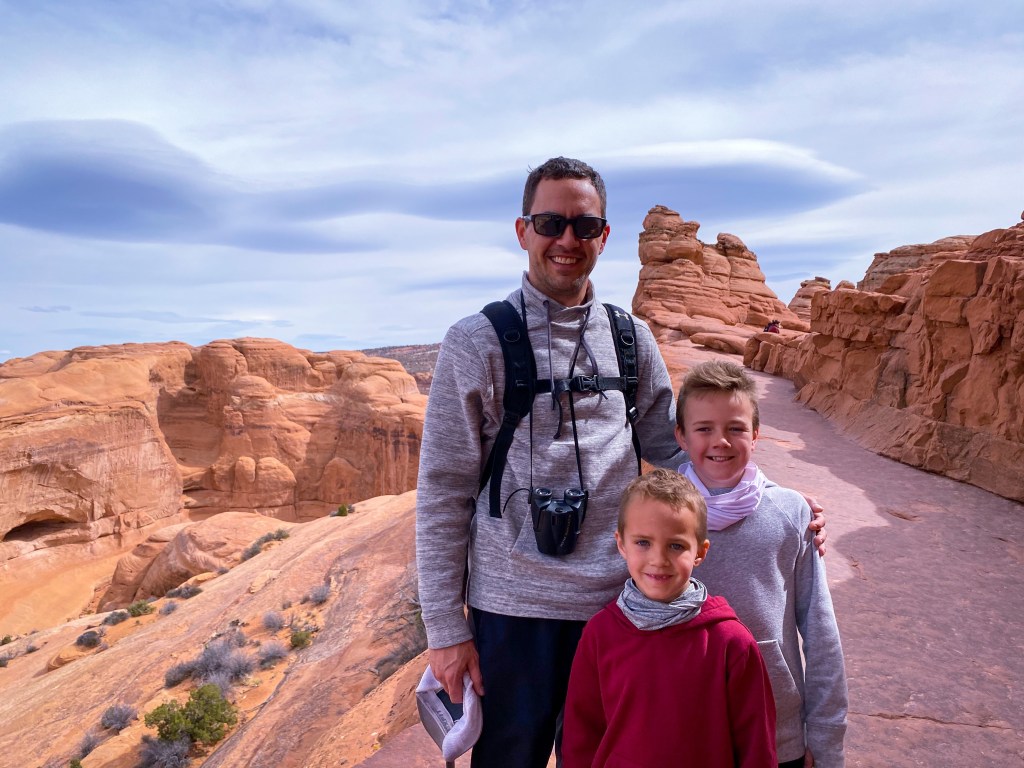
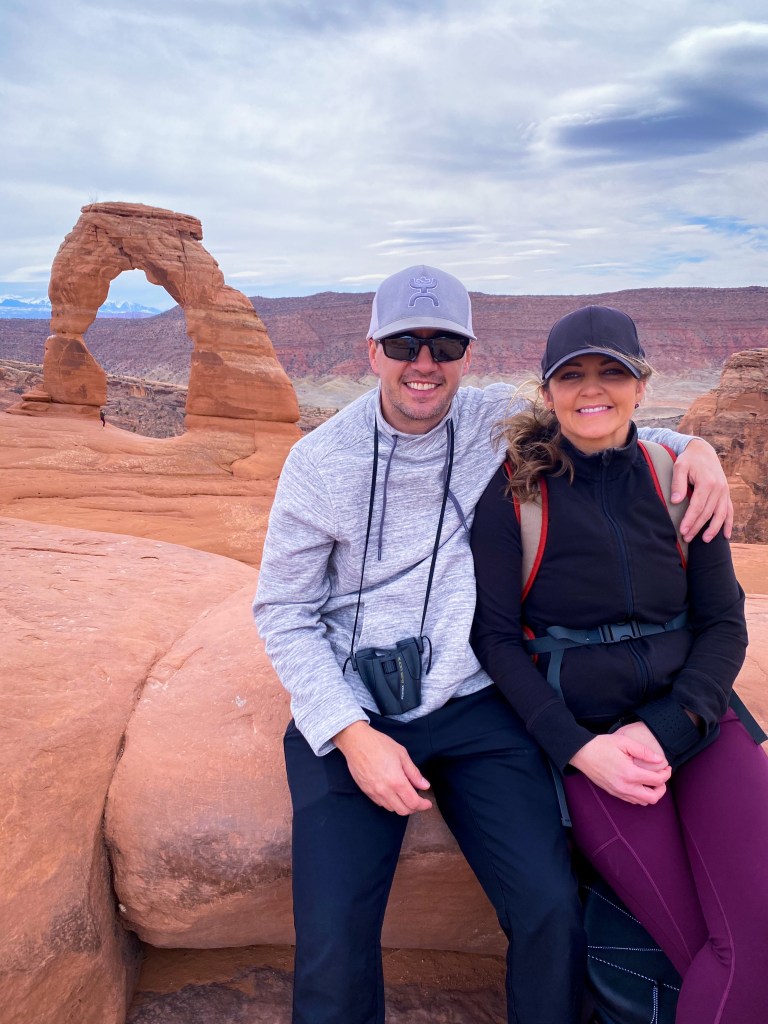
Delicate Arch Trail – Hike to the infamous Delicate Arch in Moab, Utah
The hike to Delicate Arch is a moderate 3.2 mile out and back trail. It is a lot harder going up than coming back down. But trust me, the challenge is worth it! Be sure to look into the timed-entry reservation system from April through October.
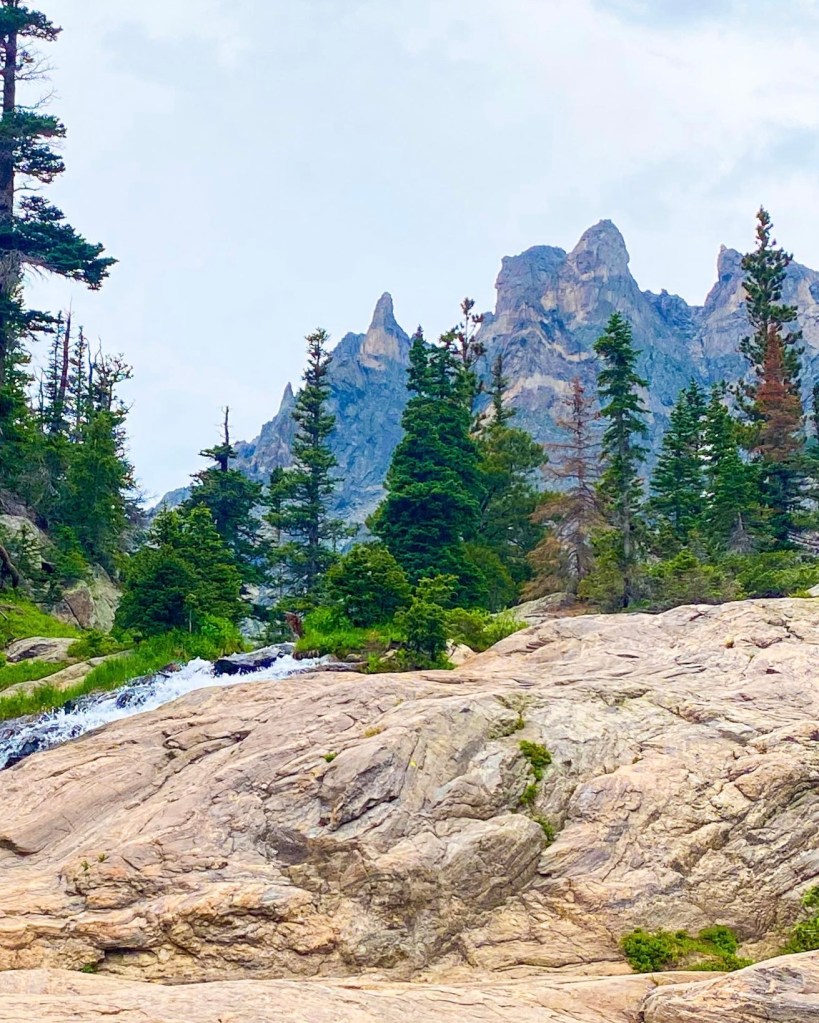
Emerald Lake Trail – Explore the magic of the Rockies near Estes Park, Colorado
Enjoy all that Rocky Mountain National Park has to offer while exploring the 3.5 mile out and back trail to Emerald Lake. Park at the Bear Lake Corridor and you will easily find the trailhead. Hike past two other beautiful lakes before arriving at Emerald Lake. Timed-entry permits are required from May through October.
Pueblo Loop Trail – Climb ladders inside ancient cliff dwellings in Los Alamos, New Mexico
Discover the ancient Puebloan cliff dwellings at Bandelier National Monument. The Pueblo Loop Trail is an easy 1.5 mile loop that offers impressive views of kivas and cliff dwellings. But the best part is the ladder access to climb into the dwellings!
Munds Wagon Trail – Hike to Merry Go Round Rock in Sedona, Arizona
This was probably the toughest hike we’ve done with our boys, but they were troopers. The hike is about 7 miles out and back and the spring is a great time to visit. The red rocks in Sedona are stunning!
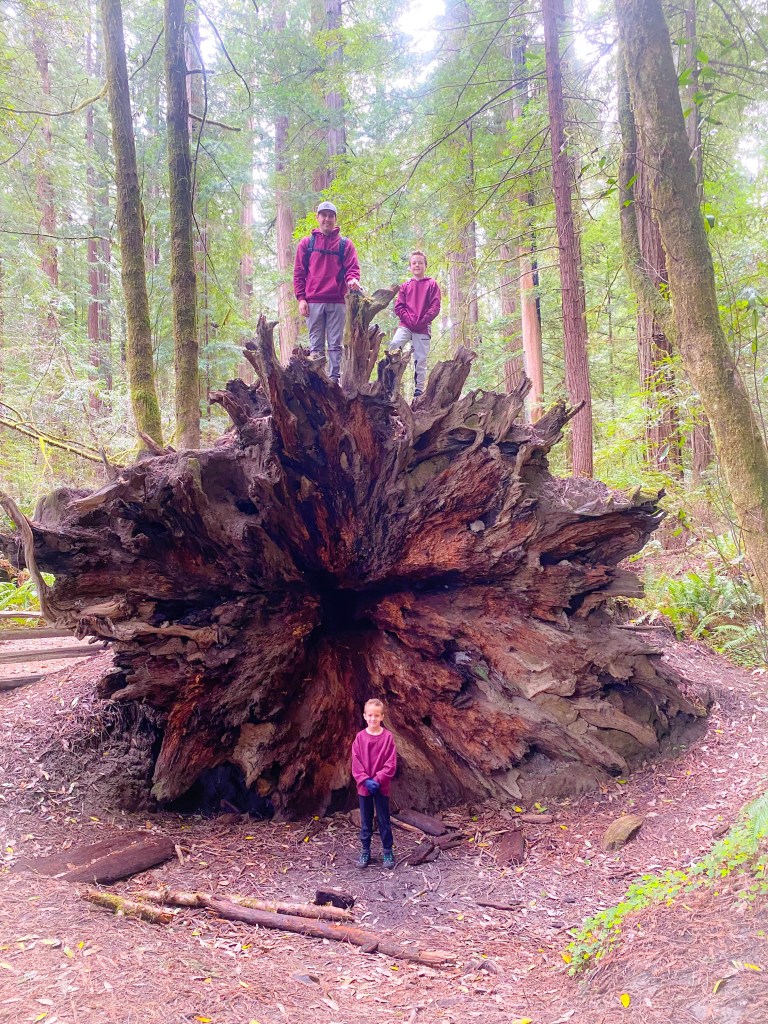
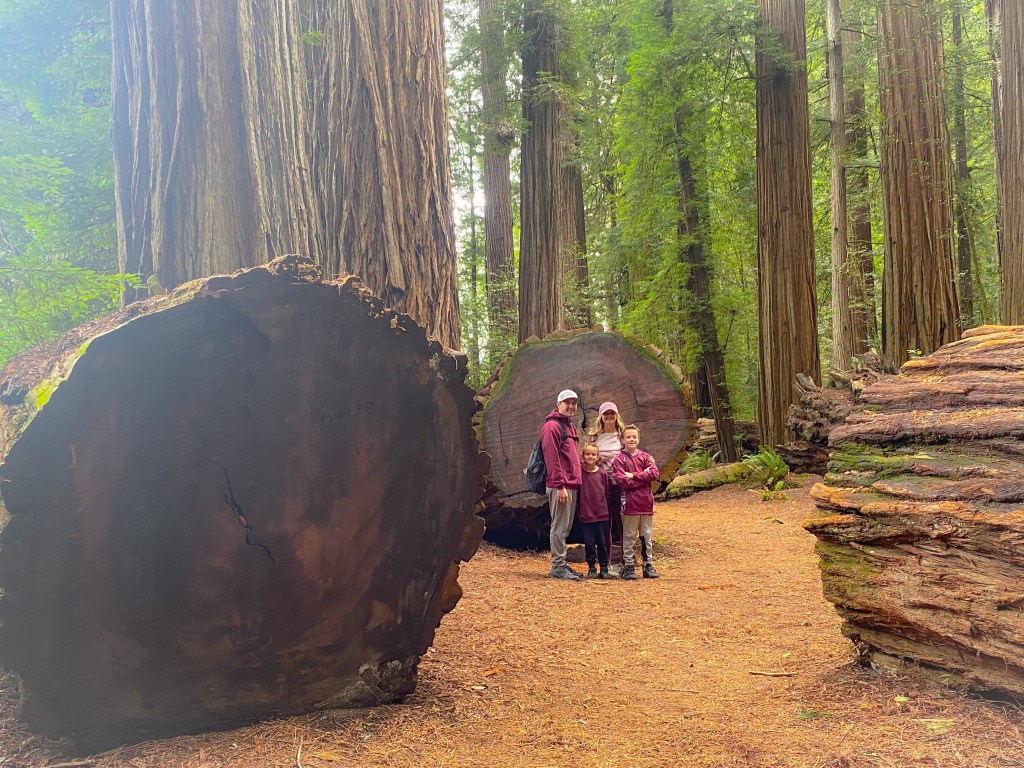
Stout Memorial Grove Trail – Walk amongst giants in Crescent City, California
This 0.6 mile loop through the giant Redwood trees in Jedediah Smith Redwood State Park is fun for the whole family! If you have kids, get them outdoors and on this trail. They’ll love this easy trail and climbing on fallen trees!
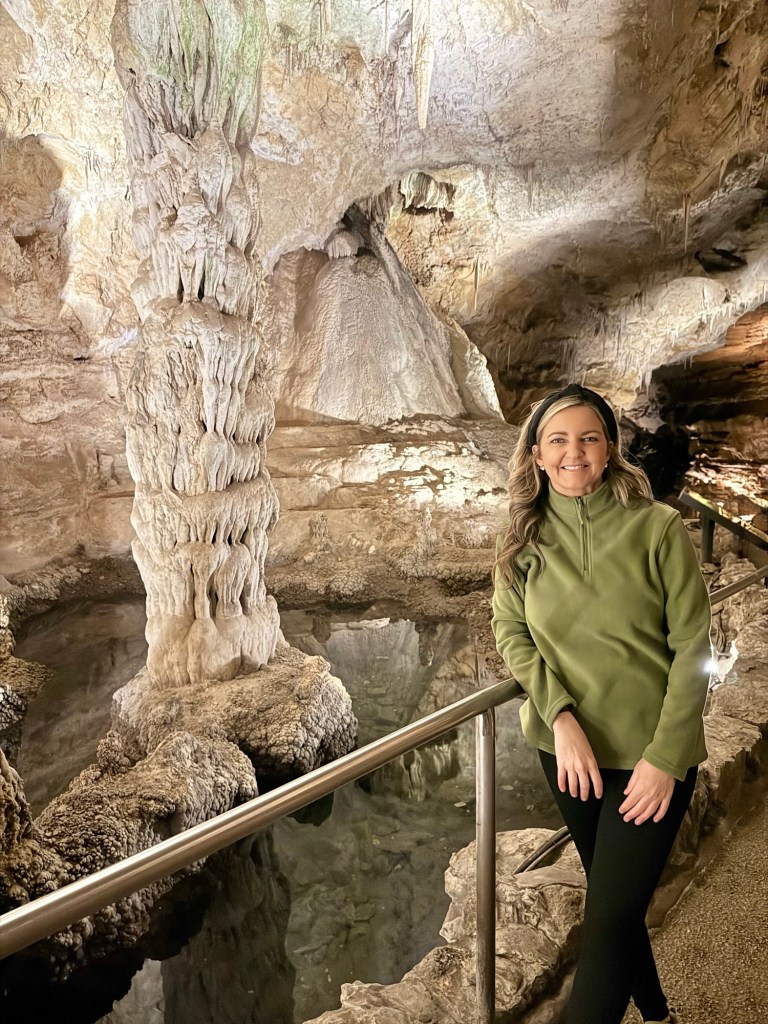
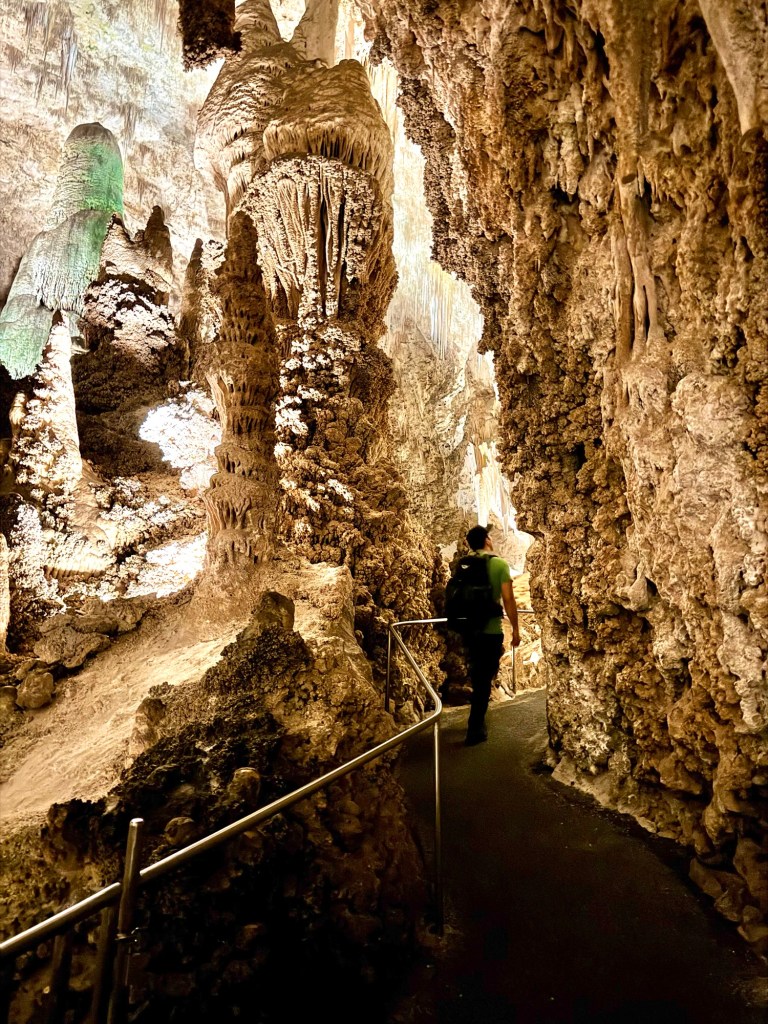
Carlsbad Caverns Big Room – Explore caves in Carlsbad, New Mexico
Take the Natural Entrance down into the Big Room and explore this impressive cave on your own! The hike is about 2.5 miles in total, but be sure to take the elevator back up! This is a really, really cool experience for kids!
Auger Falls Trail – Hike to an impressive waterfall in Twin Falls, Idaho
Another fun waterfall hike can also be found in Centennial Waterfront Park. You can make this hike as short or as long as you like, but if you do the full loop it’s about 4 miles. We decided to head straight up near the falls and the kids loved climbing over rocks and exploring close to the waterfall!
Witches Gulch – Walk through a mossy canyon in Wisconsin Dells, Wisconsin
This entire experience was a blast for our family! Witches Gulch is only accessible by taking an Upper Dells boat tour. The boat ride is very scenic and the walk through the canyon is very short and easy!
Forsyth Canyon Trail – Hike to the top of a waterfall near Boulder, Colorado
A fun, dog-friendly trail can found near Boulder! The Forsyth Canyon Trail was easy and only 1.6 miles out and back. We enjoyed climbing on rocks and seeing a waterfall from above! This trail kept the kids and the dog entertained!
Hiking with kids isn’t just about reaching the destination – it’s about embracing the adventure together. If you’d like to learn more about hiking with kids, read all of my tips for hiking with kids! You can also visit me on Instagram @road.trip.queen to see more of our adventures! Remember to be patient, encourage curiosity, and make the experience enjoyable for everyone. Happy hiking!
If you want to explore more of the United States, check out these six bucket list road trip destinations for 2024! We traveled to each of these destinations over the past year or so, and these are the top places that I would recommend to anyone needing a little road trip inspiration.
Ouray might be my favorite destination in Colorado! My first visit was this past August. I truly fell in love with the landscape and the vibe of this entire mountain town.
Stay in Durango for more dining and nightlife options
Lake Haiyaha is a stunning lake in Rocky Mountain National Park near Estes Park, Colorado. You can access this trail in the Bear Lake Corridor of the Park. This is a moderate to challenging hike because it is uphill for a bit and then there’s a rock scramble to the lake. It was so much fun… and so much easier to hike down!
Be sure to get Bear Lake Corridor permits from May – October
Driftwood Beach is a unique little gem found in Jekyll Island, Georgia. I traveled there last summer and knew I had to explore the driftwood along the beach before returning home. This is not the best beach for swimming, but it’s amazing for exploring, climbing, and photographing!
The entire Oregon coast is a dreamy road trip adventure! We made the trip from the Redwoods in California up to Cannon Beach, Oregon. That is one of my favorite trips to date. We stopped at the Natural Bridges Viewpoint off the Samual H. Boardman Scenic Corridor in Brookings, OR. This was a great place to stop and stretch our legs. You can view the natural bridges from the viewing area near the parking lot. But we went ahead and did the hike down to the bridges and walked over them! It was tough coming back up, but easy enough for my boys to do it with us and they were only 7 and 10 at the time!
Stay on the marked trails if you want to get a closer look
Watch for wildlife – we saw a seal swimming in the water
The Grand Tetons are indeed grand! If you want a fun place to explore, you can make the Grand Tetons a stop on your road trip to Yellowstone or you can make it an entire vacation destination. What I loved about our road trip to the Tetons was that the views on the drive through Wyoming were stunning and we saw so much wildlife!
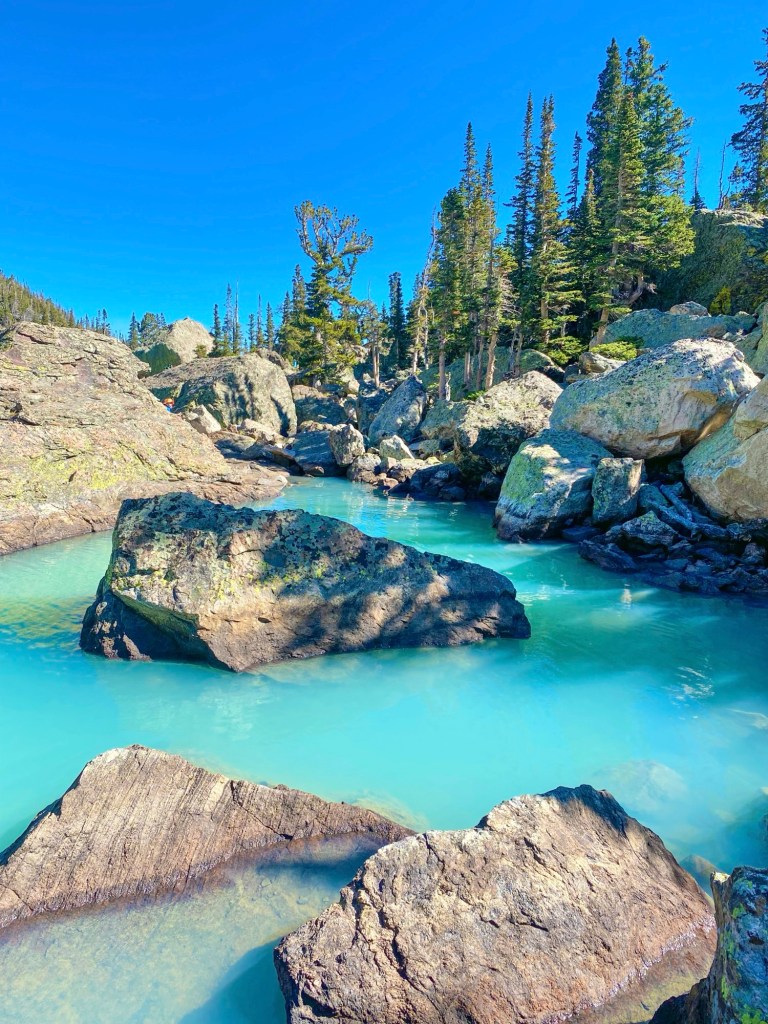
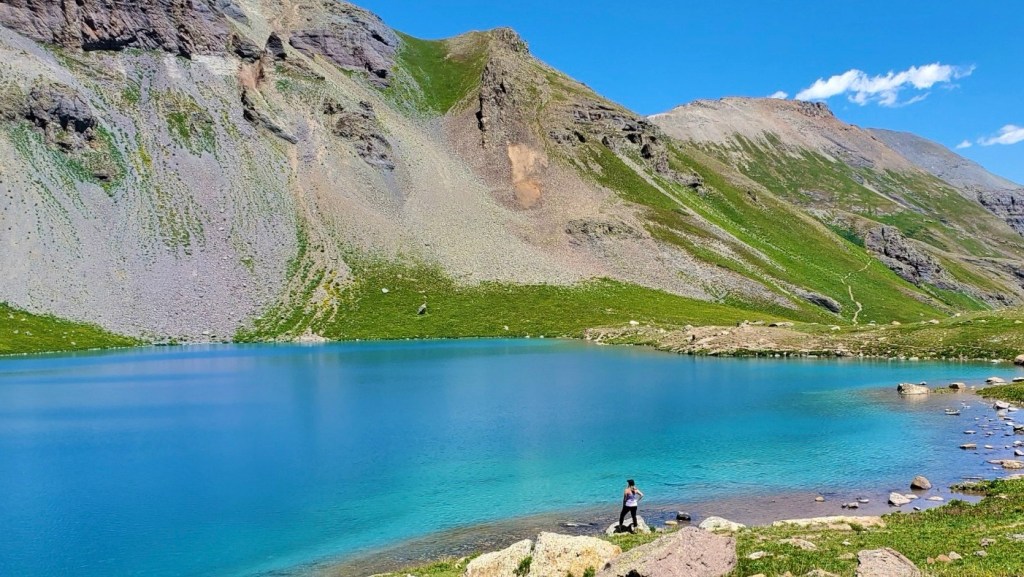
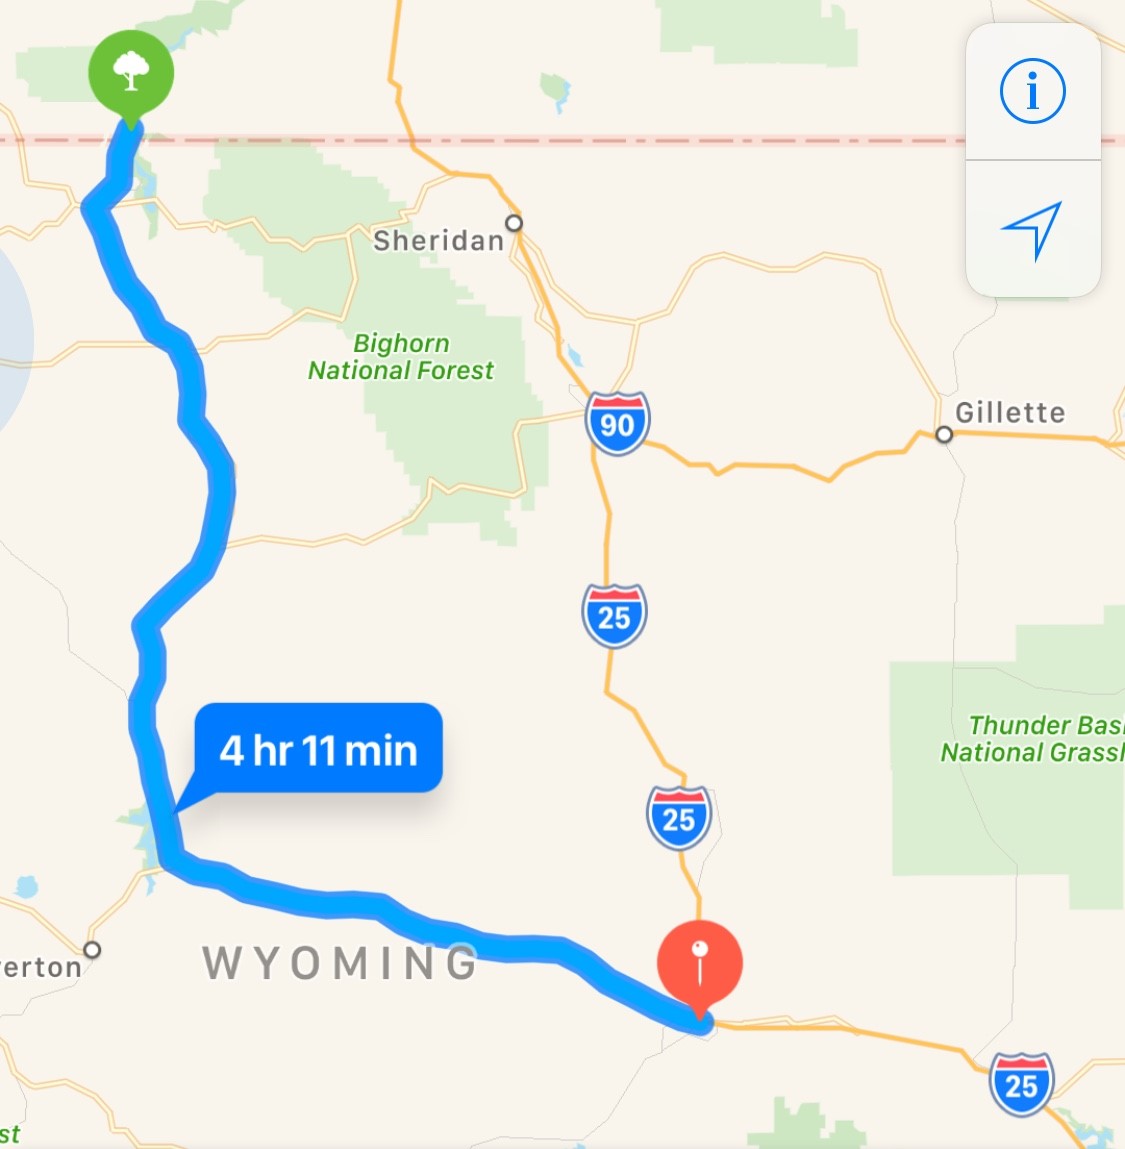
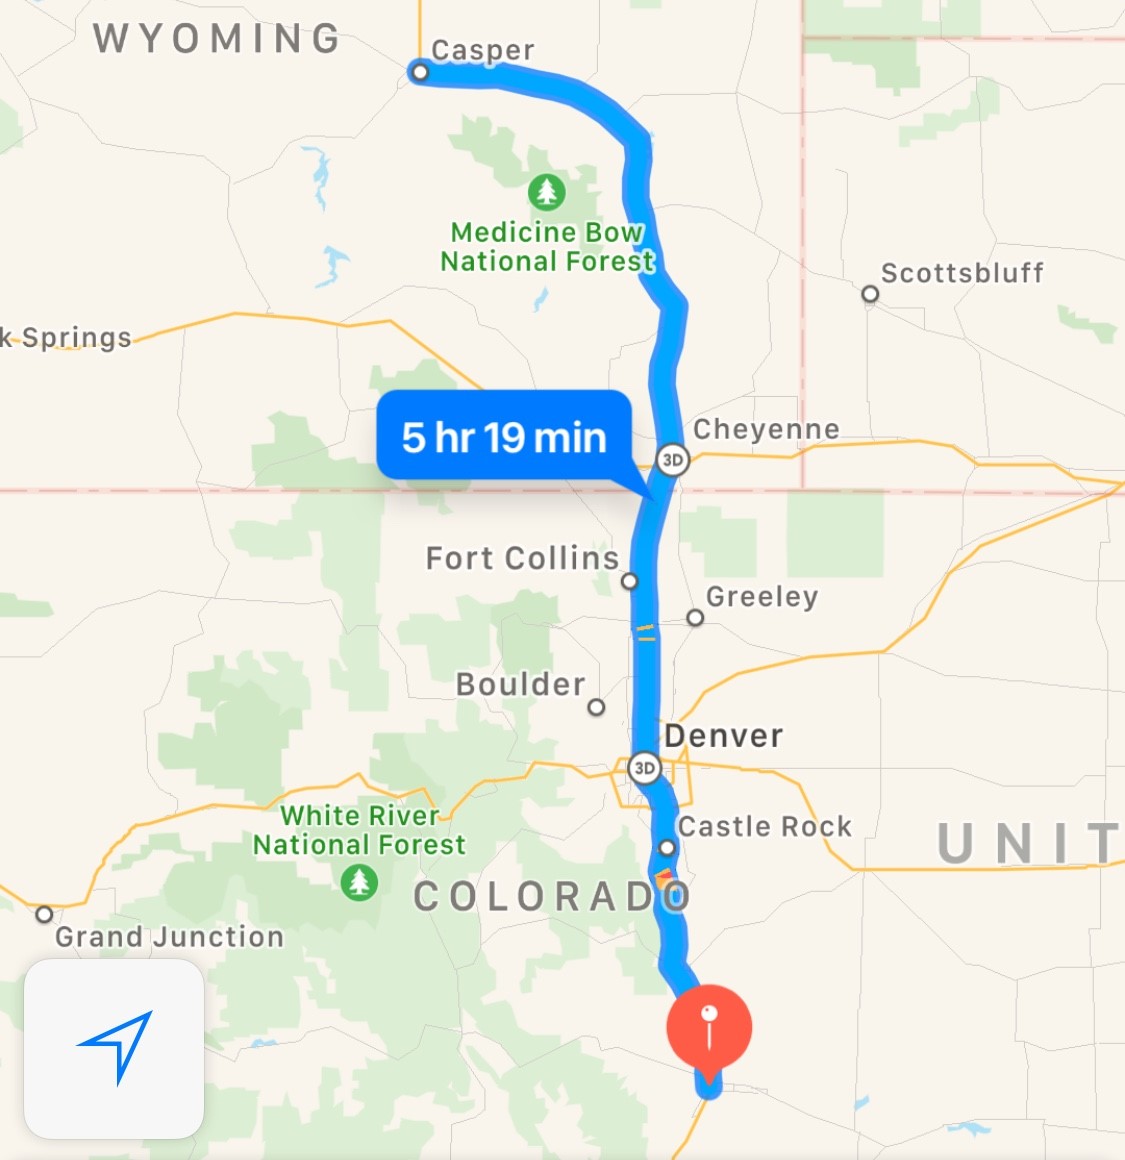
Ice Lake near Silverton, Colorado is the most outrageous lake I have ever seen. The views up to the lake were amazing. We encountered streams, waterfalls, and wildflowers along the trek. It was extremely tough for us flatlanders, but we made it. The views are one hundred percent worth the effort!
Stay in Durango for more dining and nightlife options
Traveling to National Parks has become a new family favorite of ours, man we had no clue just what we were missing out on! Once we visited our first Park, we immediately began making plans to visit another one. I recently shared a submission that Reaction.gov posted on their Share Your Story page about the park that changed it all for us. Click here to read that story.
There are sixty three National Parks in the United States. National Parks have been designated as such for their natural beauty, unique geological features, and diverse ecosystems. Twenty-eight of our states have a National Park (some have more than one).
While we haven’t even come close to visiting all 63 parks, we do have our favorites so far! We picked these National Parks as our top six for many reasons, but mostly based on how much fun our boys had at each one! At the end I will include information on the America the Beautiful Pass and the Every Kid Outdoors Pass – you will want to learn about this pass if you have a fourth grader, trust me!
Hiking Gear Favorites
Before I dive into our favorite parks, I want to share our favorite hiking gear finds! It’s so important to pack the correct gear, because weather conditions can change at a moment’s notice. We are a pretty frugal family, so none of our gear will break the bank.
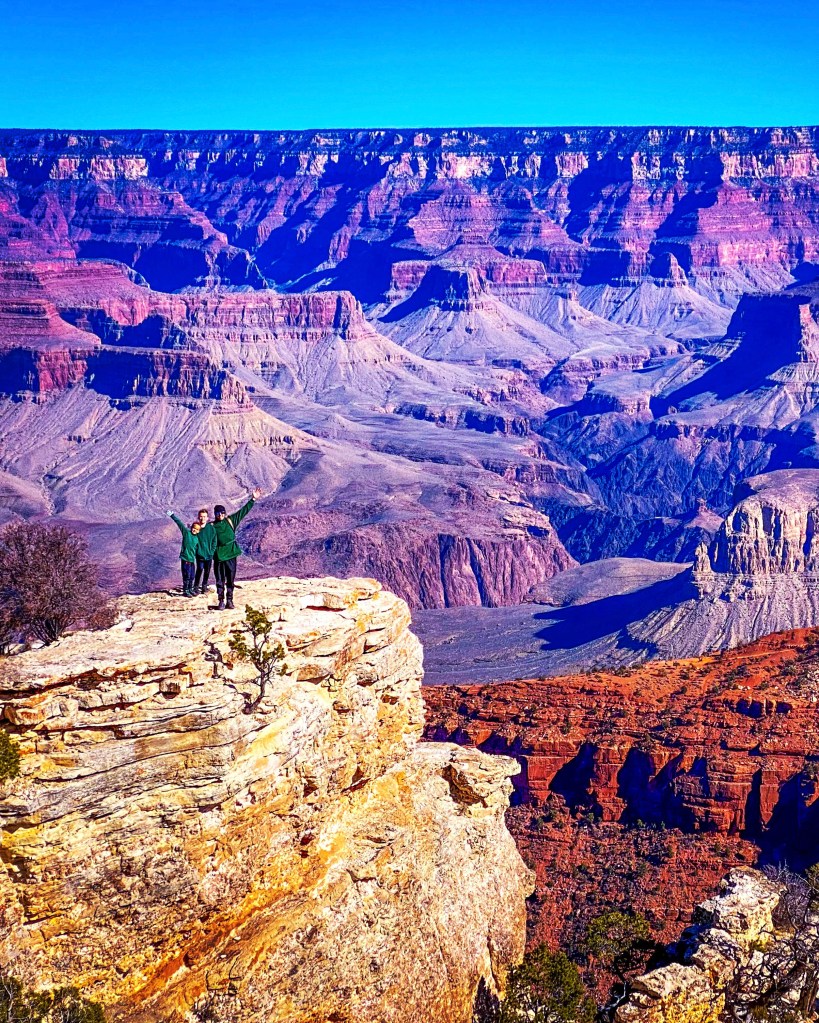
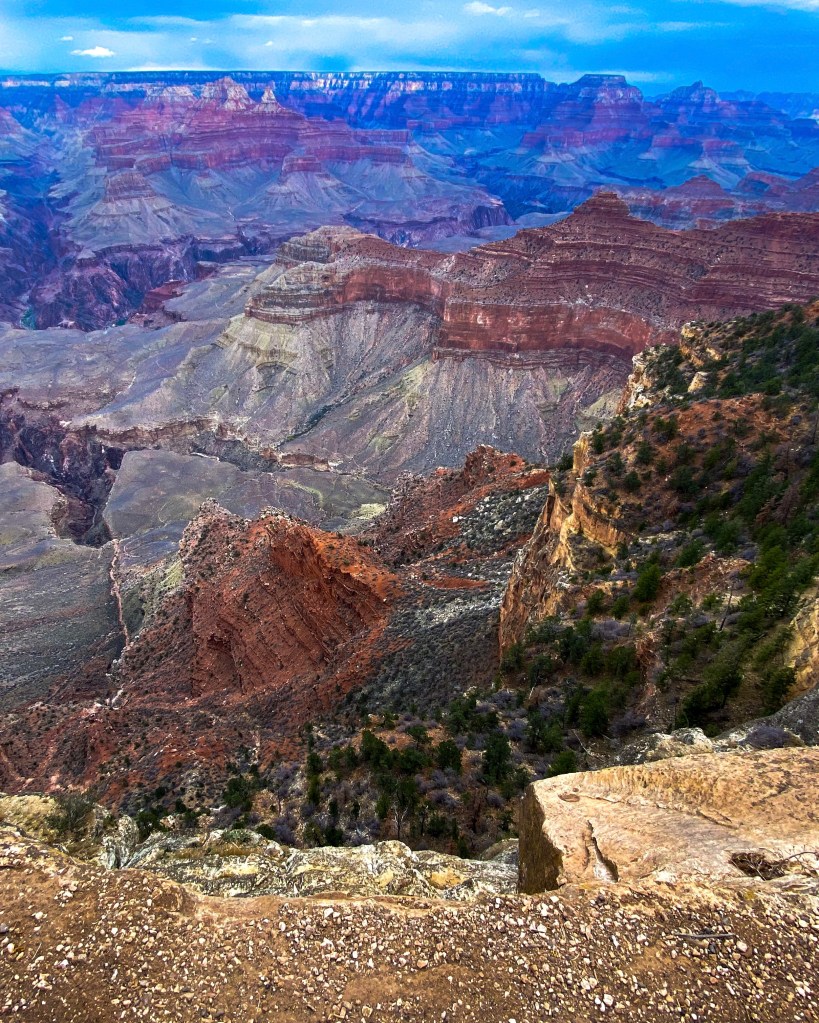
Coming in at number six is Grand Canyon National Park in beautiful northwestern Arizona. This park is home to the infamous and immense Grand Canyon. This canyon is layered with bands of red rock that reveal millions of years of geological history. This is one place that you truly need to see in person to understand the beauty and “grandness” of the canyon. We visited the park in November and had the most pleasant weather for hiking and stops at the viewpoints.
Our Grand Canyon National Park Highlights:
Hiking to Ooh Aah Point from the South Kaibab Trail – 1.8 miles out and back
Mather Point (viewpoint)
Yavapai Geology Museum
We spent two days at the Grand Canyon and think that this is the perfect amount of time to enjoy most of the sights, especially if you’re there with kids. While we would have loved to have been able to hike rim to rim, that just wasn’t feasible at this time with our kids in tow. And while we thoroughly enjoyed our visit, there are some pros and cons that I will include below.
Outside of the Yavapai Geology Museum
Pros:
The sheer beauty of the canyon is something that I strongly feel everyone should see in their lifetime.
Shuttle bus services – The shuttle system is very organized and runs smoothly between the different popular viewpoints and parking lots.
Viewpoints – The locations are stunning and you do not have to walk far to see some of the best sights in the park.
Parking lots – This park had a lot more parking lots and spaces available than some of the other National Parks we have visited.
Food Options – This is one of the few National Parks that we have visited that offer different dining options! It was nice to explore for a few hours, stop in at a restaurant for lunch and beverages, and then explore a little more!
No reservations needed!
Cons:
Heights – If you have a fear of heights, this may be too much for you! Also, if you have children with you, you MUST watch them like hawks at all times. Those edges are no joke and sadly this park averages about 12 deaths per year.
Heat – In the summer the heat in this desert climate can be excruciating. In June, July, and August, the temperatures can be above 100 degrees Fahrenheit and even hotter below the rim on the hiking trails.
Crowds – Since this is a natural wonder of the world, people from all places come to visit. The hiking trails were less crowded, but the viewpoints were packed.
Hiking – The roads, viewpoints, and hiking trailheads all start at the top of the canyon. To get the best views, it is recommended to hike down into the canyon. If you hike down, you must come back up. We are a family that is in pretty good shape and it was a really tough hike back up!
After a day or so, the views start to look the same so it might become redundant for some.
Click here to read more about our adventures in the Grand Canyon, which includes more information on lodging, dining, and our 2-day itinerary.
Entrance Fee: $35 per vehicle (pass good for 7 days)
Annual Visitors: 5 million
Best Time to Visit: March – May, September – November
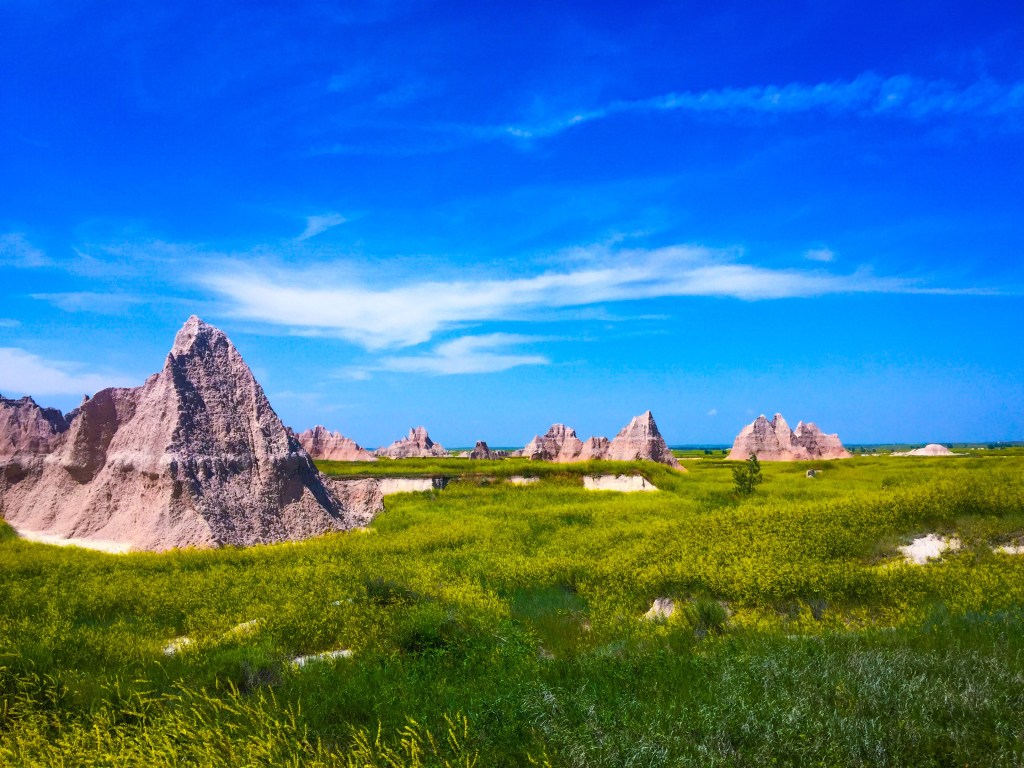
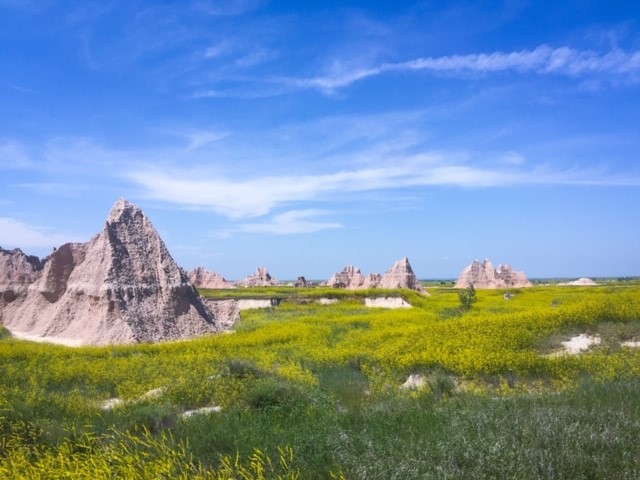
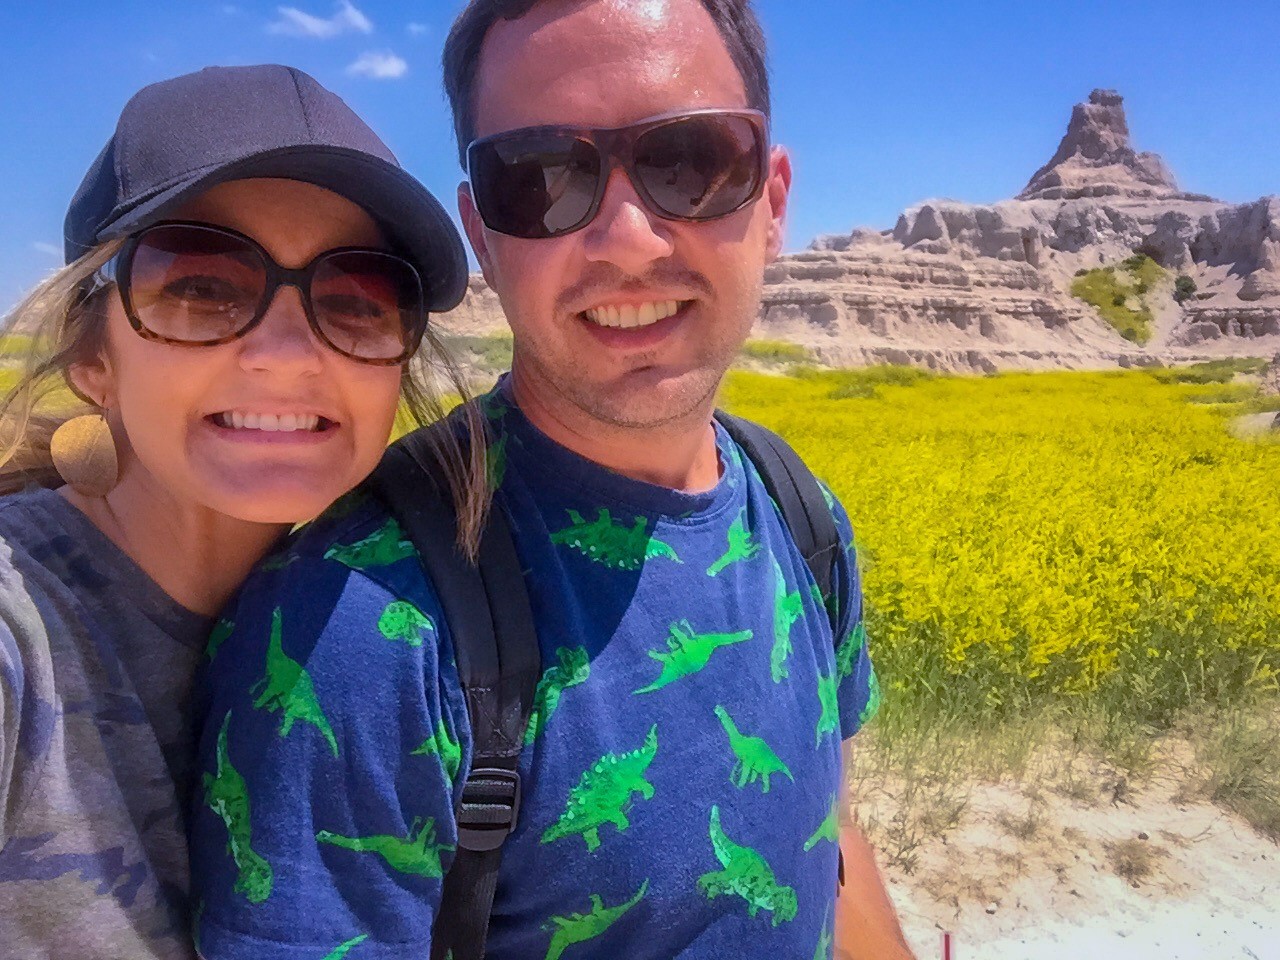
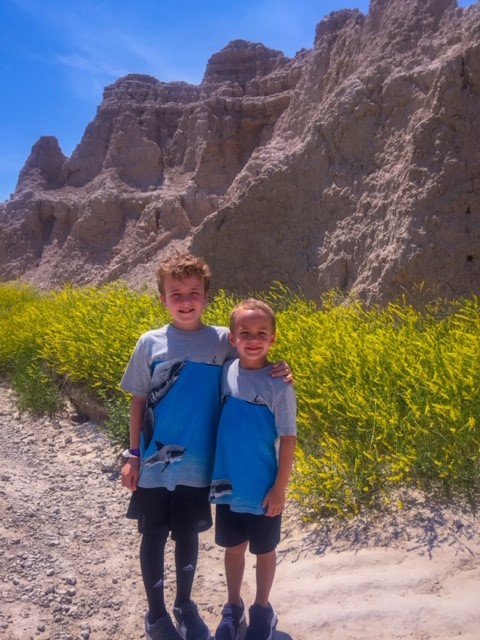
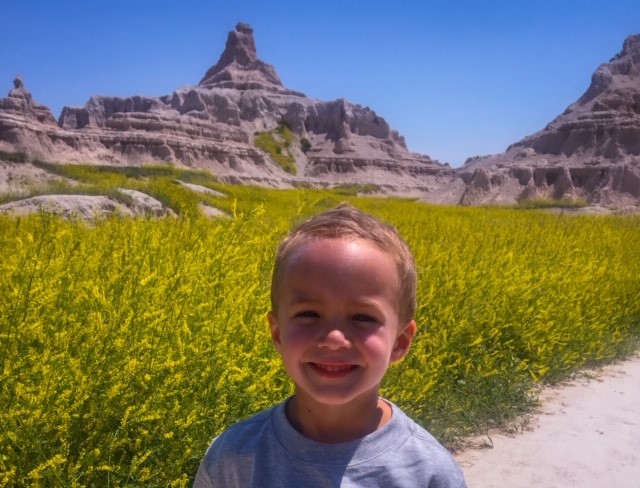
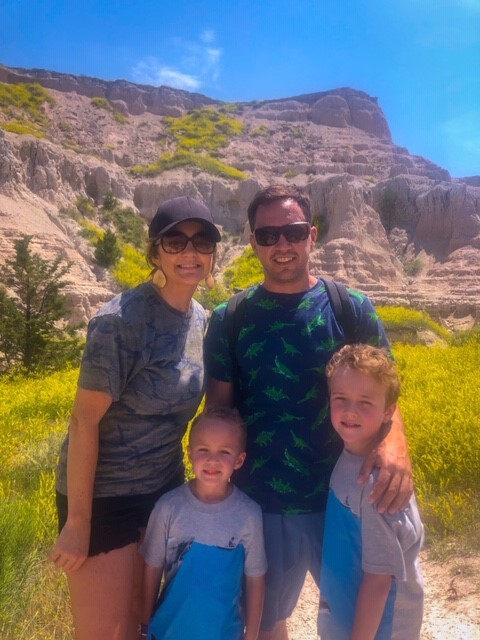
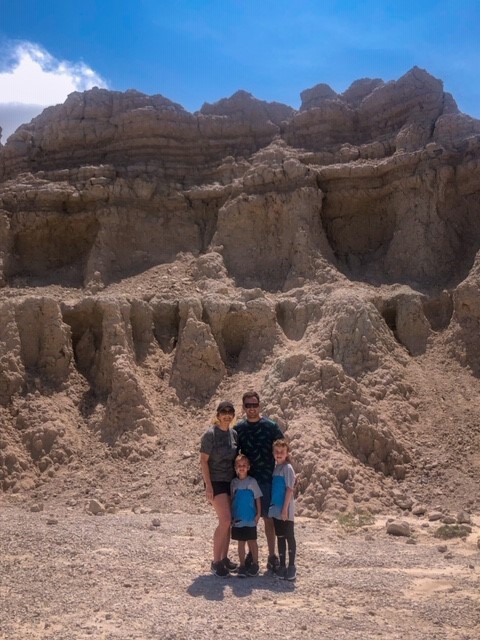
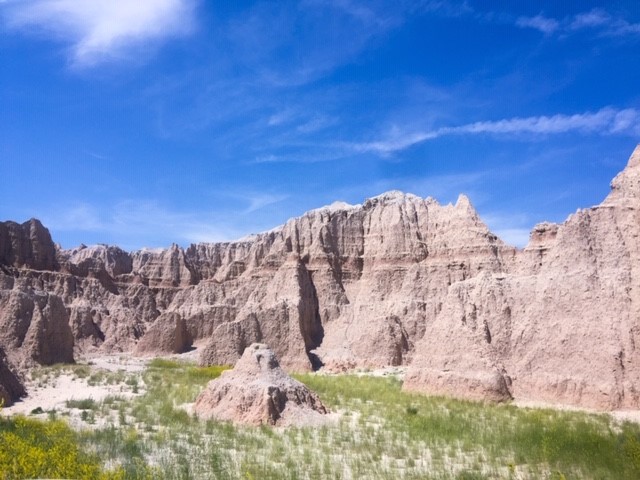
5. Badlands National Park
Badlands Loop Road
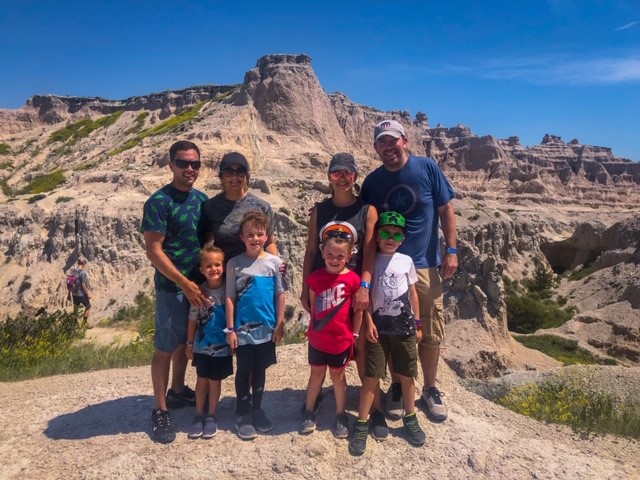
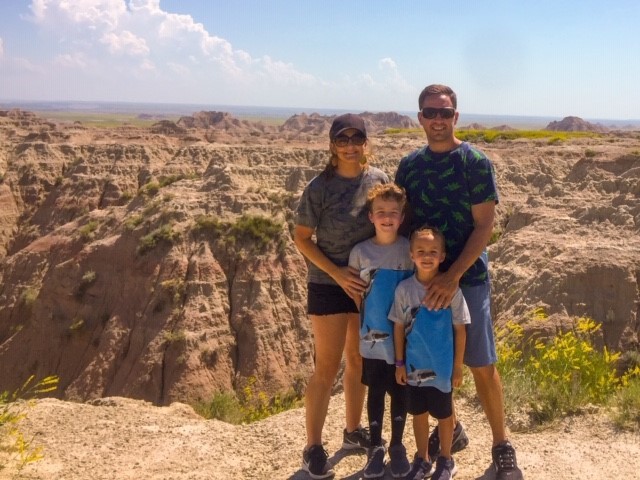
The next National Park that made the list is Badlands National Park in South Dakota. My boys LOVED all of the unique formations (made from gravel, sand, and mud) and hills to climb. This park is hugely underrated and so very unique. There are a lot of short hiking options and this is a great park for a day trip!
We only spent one day here and took advantage of this National Park while we were staying in Rapid City, SD. This is the perfect day trip if you are in the area to see Mount Rushmore! As with all places, there are some pros and cons, but this park has a lot more pros than cons.
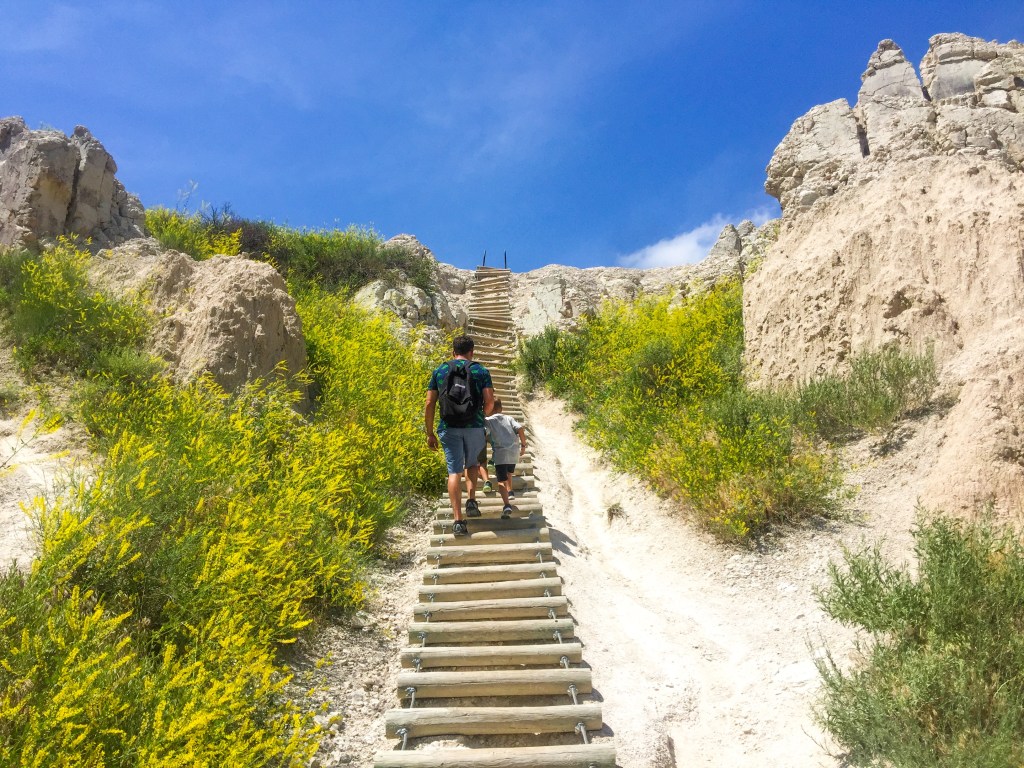
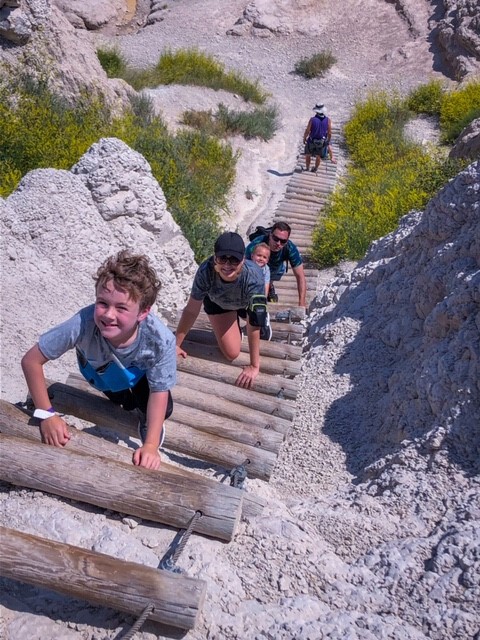
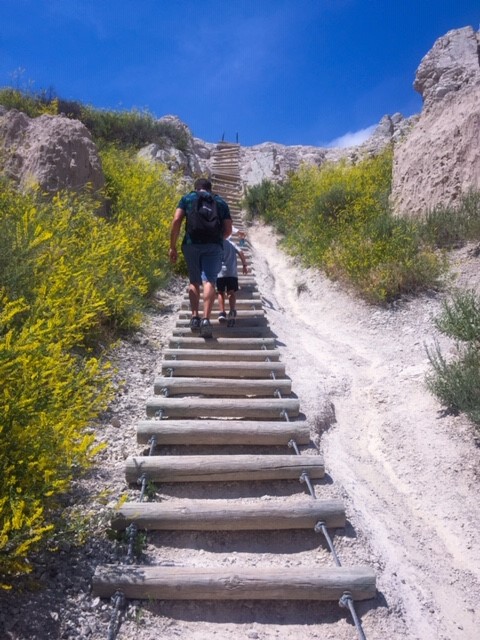
Notch Trail Hike
Pros:
Crowds – This park was not crowded at all when we visited in the summer.
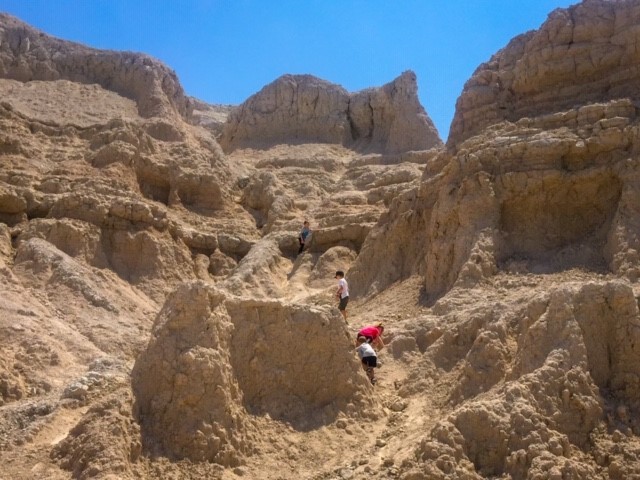
Unique formations and landscapes that the kids loved to explore!
Hikes – Range of skill levels, several are easy/moderate
View – You can see a lot from your car
Great day trip if you are already in South Dakota to see the popular tourist attraction, Mount Rushmore
No reservations needed
Cons:
Heat – It was extremely hot when we visited in the summer
We did not see food/dining options in the park
Click here to read more about our adventures in the South Dakota, which includes more information on lodging, dining, and our full itinerary.
Entrance Fee: $30 per vehicle (pass good for 7 days)
Annual Visitors: 1 million
Best Time to Visit: April – June, September – November
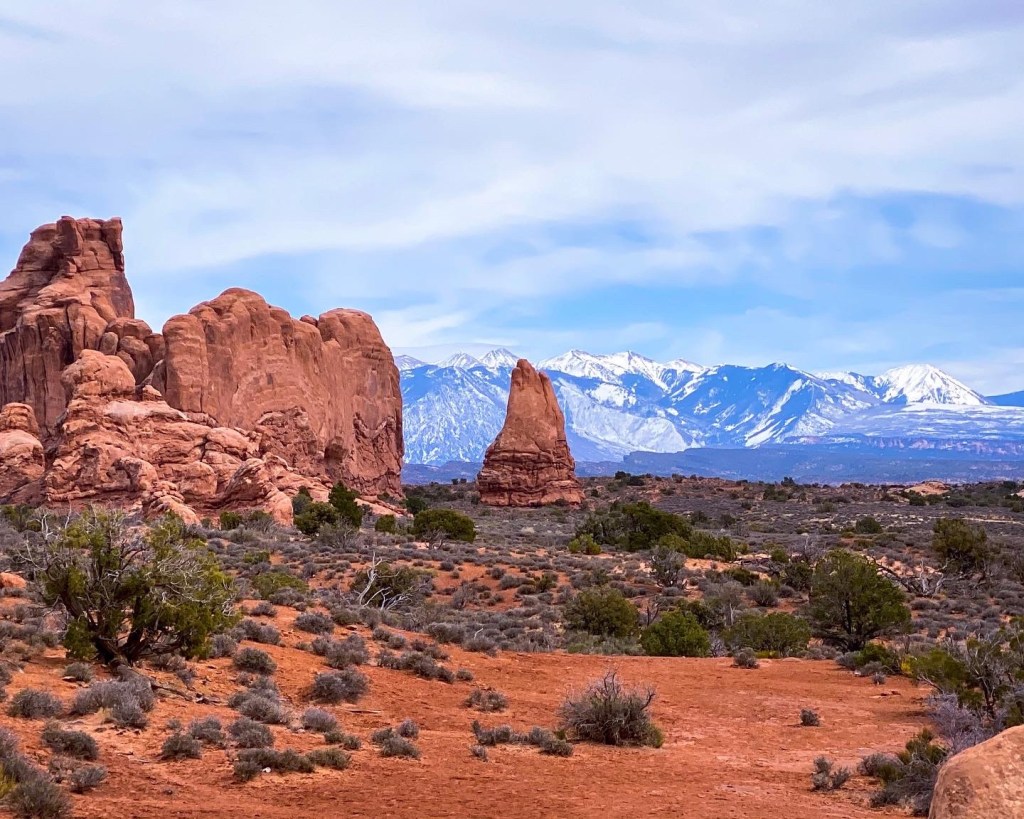
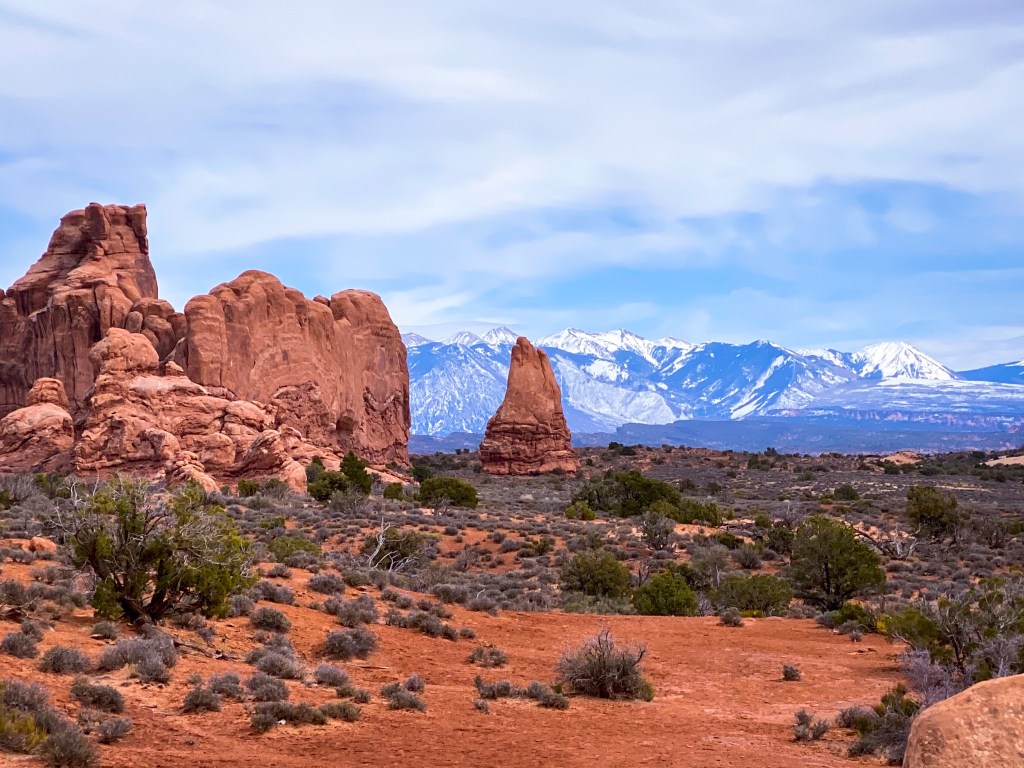
4. Arches National Park
Delicate Arch
These next two National Parks on my list all basically tied because of their close proximity to each other! Arches NP lies just North of Moab in Utah. It is known for having more than 2,000 natural sandstone arches, the most famous being Delicate Arch, along with pinnacles and balanced rocks. The geological formations are so magnificent to see in person. This is a hiker and climber’s paradise!
Our Arches National Park Favorites
Delicate Arch Hike (3 miles roundtrip)
The Arches Scenic Drive (22 miles)
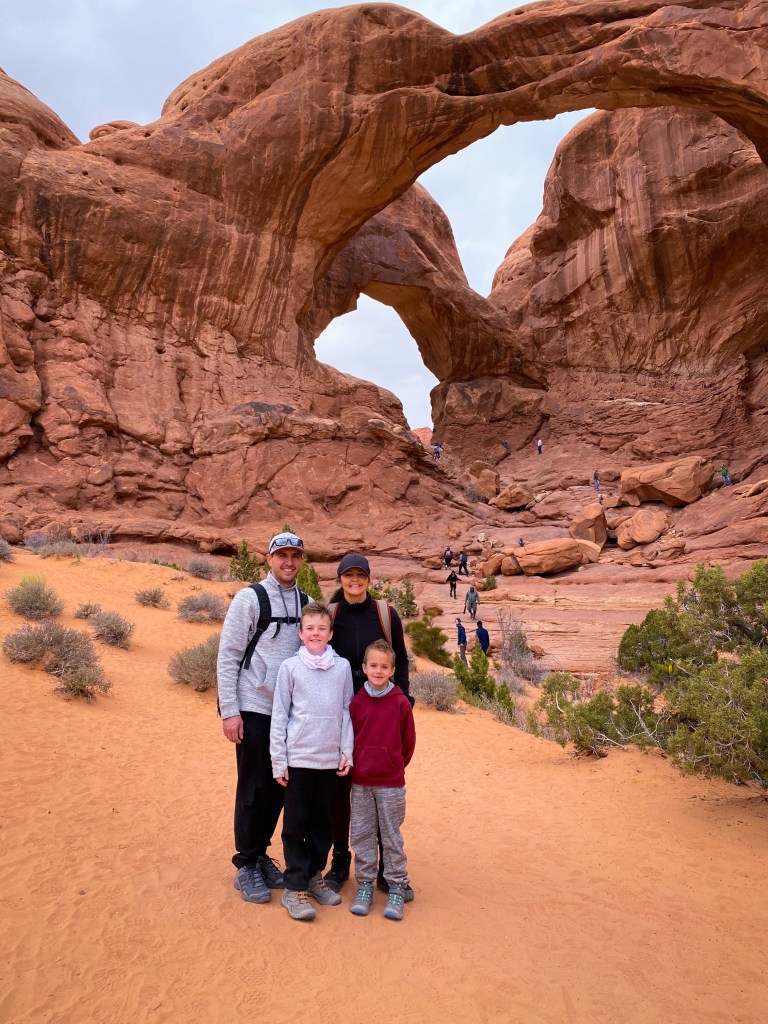
Double Arch (0.3 miles)
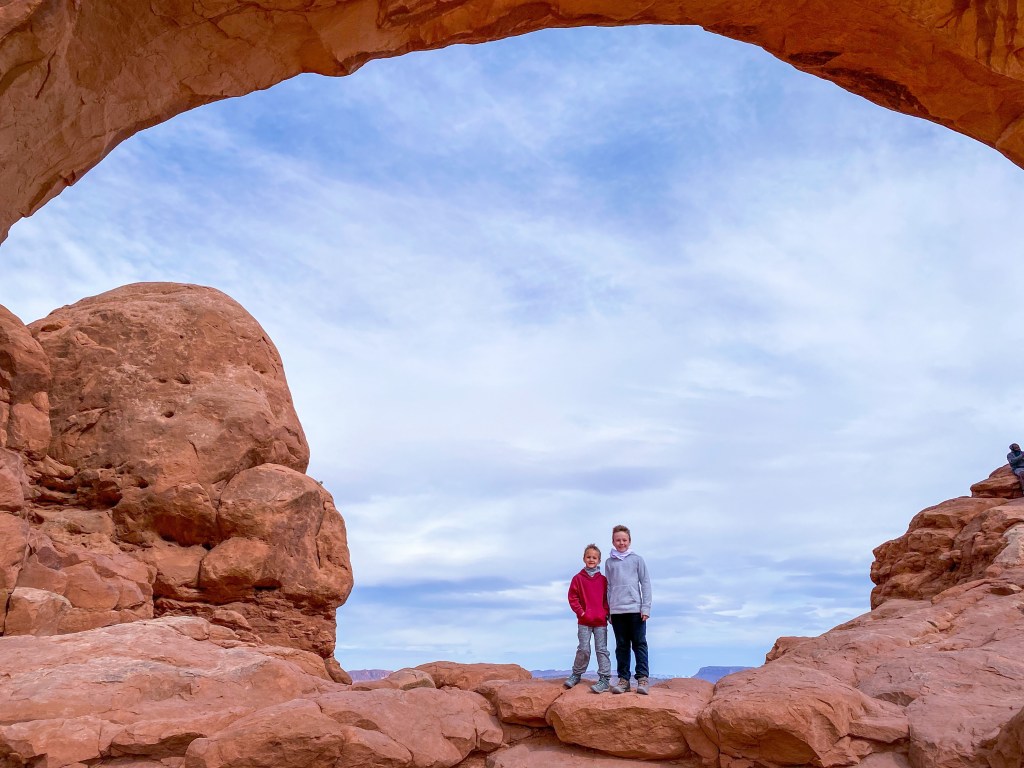
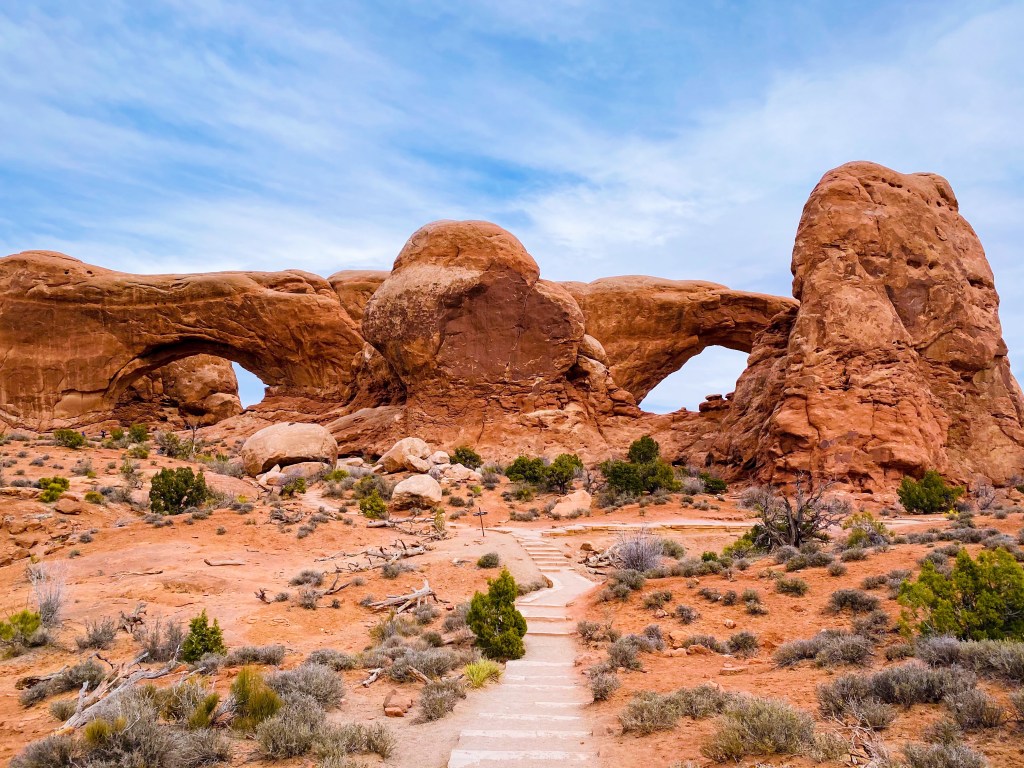
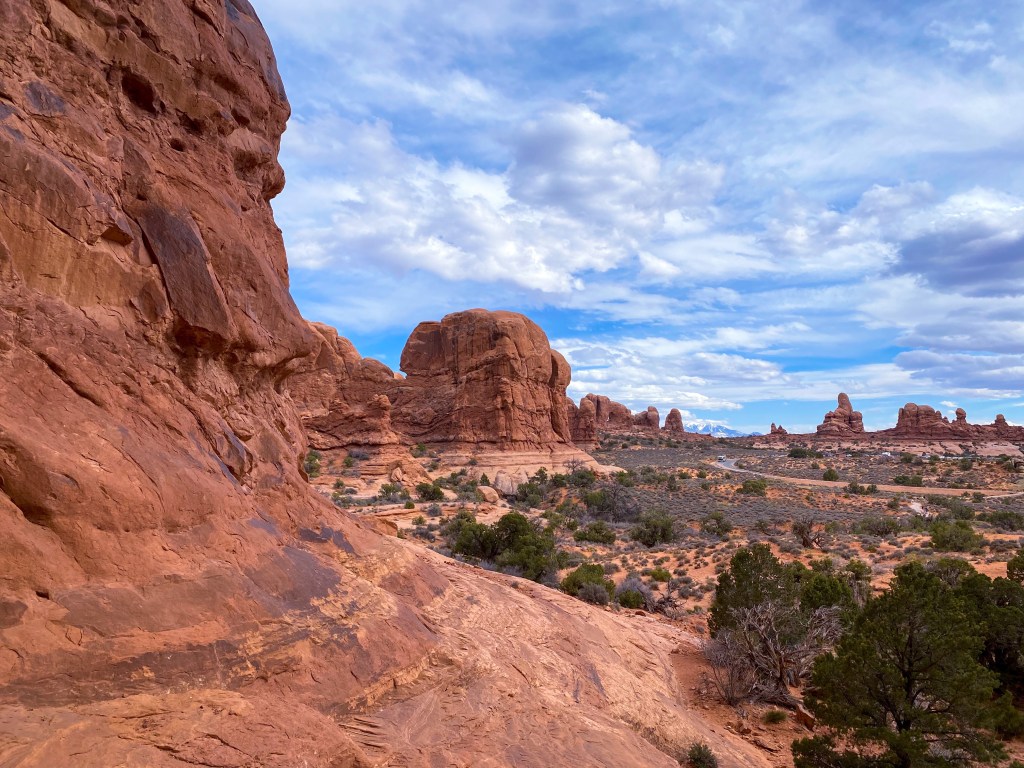
Windows Loop Trail (1 mile)
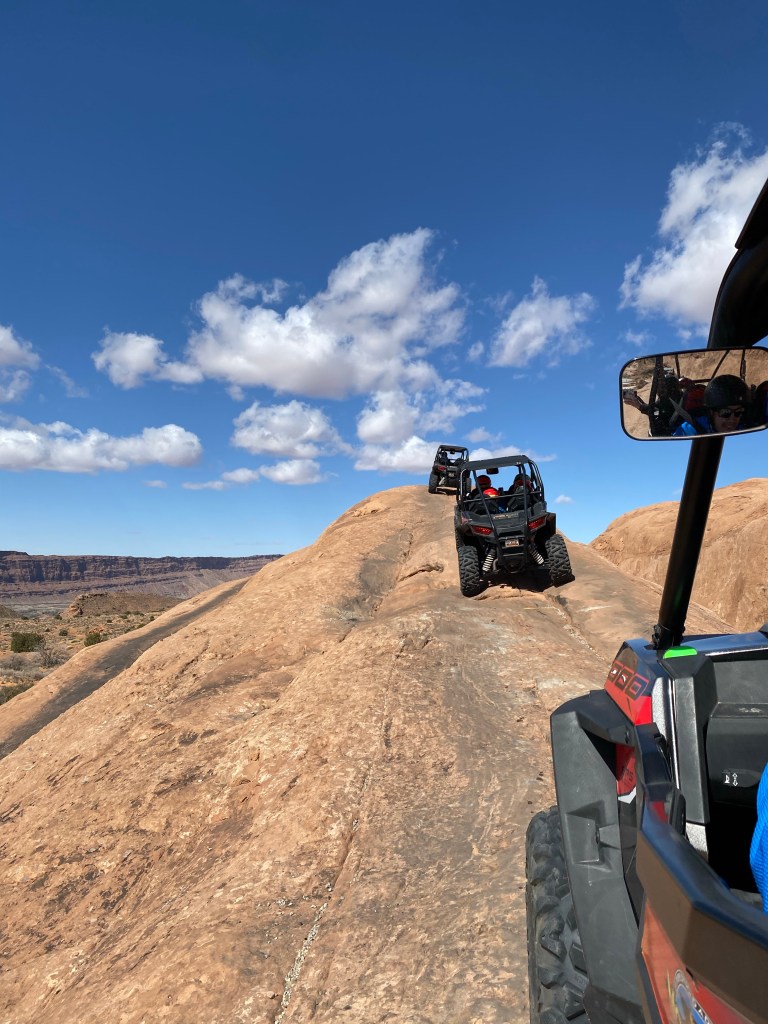
We only spent one full day in Arches National Park, but I would’ve loved to have had more time here. We were in Moab for the week, but had other adventures on the schedule! This is one of my most favorite destinations in the US. Another National Park (Canyonlands) is also in the area, as well as, an amazing state park. We truly loved the town of Moab and had a blast exploring the 2 National Parks in the area and taking a UTV tour in the canyons! If you are looking for awesome views, breathtaking hikes, adventure and more, then Moab, and the Arches National Park area, are a must!
Double Arch area
Pros:
Scenic Drive – you can see a lot from your car if you’re not a hiker!
Views – the whole area is stunning
Hikes – wide range of hikes for all skill levels and abilities
Kids loved it here – there were so many cool places for them to explore and climb
Town – really cool town with lots of dining options!
Adventure – there are UTV, Jeep, and rafting tours in the area
Cons:
Transportation – NO shuttle service inside the park (must use your own vehicle)
Reservation System/Timed Entry Tickets implemented for April 3-October 3, 2022
Temperatures – can be extremely hot in the summer months
Click here to read more about our adventures in the Arches National Park, which includes more information on lodging, dining, and our full itinerary.
Entrance Fee: $30 per vehicle (pass good for 7 days)
Annual Visitors: 1.5 million
Best Time to Visit: April – May, September – October
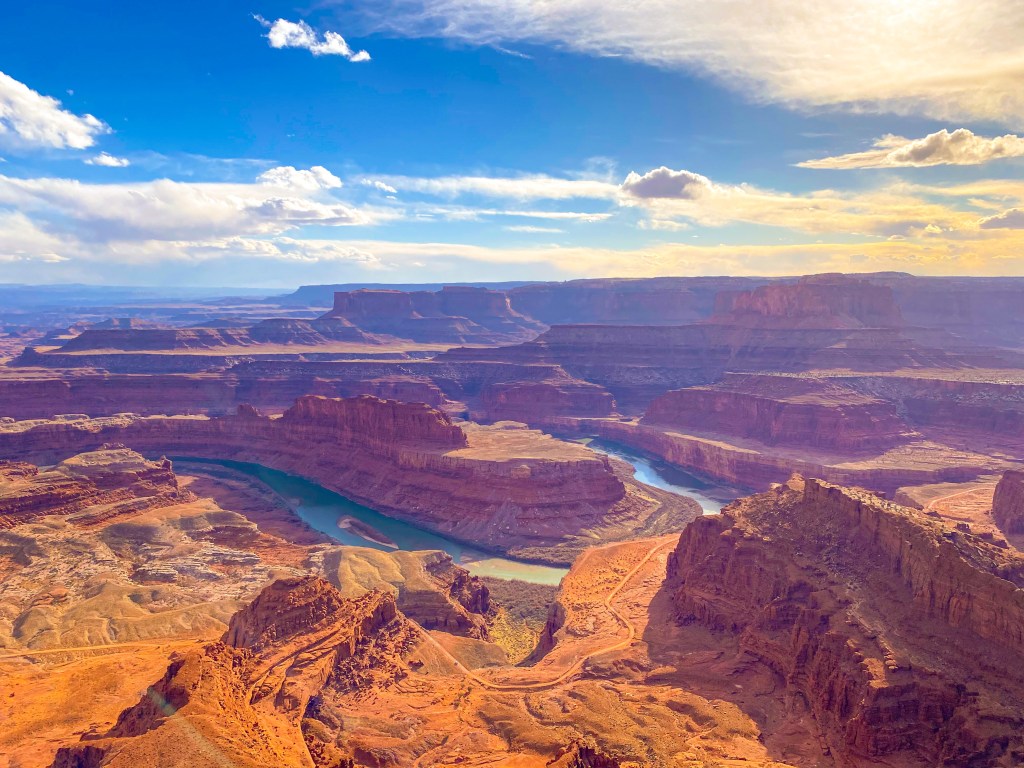
3. Canyonlands National Park
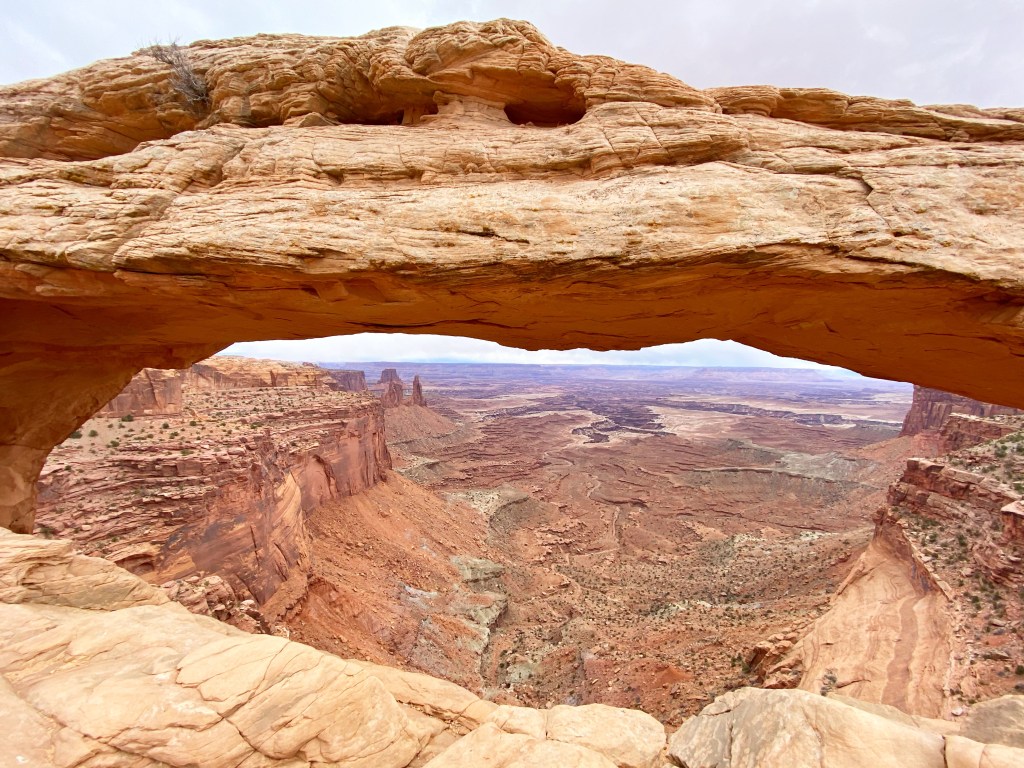
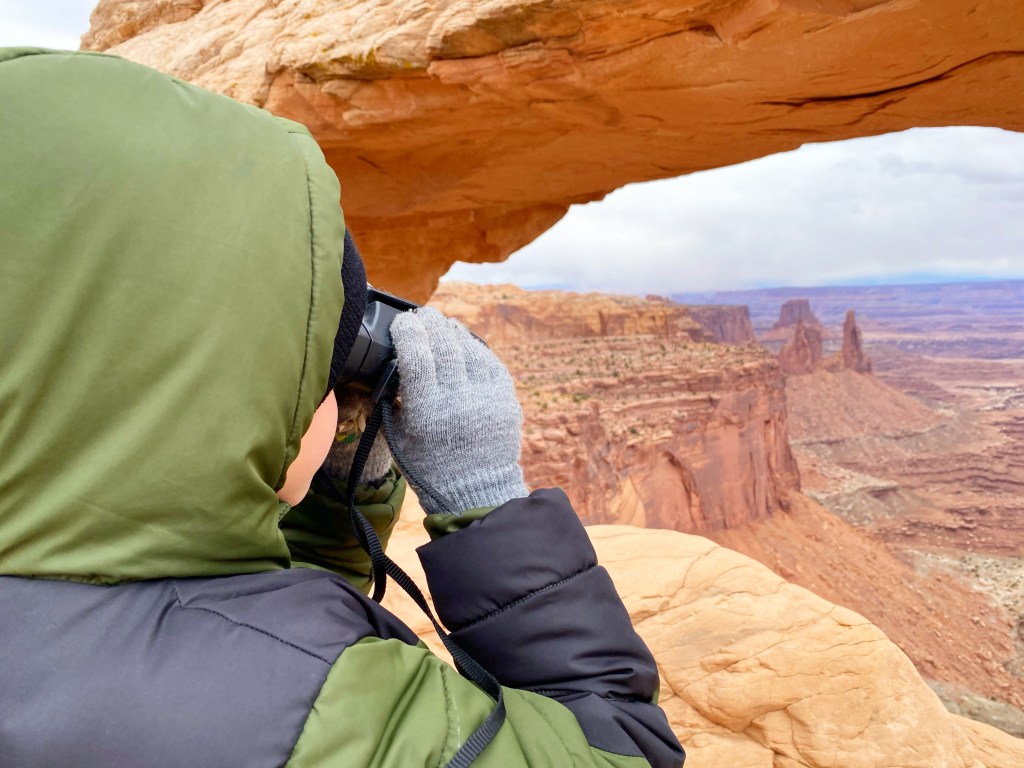
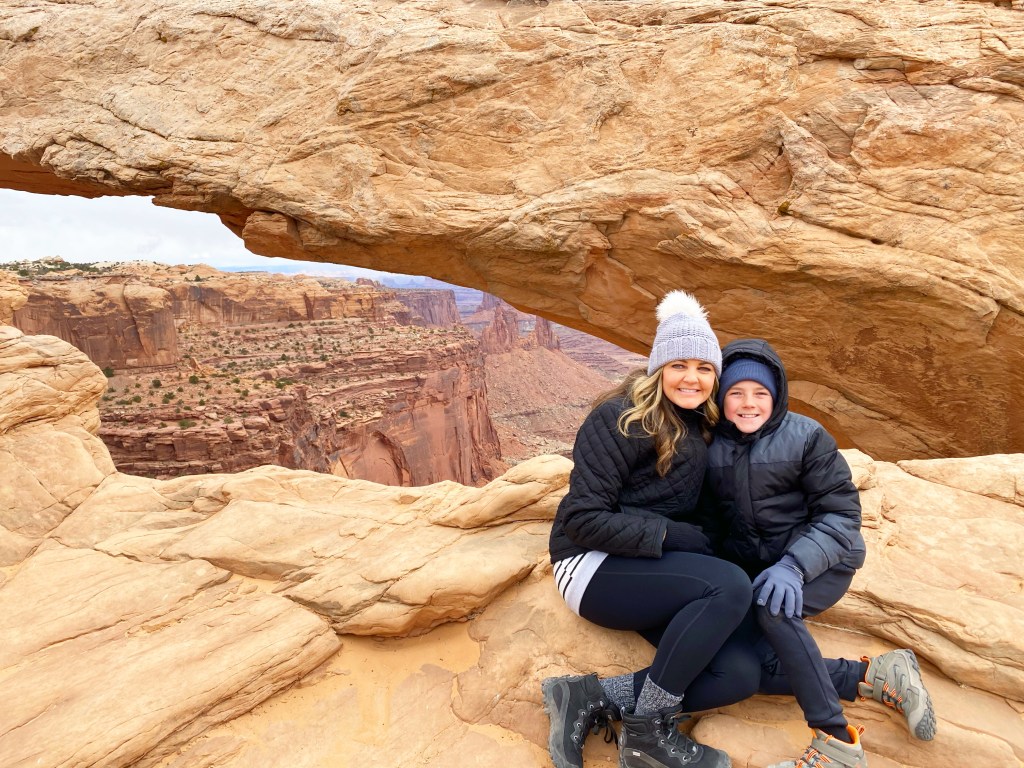
Mesa Arch
Canyonlands National Park is in southeastern Utah, near the town of Moab. This park offers a few different areas with varying features, such as, countless canyons, mesas, ancient rock paintings, colorful landscapes, and towering rock pinnacles. It’s actually the largest National Park in Utah, but is often overshadowed by the more popular parks in the area.
Our Canyonlands National Park Favorites
Island in the Sky District
Mesa Arch Hike (0.5 miles)
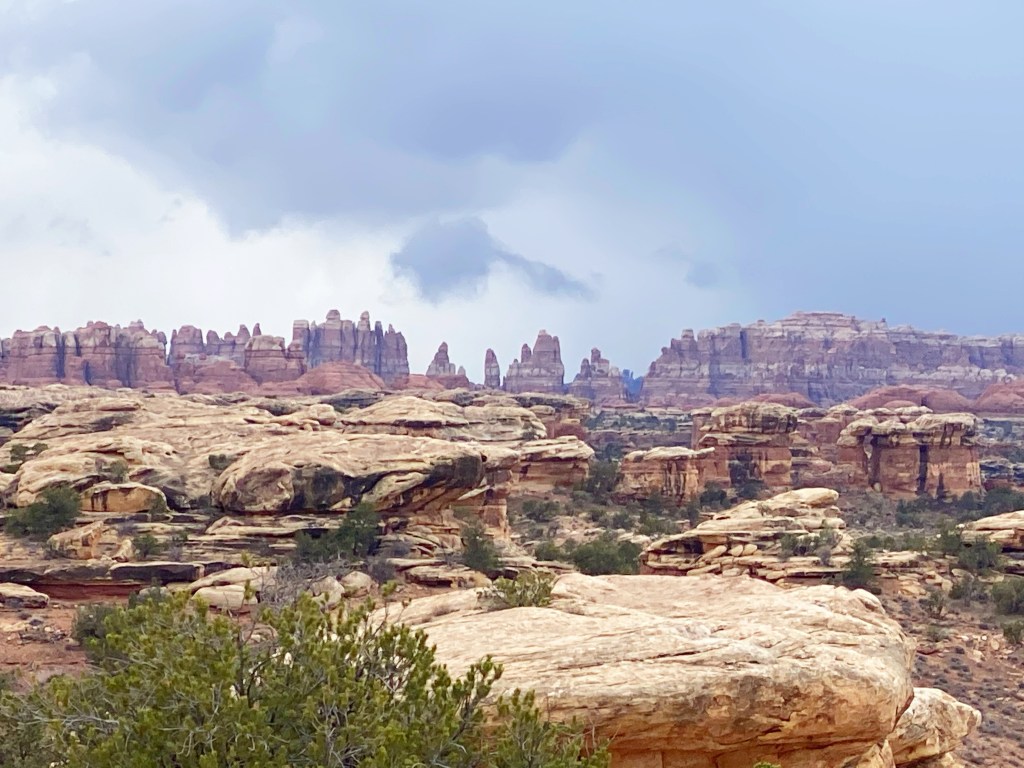
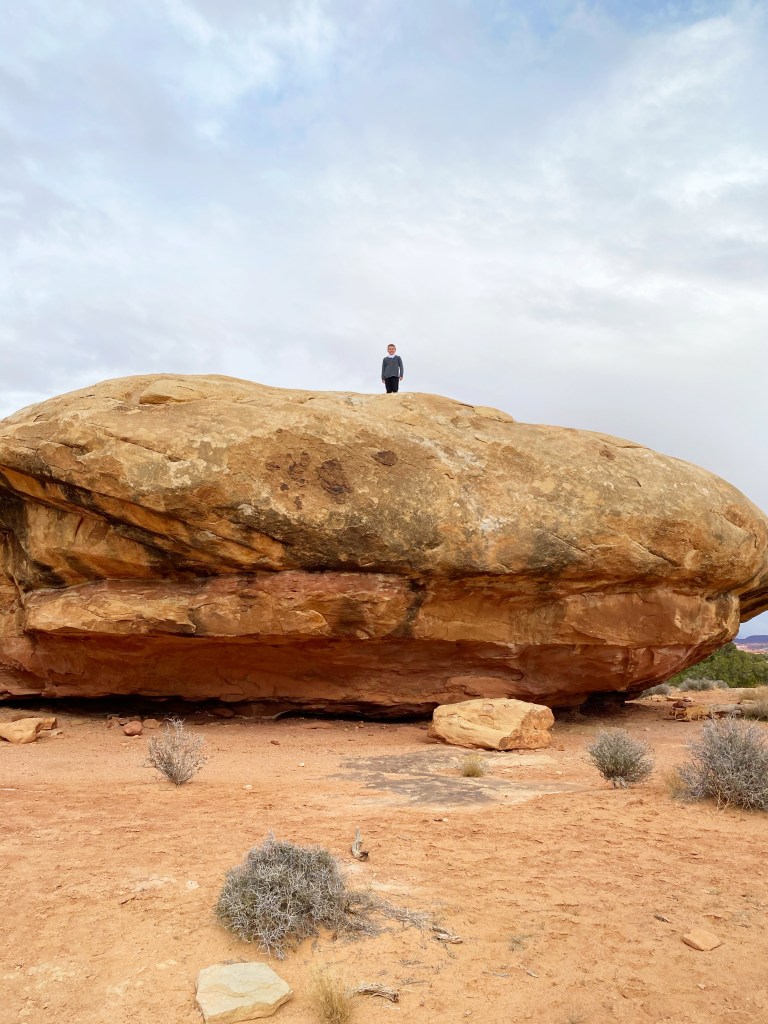
Needles District
Newspaper Rock State Historic Monument
The nearby Dead Horse Point State Park
We visited this Park when we were in Moab, Utah for spring break this past March. We only had a day here and made the mistake of driving between two districts of the Park, The Island in the Sky District and the Needles District. We had no idea that these two areas were several hours apart before we started the drive. It made for a long day, but we still had fun nonetheless! I would suggest to do your research to decide which district you want to visit if you only have a day. If you have multiple days, then plan on seeing one area per day to cut down on your driving time!
Canyonlands Area (near Dead Horse Point)
Pros:
Crowds – there were ZERO crowds when we visited in the spring!
No reservation or timed entry tickets required at this time
Stunning views and hiking trails
Cons:
There are three districts in Canyonlands NP and they are pretty far apart from each other. (2-3 hour drive)
No dining options in the park
Cliff edges can be very intimidating – make sure to keep an extra eye on your kiddos!
Very spotty cell service
Click here to read more about our adventures in the Canyonlands National Park, which includes more information on lodging, dining, and our full itinerary.
Entrance Fee: $30 per vehicle (pass good for 7 days)
Annual Visitors: 400,000
Best Time to Visit: March – April, September – October
2. Redwood National & State Parks
Stout Memorial Grove area
Redwood National Park is in northern California and is home to the world’s tallest trees on Earth! Here you’ll also find prairies, woodlands, rivers, wildlife, and miles and miles of rugged coastline. The National Park Service and California State Parks manage and preserve the lands for us to enjoy.
Our Redwood Favorites
Humboldt State Park – Avenue of the Giants
Humboldt State Park – Tall Tree Grove
Jedidiah Smith State Park – Stout Memorial Grove
Nearby Crescent City Beach
We just recently visited this National Park over our spring break, and man were we amazed! I have never seen trees so large in my life! My pictures absolutely do not show the perspective of the size, but believe me, they were massive! My boys had the best time hiking, climbing, and exploring.
Stout Memorial Grove
Pros:
Crowds – we saw a total of maybe five other people in the Parks over two days. I am not sure if this is because we visited in the spring, but it felt like we were the only people there.
The sheer beauty of the forests and the size of the trees are something I think anyone can appreciate!
This park was free to get into!
Proximity to the beach!
Cons:
Distance from a major city – these parks are not very close to a large city with an airport. Be prepared for several hours of scenic driving from the nearest airports.
Carsick – I got extremely carsick on the drive. There are so many winding roads over mountains. Be sure to bring Dramamine if you suffer from motion sickness.
Check back soon to read more about our visit to Redwood National Park!
1. Rocky Mountain National Park
Emerald Lake
Coming in at number 1 is Rocky Mountain National Park! RMNP is in northern Colorado and here you will find stunning mountain peaks, forests, the alpine tundra, aspen trees, rivers, waterfalls, lakes, and an assortment of wildlife for your viewing pleasure! There’s also 355 miles of hiking trails for all skill levels.
Our Rocky Mountain National Park favorites
Emerald Lake Hike – 3.6 miles roundtrip
Alberta Falls Hike – 1.6 miles roundtrip
Sprague Lake – 0.5 mile loop
Trail Ridge Road
We visited RMNP over the summer last year and had the most amazing trip! This park has inspired us to specifically plan destinations and road trips to other National Parks across the country. I feel like there is something for everyone here, whether you’re an avid hiker ready to conquer a mountain or just want to drive through the Park and witness the views and wildlife from the comfort of your car. If you get the chance visit, take it! I promise you won’t be disappointed!
Along the hike to Emerald Lake
Pros:
Wildlife – Abundance of wildlife that you can view, even from your car!
Convenient location – We enjoyed the town of Estes Park
Sheer beauty of the mountains and entire landscape
Cons:
Timed entry tickets required for summer visits (between May-October)
Crowds – it can be extremely crowded in the summer
Bathrooms – some of the worst Park bathrooms we have ever seen… or smelled!
Entrance Fee: $35 per vehicle (pass good for 7 days)
Annual Visitors: 4.5 million
Best Time to Visit: November – April
Click here to read more about our visit to Rocky Mountain National Park!
Every Kid Outdoors Pass:
Did you know that all 4th grade students are eligible to get an Every Kid Outdoors pass that allows free entry to America’s National Parks? Not only does your 4th grader get in free, but so does your entire vehicle! Be sure to click here if you have a 4th grader to get more information and to register for your student’s free pass! We took advantage of this pass last year and were able to visit 3 National Parks for free!
America the Beautiful Pass:
Now that our child is older, he’s not eligible for the Every Kid Outdoors pass, so we decided to go ahead and purchase the American the Beautiful pass for $80. We have plans to visit several Parks this year, so it will actually save us some money and time in line! Click here to learn more about this pass!
Thank you for taking the time to read this information! Be sure to follow the blog our travels on Instagram!
Wow! What an amazing road trip we had from Texas to Moab, Utah! We just returned from a spring break getaway that went by way to fast. I am already looking forward to the next time we get to visit this state. It is hard to adequately describe the landscape and the pictures definitely don’t do it justice!
My family at Delicate Arch
Did you know that 4th graders get a National Park Pass that gets the entire family into ALL National Parks for free? It has also been extended to 5th graders this year, so be sure to check out this link if you have a 4th or 5th grade student!
Jett with his National Park Pass!
I posted most of our itinerary on social media and several people have reached out to me asking for exact details on our route and how we planned out our days. I hope this post helps you plan your own trip – it’s a fantastic itinerary if you have kids under 10.
Day 1: We started our drive from North Texas and headed to Farmington, New Mexico for the night. It took about 13 hours total, the time change gaining an hour helped out immensely! We stayed at a nice hotel, TownePlace Suites by Marriott and it was in a great location next to a gas station and several restaurants. We were able to walk to The Outback Steakhouse for a quick dinner before getting ready for bed.
Texas to Farmington, NM
Helpful Tip – If I know we will be stopping overnight to stay at hotels during our drive, I pack a smaller suitcase for those nights so we don’t have to haul all of our luggage in and out. I also use packing cubes to keep our clothes situated!
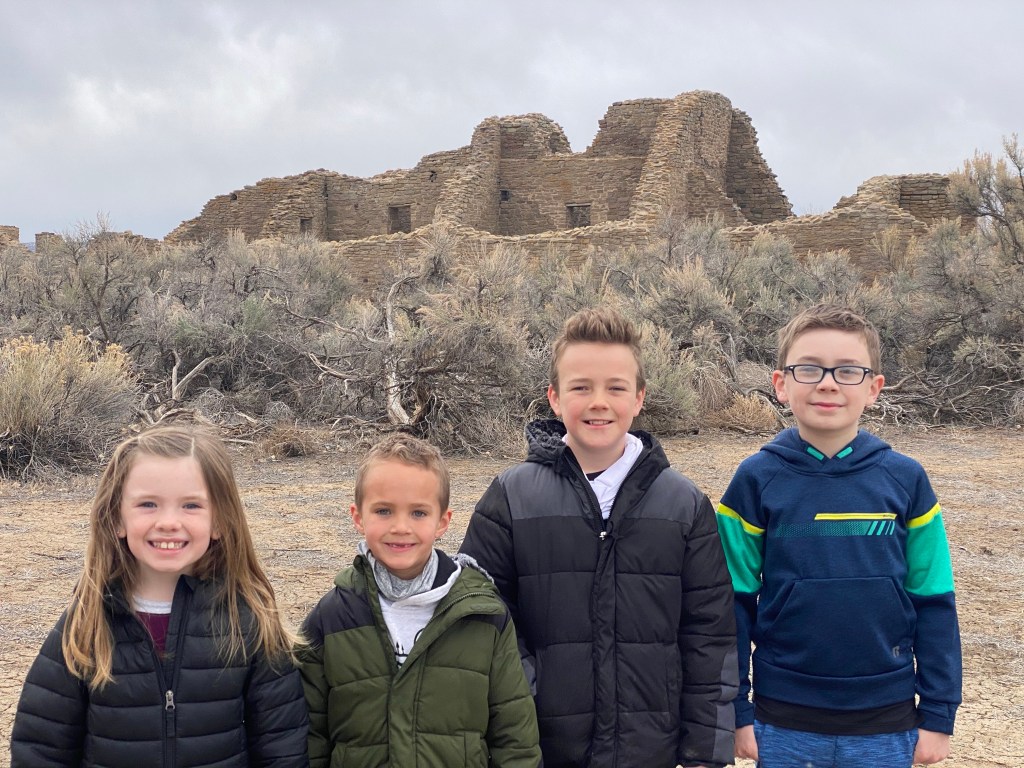
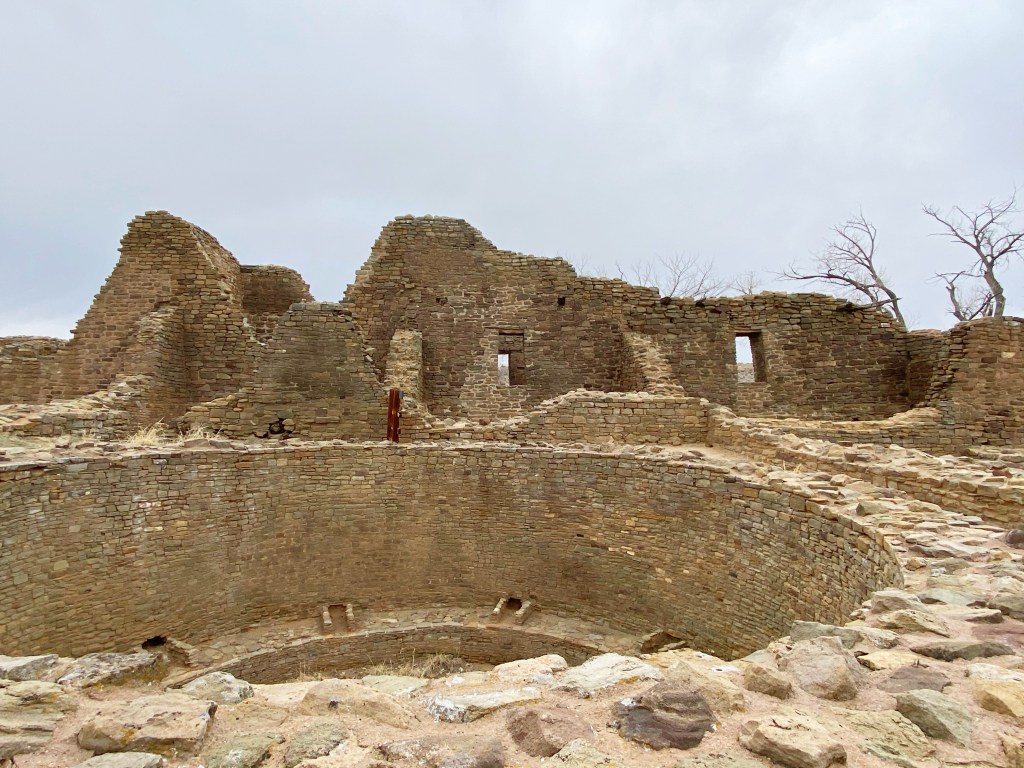
Day 2: We checked out of the hotel and decided to visit the Aztec Ruins National Monument near Farmington. This was a quick stop but it was really neat. My boys loved the prairie dogs that were outside of the park. Inside the park you are able to take a self-guided tour around the ruins. A park ranger on site told us that these ruins aren’t actually from the Aztecs, but from the Pueblos that lived there. They were named Aztecs Ruins long ago and the name just stuck. The ruins were really cool and this was a great way for the kids to burn up some energy before getting back in the car.
The Aztec Ruins behind the kids
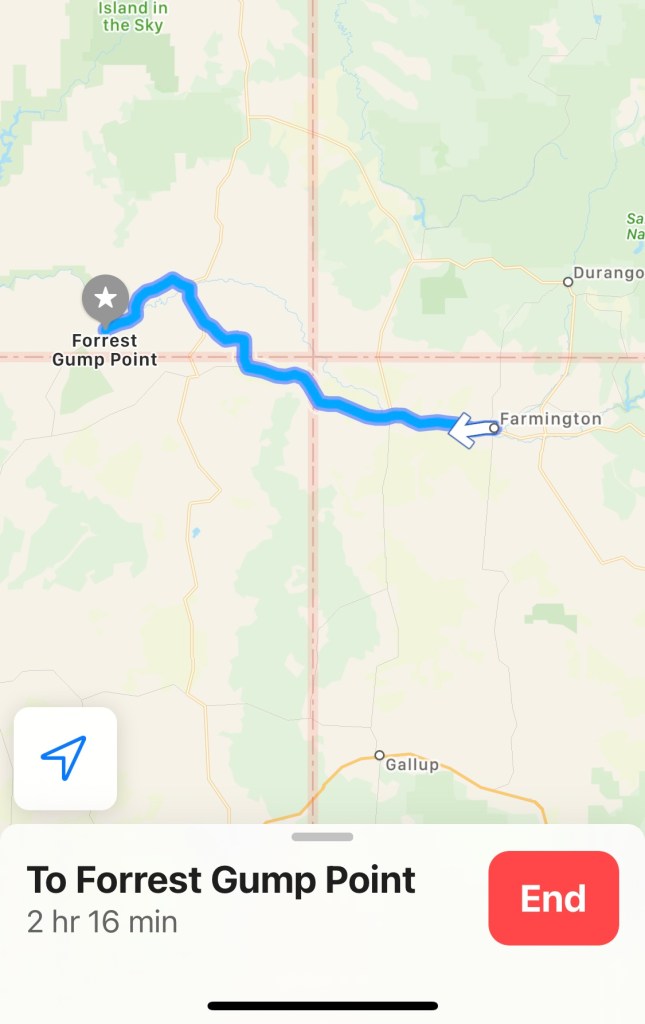
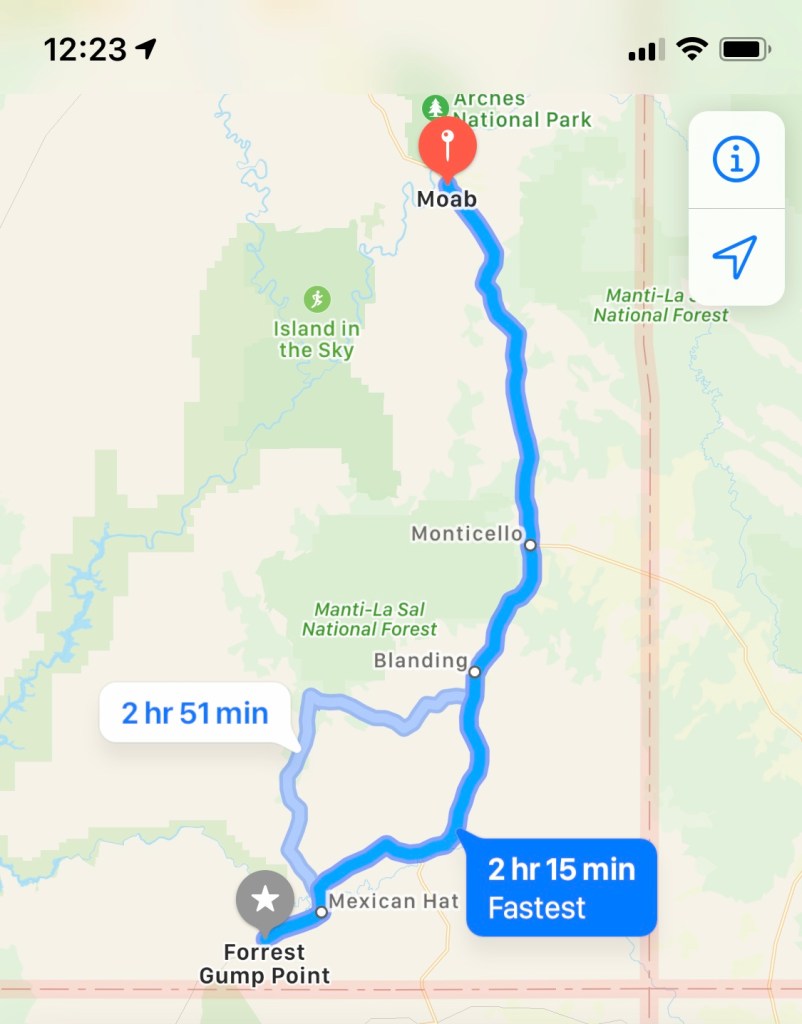
From here I put in “Forrest Gump Point” into my GPS. It’s about 2 hours 15 minutes to this location. It is the iconic place in the movie where Forrest Gump stops running, right near Monument Valley. If you notice, this route takes you through Arizona, so that was an exciting bonus! Monument Valley is currently closed, as is Four Corners.
The Route from Farmington, NM to Forrest Gump Point
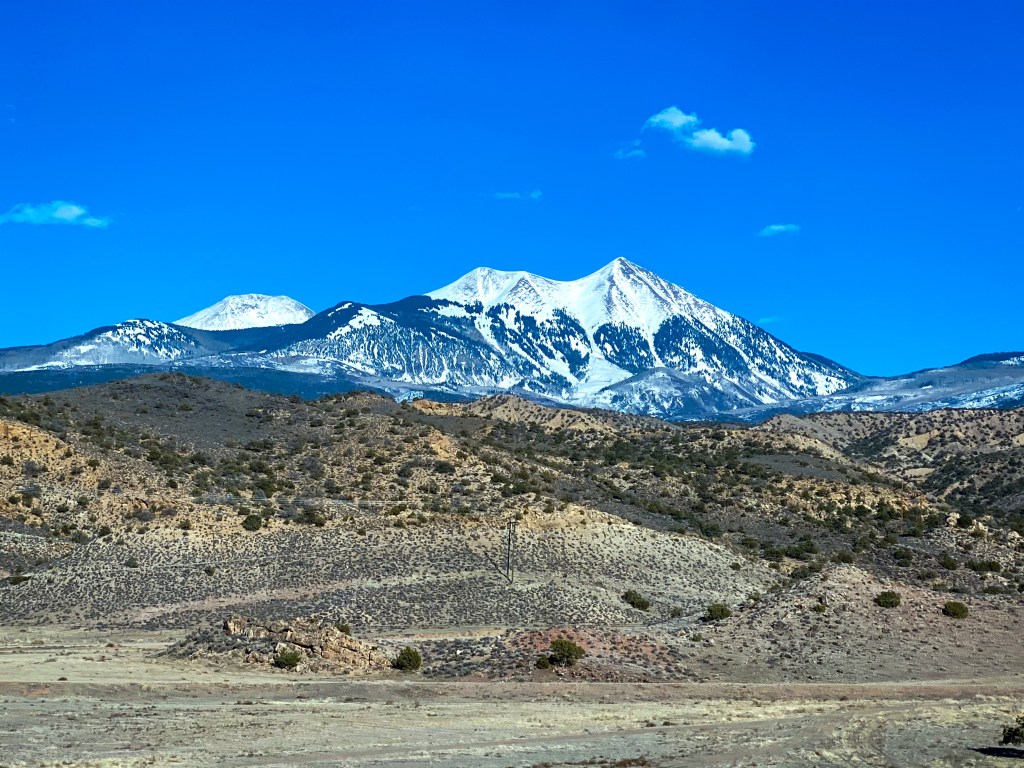
But these are places that you can definitely check out when they open back up! We were able to see Shiprock Peak, a gorgeous peak that has been the backdrop of several movies. I read online that this is sacred ground and you can’t actually get to it, but we stopped as close as we could for a photo op. You can put Shiprock Monument into your GPS if you want to try to get closer to the peak.
Shiprock Peak
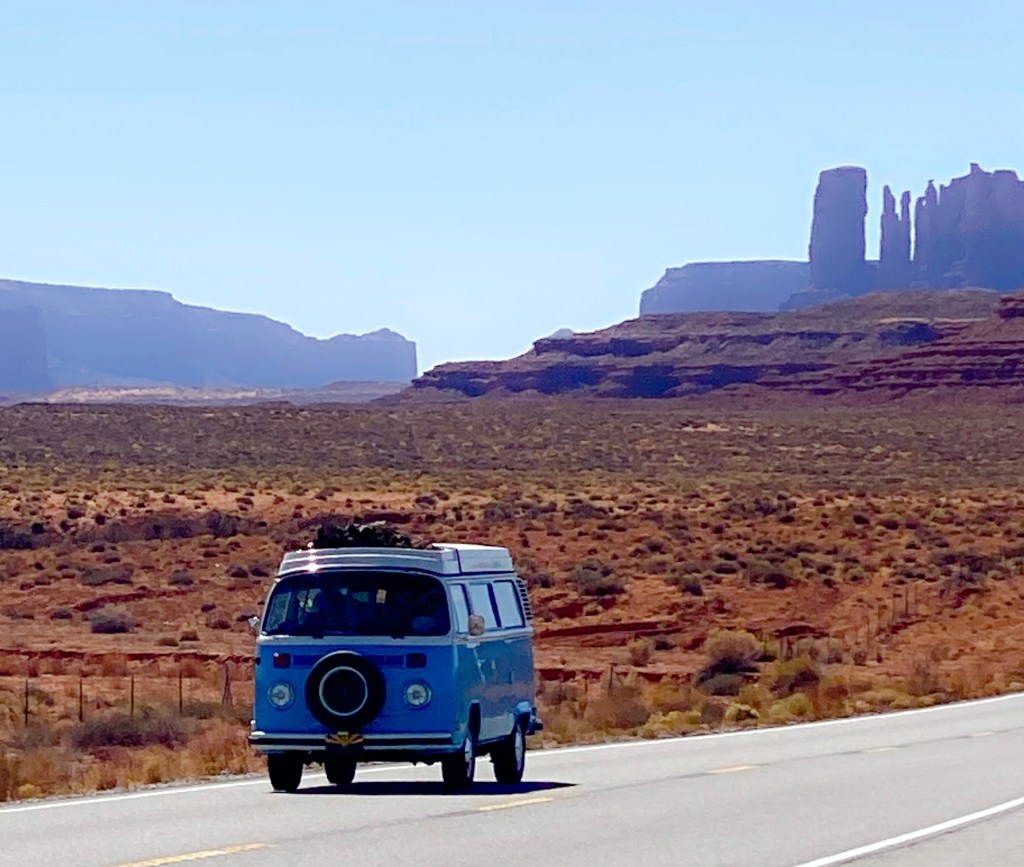
After a quick photo at Shiprock, we continued our drive to Forrest Gump Point. The scenery is amazing and the pictures below don’t do it justice. I was so excited to see Monument Valley and love the family photo we were able to get!
Forrest Gump Point
There are not a lot of places to eat or even gas stations along this route, so be warned! We were starving and had to wait about 30-45 minutes to find a restaurant in Bluff, Utah to stop at. Luckily we pulled in right before The Twin Rocks Trading Post Cafe was closing at 3:00. We didn’t see a kids menu, but ours had no problem having street tacos and quesadillas! It was a very nice place to eat with both indoor/outdoor dining.
Finally after leaving the restaurant, we were headed to Moab for the week. Again, the sights were beautiful which made the long drive worthwhile.
Forrest Gump Point to Moab, UT
We stayed at the Hyatt Place Moab and found the hotel very accommodating. Rooms were cozy, the breakfast grab and go bags were great, and the kids loved the outdoor heated pool and hot tub. I would definitely stay at this place again, the location was great and the staff was very friendly and helpful. The breakfast provided was an egg and sausage breakfast bowl and it also included a boiled egg, yogurt, muffins, and juice/milk/coffee. We even packed the boiled eggs in our backpacks and had them for a snack during our days of hiking! For dinner in Moab, we ate at The Broken Oar and I had a steak and mashed potatoes that were delicious!
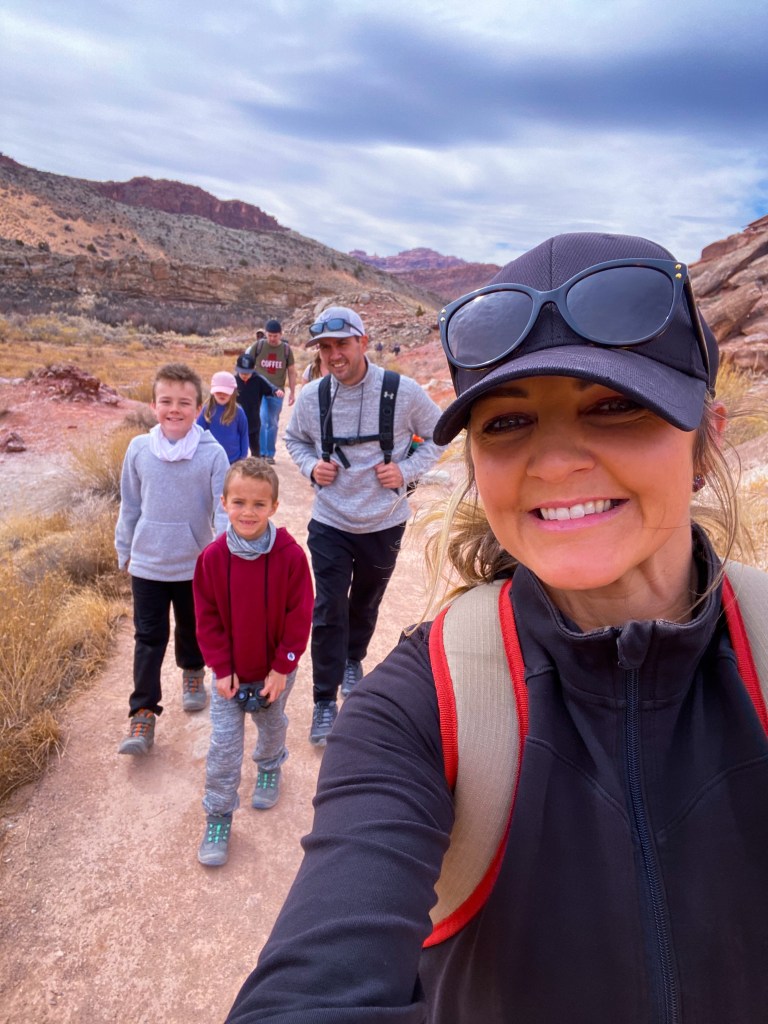
Day 3: So day three was our first day in Moab and we decided to spend the day hiking at Arches National Park. I had to see the Delicate Arch, so that was our first hike for the day. I kept a close watch on the live webcam at the ticket area, and never saw long lines to get into the park. We arrived around 10 am. I am sure it’s much busier during the summer. This was our first visit to Utah, so I didn’t really know what to expect at the park. But it ended up being super easy! Take the map that is offered to you at the ticket area. The park has signs along the way and we were able to find the Delicate Arch hike fairly easy and we enjoyed the sights along the way. What I love about this park is that even people that can’t hike can enjoy almost everything! There are places to pull over and view the famous landmarks or you can park and hike to them. We knew that the hike to Delicate Arch would be the longest and hardest of the trip so we started there first. I am not going to lie, it was pretty hard in one part that is a very steep incline. The rest is fairly easy and the walk back down was no trouble at all. The kids did great and we saw people of all ages and ability levels able to do this one. And I promise that the view at the end is amazing! I also loved that everyone waited turns to take photos under the arch and we all offered to take photos of each other. I am so happy to have these memories of my family.
The start of hike to Delicate Arch
We left the Delicate Arch and stopped in a shady area to have a quick lunch. We packed sandwiches we got from the hotel store and our extra leftovers from breakfast. The temps were in the 60s so it was very comfortable. It was extremely windy the closer we got to the arch though. The kids got a chance to eat and play a little, then we made our way back down. Be sure to check out the petroglyphs before you leave the area!
Our lunch stopThe petroglyphs
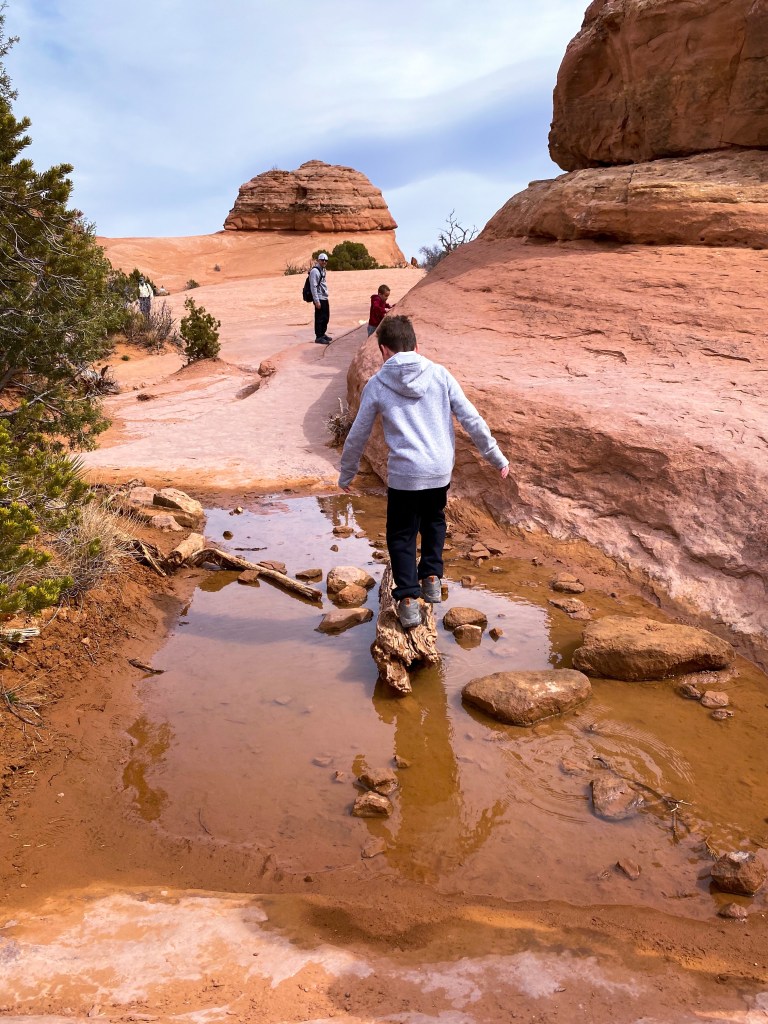
From here, we drove over to the double arch and this was a very easy and short hike. My boys loved exploring the arches and the rocks at the bottom. Restrooms are located at most of the parking areas before hiking so that was helpful, too. We had such a good time hiking and climbing and playing in this area. It was so much easier to explore than the Delicate Arch hike. In all, we hiked 6 miles/64 flights on this day! We decided to leave around 5:00 pm and headed straight to dinner. We ended up going to The Moab Brewery and it was also delicious! But be warned, a lot of their food is very, very spicy if it has their green chili on it! The kids loved that their kids meals came with a Frisbee plate! We ended the night in the hot tub, soaking all of our sore muscles.
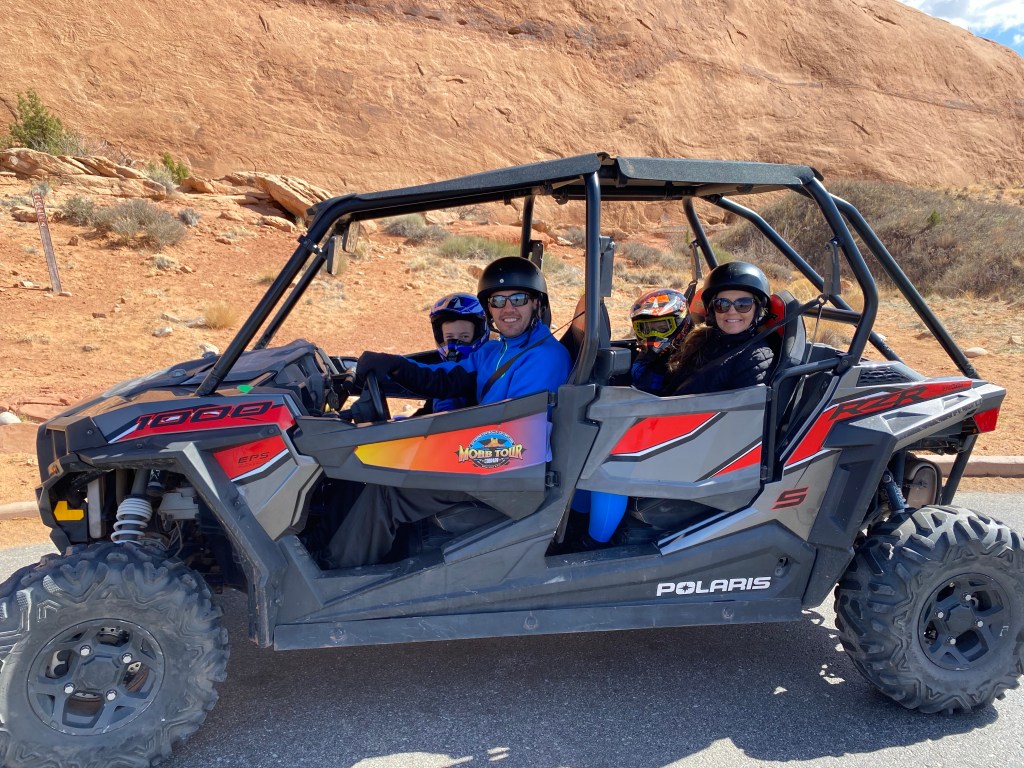
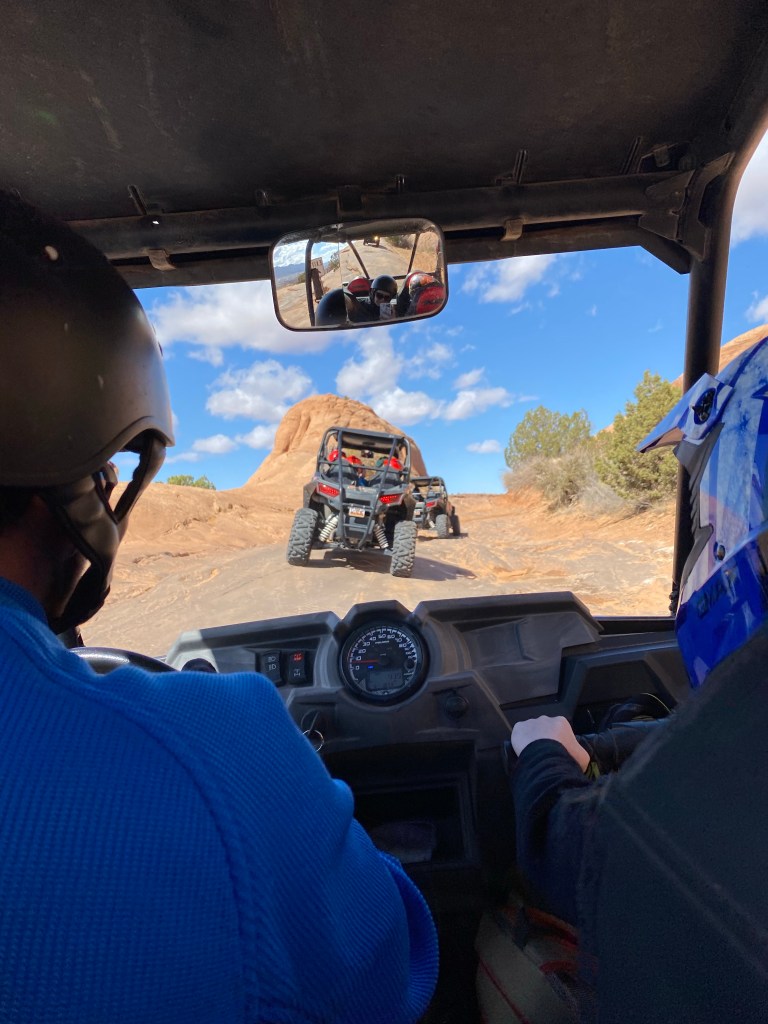
Day 4: Today we booked a guided UTV excursion with Moab Tour Company. We decided to go with their most popular tour which was a level 2, 3 hour UTV trip on Hells Revenge and Fins & Things trails. It was EPIC! We loved our guide, Tyler. He was super funny but also made us really comfortable. He took us to see several gorgeous places in the Sand Flats and took photos of our family. We also got to check out some dinosaur tracks. The trails were pretty intense in places, but so much fun! I can’t recommend this tour enough. Our kids loved it, but my husband probably had the best time getting to drive the UTV! For lunch, we stopped at Zax, which was downtown. We passed it on our ride and it looked like it had a lot of options. I had a delicious steak pasta, my husband had pizza, and the kids had burgers and mac and cheese from the kids menu.
The trails were epic! Look at that view!
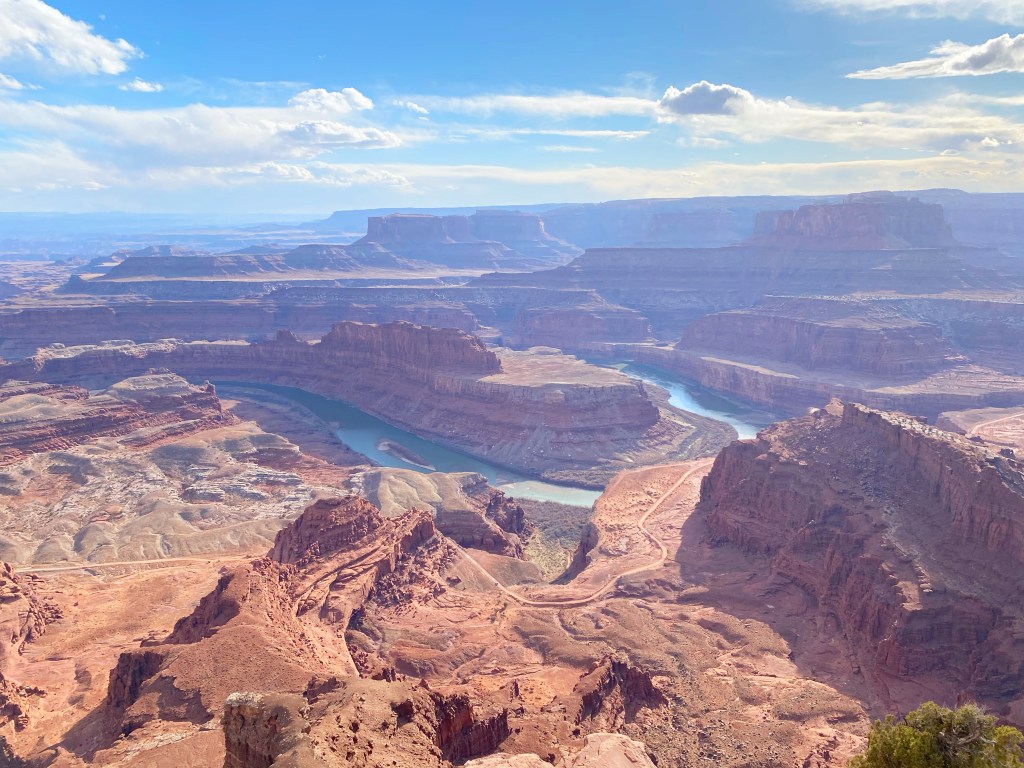
After our UTV ride, we decided to go check out Dead Horse Point State Park. This is another place that is stunning and the pictures don’t do it justice. We checked out all of the overlooks, which meant that we didn’t have to do a lot of hiking. Just hang on to your kids, some of the overlooks were crazy! The kids had a really good time just exploring and climbing on rocks and into small crevices. We ended the night with fast food and time at the pool!
Dead Horse Point State Park
Day 5: This was our last full day in Moab before our journey home. We decided to spend the day in Canyonlands National Park, which is very close to Dead Horse Point State Park. We enjoyed some of the smaller hikes, like the one we did at Mesa Arch. If you have kids, make sure they don’t run up to the arch, there’s a steep drop-off right past it!
Right at the edge of Mesa Arch
The hike to Mesa Arch was a very easy and short loop with lots of nice views! This park is a little bigger than we thought and was a little more confusing for us to maneuver.
We started at Canyonlands near Dead Horse Point and then wanted to see The Needles area. Little did we know that these two parts weren’t close to each other and it took us about 2.5 hours to get from one area to the next via car. The views were totally worth it, but it felt like we spent a lot of time driving. We did get to see Newspaper Rock on our drive to The Needles area and we found some fun hikes. We realized that the hike down to the Needles was 10.4 miles and knew our kids couldn’t do it. So we stayed in one area and let the kids play and climb. Then it started to snow which made for a beautiful scenic drive back to the hotel. We stopped for Mexican food at Fiesta Mexicana and it was probably my favorite dining experience of the trip! The enchiladas and margaritas were great and we all left stuffed!
Newspaper RockThe Needles in the distance
Day 6: Our original plan was to drive back to New Mexico for the night and find some fun things to do before heading home. However, the weather had other plans for us and Colorado was expected to get record breaking snow and New Mexico had chances of snow too. I also looked at the weather in Texas and the panhandle had chances of tornadoes (which did happen), so we ended up just driving about 9 hours to Amarillo for the night and then and then left the following day for a 6 hour drive home. All in all, it was a fantastic family trip and we cannot wait to explore another National Park! I hope you get the chance to visit Moab, you won’t be disappointed!
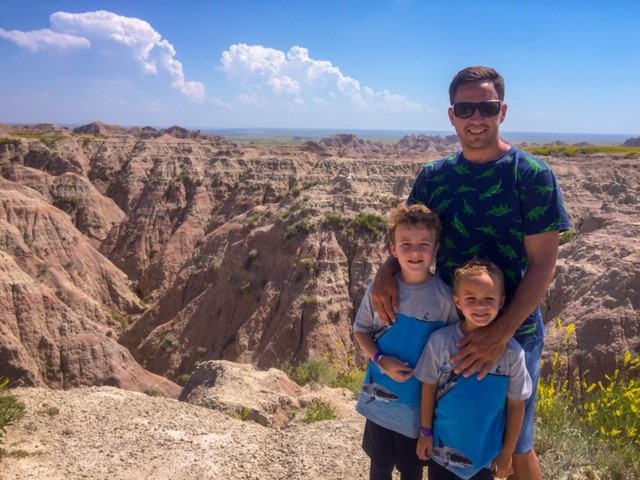
Hey y’all! Well, I’m writing from Cody, WY today as we wait for our Yukon to be worked on. We were not expecting that the whole computer system would go out on our drive back home. But, we’re at a nice little Inn that’s in a great location and Cody is a beautiful little town. So, I decided I might as well blog about this trip while it’s fresh on my mind. Plus, I’ve had several friends reach out to me asking how I planned this trip to begin with, so I thought I’d list out our itinerary for others to use. We definitely didn’t see or do it all, but we had the best time!
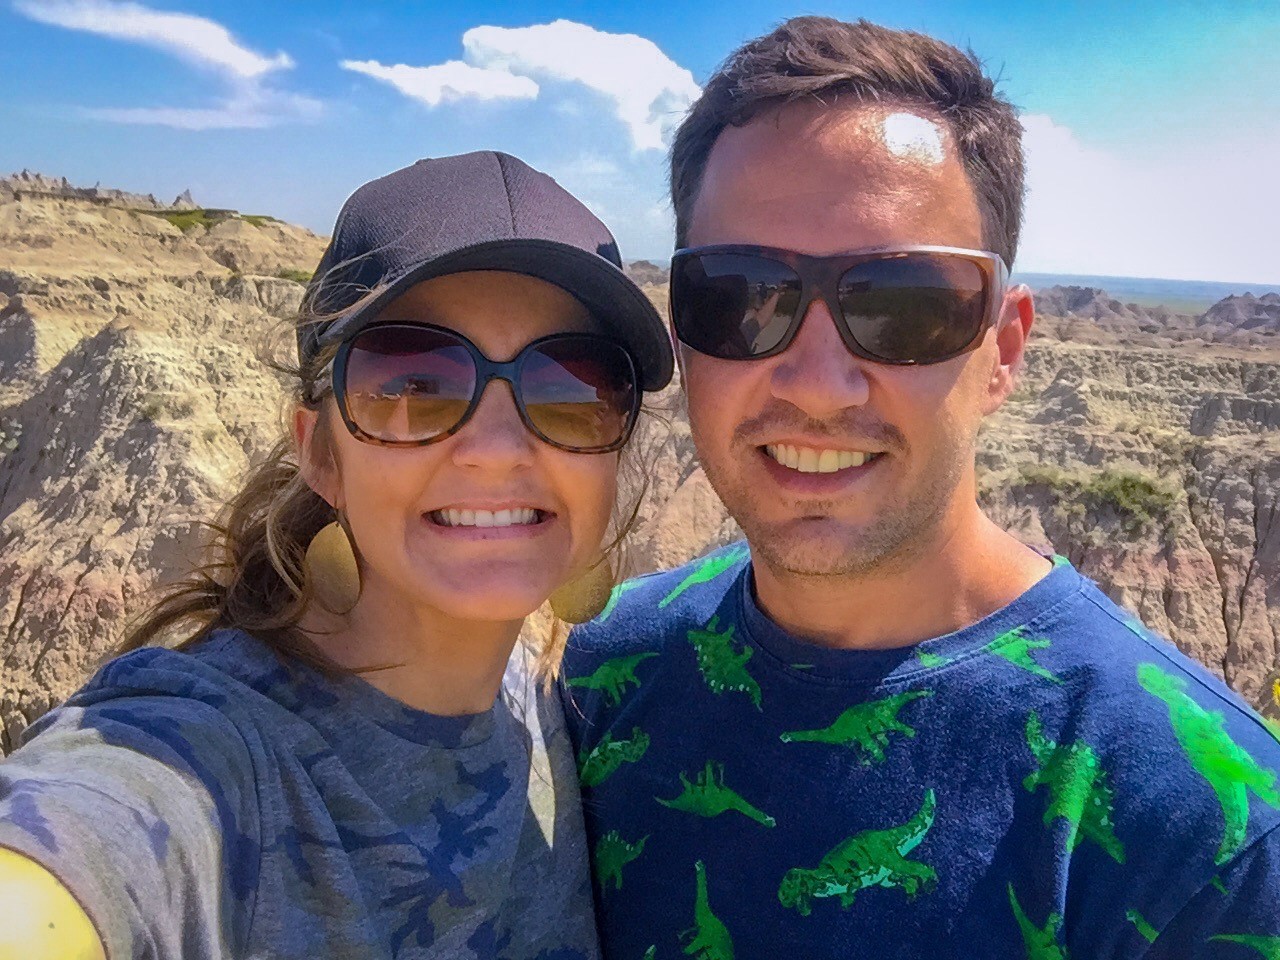
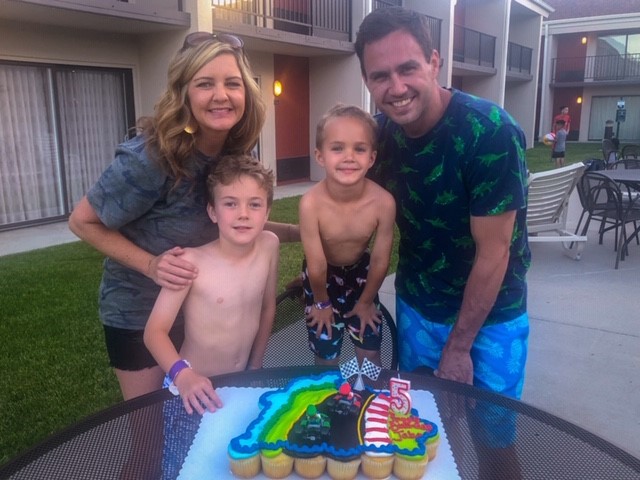
Honestly, South Dakota wasn’t even my original destination. I wanted to visit the Redwood Forests in California but didn’t think that Jereme would want to drive that far. He hates road tripping haha! And when looking for plane tickets and rental cars, I got a little overwhelmed. It just so happens that my 2nd grade son’s class was learning about the presidents and monuments around the USA. He quickly became fascinated with Mount Rushmore and when I looked at the distance, I realized that a 15 hour drive would be totally do-able. I mean we drove to South Carolina over spring break and that was a 16 hour trip! We decided to book our trip from June 23-29th and we would be able to celebrate our 15 year anniversary and Jake’s 5th birthday while we were there. Once I had dates in mind, I went to Pinterest and read other travel blogs for inspiration. I had no idea there was SOOOOOO much to do in South Dakota!
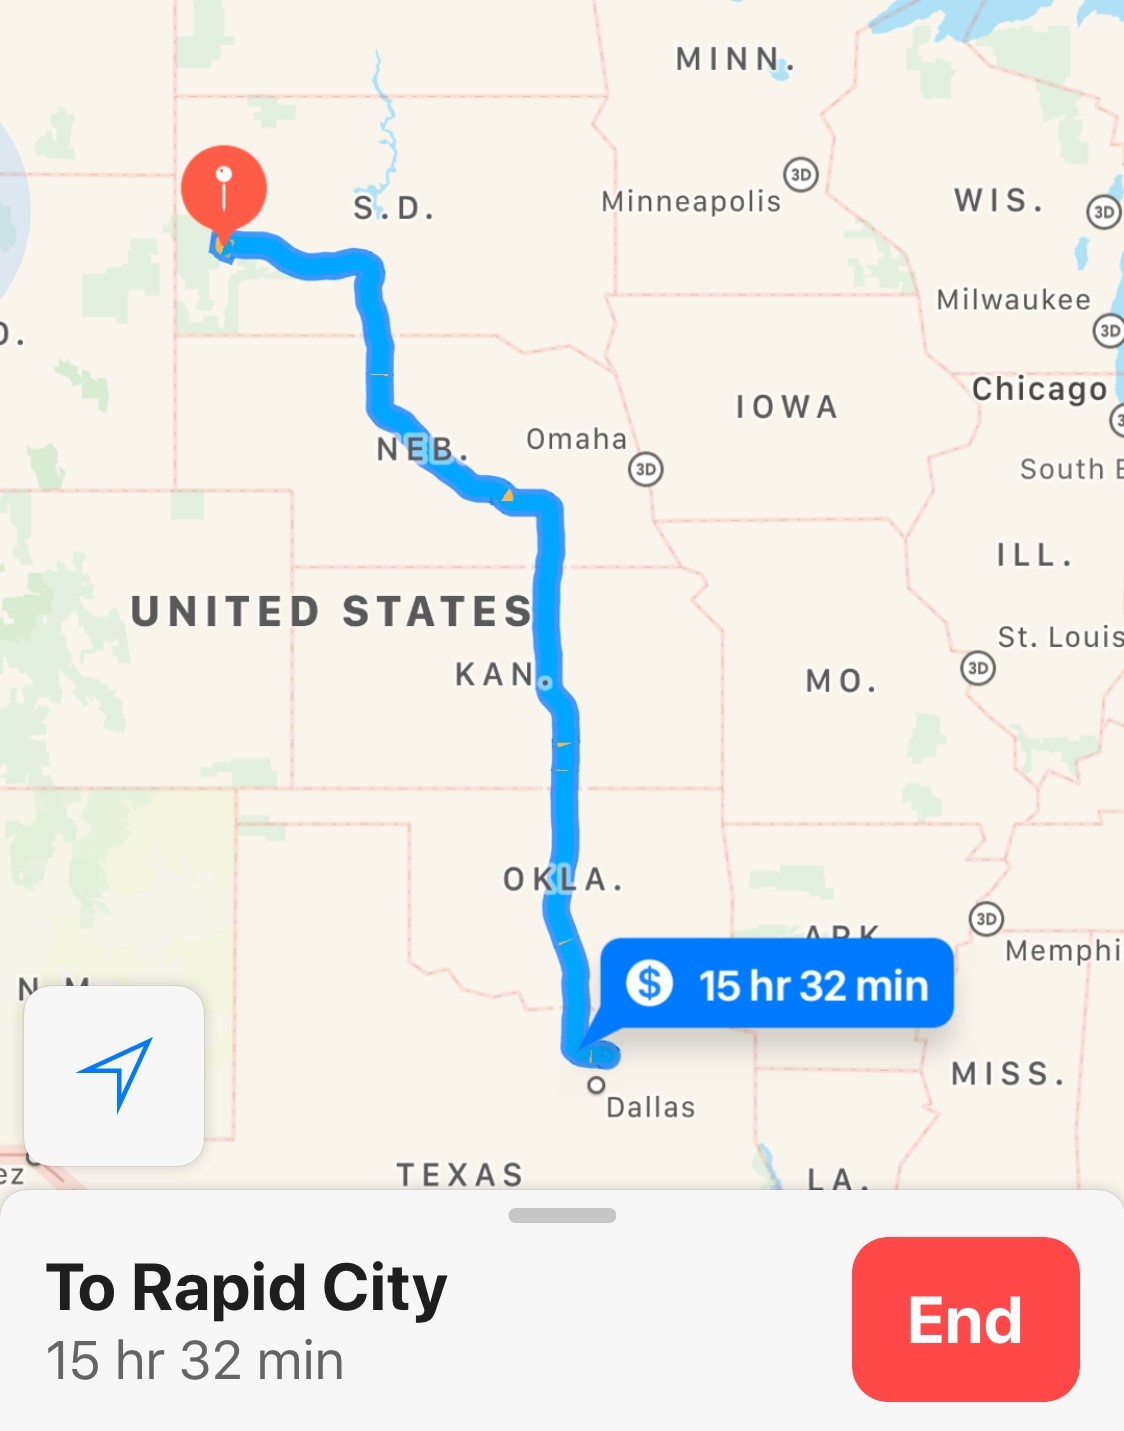
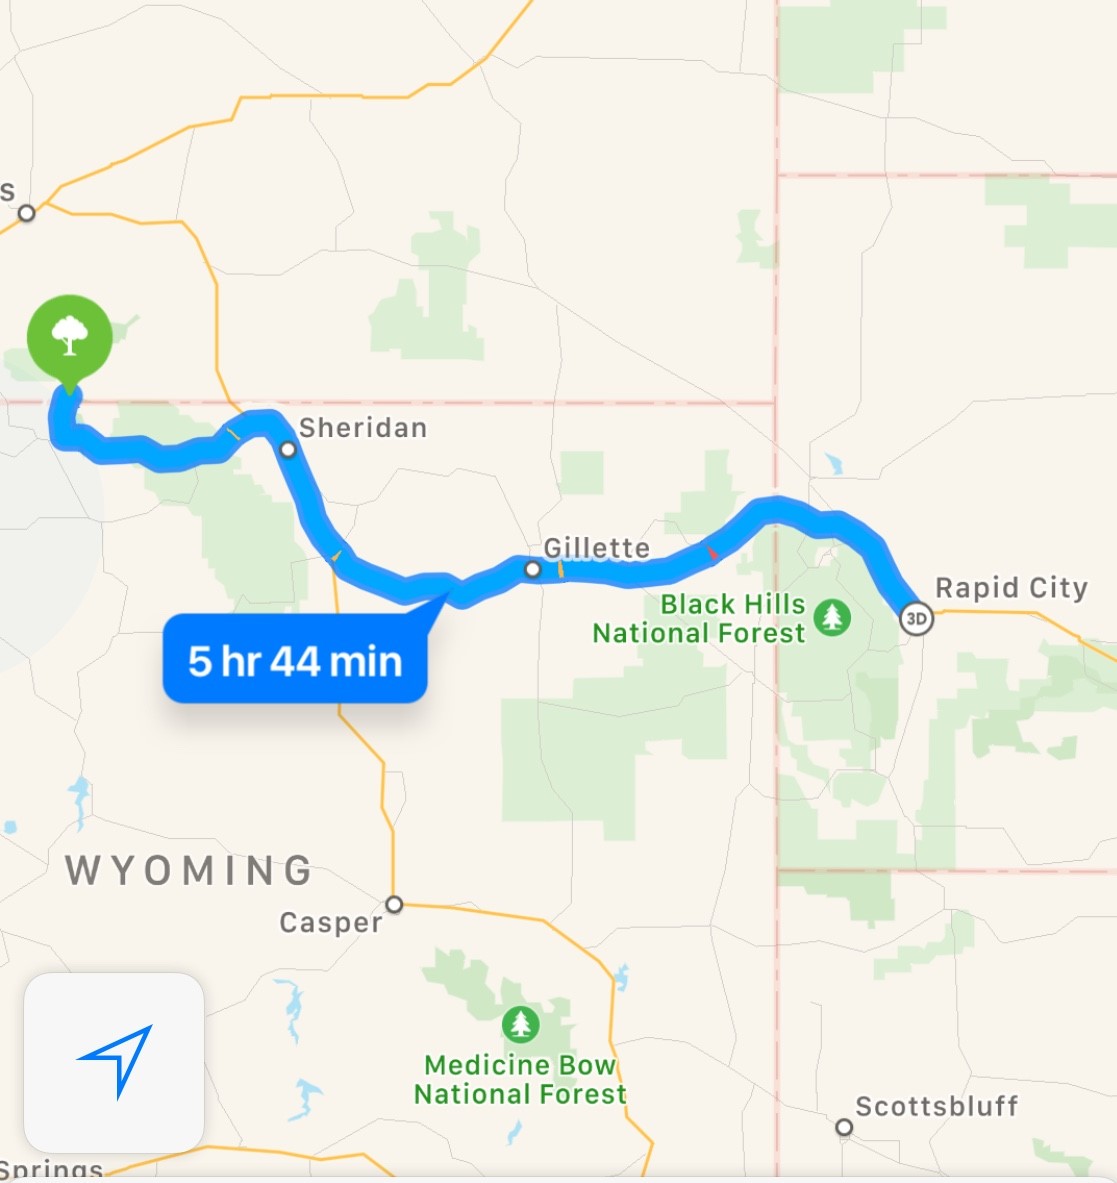
I discovered that Rapid City, SD is a nice size town with a lot of lodging and dinner options. I’ve mentioned before that I use Expedia.com to book most of our hotels using the book now/pay later option. I found a fun Best Western with a water slide and was sold! We booked it that day and I had a few months to plan out our week. We decided that on the drive up to South Dakota, we would just go straight there the quickest way. Below is the route we took. We stopped in Grand Island, Nebraska for the night after driving most of the day.
Screenshot of our route to Rapid City, SD
Day 1: We left around 10:00 am on Sunday, June 22nd. The drive to Nebraska was about 8 hours. It was so beautiful. On the drive, I started googling fun places to visit and used some of the billboards along the route and found that we were really close to Smith Falls, which happens to be the largest waterfall in Nebraska. Of course, we had to stop there! That took us a little ways off of the route and added about 2 additional hours total with the extra driving and exploring the area. It was totally worth it!
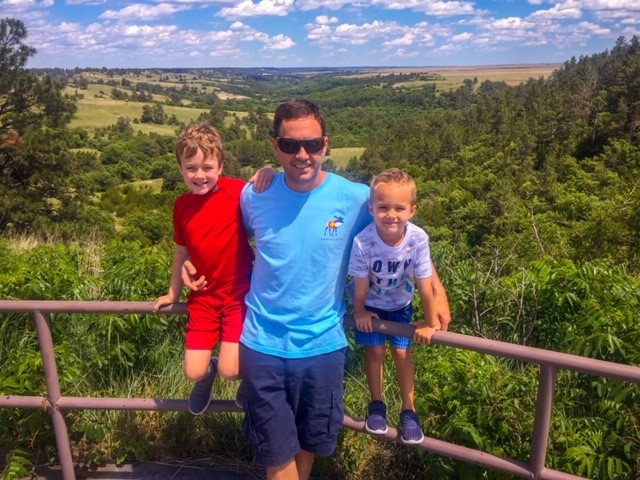
Scenic overlook on the drive to Smith Falls State Park
My sweet Jake at the scenic overlook!
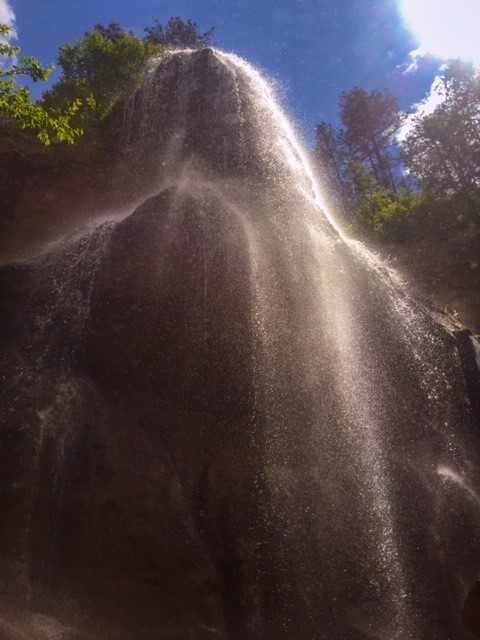
Smith Falls
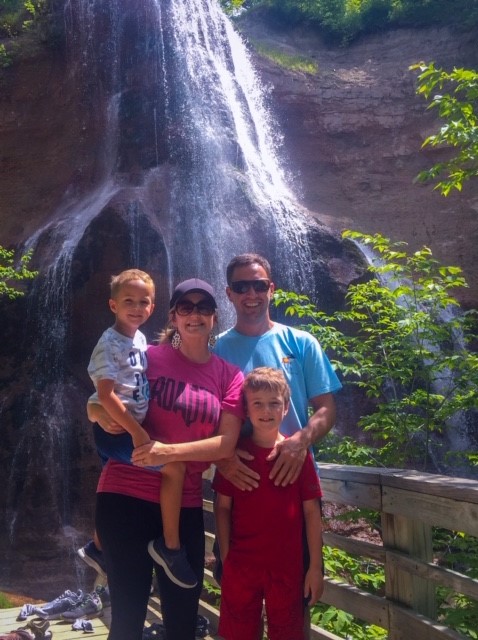
Family photo in front of Smith Falls
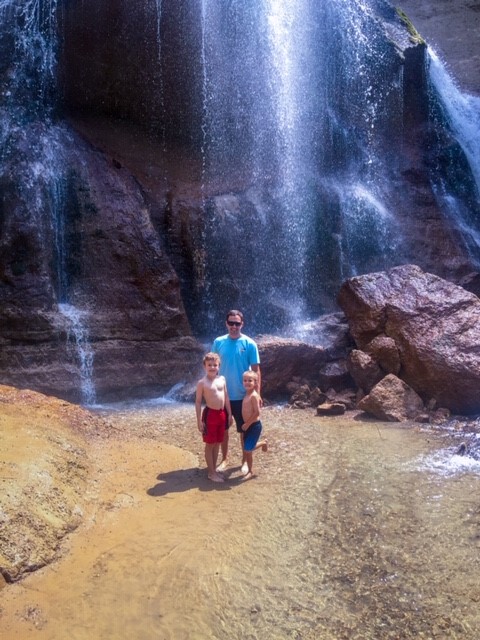
Jereme and the boys!
The trail leading to the waterfall!
As you can see, it was a really neat stop after driving all day. The entire path was labeled and most of it was on a boardwalk through the forest. My boys loved it! From here, we drove to Grand Island, Nebraska and stayed at the Ramada by Wyndham for the night. And let me just say, this hotel had the best free breakfast buffet that we’ve ever had by far!
Day 2: After a restful night, we got up and finished the drive to Rapid City, SD. The drive from Nebraska to South Dakota was gorgeous.
Murdo, SD
We got caught in a small storm during the drive
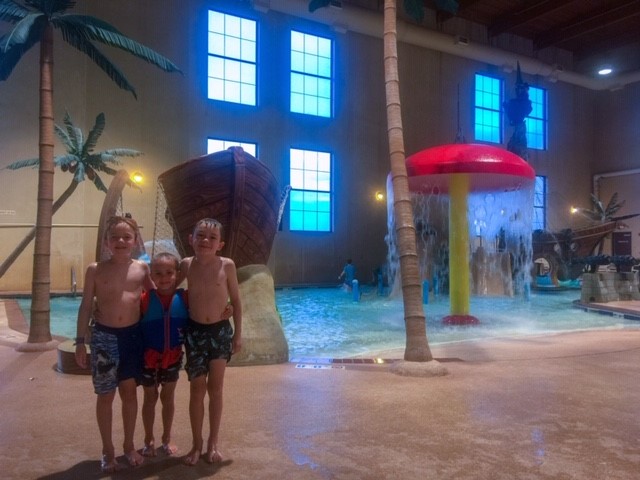
We booked our week at the Best Western Ramkota Hotel in Rapid City. It was great! The best part was the water park inside the hotel and the crazy slides that the kids LOVED! We went to the water park every single night! I highly recommend this hotel too, especially if you have children with you!
How cool is this place!?
My boys going down the slides!
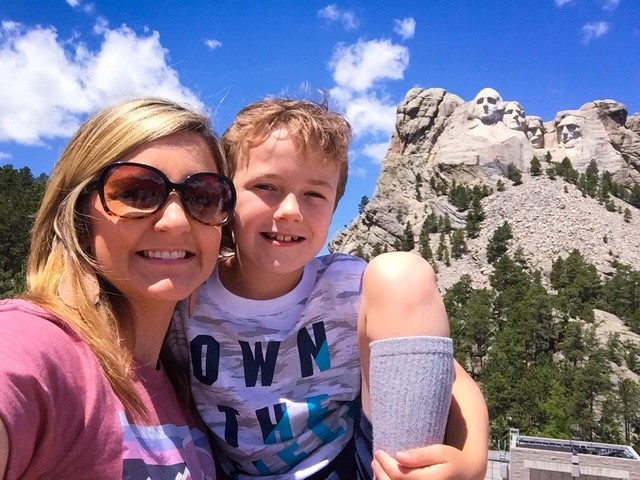
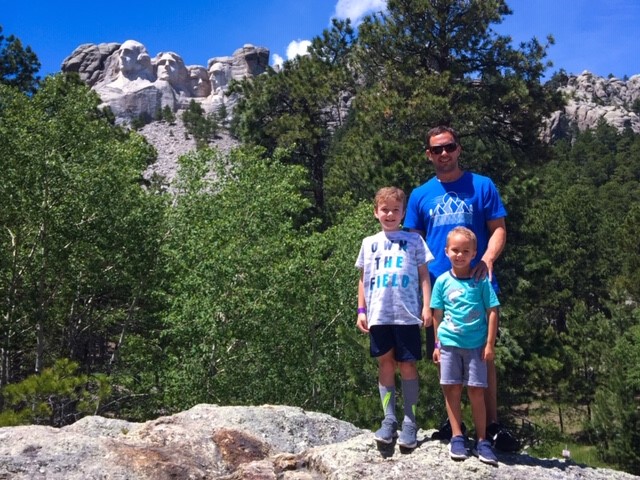
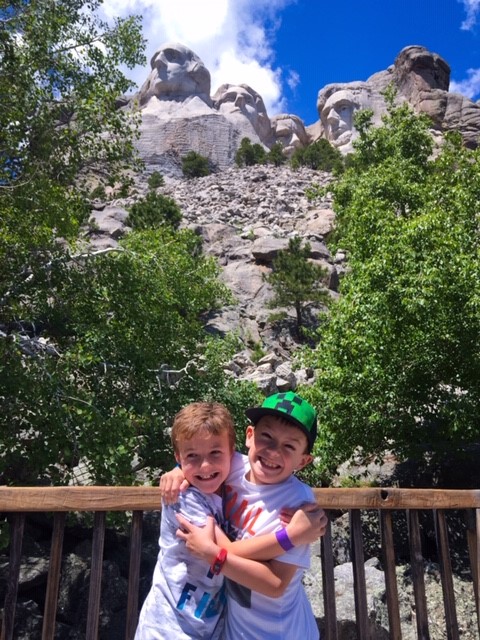
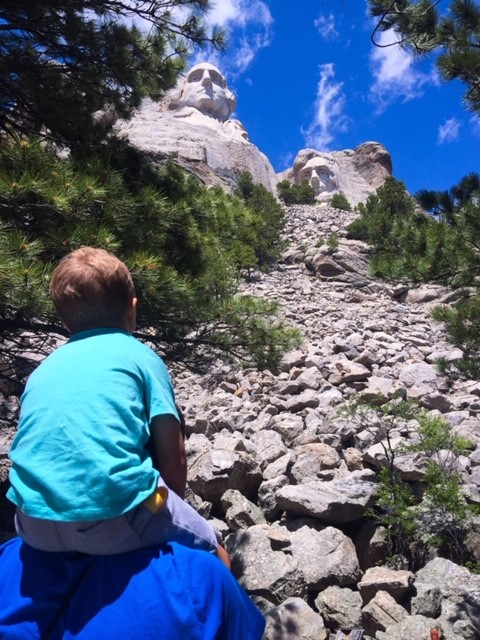
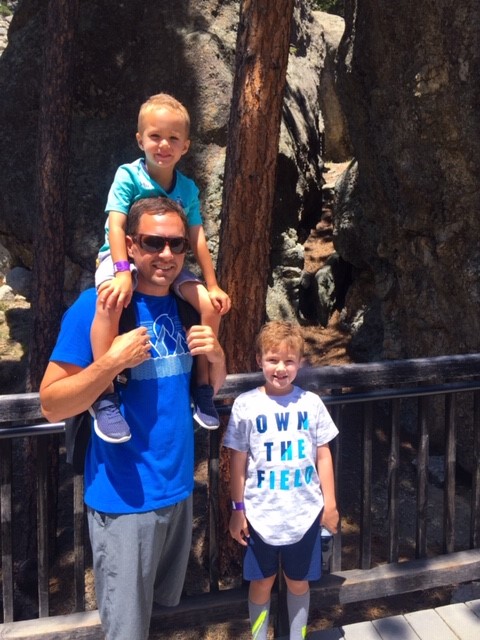
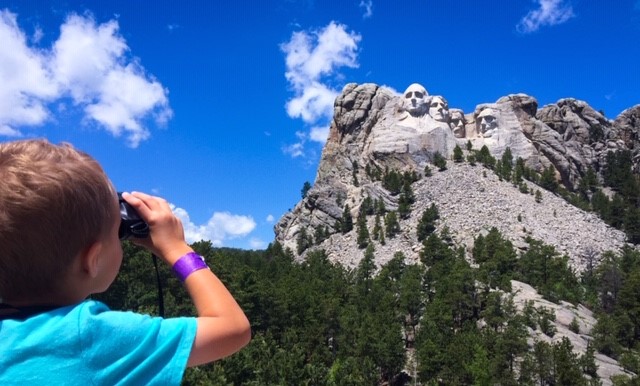
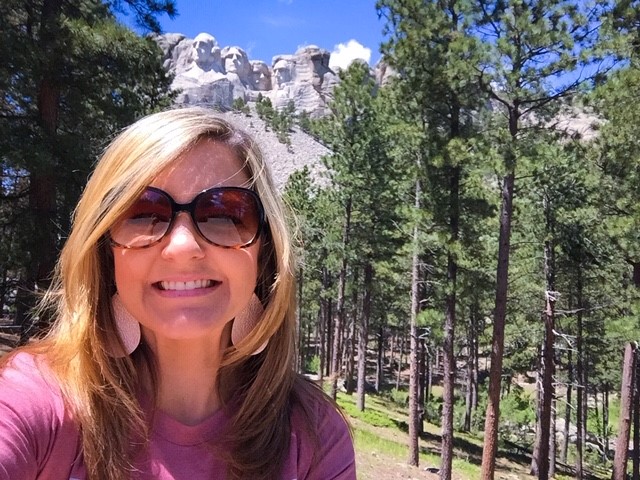
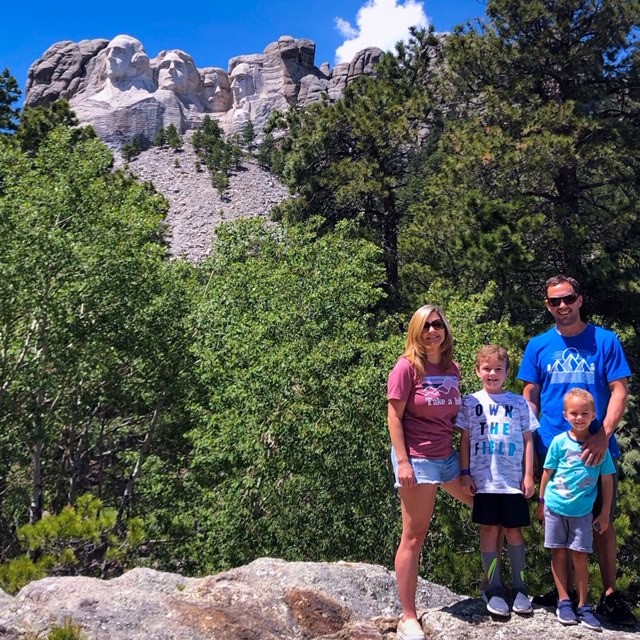
Day 3: Now to the fun stuff! We decided to head to Mount Rushmore first! The kids were so excited to see it and I really wanted to visit this place on our anniversary! I had no idea that it would be so neat. I honestly thought we’d just look at the monument and be on our way. I was totally wrong! The drive from Rapid City to Mount Rushmore took about 30 minutes and it was a really scenic drive. Most attractions are between Rapid City and Mount Rushmore, so that was really convenient for us! And I loved that the roads were very easy to navigate and there are signs everywhere, too that are helpful.
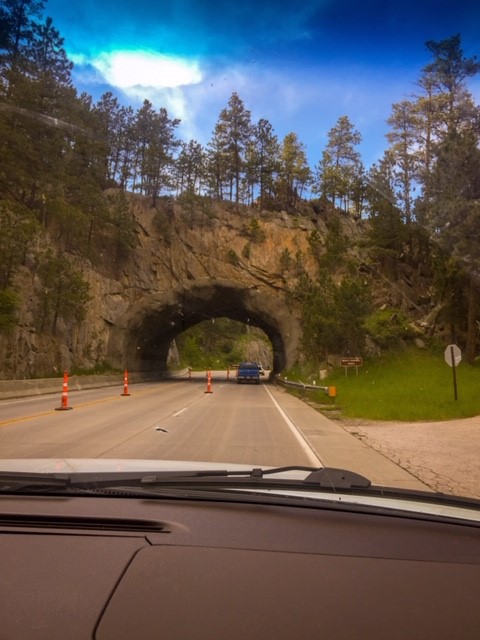
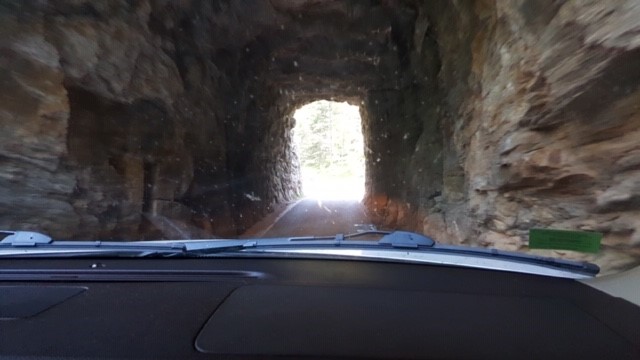
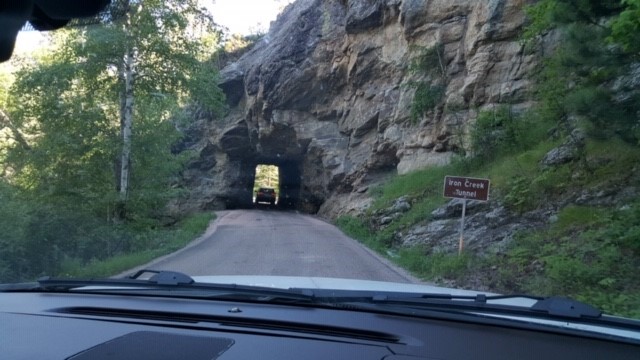
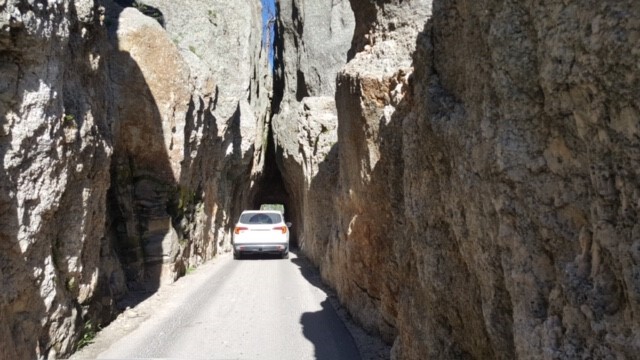
Tunnel on the highway right before Keystone, SD
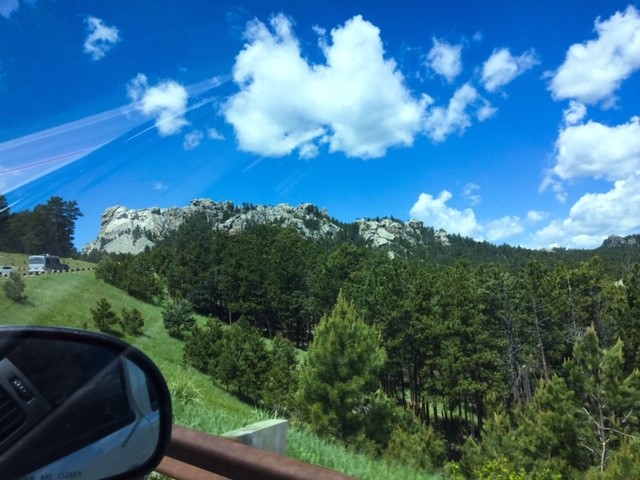
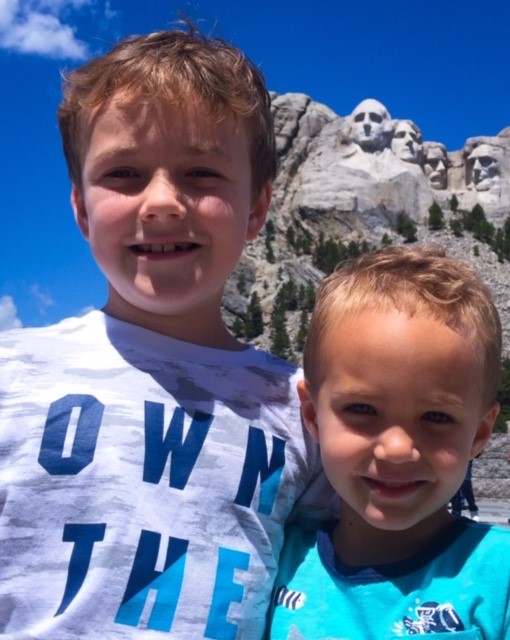
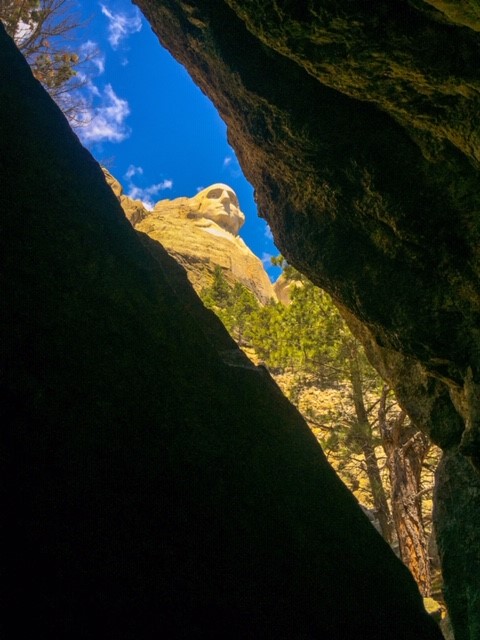
When we came around a corner up in the mountains near Mount Rushmore, it suddenly came into view, and it literally brought tears to my eyes. I’ve been wanting to visit this monument since I was about 20, which is when Jereme and I really started traveling together. It was just pure excitement in the car!
First glimpse of Mount Rushmore
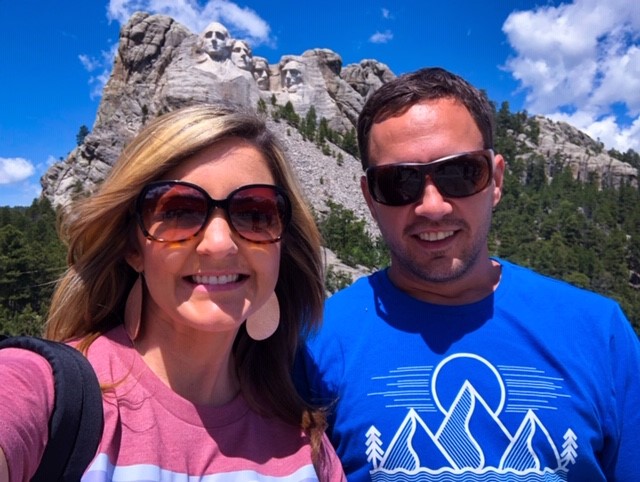
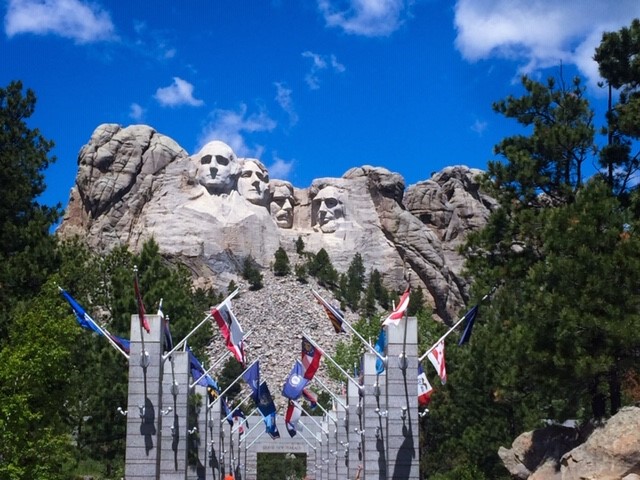
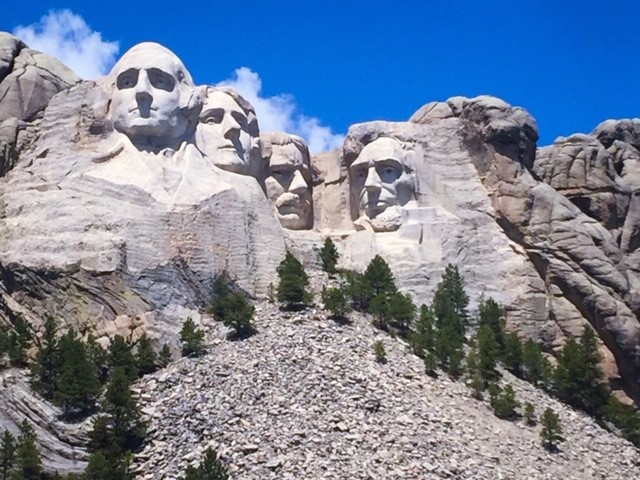
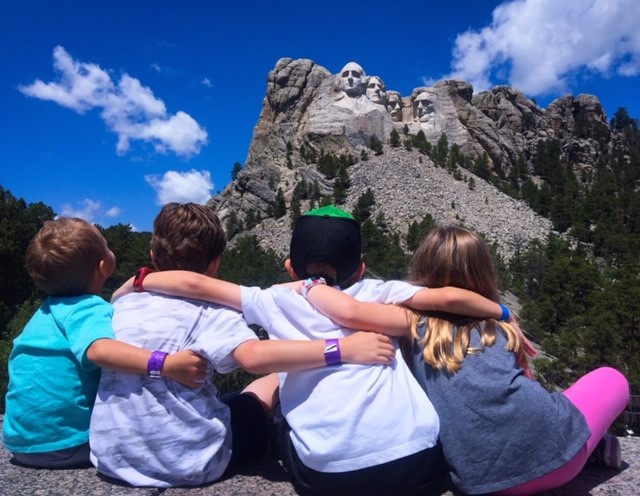
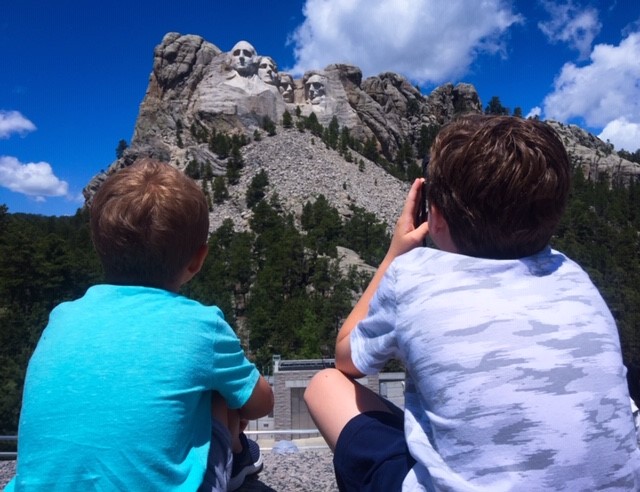
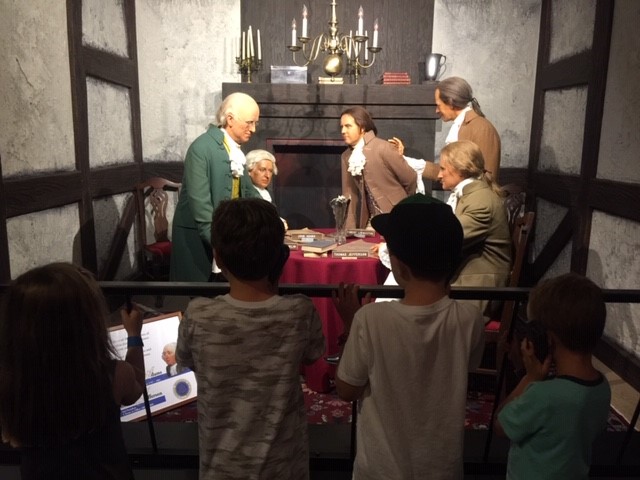
I could probably post a thousand pictures of this monument, but I won’t haha! Even though is was crowded, we really had a good time. I had no idea that there are different trails and areas to view this monument from different angles. One of my favorite parts is that there are different stops along the trail throughout the park with informational plaques about each of the 4 presidents represented (George Washington, Thomas Jefferson, Theodore Roosevelt, and Abraham Lincoln). These are strategically placed and when you look up, you get the best view of the president mentioned. The cost to enter the park is a $10 parking fee. There’s also a gift shop, places to grab food/drinks, some of the old tools used to build the monument, and the original plans for the carvings. Here are some of my favorite pictures from Mount Rushmore National Park!
Happy 15th Anniversary to us!
My favorite picture!
The only problem we had the whole day was that a pine cone fell out of a tree, hit Jake on the forehead, and cut it! Hahaha! He was so mad!
After exploring Mount Rushmore we decided to head to Crazy Horse Memorial. It’s about a 30 minute drive from Mt. Rushmore. I don’t know if I’ve ever mentioned that Jereme is Native American, so this was special for him. The cost to get into this memorial is $30. It also has a place to eat, which we took advantage of. I love buffets, and it did not disappoint. There’s also different artifacts to look at from the Sioux Indian tribes in the area. We did not take the bus closer to the memorial, but we still enjoyed our visit. I recommend taking binoculars if you aren’t going to take the bus to get a closer look!
Crazy Horse behind Jereme
This is what the memorial will look like when it’s complete! It will be bigger than the pyramids in Egypt!
The drive from Mount Rushmore to Crazy Horse was another scenic drive. We stopped at a lake and explored a little before meeting back up with the Morgans.
We decided to end our day at the National Presidential Wax Museum in Keystone, SD, which is on the way back to Rapid City. It cost around $32 for my family to enter. We all had a great time! Here are just a few of the pictures from inside.
Jett
Jake
Check out their shirts! Thanks Miss Carrie!
The teacher in me loved this part!
After spending a few hours at Bear Country USA, we decided to head to Keystone to explore the downtown area. It’s a quaint little area with lots of food, drinks, and souvenir shopping! We ate at a Mexican food place called, Guadalajara’s. It was yummy!
Keystone, SD
We had to take a picture in front of this Bigfoot, in Bigfoot shirts!
While we were eating we decided to go check out Rushmore Cave. I think it cost my family around $42 for the cave tour. It’s an entire adventure park, but we just chose to do the cave tour. We had a great tour guide, Kaden and he did an excellent job of telling us the history of the cave. I don’t think I’ve ever been inside a cave with so many tight squeezes! I absolutely loved it!
As you can tell, these kiddos loved the cave tour!
From the cave, we went to… you guessed it! Back to the hotel water park!
Day 5: Day 5 was probably my favorite day in South Dakota! I can’t even begin to describe the trail we hiked around Custer State Park. I came across images of the Sunday Gulch Trail and knew we had to do it. I am not going to lie, there were tears shed around the 2.5 mile mark from my oldest kiddo. (We didn’t know he was actually getting sick with a fever/cold at the time). This hike is 3.9 miles long, it’s labeled as a HARD trail with a lot of uphill and downhill hiking, trekking through water, over rapids and streams using rocks or tree logs to get across. It was so much fun, but so much work. I can’t even describe how beautiful the sights were and my pictures just don’t do it justice. We could’ve explored this park for 3-4 days! I didn’t get many shots of us on the crazier parts of the trail because I had to help pass our little one off to Jereme and didn’t want to drop my phone in the water. But trust me, it was so cool! We packed a picnic lunch and found a nice, shady area to eat and then took off. It cost us $20 to get into the park, but that includes a 5 day pass to return. There are bathrooms, a store/souvenir shop, canoe rentals, and probably more than I even saw. After the hike, the kiddos and Jereme jumped into the lake for a freezing cold swim! Helpful Tips: Bring plenty of food and water for the day, wear sunscreen and reapply often, use bug repellent, bring a first aid kit, take a swimsuit or change of clothes/shoes, expect to get wet, and have a blast!
Screenshot of the Sunday Gulch Trail from Jeremy Morgan’s phone
Lunch!
Jett at the end of the hike!
We took the iconic Needles Highway back to Keystone after we left Custer State Park, which is an adventure in itself. It’s over 30 miles long with over 300 curves and switchbacks, pigtails, and tunnels. I had to do the driving because I get so carsick, but the speeds are so slow that I was honestly fine the entire drive. Jereme was the photographer for us this time! Next to our hotel was an Olive Garden and we headed there and I ate pasta for days!
Me driving inside a tunnel
The Morgans ahead of us
After dinner the kids suddenly felt better and had enough energy to close the water park down at the hotel!
Day 6: Today was Friday, June 28th and our little guy’s 5th Birthday! Jake wanted to go on another hike before we had a small pool party/cake for his birthday that night. We decided to explore The Badlands National Park and wow, what a sight! It’s another gorgeous place with land forms that are hard to describe. The only bad part about this day, is that it was so HOT! The temps had been mild, in the 70’s all the other days of our trip, but on this day it felt like we were back in TX! We didn’t stay as long as we wanted to because of the heat. It cost $25 to get into this park and there are several marked trails to take as soon as you park your car. We hiked the Notch Trail which was 1.5 miles round-trip and had a log ladder that we had to climb for great views! Since it was hot, we took a scenic drive through the park back to Wall, SD.
The Birthday Boy!
When we left The Badlands, we visited Wall Drug which was recommended on every blog I came across. To be honest, I could’ve skipped out on this one. It was a neat place, we had great ice cream and bought some cute souvenirs. But it wasn’t a must for my family. For some reason, I didn’t take a single picture at this stop! We then headed back to our hotel and had some birthday cake for Jake’s birthday and spent the rest of the evening at the hotel water park, of course!
I can’t believe we have a 5-year-old!
Day 7: Sadly, we had to check out of our hotel today and start the journey home. We had a really great plan to explore a few different states on the way back to TX. Our plan was to drive to Sturgis and Spearfish Canyon, SD, venture into Wyoming, cut up to Montana to Devils Canyon Overlook, then head down to Casper, WY for the night. Then the following day, we planned to drive down to Denver for lunch, explore Garden of the Gods and Pike’s Peak in Colorado Springs, before heading to Pueblo, CO for the night. From there we would have a 10 hour drive to our house. We had hotels booked, but God had another plan for us and I’m choosing to look at this situation as a divine intervention. We did get to drive through Wyoming and up to Montana, but right when we got to Lovell, WY our Yukon basically lost all power. We were stranded, luckily right outside of a restaurant full of helpful people, while we had to wait 4 hours for a tow truck to come get us. I quickly canceled all of our hotels and found one in Cody, WY and that’s where we still are, 2 days later. The mechanic said the Yukon should be fixed by noon tomorrow, so we’re hopeful that we’ll be home by Wednesday (July 3rd).
Here is our original plan for the drive home, feel free to use if you’re road tripping from SD – TX!
Rapid City to Devils Canyon Overlook
Devils Canyon Overlook to Casper, WY
Casper, WY to Pueblo, CO
We took the scenic bypass through Spearfish Canyon and I am so glad we did! We stumbled across Bridal Veil Falls by accident and had a quick hike up to see the waterfall up close! Below are just a few of our favorite pictures. Helpful Tips: You have to cross over a large stream to get to the falls. Bring extra shoes, I did great crossing over the rocks on the way to see the waterfall. Then I fell into the stream in tennis shoes on the way back across!
From here we crossed over into Wyoming, not knowing we’d still be here days later haha! This is such a beautiful state, I guess there are way worse places to the stranded.
Here are some of my favorite pictures of our drive through Wyoming! As you can tell, we stopped at most of the scenic overlooks throughout this trip.
Once you get close to Lovell, WY, you take a quick right off of highway 37 and drive about 10 minutes and cross into Montana to Devils Canyon Overlook. It was totally worth the drive, this place was fascinating. Some describe it like Wyoming/Montana’s Grand Canyon!
From here our plans changed and that is ok! I have learned a few things during this trying situation. First, my family is pretty great. We all handled this dilemma exceptionally well and nobody panicked. I only cried once and that was when waitresses at the restaurant we were at heard about our situation and paid for our food. I was just overwhelmed with all of the kindness from complete strangers! Second, you can have some of the best thought-out plans, but they can change really quick and you just have to roll with it and stay positive. Third, I have never in my life been more thankful that I live in a small town close to my family and friends! Fourth, I will never take owning a car for granted again. It has not been fun being without one for the past two days!
So there it is, our Texas-South Dakota (and more) itinerary! One day, Carrie may decide to start blogging from her perspective, too! They had a great trip, and made it back to Texas on Saturday night! You’ll want to stay tuned for her trip because they visited Colorado, Wyoming, Montana, and North Dakota before meeting us in Rapid City! And y’all say a prayer for us, hopefully we make it home soon!